


|
|
NanoArduino
|
x 1 | |
|
|
OLED裸屏-焊接式, 白色 |
x 1 |

|
arduino IDEArduino
|
🎮 DIY Arduino Nano Snake Game Console with OLED Display
🎮 DIY Arduino Nano Snake Game Console with OLED Display and Buttons
Do you love retro games? Want to build your own handheld Snake game console? Today, I'm going to show you how to make a DIY Snake Game Console using an Arduino Nano, 0.96” OLED Display, and just 4 buttons! Let’s dive into this fun and educational electronics project. 💡
🧰 Components Needed
- Arduino Nano
- OLED Display (0.96” I2C)
- 4 Push Buttons
- 4 × 10KΩ Resistors
- Breadboard & Jumper Wires
- USB Cable for Programming
🔌 Wiring Diagram
Below is the wiring diagram to connect the components. Make sure you follow this properly:

OLED Display:
- GND → Arduino GND
- VCC → Arduino 5V
- SCL → Arduino A5
- SDA → Arduino A4
- Buttons (with Pull-up Resistors):
- UP → Arduino D2
- LEFT → Arduino D3
- RIGHT → Arduino D4
- DOWN → Arduino D5
- Each button is connected with a 10K pull-down resistor to ensure stable readings.
💻 Arduino Code
You can copy and paste the code below directly into your Arduino IDE. This code draws a Snake game on the OLED display and lets you control it using the 4 buttons.
#include <Adafruit_GFX.h>
#include <Adafruit_SSD1306.h>
#define SCREEN_WIDTH 128
#define SCREEN_HEIGHT 64
#define OLED_RESET -1
Adafruit_SSD1306 display(SCREEN_WIDTH, SCREEN_HEIGHT, &Wire, OLED_RESET);
// Button pins
#define UP_BTN 2
#define LEFT_BTN 3
#define RIGHT_BTN 4
#define DOWN_BTN 5
// Debounce timing
unsigned long lastInputTime = 0;
const unsigned long debounceDelay = 100;
// Snake grid and logic
#define GRID_SIZE 4
#define MAX_LENGTH 64
int snakeX[MAX_LENGTH];
int snakeY[MAX_LENGTH];
int length = 3;
int dirX = 1;
int dirY = 0;
int foodX, foodY;
bool gameOver = false;
void setup() {
Serial.begin(9600);
pinMode(UP_BTN, INPUT_PULLUP);
pinMode(LEFT_BTN, INPUT_PULLUP);
pinMode(RIGHT_BTN, INPUT_PULLUP);
pinMode(DOWN_BTN, INPUT_PULLUP);
if (!display.begin(SSD1306_SWITCHCAPVCC, 0x3C)) {
Serial.println(F("OLED failed"));
while (1);
}
display.clearDisplay();
display.display();
snakeX[0] = 64; snakeY[0] = 32;
snakeX[1] = 60; snakeY[1] = 32;
snakeX[2] = 56; snakeY[2] = 32;
generateFood();
}
void loop() {
if (gameOver) {
display.clearDisplay();
display.setTextSize(1);
display.setTextColor(SSD1306_WHITE);
display.setCursor(30, 30);
display.println("Game Over!");
display.display();
delay(3000);
resetGame();
}
handleInput();
moveSnake();
checkCollision();
drawGame();
delay(150);
}
// Remaining functions: handleInput(), moveSnake(), generateFood(), checkCollision(), drawGame(), resetGame()
// (Included in full in the downloadable code)
🕹 How It Works
- The snake moves on a grid drawn on the OLED screen.
- You control its direction using 4 buttons (UP, DOWN, LEFT, RIGHT).
- The snake grows longer every time it eats food.
- The game ends if the snake hits the wall or itself.
🧠 Tips
- You can increase the difficulty by reducing the delay in the loop() function.
- Add a score system and show it on the display.
- Enclose the components in a 3D-printed or cardboard case for a portable console!
📽 Bonus: Video Tutorial
🎥 I'm also making a CapCut Bangla Tutorial Series on this. Stay tuned on my YouTube channel to watch the full build and see it in action!
📎 Conclusion
This project is a fantastic way to learn about Arduino, graphics, and game logic while having fun. Once done, you’ll have your very own handheld Snake Game Console that you built from scratch! 🚀
If you liked this tutorial, leave a comment, share it with friends, and subscribe for more awesome DIY electronics projects. ❤️
🎮 DIY Arduino Nano Snake Game Console with OLED Display
Project images are for reference only. Actual production is based on the manufacturing files on the project page.
Please review the designer's notes (e.g., PCB thickness) and select the appropriate options.
PCBWay is not responsible
for issues caused by unsuitable parameter selections.
For more important ordering information, please refer to
Read More


Raspberry Pi 5 7 Inch Touch Screen IPS 1024x600 HD LCD HDMI-compatible Display for RPI 4B 3B+ OPI 5 AIDA64 PC Secondary Screen(Without Speaker)
BUY NOW

- Comments(0)
- Likes(0)
 More by Estiak Khan
-
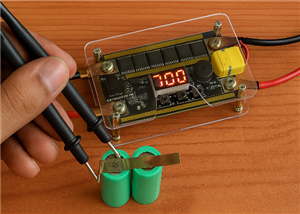 ⚡ How to Make a DIY Spot Welding Machine at Home for 18650 Batteries | Full Circuit & Working
If you’re working on battery pack projects using 18650 lithium-ion cells, then you know how importan...
⚡ How to Make a DIY Spot Welding Machine at Home for 18650 Batteries | Full Circuit & Working
If you’re working on battery pack projects using 18650 lithium-ion cells, then you know how importan...
-
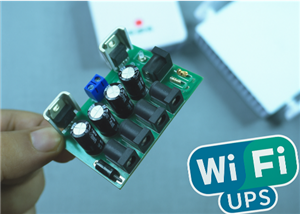 🔋 How to Make a Simple DIY Wi-Fi Router UPS at Home | Step-by-Step Guide with Circuit & PCB
Do you lose internet connection every time the power goes out?If yes, then this simple DIY Wi-Fi Rou...
🔋 How to Make a Simple DIY Wi-Fi Router UPS at Home | Step-by-Step Guide with Circuit & PCB
Do you lose internet connection every time the power goes out?If yes, then this simple DIY Wi-Fi Rou...
-
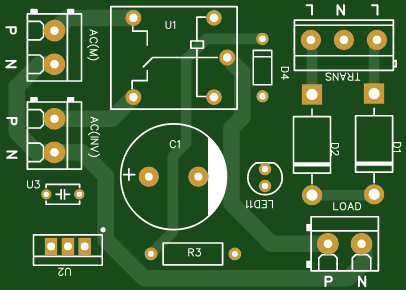 Automatic AC Changeover for Inverter
 – DIY Circuit GuideAre you tired of manually switching between ...
Automatic AC Changeover for Inverter
Automatic AC Changeover for Inverter – DIY Circuit GuideAre you tired of manually switching between ...
-
 How to Make a 12V AC/DC Fan Controller Module
If you're looking for an efficient way to control a 12V fan using either AC or DC input, this DIY pr...
How to Make a 12V AC/DC Fan Controller Module
If you're looking for an efficient way to control a 12V fan using either AC or DC input, this DIY pr...
-
 Autocut DC Mini IPS for DC 12V Load
If you are looking for a reliable Autocut DC Mini IPS for DC 12V ...
Autocut DC Mini IPS for DC 12V Load
Autocut DC Mini IPS for DC 12V LoadIf you are looking for a reliable Autocut DC Mini IPS for DC 12V ...
-
 Build a 12V Battery Autocut System with LCD Display
Are you looking for an efficient and affordable way to protect and monitor your 12V battery system? ...
Build a 12V Battery Autocut System with LCD Display
Are you looking for an efficient and affordable way to protect and monitor your 12V battery system? ...
-
 DIY Transistor Tester | Build Your Own LCR Meter at Home with Arduino Nano
Are you fascinated by electronics and want to create your own tools for testing components? Building...
DIY Transistor Tester | Build Your Own LCR Meter at Home with Arduino Nano
Are you fascinated by electronics and want to create your own tools for testing components? Building...
-
 How to Make a Pure Sine Wave Inverter Using EG8010 + IR2110S | Step-by-Step Guide
If you are looking ...
How to Make a Pure Sine Wave Inverter Using EG8010 + IR2110S | Step-by-Step Guide
How to Make a Pure Sine Wave Inverter Using EG8010 + IR2110S | Step-by-Step GuideIf you are looking ...
-
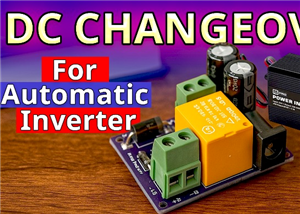 🔋 How to Make DC Changeover for Automatic Inverter System | DIY Inverter Changeover Switch
Are you tired of manually switching between DC power supply and battery backup during load shedding?...
🔋 How to Make DC Changeover for Automatic Inverter System | DIY Inverter Changeover Switch
Are you tired of manually switching between DC power supply and battery backup during load shedding?...
-
 No Need Adapter 🤔 WiFi Router UPS Making with Transformer
No Need Adapter WiFi Router UPS Making with Transformer | Complete Circuit DiagramAre you tired of ...
No Need Adapter 🤔 WiFi Router UPS Making with Transformer
No Need Adapter WiFi Router UPS Making with Transformer | Complete Circuit DiagramAre you tired of ...
-
 🔋 How to Make a Power Bank Module at Home
Are you looking to build your own DIY power bank at home? In this blog post, we’ll show you how to c...
🔋 How to Make a Power Bank Module at Home
Are you looking to build your own DIY power bank at home? In this blog post, we’ll show you how to c...
-
 Cute LIT 220W Inverter Load Test ⚡ Auto Changeover IPS System Explained! 🔋 Real Load Backup Test
Are you looking for a reliable backup power solution for your WiFi router, CCTV, or small appliances...
Cute LIT 220W Inverter Load Test ⚡ Auto Changeover IPS System Explained! 🔋 Real Load Backup Test
Are you looking for a reliable backup power solution for your WiFi router, CCTV, or small appliances...
-
 ⚡ Hybrid WiFi Router UPS for Solar System
IntroductionPower cuts in off-grid areas can disrupt internet connectivity. With the rise of solar s...
⚡ Hybrid WiFi Router UPS for Solar System
IntroductionPower cuts in off-grid areas can disrupt internet connectivity. With the rise of solar s...
-
 🔋 DIY Solar-Based Mini IPS at Home | Auto Load Changeover Circuit for 12V DC Fan/Light
If you're looking for an easy and affordable solution to keep your 12V DC fan or light running even ...
🔋 DIY Solar-Based Mini IPS at Home | Auto Load Changeover Circuit for 12V DC Fan/Light
If you're looking for an easy and affordable solution to keep your 12V DC fan or light running even ...
-
 🔋 DIY Automatic Cut Off 12V Trickle Charger | Lead Acid Battery AutoCut Charger
Do you often charge your 12V lead-acid battery manually and worry about overcharging? With this DIY ...
🔋 DIY Automatic Cut Off 12V Trickle Charger | Lead Acid Battery AutoCut Charger
Do you often charge your 12V lead-acid battery manually and worry about overcharging? With this DIY ...
-
 🔥 DIY Smart 12V Battery at Home | Using 18650 Cells + Smart BMS
Looking for a way to build a powerful and smart 12V battery at home? In this guide, I'll show you h...
🔥 DIY Smart 12V Battery at Home | Using 18650 Cells + Smart BMS
Looking for a way to build a powerful and smart 12V battery at home? In this guide, I'll show you h...
-
 🎮 DIY Arduino Nano Snake Game Console with OLED Display
DIY Arduino Nano Snake Game Console with OLED Display and ButtonsDo you love retro games? Want to bu...
🎮 DIY Arduino Nano Snake Game Console with OLED Display
DIY Arduino Nano Snake Game Console with OLED Display and ButtonsDo you love retro games? Want to bu...
-
 DIY 150W IPS Making At Home with Auto Changeover System | Mini IPS 2025
How to Make an Automatic 150W IPS Using Two Circuit ModulesAre you looking for a reliable and effici...
DIY 150W IPS Making At Home with Auto Changeover System | Mini IPS 2025
How to Make an Automatic 150W IPS Using Two Circuit ModulesAre you looking for a reliable and effici...
-
Programmable Mist Maker - XIAO / QT PY Extension
1102 2 1 -
RadioHAT - Raspberry Pi radio development platform
916 0 2 -
-
-
-
-
ARPS-2 – Arduino-Compatible Robot Project Shield for Arduino UNO
3347 0 6 -
A Compact Charging Breakout Board For Waveshare ESP32-C3
3961 3 8 -
AI-driven LoRa & LLM-enabled Kiosk & Food Delivery System
4351 2 2


