


|
|
SRA-12VDC-CLSongle
|
x 1 | |
|
|
NE555Texas Instruments
|
x 1 | |
|
|
1N5408-E3/73Vishay General Semiconductor
|
x 1 | |
|
|
1N4007DIODES
|
x 1 | |
|
|
BC557-B |
x 1 | |
|
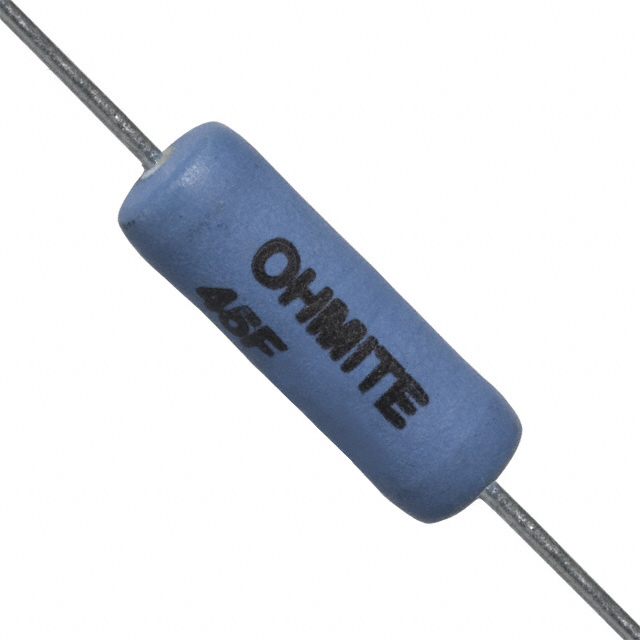
45F1K0EOhmite
|
x 1 | |
|
FM0207FTE52-2K2YAGEO
|
x 1 | |
|
|
1N4148WSH RRG |
x 1 |
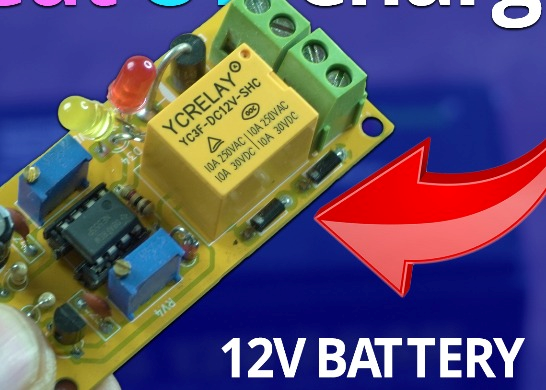
🔋 DIY Automatic Cut Off 12V Trickle Charger | Lead Acid Battery AutoCut Charger
Do you often charge your 12V lead-acid battery manually and worry about overcharging? With this DIY Automatic Cut Off 12V Trickle Charger, you can safely charge your battery without supervision. This smart charger automatically disconnects when the battery is full—protecting your battery and extending its life.
In this post, you’ll get the full circuit diagram, parts list, working principle, and step-by-step guide to make your own lead-acid battery auto cut-off charger at home!
⚙️ What is a Trickle Charger?
A trickle charger is a low-current battery charger designed to charge batteries slowly and maintain them at full capacity. It’s especially useful for lead-acid batteries that are not used regularly, like those in cars, bikes, solar systems, or inverters.
However, trickle charging without cutoff can overcharge the battery, leading to reduced life or even damage. That’s why adding auto cut-off protection is essential.
✅ Features of This DIY Charger
🔌 12V lead-acid battery compatible
🛑 Automatic cut-off when fully charged
🔁 Auto resume if voltage drops
🔋 Safe, simple, and low-cost design
🧰 Built with commonly available components
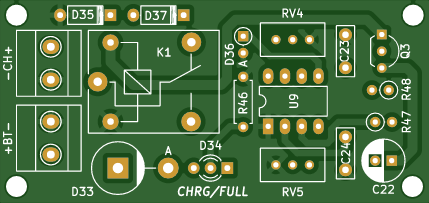
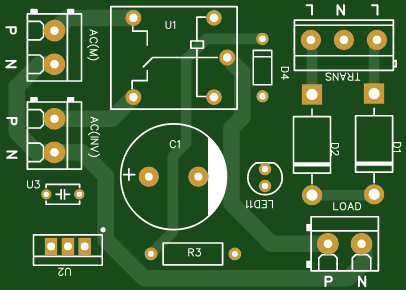
📊 Circuit Diagram Explanation

Figure: Auto Cut-Off 12V Battery Charger Circuit using 555 Timer
This is a smart automatic battery cut-off charger circuit built using the NE555 timer IC, a relay, and a few passive components. Here's how the circuit works in simple terms:
🔍 Key Components Breakdown
1. Power Input and Protection
D37 (1N4007): Protects the circuit from reverse polarity.
R48 (2.2K) and RV5 (50K potentiometer): Voltage divider network to control the trigger level.
Zener D36 (5.1V): Sets a reference voltage input to pin 2 of the NE555.
2. 555 Timer Configuration (U9 - NE555D)
Mode: The NE555 is configured as a comparator.
Pin 2 (TR) monitors the voltage through the adjustable divider.
When the battery voltage is below the threshold, pin 3 (Output) goes high, turning on the transistor.
When the battery is fully charged, pin 3 goes low, deactivating the relay.
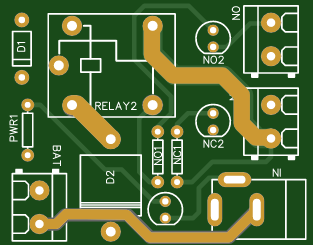
3. Transistor Switch and Relay Control
Q3 (BC557 PNP): Works as a switch to drive the relay.
R47 (1K): Limits base current to the transistor.
C22 (220µF): Provides a delay/smoothing to avoid relay flickering.
D35 (1N4007): Flyback diode across relay coil to suppress back EMF.
K1 (Relay G5Q-1): Connects or disconnects the charging supply to the battery.
4. Dual Color LED Indicator (D34)
Connected across the relay contacts:
RED LED turns ON during charging.
GREEN LED lights up when the battery is fully charged (relay off).
This provides a simple visual indication of charging status.
🔁 How the Auto Cut-Off Works
Battery voltage is monitored by the voltage divider and fed into pin 2 of NE555.
When battery voltage is below threshold (e.g., <14.2V), the NE555 output goes HIGH:
Turns ON transistor → Relay energizes → Charging starts.
When battery voltage reaches the set threshold, the NE555 output goes LOW:
Transistor turns OFF → Relay disconnects the charger.
The LED indicator switches from RED to GREEN to show full charge.
This cycle can repeat automatically, making it ideal for safe trickle charging.
🧪 Calibration Tips
RV5 (50K Potentiometer) is used to set the cutoff voltage precisely.
Use a multimeter to monitor and adjust RV5 while observing relay action.
Target voltage:
For 12V lead-acid batteries: 14.2V – 14.4V cutoff
For SLA (sealed): 13.8V – 14.0V max
✅ Advantages of This Circuit
Prevents battery overcharging
Automatically restarts charging when voltage drops
Low-cost and DIY-friendly
Uses standard electronic components
Suitable for car, bike, inverter, and solar battery charging
🔍Video Reference
📝 Conclusion
This DIY Auto Cut Off 12V Trickle Charger is a must-have project for anyone using lead-acid batteries regularly. It’s budget-friendly, easy to build, and adds safety and intelligence to your charging routine.
🔋 DIY Automatic Cut Off 12V Trickle Charger | Lead Acid Battery AutoCut Charger
*PCBWay community is a sharing platform. We are not responsible for any design issues and parameter issues (board thickness, surface finish, etc.) you choose.


Raspberry Pi 5 7 Inch Touch Screen IPS 1024x600 HD LCD HDMI-compatible Display for RPI 4B 3B+ OPI 5 AIDA64 PC Secondary Screen(Without Speaker)
BUY NOW


- Comments(0)
- Likes(0)
 More by Estiak Khan
-
 ⚡ How to Make a DIY Spot Welding Machine at Home for 18650 Batteries | Full Circuit & Working
If you’re working on battery pack projects using 18650 lithium-ion cells, then you know how importan...
⚡ How to Make a DIY Spot Welding Machine at Home for 18650 Batteries | Full Circuit & Working
If you’re working on battery pack projects using 18650 lithium-ion cells, then you know how importan...
-
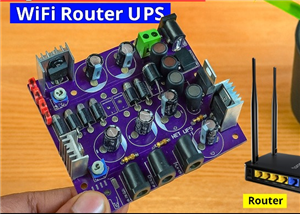
 🔋 How to Make a Simple DIY Wi-Fi Router UPS at Home | Step-by-Step Guide with Circuit & PCB
Do you lose internet connection every time the power goes out?If yes, then this simple DIY Wi-Fi Rou...
🔋 How to Make a Simple DIY Wi-Fi Router UPS at Home | Step-by-Step Guide with Circuit & PCB
Do you lose internet connection every time the power goes out?If yes, then this simple DIY Wi-Fi Rou...
-
 Automatic AC Changeover for Inverter
 – DIY Circuit GuideAre you tired of manually switching between ...
Automatic AC Changeover for Inverter
Automatic AC Changeover for Inverter – DIY Circuit GuideAre you tired of manually switching between ...
-
 How to Make a 12V AC/DC Fan Controller Module
If you're looking for an efficient way to control a 12V fan using either AC or DC input, this DIY pr...
How to Make a 12V AC/DC Fan Controller Module
If you're looking for an efficient way to control a 12V fan using either AC or DC input, this DIY pr...
-
 Autocut DC Mini IPS for DC 12V Load
If you are looking for a reliable Autocut DC Mini IPS for DC 12V ...
Autocut DC Mini IPS for DC 12V Load
Autocut DC Mini IPS for DC 12V LoadIf you are looking for a reliable Autocut DC Mini IPS for DC 12V ...
-
 Build a 12V Battery Autocut System with LCD Display
Are you looking for an efficient and affordable way to protect and monitor your 12V battery system? ...
Build a 12V Battery Autocut System with LCD Display
Are you looking for an efficient and affordable way to protect and monitor your 12V battery system? ...
-
 DIY Transistor Tester | Build Your Own LCR Meter at Home with Arduino Nano
Are you fascinated by electronics and want to create your own tools for testing components? Building...
DIY Transistor Tester | Build Your Own LCR Meter at Home with Arduino Nano
Are you fascinated by electronics and want to create your own tools for testing components? Building...
-
 How to Make a Pure Sine Wave Inverter Using EG8010 + IR2110S | Step-by-Step Guide
If you are looking ...
How to Make a Pure Sine Wave Inverter Using EG8010 + IR2110S | Step-by-Step Guide
How to Make a Pure Sine Wave Inverter Using EG8010 + IR2110S | Step-by-Step GuideIf you are looking ...
-
 🔋 How to Make DC Changeover for Automatic Inverter System | DIY Inverter Changeover Switch
Are you tired of manually switching between DC power supply and battery backup during load shedding?...
🔋 How to Make DC Changeover for Automatic Inverter System | DIY Inverter Changeover Switch
Are you tired of manually switching between DC power supply and battery backup during load shedding?...
-
 No Need Adapter 🤔 WiFi Router UPS Making with Transformer
No Need Adapter WiFi Router UPS Making with Transformer | Complete Circuit DiagramAre you tired of ...
No Need Adapter 🤔 WiFi Router UPS Making with Transformer
No Need Adapter WiFi Router UPS Making with Transformer | Complete Circuit DiagramAre you tired of ...
-
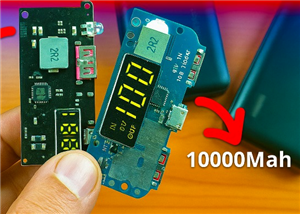 🔋 How to Make a Power Bank Module at Home
Are you looking to build your own DIY power bank at home? In this blog post, we’ll show you how to c...
🔋 How to Make a Power Bank Module at Home
Are you looking to build your own DIY power bank at home? In this blog post, we’ll show you how to c...
-
 Cute LIT 220W Inverter Load Test ⚡ Auto Changeover IPS System Explained! 🔋 Real Load Backup Test
Are you looking for a reliable backup power solution for your WiFi router, CCTV, or small appliances...
Cute LIT 220W Inverter Load Test ⚡ Auto Changeover IPS System Explained! 🔋 Real Load Backup Test
Are you looking for a reliable backup power solution for your WiFi router, CCTV, or small appliances...
-
 ⚡ Hybrid WiFi Router UPS for Solar System
IntroductionPower cuts in off-grid areas can disrupt internet connectivity. With the rise of solar s...
⚡ Hybrid WiFi Router UPS for Solar System
IntroductionPower cuts in off-grid areas can disrupt internet connectivity. With the rise of solar s...
-
 🔋 DIY Solar-Based Mini IPS at Home | Auto Load Changeover Circuit for 12V DC Fan/Light
If you're looking for an easy and affordable solution to keep your 12V DC fan or light running even ...
🔋 DIY Solar-Based Mini IPS at Home | Auto Load Changeover Circuit for 12V DC Fan/Light
If you're looking for an easy and affordable solution to keep your 12V DC fan or light running even ...
-
 🔋 DIY Automatic Cut Off 12V Trickle Charger | Lead Acid Battery AutoCut Charger
Do you often charge your 12V lead-acid battery manually and worry about overcharging? With this DIY ...
🔋 DIY Automatic Cut Off 12V Trickle Charger | Lead Acid Battery AutoCut Charger
Do you often charge your 12V lead-acid battery manually and worry about overcharging? With this DIY ...
-
 🔥 DIY Smart 12V Battery at Home | Using 18650 Cells + Smart BMS
Looking for a way to build a powerful and smart 12V battery at home? In this guide, I'll show you h...
🔥 DIY Smart 12V Battery at Home | Using 18650 Cells + Smart BMS
Looking for a way to build a powerful and smart 12V battery at home? In this guide, I'll show you h...
-
 🎮 DIY Arduino Nano Snake Game Console with OLED Display
DIY Arduino Nano Snake Game Console with OLED Display and ButtonsDo you love retro games? Want to bu...
🎮 DIY Arduino Nano Snake Game Console with OLED Display
DIY Arduino Nano Snake Game Console with OLED Display and ButtonsDo you love retro games? Want to bu...
-
 DIY 150W IPS Making At Home with Auto Changeover System | Mini IPS 2025
How to Make an Automatic 150W IPS Using Two Circuit ModulesAre you looking for a reliable and effici...
DIY 150W IPS Making At Home with Auto Changeover System | Mini IPS 2025
How to Make an Automatic 150W IPS Using Two Circuit ModulesAre you looking for a reliable and effici...
-
Programmable Mist Maker - XIAO / QT PY Extension
171 0 0 -
RadioHAT - Raspberry Pi radio development platform
180 0 1 -
-
-
-
-
ARPS-2 – Arduino-Compatible Robot Project Shield for Arduino UNO
2766 0 5 -
A Compact Charging Breakout Board For Waveshare ESP32-C3
3273 3 8 -
AI-driven LoRa & LLM-enabled Kiosk & Food Delivery System
3528 2 2


