


|
KiCad 8.0KiCad
|
4x2 Channel Remote Controller – Receiver Part
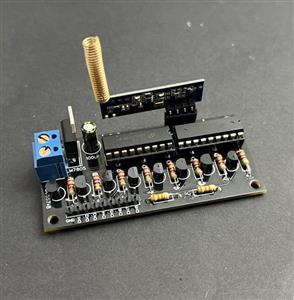
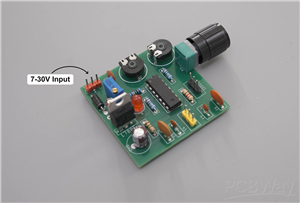
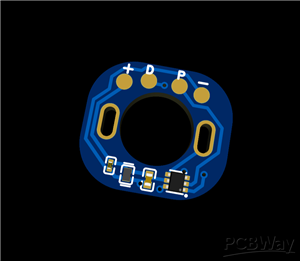
The receiver circuit for this 4x2 channel remote controller enables reliable wireless communication with the transmitter for RC toys, robotics, and other applications. It operates using RF communication and ensures seamless data decoding to control 8 channels individually.
Receiver Circuit Overview
The receiver circuit is built around the HT12D decoder IC, which decodes the 12-bit serial data sent by the transmitter into parallel format. The SRX882 RF module captures the transmitted signal and passes it to the HT12D decoder. The 8 address pins on the HT12D are configured to match the transmitter's address to ensure secure communication.
Once the signal is decoded, the data pins of the HT12D control transistors that drive relays. These relays act as switches for connected devices, enabling control over four different channels.
Indicator LEDs are included to show the status of the received signal and the relay activations.
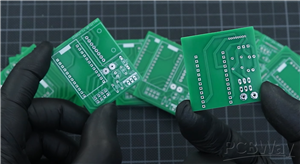
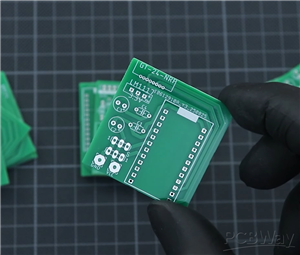
PCB Design
The receiver PCB layout is compact and well-organized to ensure efficient signal processing and ease of assembly. The board includes:
- Dedicated slots for the HT12D IC and SRX882 module.
- Proper routing of relay-driving signals.
- Connection terminals for external loads.
Assembly Steps
- Soldering Components: Assemble the PCB by soldering all components as per the circuit diagram.
- Setting Address Pins: Configure the address pins (A0-A7) on the HT12D to match the transmitter's address.
- Connecting Power Supply: Attach a 9V battery to the input of the LM7805 voltage regulator.
- Final Testing: Power on the circuit and test it by triggering the transmitter buttons. Check relay activation and indicator LEDs for proper operation.
Conclusion
This receiver design ensures reliable operation for wireless control projects, offering flexibility for a wide range of applications. Its straightforward assembly and use of readily available components make it a great addition to DIY and educational projects.

4x2 Channel Remote Controller – Receiver Part
Project images are for reference only. Actual production is based on the manufacturing files on the project page.
Please review the designer's notes (e.g., PCB thickness) and select the appropriate options.
PCBWay is not responsible
for issues caused by unsuitable parameter selections.
For more important ordering information, please refer to
Read More


Raspberry Pi 5 7 Inch Touch Screen IPS 1024x600 HD LCD HDMI-compatible Display for RPI 4B 3B+ OPI 5 AIDA64 PC Secondary Screen(Without Speaker)
BUY NOW


- Comments(1)
- Likes(1)
More by Nirmal Maa
-
 VC-02 Module Based Home Automation
In this guide, I’ll take you through the process of building a project using a custom-designed PCB, ...
VC-02 Module Based Home Automation
In this guide, I’ll take you through the process of building a project using a custom-designed PCB, ...
-
 PCBWay 12th Anniversary Badge Design
To celebrate the 12th Anniversary of PCBWay, I designed a special interactive electronic badge that ...
PCBWay 12th Anniversary Badge Design
To celebrate the 12th Anniversary of PCBWay, I designed a special interactive electronic badge that ...
-
 16-Array Line Follower Robot Sensor PCB Design
This project presents a purpose-built 16-channel line follower sensor PCB engineered for precision r...
16-Array Line Follower Robot Sensor PCB Design
This project presents a purpose-built 16-channel line follower sensor PCB engineered for precision r...
-
 ESP01 + TM1637 NTP Clock (0.56″ 7-Segment Display)
This project is a minimalist Wi-Fi desk clock built around the ESP-01 / ESP-01S and a 0.56″ TM1637 7...
ESP01 + TM1637 NTP Clock (0.56″ 7-Segment Display)
This project is a minimalist Wi-Fi desk clock built around the ESP-01 / ESP-01S and a 0.56″ TM1637 7...
-
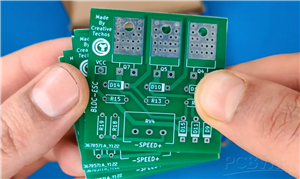
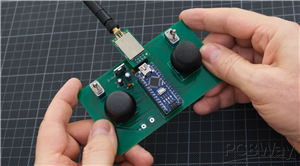 Wireless Dual-Joystick NRF24 Controller PCB for Robotics & RC Applications
This project presents a compact and reliable dual-joystick wireless controller PCB, designed for rob...
Wireless Dual-Joystick NRF24 Controller PCB for Robotics & RC Applications
This project presents a compact and reliable dual-joystick wireless controller PCB, designed for rob...
-
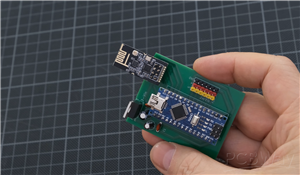 Channel RC Receiver PCB (NRF24 + Arduino Nano)
This receiver board is the compact, reliable counterpart to the 6-channel transmitter, designed to d...
Channel RC Receiver PCB (NRF24 + Arduino Nano)
This receiver board is the compact, reliable counterpart to the 6-channel transmitter, designed to d...
-
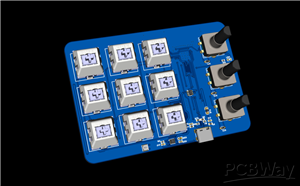 Compact 3×3 Streaming Macro Pad with RGB & Encoders
The TriPad Studio Controller is a professional-grade 3×3 macro pad designed specifically for streame...
Compact 3×3 Streaming Macro Pad with RGB & Encoders
The TriPad Studio Controller is a professional-grade 3×3 macro pad designed specifically for streame...
-
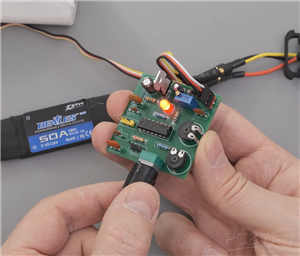 Servo & ESC Tester with End-Point Adjustment – (Dual Supply / High-Power)
The Servo & ESC Tester PCB (Dual Supply Version) is designed for applications involving high-tor...
Servo & ESC Tester with End-Point Adjustment – (Dual Supply / High-Power)
The Servo & ESC Tester PCB (Dual Supply Version) is designed for applications involving high-tor...
-
 Servo & ESC Tester with End-Point Adjustment – Single Supply
This Servo & ESC Tester PCB (Single Supply Version) is designed as a compact and reliable tool f...
Servo & ESC Tester with End-Point Adjustment – Single Supply
This Servo & ESC Tester PCB (Single Supply Version) is designed as a compact and reliable tool f...
-
 FPV Head Tracking System – Transmitter PCB
The Transmitter PCB is the sensing and data-sending side of the FPV head tracking system, designed t...
FPV Head Tracking System – Transmitter PCB
The Transmitter PCB is the sensing and data-sending side of the FPV head tracking system, designed t...
-
 FPV Head Tracking System – Receiver PCB (Small Version)
The Small Receiver PCB is the compact counterpart of the FPV head tracking system receiver, designed...
FPV Head Tracking System – Receiver PCB (Small Version)
The Small Receiver PCB is the compact counterpart of the FPV head tracking system receiver, designed...
-
 FPV Head Tracking System – Receiver PCB (Large Version)
This Large Receiver PCB is a core part of a DIY FPV head tracking system, designed to receive head m...
FPV Head Tracking System – Receiver PCB (Large Version)
This Large Receiver PCB is a core part of a DIY FPV head tracking system, designed to receive head m...
-
 N20 Motor Breakout with DRV8212 4A Driver
This N20 Motor Breakout is a compact, motor-mounted driver board built around the DRV8212 H-bridge m...
N20 Motor Breakout with DRV8212 4A Driver
This N20 Motor Breakout is a compact, motor-mounted driver board built around the DRV8212 H-bridge m...
-
 Compact Motion Controller for Competitive Robotics
HMotion is a purpose-built controller PCB designed to simplify and strengthen robotics projects wher...
Compact Motion Controller for Competitive Robotics
HMotion is a purpose-built controller PCB designed to simplify and strengthen robotics projects wher...
-
 LM723 Solar Charge Controller with Voltage & Current Control
This project demonstrates a high-power solar charge controller built around the classic LM723 voltag...
LM723 Solar Charge Controller with Voltage & Current Control
This project demonstrates a high-power solar charge controller built around the classic LM723 voltag...
-
 Transformerless Adjustable AC-to-DC LED Driver (220V AC → 3V–110V DC)
This project explores a transformerless, auto-adjustable LED driver designed to convert 220V AC main...
Transformerless Adjustable AC-to-DC LED Driver (220V AC → 3V–110V DC)
This project explores a transformerless, auto-adjustable LED driver designed to convert 220V AC main...
-
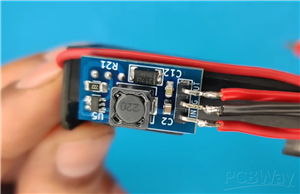 Adjustable 3.7V Step-Up Boost Converter (5V–30V)
This project presents a compact and efficient step-up boost converter designed to generate higher vo...
Adjustable 3.7V Step-Up Boost Converter (5V–30V)
This project presents a compact and efficient step-up boost converter designed to generate higher vo...
-
 60A Brushless BLDC Motor Controller (ESC)
This project showcases a DIY 60A Brushless DC (BLDC) Motor Controller (ESC) built using N-channel MO...
60A Brushless BLDC Motor Controller (ESC)
This project showcases a DIY 60A Brushless DC (BLDC) Motor Controller (ESC) built using N-channel MO...
-
Programmable Mist Maker - XIAO / QT PY Extension
1052 2 1 -
RadioHAT - Raspberry Pi radio development platform
849 0 2 -
-
-
-
-
ARPS-2 – Arduino-Compatible Robot Project Shield for Arduino UNO
3315 0 6 -
A Compact Charging Breakout Board For Waveshare ESP32-C3
3918 3 8 -
AI-driven LoRa & LLM-enabled Kiosk & Food Delivery System
4305 2 2


