


|
Soldering Iron Kit |
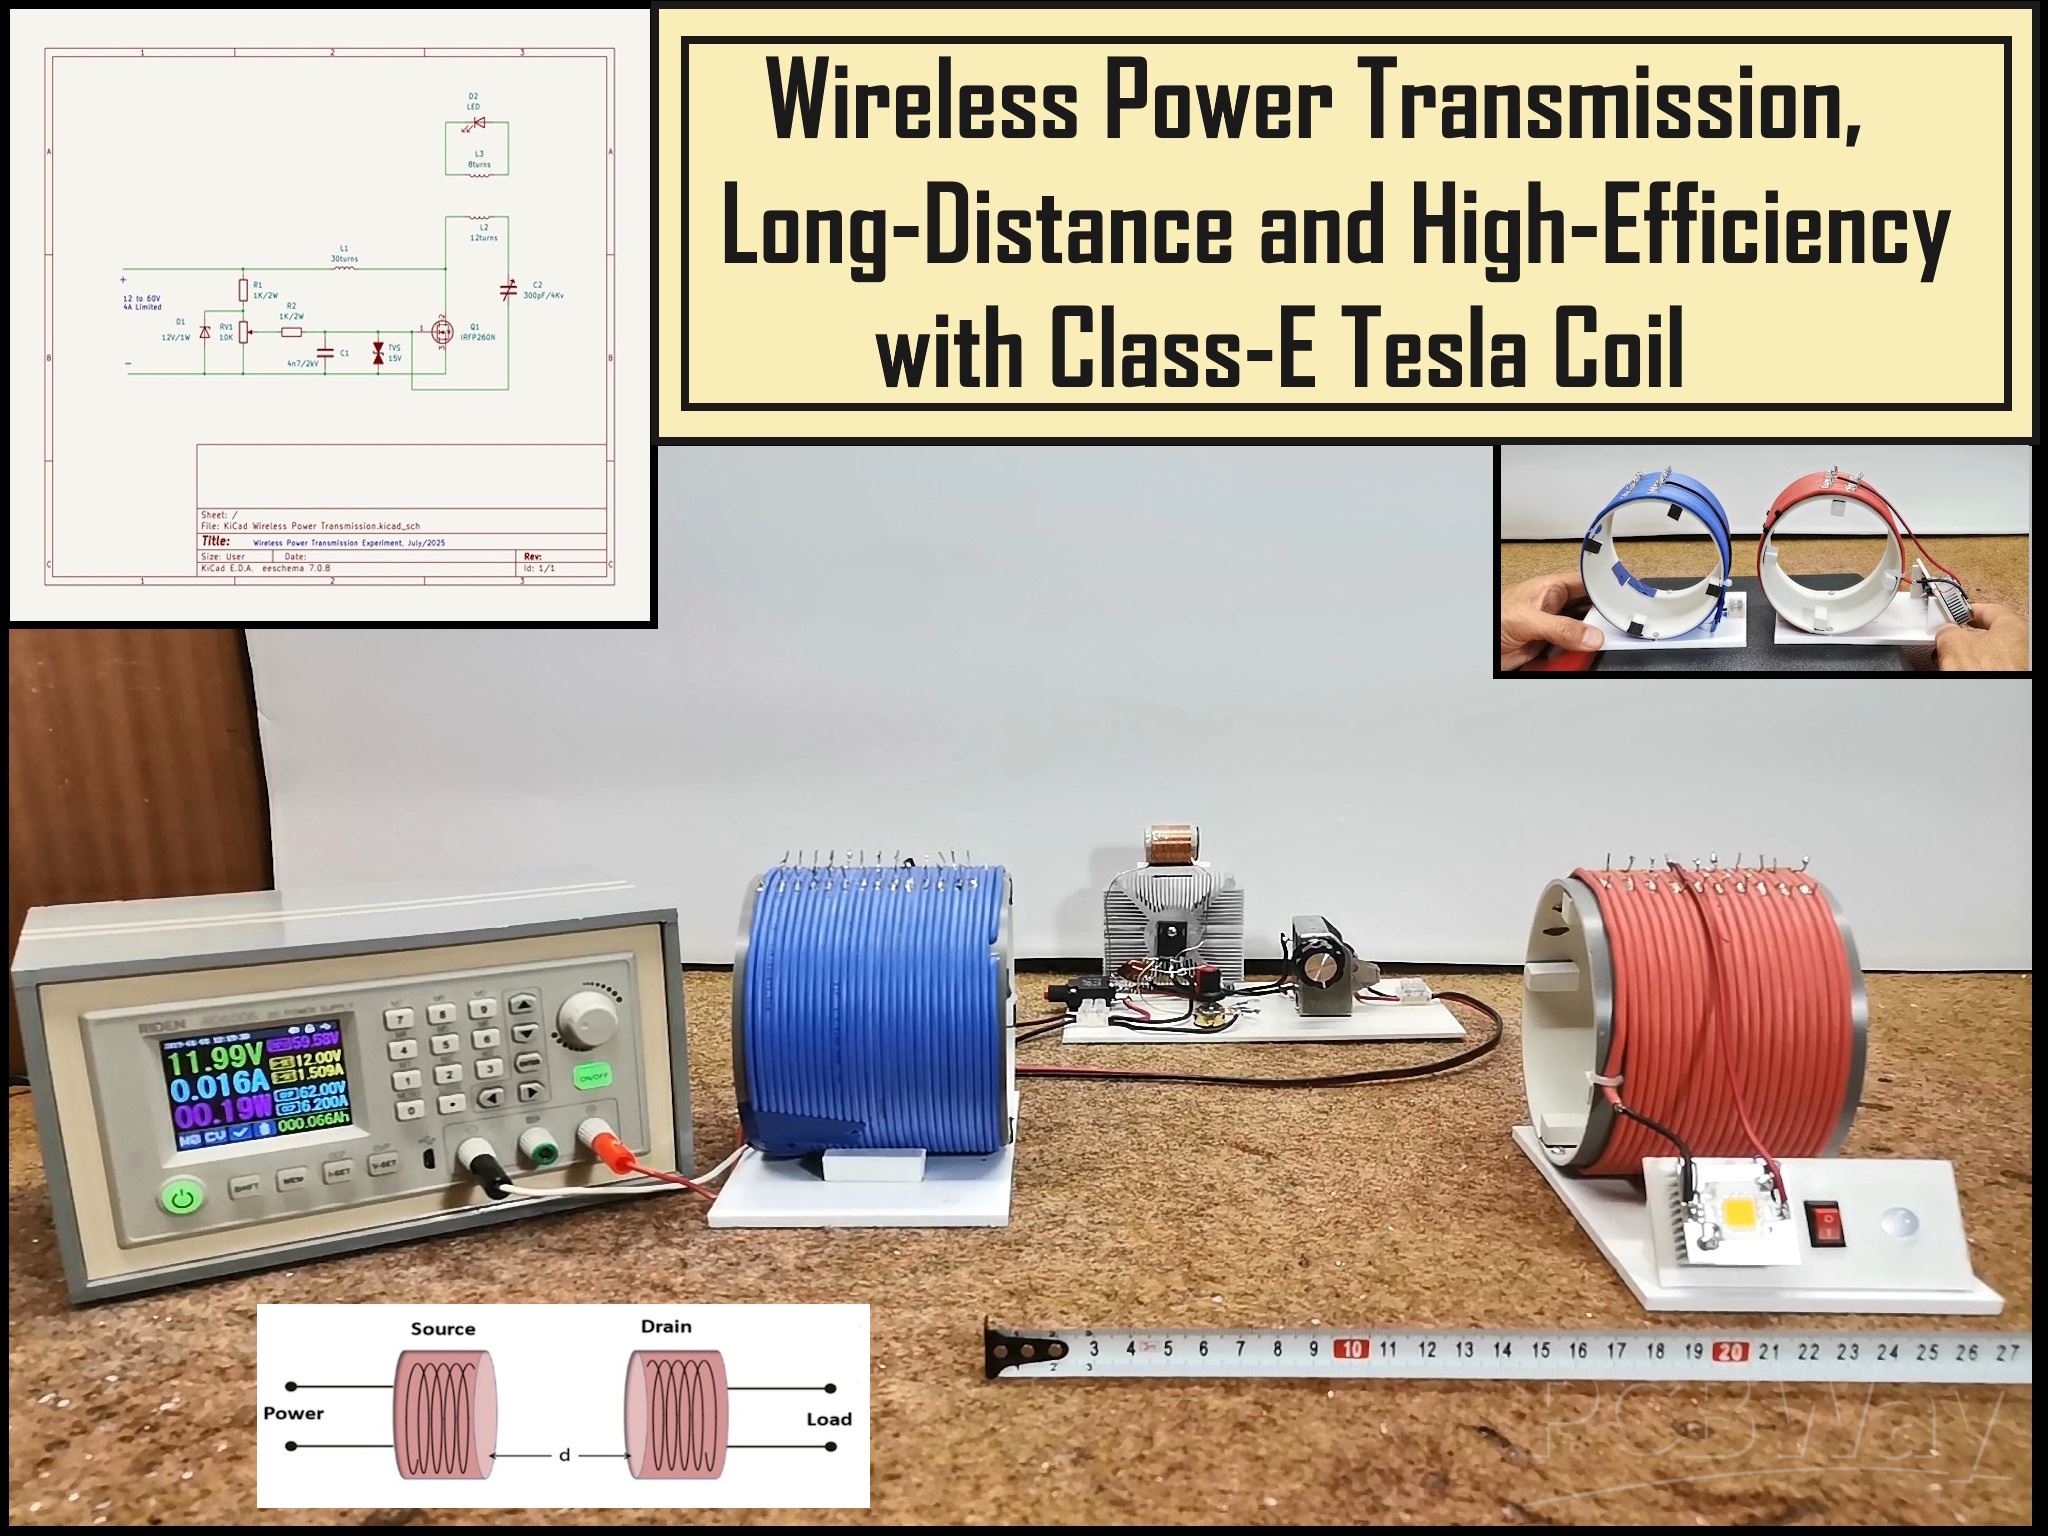
Wireless Power Transmission, Long-Distance and High-Efficiency with Class-E Tesla Coil
Wireless energy transfer also known as wireless power transmission is a method of getting useful electricity from one place to another without the need for electrical conducting media. This innovative technology eliminates the need for traditional power cables, offering a convenient and efficient way to charge or power various devices.
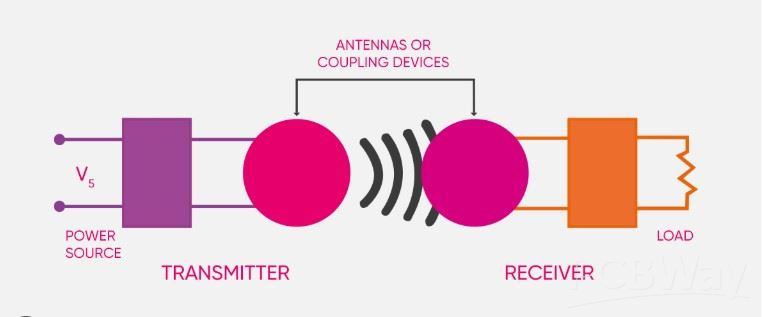
A wireless power transmission system generally consists of transmitter that converts input power into a time-varying electromagnetic field and receiver that receive the power from the electromagnetic field and convert it back into DC or AC electric current, which then powers an electrical load. In some of my previous videos, I presented a way to build such systems, one of which focused on the transmission distance, and the other on the coefficient of efficiency (i.e., transmitting more power over shorter distances). This time, I will present you with such an experiment that combines the positive aspects of the two previously mentioned projects.
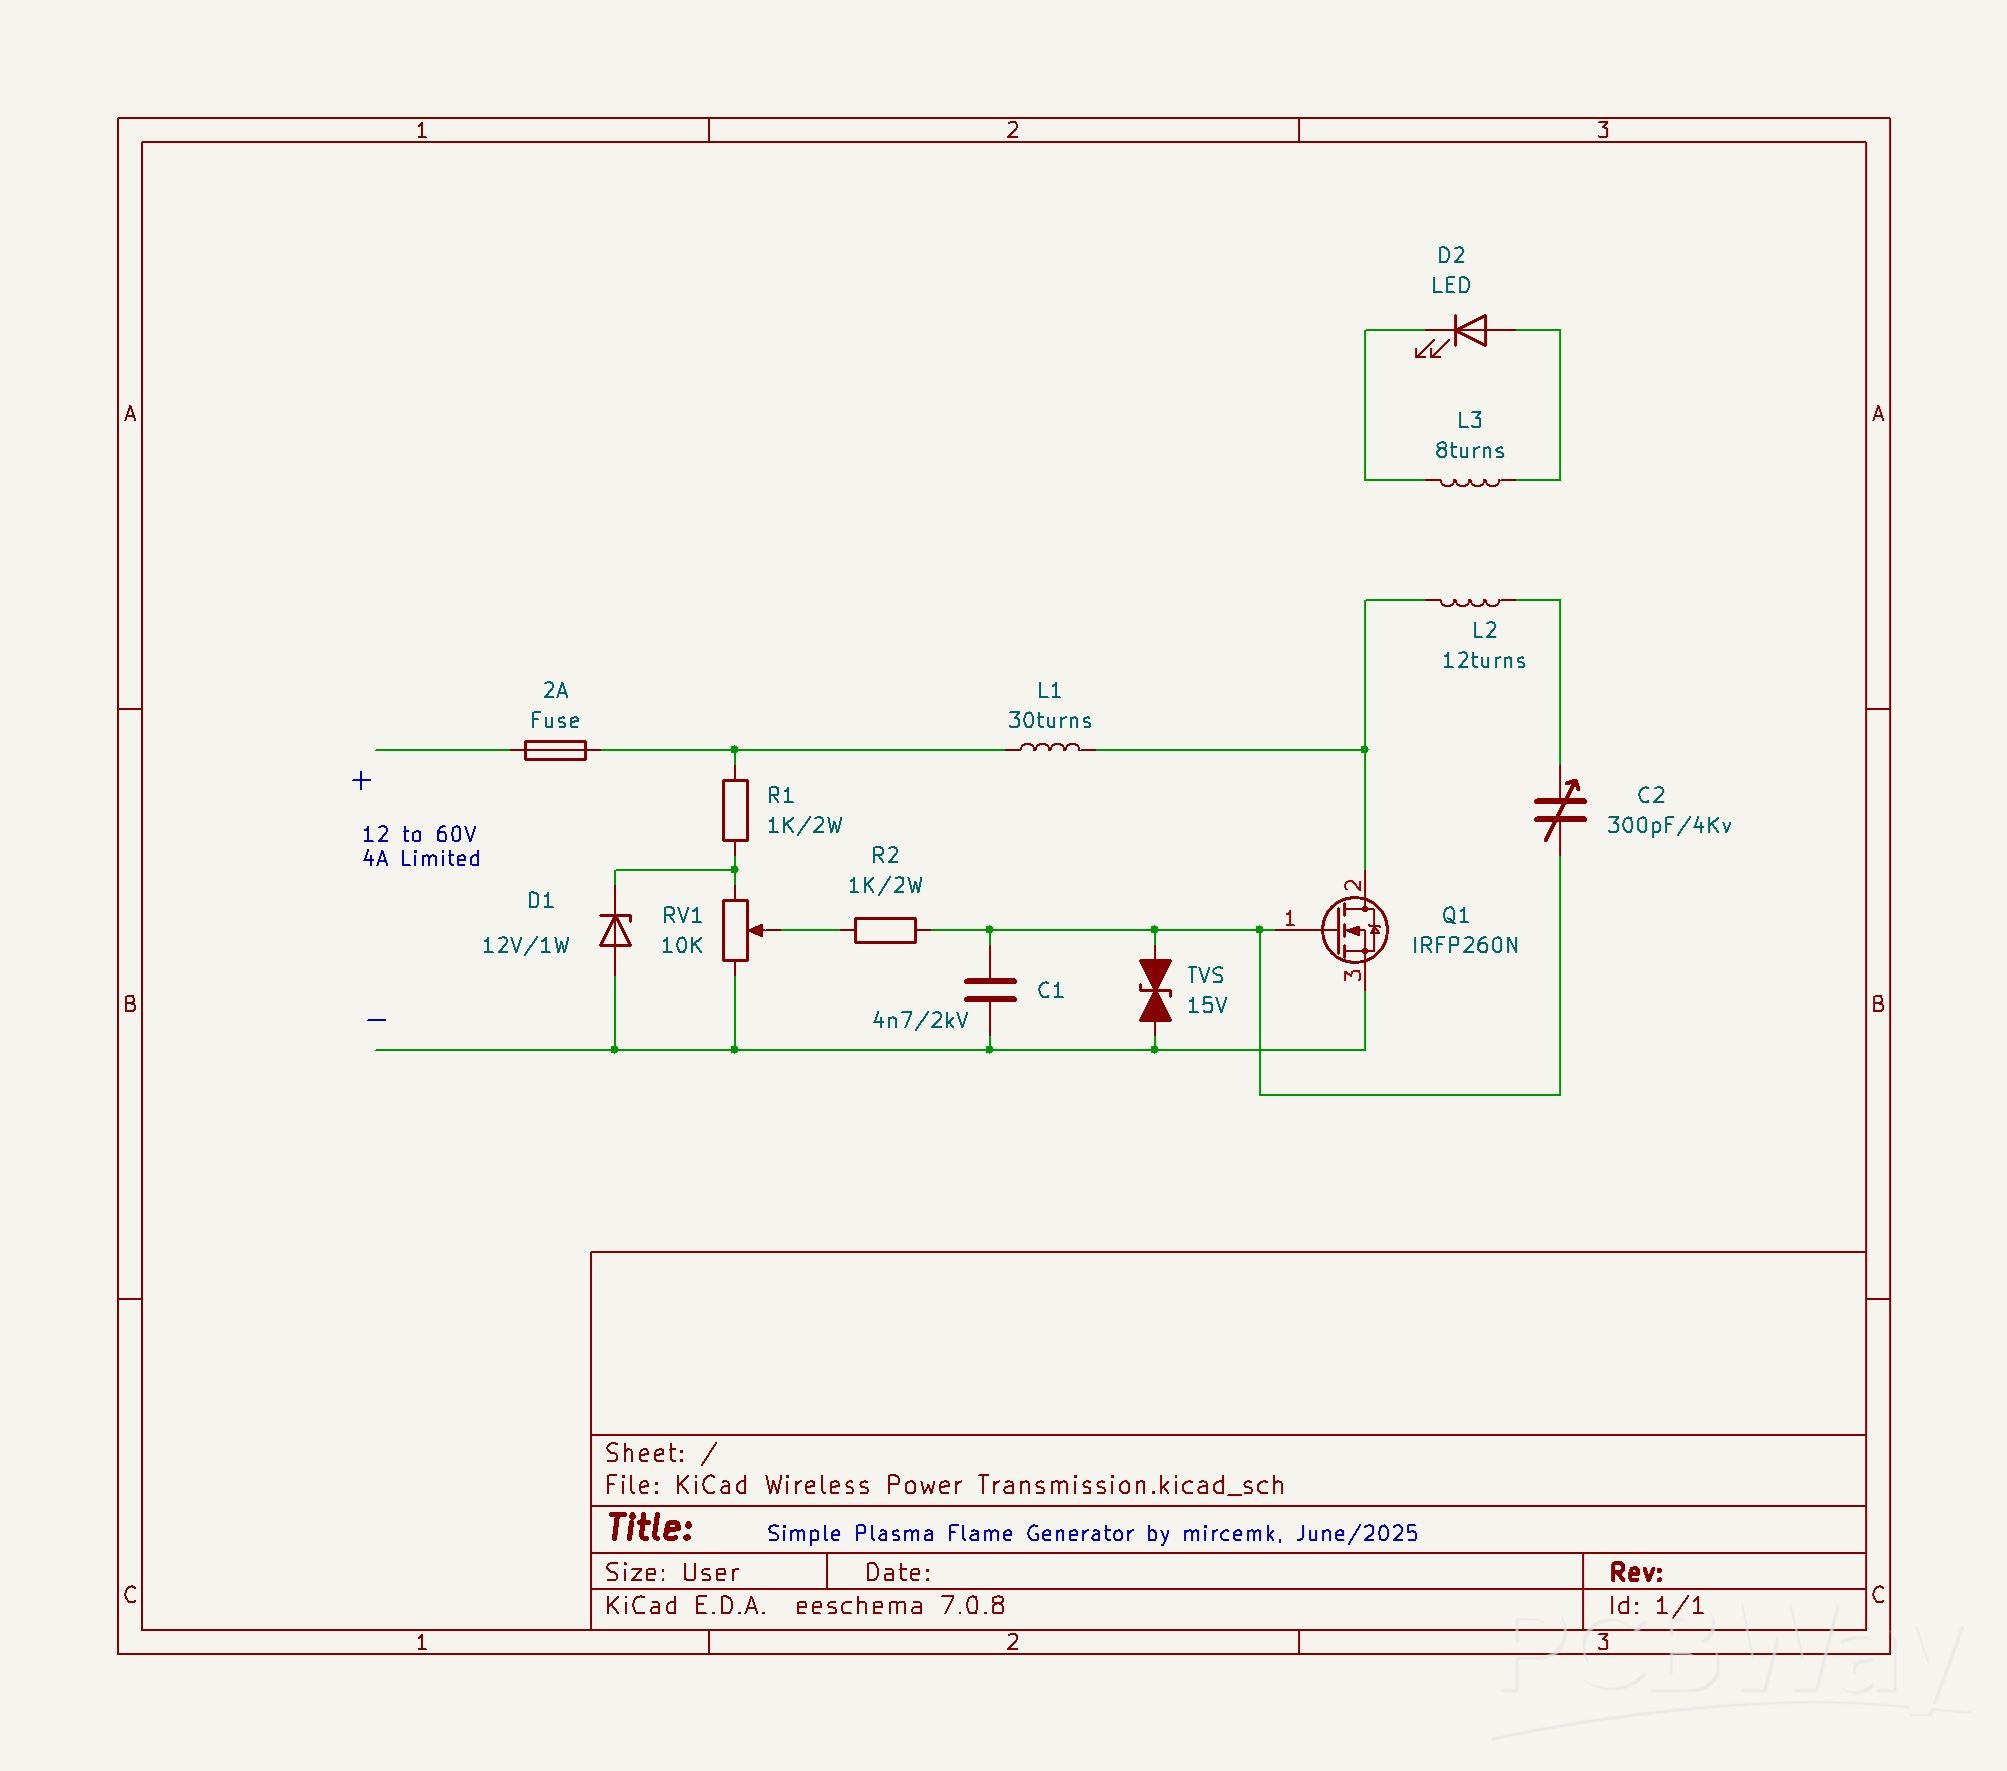
Unlike previous projects, where I used a so-called Mazzilli ZVS driver on the transmitter side, this time I will use a modified Class-E Tesla coil circuit, where the no-load consumption is minimal and at the same time the transmitted energy over a given distance is relatively large. The device is really simple to make and consists of a minimal number of components.
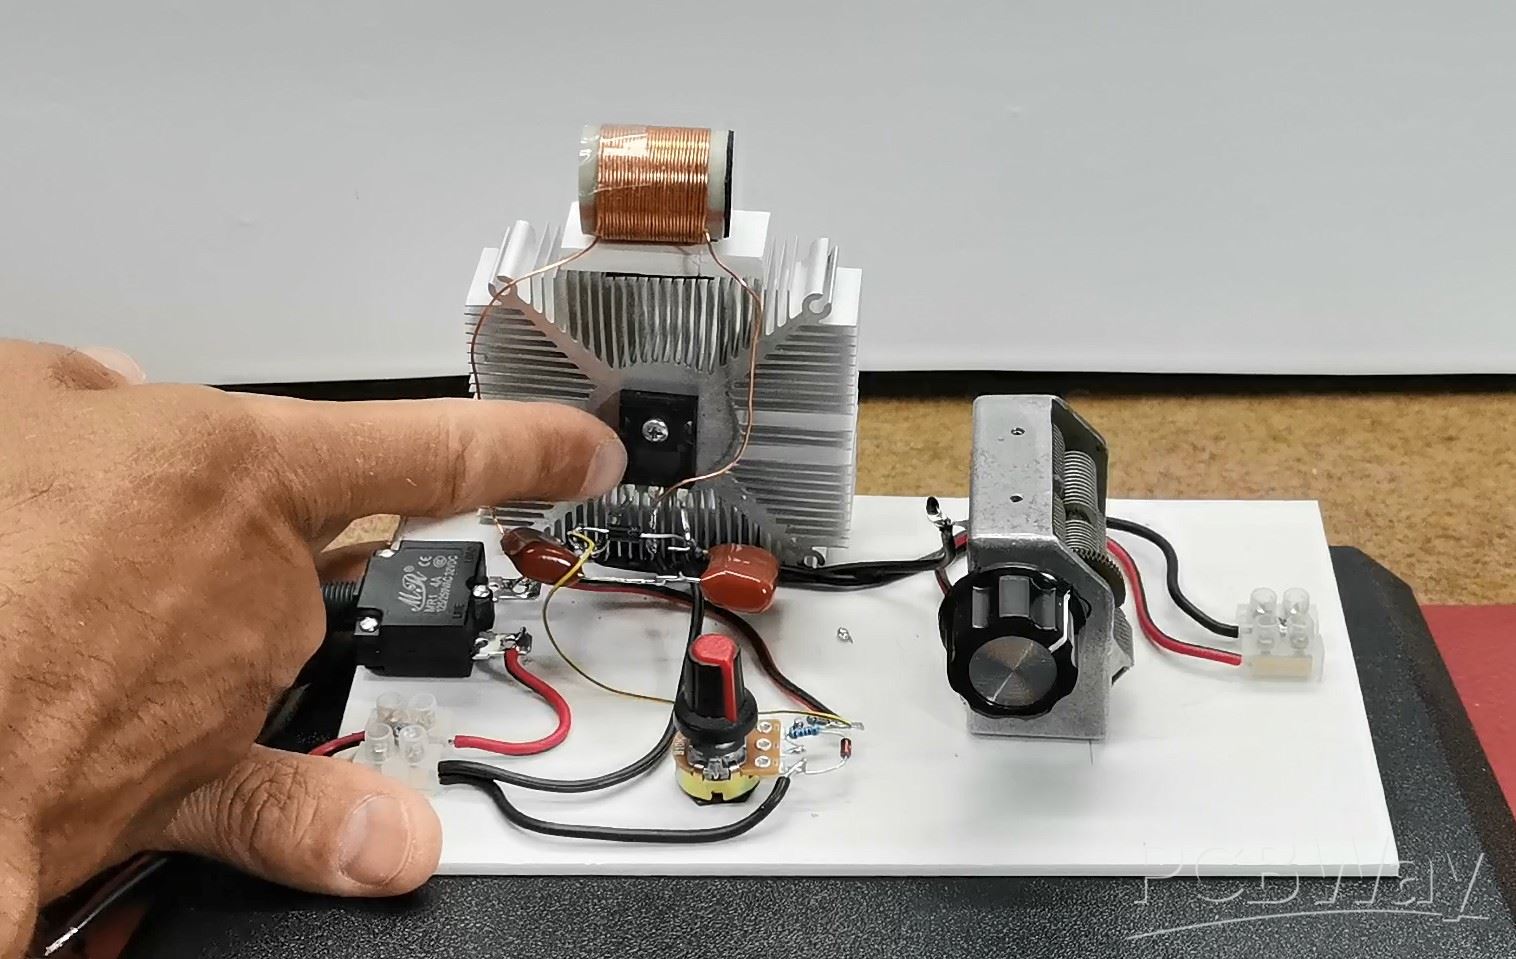
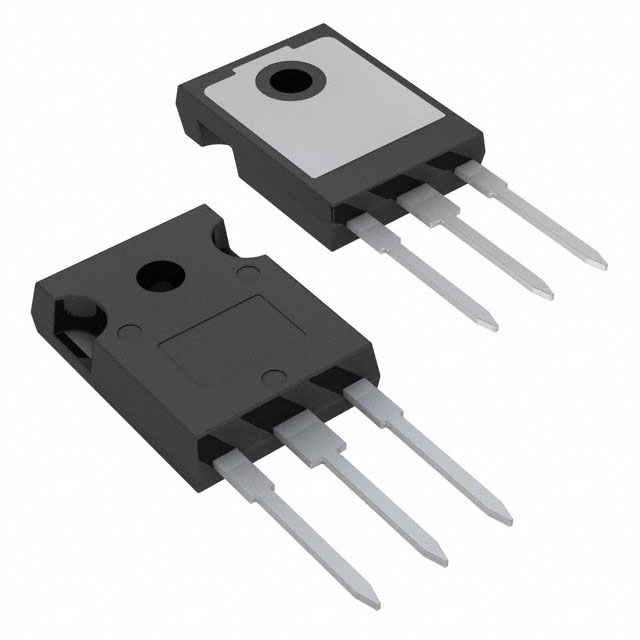
- IRFP260N Power Mosfet
- few resistors
- Potentiometer
- Zener diode and TVS protector
- two capacitors
- one coil consist 30 turns enammeled copper wire with 0.5mm cross section
- And Transmiting and receiver coils
I wound these coils on a plastic cylinder with a diameter of 11cm and used insulated wire with a thickness of 1.5mm.
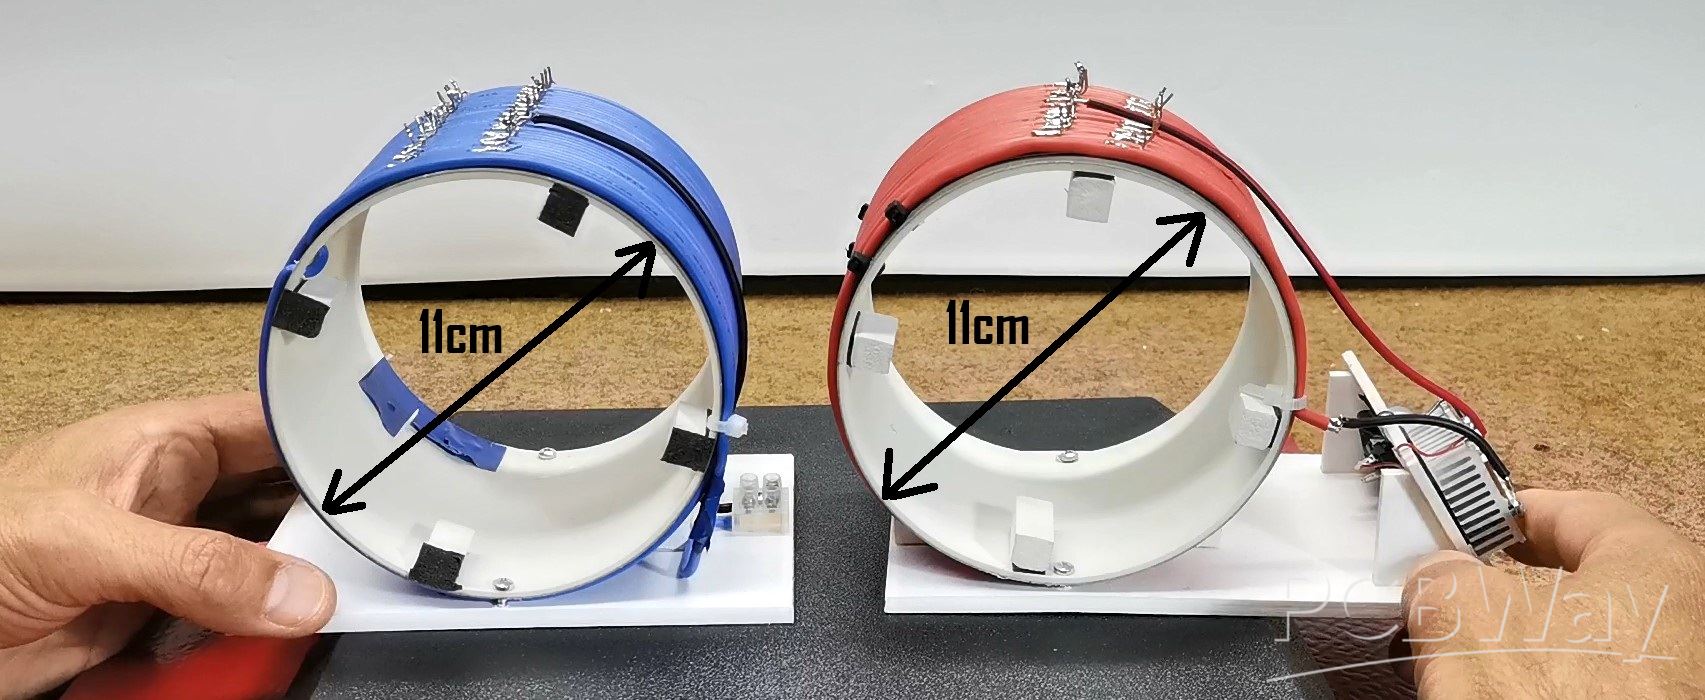
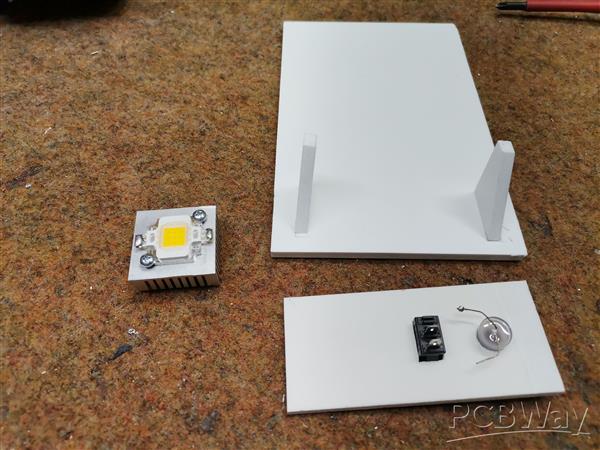
As you can see on these coils I made an output for each single turn so that I could precisely choose the optimal number of turns during experimentation. For the consumer on the receiving side I use a combination of a 10 watt LED and a regular white 10mm LED so that I can cover both aspects - the maximum transmission distance and the maximum power.
This project is sponsored by PCBWay. They has all the services you need to create your project at the best price, whether is a scool project, or complex professional project. On PCBWay you can share your experiences, or get inspiration for your next project. They also provide completed Surface mount SMT PCB assemblY service at a best price, and ISO9001 quality control. Visit pcbway.com for more services.

This time I will not make precise measurements of the transmitted power because we are dealing with high frequencies during the transfer so you can visually roughly conclude about the amount of power and the distance. First, let me briefly explain the circuitdiagram:
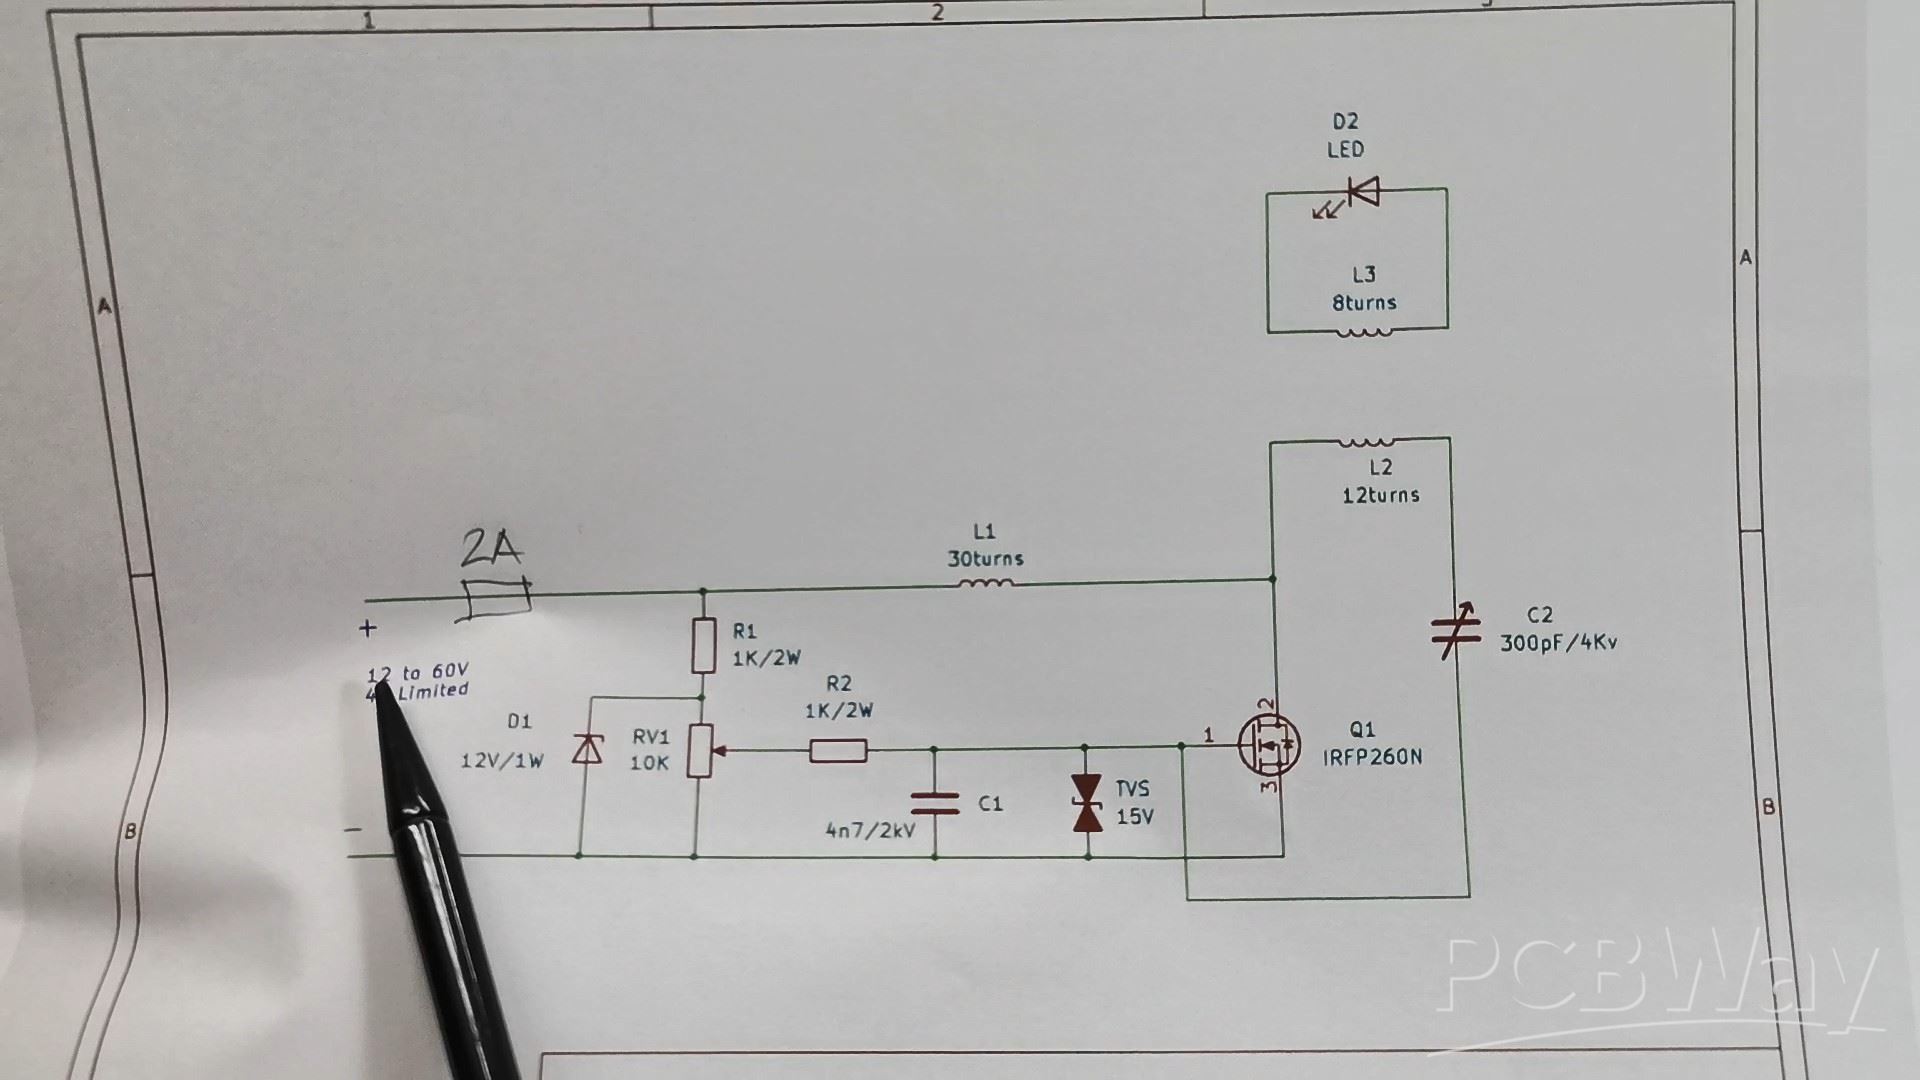
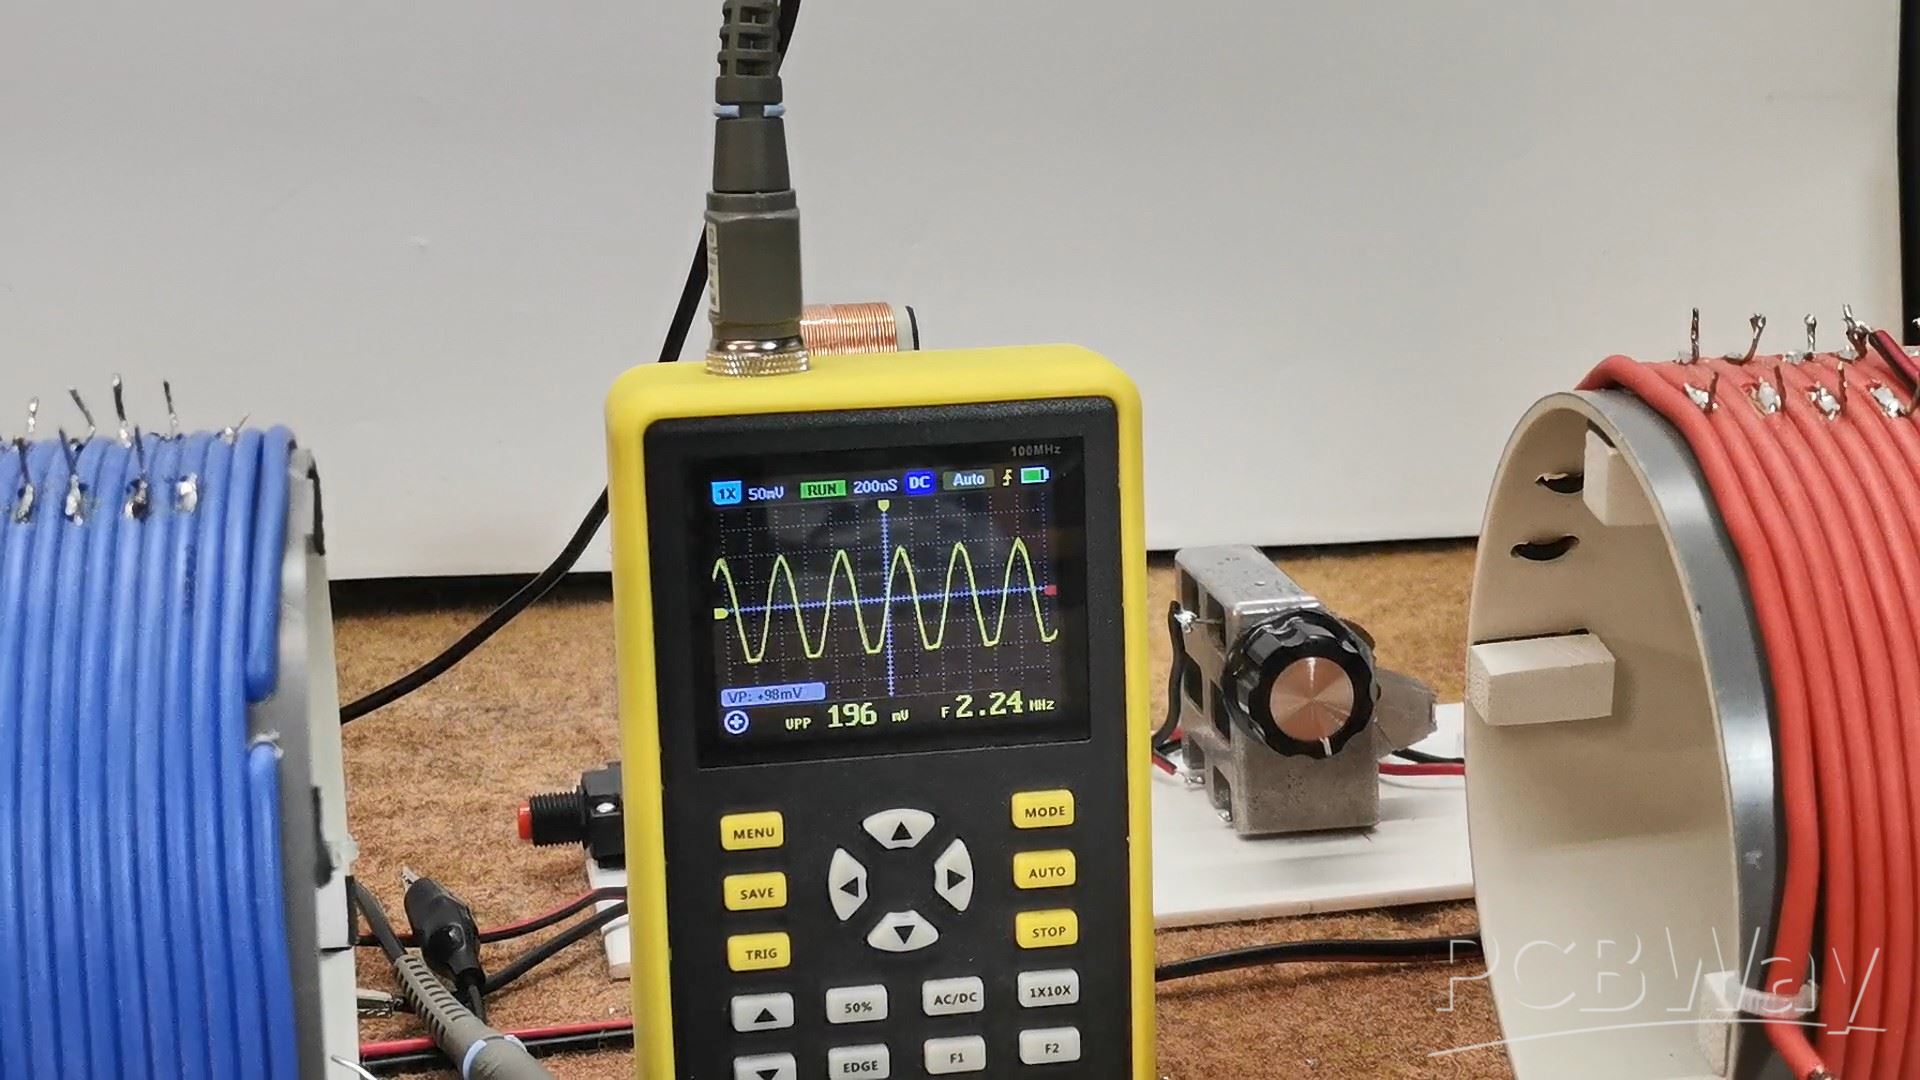
The device is powered by 9 to 60 volts DC and to protect the mosfet, the current at the source is limited to 2A. There is an automatic 2A fuse at the input to turn off the source in case of damage to any of the components. With the potentiometer, we adjust the voltage at the gate, and D1 and TVS serve to protect against parasitic voltage peaks. The oscillation frequency depends on the values of C2 and L2 and with these specific values is about 2 MHz.
For C2 I use a variable capacitor from an old Tube radio, with which I can change the oscillation frequency within a certain range.
Next comes the interesting part, which is testing. On the Power Supply display, we will monitor the voltage, current, and total power consumed on the transmitter side. Let me tell you that I determined the optimal number of turns on the transmitter and receiver coils experimentally after many hours of testing. The transmitter coil contains 12 turns, and the receiver coil contains 8 turns.
First, I will test at what greatest distance, while using the lowest possible consumption, I will be able to light a 10-watt LED. Let's see the total consumption of the device in idle mode, with a voltage of 12V.
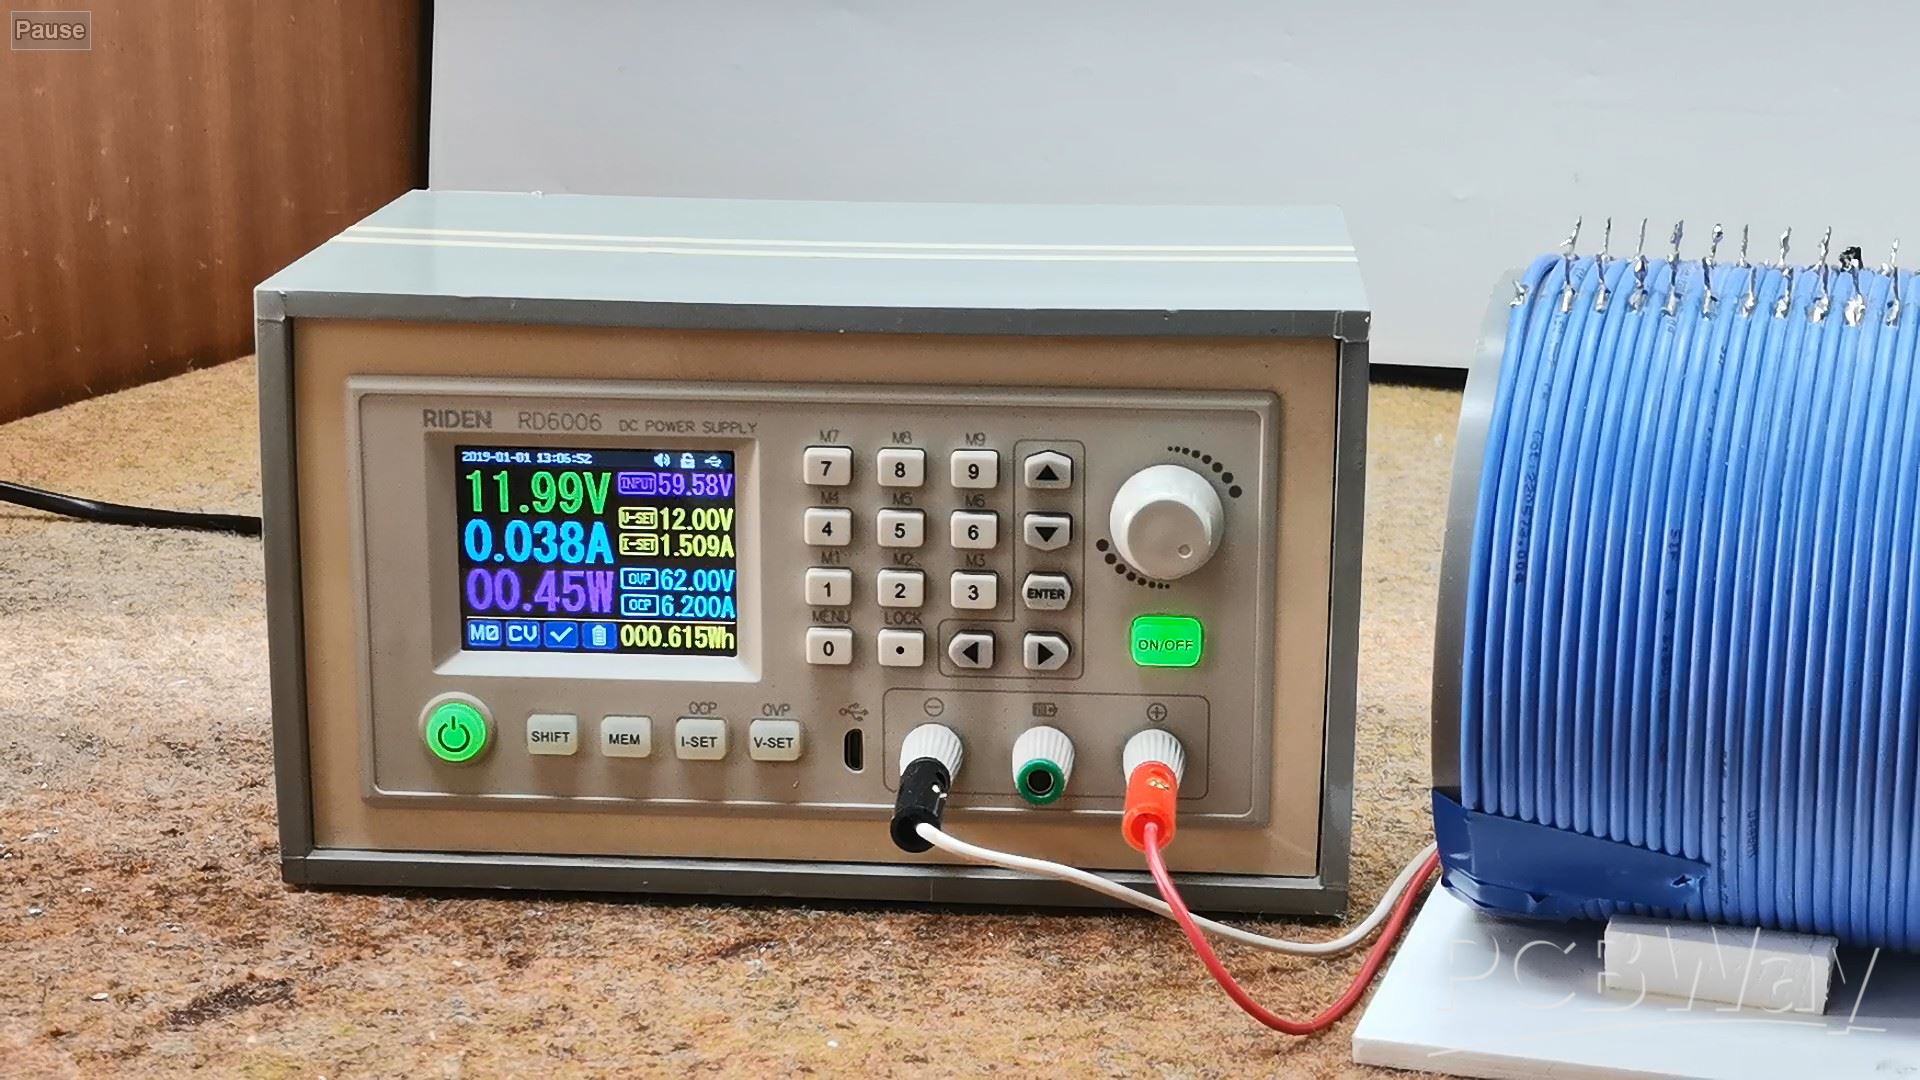
We see that it is less than 0.45 watts, and if you look at the previously mentioned video using the ZVS driver, it was about 71W, which is more than 150 times more. Next, let's see at what maximum distance a 10W LED will glow and how much the consumption will increase. The LED lit up at about 20cm distance, and the consumption is increased by only 10 milliwatts, which is an almost unbelievable result.
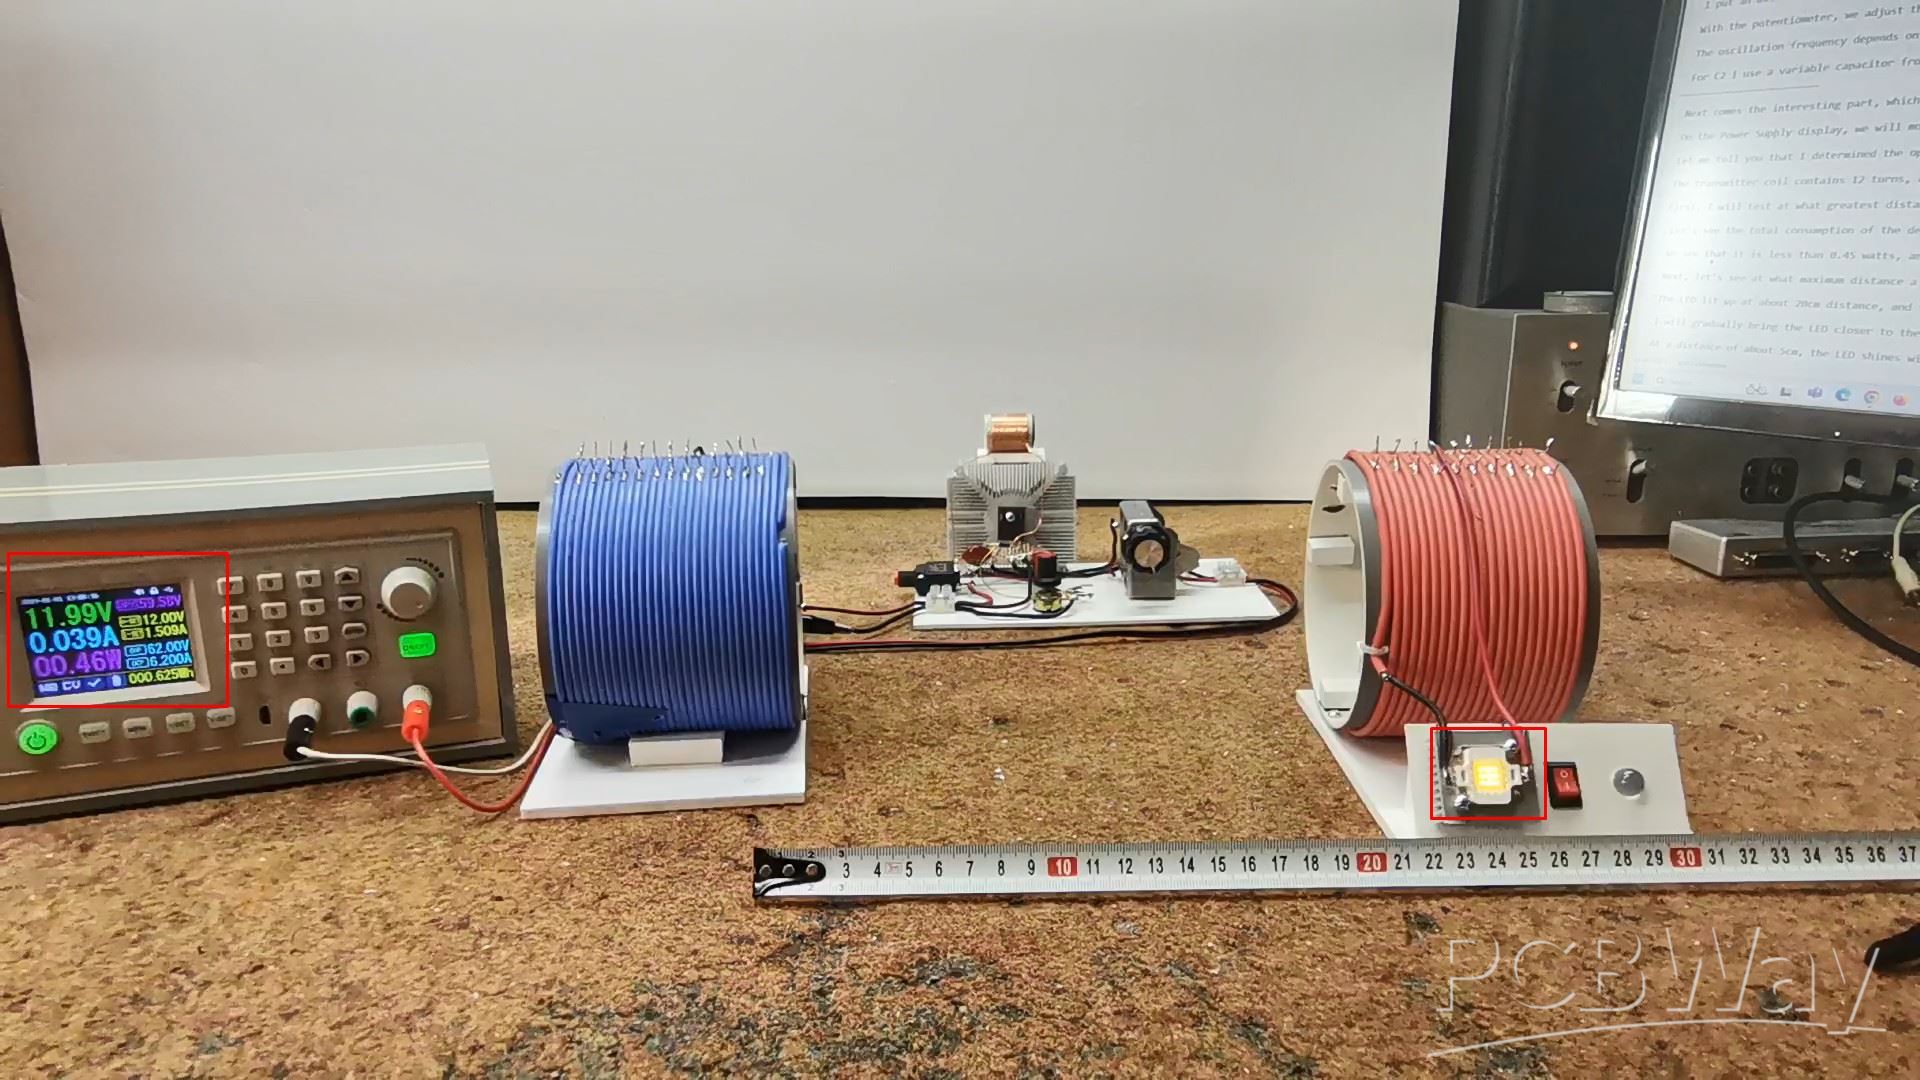
At a distance of about 5cm, the LED shines with relatively high intensity, and the total consumption is only 0.7 watts. Next I will perform the same tests but this time with standard 10mm white LED.
You may also be interested in the frequency of oscillation of the transmitter and we will check it with a small oscilloscope to whose probe I connected a short wire. The frequency is about 2.14 MHz
These were tests to demonstrate the properties at minimum voltage and current, and it is immediately obvious that the results of this device are incomparable to those of the previously mentioned. I want to emphasize that this time I will only perform a visual analysis of the receiver side according to the intensity of the LEDs, and soon in one of the next videos I will also create a presentation with detailed calculations as well as the coefficient of useful action in relation to distance. Several more tests are coming with higher supply voltage and proportionally higher power consumption.
You may notice that in the previously mentioned experiment I achieved longer transfer distances, but note that I achieved this by using additional passive amplifiers in the path from the transmitter to the receiver.
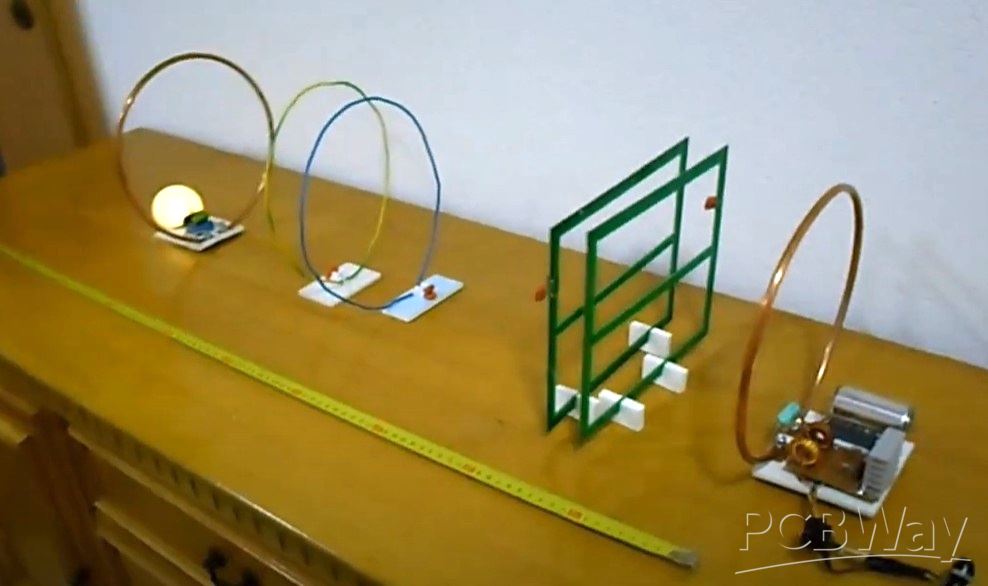
When it comes to the actual distance between the transmitter and the receiver without additional components in between, this experiment is the absolute winner with almost double the distance achieved in both categories.
And finally a brief conclusion. This project successfully demonstrates a highly efficient and long-range wireless power transfer system using a modified Class-E Tesla coil, offering significantly improved distance compared to previous designs without needing passive amplifiers.
SAFETY NOTE: Please do not attempt to recreate the experiments shown on this video unless you are familiar with High Voltage Safety Techniques! Direct Current even above 60V maybe lethal, even when the AC supply voltage has been disconnected due to the stored energy in the capacitors. I have no responsibility on any hazards caused by the circuit. Be very careful. This is a humble request.
Wireless Power Transmission, Long-Distance and High-Efficiency with Class-E Tesla Coil


Raspberry Pi 5 7 Inch Touch Screen IPS 1024x600 HD LCD HDMI-compatible Display for RPI 4B 3B+ OPI 5 AIDA64 PC Secondary Screen(Without Speaker)
BUY NOW


- Comments(0)
- Likes(0)
More by Mirko Pavleski
-
 Arduino 3D Printed self Balancing Cube
Self-balancing devices are electronic devices that use sensors and motors to keep themselves balanc...
Arduino 3D Printed self Balancing Cube
Self-balancing devices are electronic devices that use sensors and motors to keep themselves balanc...
-
 DIY Tesla Coil based Plasma Rife Machine
In several of my previous videos, I presented you with different ways to make a Rife Machine, from ...
DIY Tesla Coil based Plasma Rife Machine
In several of my previous videos, I presented you with different ways to make a Rife Machine, from ...
-
 ESP32 Analog VU Meter – Smooth Needle, Real Audio Response (DIY Build)
In several of my previous videos I have shown you how to make analog VU meters emulated on differen...
ESP32 Analog VU Meter – Smooth Needle, Real Audio Response (DIY Build)
In several of my previous videos I have shown you how to make analog VU meters emulated on differen...
-
 The Ultimate Smartphone VFO ESP32 & Si5351 Wireless Control
Variable frequency oscillators (VFOs) are commonly used in radio transmitters and receivers, especi...
The Ultimate Smartphone VFO ESP32 & Si5351 Wireless Control
Variable frequency oscillators (VFOs) are commonly used in radio transmitters and receivers, especi...
-
 DIY Shortwave Propagation Monitor - Measure Ionosphere Conditions
Shortwave Propagation is the way radio waves in the 3 to 30 MHz range travel from point A to point ...
DIY Shortwave Propagation Monitor - Measure Ionosphere Conditions
Shortwave Propagation is the way radio waves in the 3 to 30 MHz range travel from point A to point ...
-
 Professional grade Smart Lock with ESP32, BLE and Android App Control
An electronic codelock is a security device that grants access using a numerical sequence—a PIN cod...
Professional grade Smart Lock with ESP32, BLE and Android App Control
An electronic codelock is a security device that grants access using a numerical sequence—a PIN cod...
-
 Building a 3-Input Stereo ECC83 (12AX7) Tube Preamp
Some time ago I presented you a project for a 3W stereo tube amplifier with a GU32 output vacuum t...
Building a 3-Input Stereo ECC83 (12AX7) Tube Preamp
Some time ago I presented you a project for a 3W stereo tube amplifier with a GU32 output vacuum t...
-
 ESP32 Weather Dashboard with Satellite Maps and 16-day Weather Forecast
As you can see from my previous videos, besides Electronics, my fields of experimentation and proje...
ESP32 Weather Dashboard with Satellite Maps and 16-day Weather Forecast
As you can see from my previous videos, besides Electronics, my fields of experimentation and proje...
-
 Retro Analog VU Meter on Round dispalys (ESP32 and GC9A01)
Recently, in one of my previous videos I presented you a Retro VU Meter project on round displays ...
Retro Analog VU Meter on Round dispalys (ESP32 and GC9A01)
Recently, in one of my previous videos I presented you a Retro VU Meter project on round displays ...
-
 Ultimate 2-Player Reaction Timer with WS2812B LED Strips & Arduino
Arcade reaction game is a genre of play designed to test a player's physical response time and hand...
Ultimate 2-Player Reaction Timer with WS2812B LED Strips & Arduino
Arcade reaction game is a genre of play designed to test a player's physical response time and hand...
-
 Building a Vintage Tube-Style Internet Radio with Raspberry Pi & Rotary Encoder
Internet radio (also known as web radio or net radio) is a digital audio service transmitted via th...
Building a Vintage Tube-Style Internet Radio with Raspberry Pi & Rotary Encoder
Internet radio (also known as web radio or net radio) is a digital audio service transmitted via th...
-
 DIY Smart Code Lock with CrowPanel 1.28 ESP32 Rotary Display
A code lock is a keyless security device—either mechanical or electronic—that restricts access to d...
DIY Smart Code Lock with CrowPanel 1.28 ESP32 Rotary Display
A code lock is a keyless security device—either mechanical or electronic—that restricts access to d...
-
 SDR Panadapter for Vintage Tube Radios – Step-by-Step Tutorial
A radio panadapter (or panoramic adapter) is a device or software tool used in amateur radio and ot...
SDR Panadapter for Vintage Tube Radios – Step-by-Step Tutorial
A radio panadapter (or panoramic adapter) is a device or software tool used in amateur radio and ot...
-
 Oscilloscope Clock Simulation on a Round ESP32 Display
An oscilloscope clock is a circuit that turns an old analog oscilloscope into a stylish, retro-them...
Oscilloscope Clock Simulation on a Round ESP32 Display
An oscilloscope clock is a circuit that turns an old analog oscilloscope into a stylish, retro-them...
-
 DIY Simple GU32 Tube Stereo Amplifier (2x3W on 12VDC)
Vacuum tube amplifiers are often favored for their smooth harmonic distortion, especially in the low...
DIY Simple GU32 Tube Stereo Amplifier (2x3W on 12VDC)
Vacuum tube amplifiers are often favored for their smooth harmonic distortion, especially in the low...
-
 DIY 3-Display OLED Clock with Arduino and I2C Multiplexer
In this video I want to present you another unusual clock to add to my large collection of such DIY...
DIY 3-Display OLED Clock with Arduino and I2C Multiplexer
In this video I want to present you another unusual clock to add to my large collection of such DIY...
-
 Build a 5-Day forecast Raspberry Pi Weather Dashboard (Step-by-Step)
Recently in one of my previous videos,I introduced you to the 7 inch Elecrow Pi Terminal and how to...
Build a 5-Day forecast Raspberry Pi Weather Dashboard (Step-by-Step)
Recently in one of my previous videos,I introduced you to the 7 inch Elecrow Pi Terminal and how to...
-
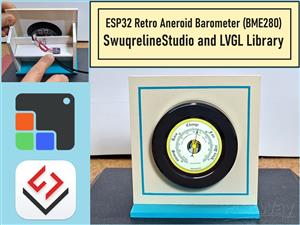 ESP32 Aneroid Barometer using Squareline Studio and LVGL on CrowPanel Round display
A barometer is a scientific instrument used to measure atmospheric pressure. Rising Pressure genera...
ESP32 Aneroid Barometer using Squareline Studio and LVGL on CrowPanel Round display
A barometer is a scientific instrument used to measure atmospheric pressure. Rising Pressure genera...
-
-
ARPS-2 – Arduino-Compatible Robot Project Shield for Arduino UNO
2462 0 5 -
A Compact Charging Breakout Board For Waveshare ESP32-C3
2900 3 7 -
AI-driven LoRa & LLM-enabled Kiosk & Food Delivery System
3116 2 1 -
-
-
-
ESP32-C3 BLE Keyboard - Battery Powered with USB-C Charging
3162 0 2 -


