|
|
Arduino Nano R3 |
x 1 | |
|
|
12 Leds led ring WS2812 |
x 1 | |
|
|
DS3231 realtime clock module |
x 1 | |
|
|
DHT11 Temperature & Humidity Sensor |
x 1 | |
|
|
Buzzer |
x 1 | |
|
|
Pushbutton |
x 1 |

|
Soldering Iron Kit |
|

|
arduino IDEArduino
|
Unusual Led Ring Arduino Clock, Temperature, and Humidity meter
There are many arduino clock projects with temperature and humidity readings where the results are usually displayed on some kind of display. This time I will show you how to make such a device, where instead of a display, an Addressable WS2812B pixel ring with 12 LEDs is used. .

This is another in my series of Unusual Clocks which you can see in the given playlist. The reading of the values is conceived in a very intuitive way with the help of various color combinations.
Even the clock has a resolution of 1 second on only 12 LEDs. Otherwise, the code is taken from the ChrisAsi github site, and is called tux-clock, but I couldn't find a video presentation, so I decided to make the device myself and check its functionality. Another curiosity is the way to enter commands with just one button with the help of single click, double click and long click.

Otherwise, the device is extremely simple to build and contains only a few components:
- Arduino Nano MCU board
- Addressable WS2812B pixel ring with 12 LEDs
- DS3231 Realtime clock module
- DHT11 Temperature + humidity sensor
- A button
- Resistor
- and Buzzer
The buzzer signals the push of the button.
This project is sponsored by PCBWay. They has all the services you need to create your project at the best price, whether is a scool project, or complex professional project. On PCBWay you can share your experiences, or get inspiration for your next project. They also provide completed Surface mount SMT PCB assemblY service at a best price, and ISO9001 quality control.

And now let's see how the device works in real conditions.
Immediately after switching on after testing the diode ring, the clock starts in the current time setting position. With short kicks on the button, we set the hour, which is the pink or red LED(AM or PM). When we set it, we wait for a certain time and now the blue LED that indicates the minutes is lit. We adjust the minutes in the same way, and after a few seconds the correct time appears.
We read the exact time in the following way:
- The Red Led indicates the Hour specifically it is 5
- The blue LED shows the minutes, specifically 47 minutes
- both green LEDs indicate the seconds. As you can see, with each passing second, the intensity of the Led gradually increases, and every five seconds, the next Led is turned on. The same principle applies to minutes and hours.

Now with a double click the following state appears on the display and actually represents the current humidity measured by the DHT11 sensor. Currently it is 68 degrees Celsius, the red LED represents the tens and the blue the units.

With the next double click I displayed the temperature also measured by the DHT11 sensor, and currently it is 21 degrees Celsius. Analogous to the previous case, the red LED represents the first digit, and the blue the second digit.

Also, the device even has the ability to adjust the intensity of the LEDs. This menu is entered with the next double click, and the desired intensity is adjusted with short clicks on the desired value. Then that value is remembered with a double click.

Now device is returned to the first menu for setting the correct time and if it was previously set at the beginning, now we just single click to houyrs and minutes show the previously set time.

And finally a short conclusion
Although this is a very simple Arduino project, it contains more
different options, as well as a very intuitive way to show a lot of information on the "Display" consisting of only 12 LEDs.
For the sake of a better visual impression, I made a suitable case for the device from PVC boards with a thickness of 3 and 5 mm, and then covered it with colored self-adhesive wallpaper.

#include <Wire.h>
//#include <Math.h>
#include <RTClib.h>
#include <Adafruit_NeoPixel.h>
#include <SimpleDHT.h>

//Pin setup
const int DHT_PIN = 2;
const int NEO_PIN = 6;
const int BUZZER_PIN = 9;
const int BTN_PIN = 4; //2.2kohm pullup

//Pushbutton
bool btn_down_short = false;
bool btn_down_long = false;
bool btn_ignore = false;
bool btn_was_down = false;
unsigned long btn_down_started = 0;

//Temp and Humidity Sensor
SimpleDHT11 dht11;
byte temperature = 0;
byte humidity = 0;

//Neopixel Ring (12 LEDs)
Adafruit_NeoPixel strip = Adafruit_NeoPixel(12, 6, NEO_GRB + NEO_KHZ800);

//RTC (Real Time Clock Breakout)
RTC_DS3231 ds3231;

//Keep track of milliseconds between seconds
int last_sec_five = 0;
unsigned long last_sec_five_millis = 0;

//Needed to keep track of datetime editing
unsigned long edit_date_blink_millis = 0;
int edit_time_hour = 0;
int edit_time_min = 0;

//RTC time
int rtc[7]; //sec,min,hour,dow,day,month,year
unsigned long rtc_last_refreshed = 0;

//The state to keep track of navigation
String state = "";

//The default brightness level of the LEDs
int brightness = 20; //1 - 255
int edit_brightness_state = 1;

void setup()
{
    Serial.begin(9600);

    delay(3000);

    state = "setup_pins";
    setupPins();
    Serial.println("Pin setup done");

    state = "rtc_setup";
    setupRtc();
    Serial.println("RTC setup done.");

    setupNeo();
    Serial.print("LED brightness defaulted to: ");
    Serial.println(brightness);

    state = "led_test";
    ledTest();
    Serial.println("LED test done.");

    state = "show_time";
}

void loop()
{
    Serial.print(rtc[2]); Serial.print(":");
    Serial.print(rtc[1]); Serial.print(":");
    Serial.print(rtc[0]); Serial.print(" -- ");
    Serial.print((int)(((int)temperature * 9)/5) + 32); Serial.print(" -- ");
    Serial.print(humidity); Serial.print(" -- ");
    Serial.println(brightness);

    unsigned long current_millis = millis();

    checkButtonState();

    //Refresh RTC time buffer every second
    if(millis() - rtc_last_refreshed > 1000 || rtc_last_refreshed > millis())
    {
        rtc_last_refreshed = millis();
        getDateTime();
        getDhtData();
    }

    //Keep track of milliseconds between each multiples of 5 seconds
    if(rtc[0]/5 != last_sec_five)
    {
        last_sec_five = rtc[0]/5;
        last_sec_five_millis = millis();
    }

    if(state == "edit_time")
    {
        state = "edit_hour";
    }
    else if(state == "edit_hour")
    {
        if(btn_down_long)
        {
            state = "edit_minute";
        }
        else
        {
            editHour();
        }
    }
    else if(state == "edit_minute")
    {
        if(btn_down_long)
        {
            //User just finished editing the time, set the entered time in RTC
            setDateTime(0, edit_time_min, edit_time_hour, rtc[3], rtc[4], rtc[5], rtc[6]);
            printRtcToSerial();
            state = "show_time";
        }
        else
        {
            editMinute();
        }
    }
    else if(state == "show_temperature")
    {
        if(btn_down_short)
        {
            state = "show_humidity";
        }
        else if(btn_down_long)
        {

        }
        else
        {
            showTemperature();
        }
    }
    else if(state == "show_humidity")
    {
        if(btn_down_short)
        {
            state = "show_brightness";
        }
        else if(btn_down_long)
        {

        }
        else
        {
            showHumidity();
        }
    }
    else if(state == "edit_brightness")
    {
        if(btn_down_long)
        {
            state = "show_brightness";
        }
        else
        {
            editBrightness();
        }
    }
    else if(state == "show_brightness")
    {
        if(btn_down_short)
        {
            state = "show_time";
        }
        if(btn_down_long)
        {
            state = "edit_brightness";
        }
        else
        {
            showBrightness();
        }
    }
    else
    {
        if(btn_down_short)
        {
            state = "show_temperature";
        }
        else if(btn_down_long)
        {
            state = "edit_time";
        }
        else
        {
            showTime(rtc[2], rtc[1], rtc[0]);
        }
    }
}

void setupPins()
{
    pinMode(BUZZER_PIN, OUTPUT);
    pinMode(BTN_PIN, INPUT);
}

void setupRtc()
{
    if(!ds3231.begin())
    {
        Serial.println("Couldn't find RTC");
        while (1);
    }

    if(ds3231.lostPower())
    {
        Serial.println("RTC lost power, lets set the time!");
        ds3231.adjust(DateTime(F(__DATE__), F(__TIME__)));
    }

    getDateTime();
    printRtcToSerial();
}

void printRtcToSerial()
{
    Serial.print("RTC set to: ");
    Serial.print(rtc[5]); Serial.print("/");
    Serial.print(rtc[4]); Serial.print("/");
    Serial.print(rtc[6]); Serial.print(" ");
    Serial.print(rtc[2]); Serial.print(":");
    Serial.print(rtc[1]); Serial.print(":");
    Serial.println(rtc[0]);
}

void setupNeo()
{
    strip.begin();
    strip.show();
    strip.setBrightness(brightness);
}

void ledTest()
{
    clearNeo();
    strip.setPixelColor(0, 255, 255, 255);
    strip.show();
    delay(1000);

    for(int p=0; p <= 11; p++)
    {
        clearNeo();
        strip.setPixelColor(p , 255, 0, 0);
        strip.show();
        delay(50);
    }

    for(int p=0; p <= 11; p++)
    {
        clearNeo();
        strip.setPixelColor(p , 0, 255, 0);
        strip.show();
        delay(50);
    }

    for(int p=0; p <= 11; p++)
    {
        clearNeo();
        strip.setPixelColor(p , 0, 0, 255);
        strip.show();
        delay(50);
    }
}

void getDateTime()
{
    DateTime now = ds3231.now();
    rtc[0] = now.second();
    rtc[1] = now.minute();
    rtc[2] = now.hour();
    rtc[3] = now.dayOfTheWeek();
    rtc[4] = now.day();
    rtc[5] = now.month();
    rtc[6] = now.year();
}

void setDateTime(int sec, int min, int hour, int dow, int day, int month, int year)
{
    ds3231.adjust(DateTime(year, month, day, hour, min, sec));

    getDateTime();

    edit_time_hour = 0;
    edit_time_min = 0;
}

void showTime(int show_hour, int show_minute, int show_second)
{
    int five_millis = millis() - last_sec_five_millis;
    five_millis = five_millis <= 5000 ? five_millis : 5000;
    int second_ratio = map(five_millis, 0, 5000, 0, 255);
    int second = (show_second/5)+1;

    int minute_ratio = map(((show_minute % 5)*10), 0, 50, 0, 255);
    int minute = (show_minute/5)+1;

    int hour_ratio = map(show_minute, 0, 60, 0, 255);
    int hour = (show_hour > 12 ? show_hour-12 : show_hour);

    for(int x=0; x < 13; x++)
    {
        int r = 0;
        int g = 0;
        int b = 0;

        if(second-1 == x)
        {
            g = 255-second_ratio;
        }
        if(second == x || (second == 12 && x == 0))
        {
            g = second_ratio;
        }
        if(minute-1 == x)
        {
            b = 255-minute_ratio;
        }
        if(minute == x)
        {
            b = minute_ratio;
        }
        if(hour-1 == x)
        {
            r = 255-hour_ratio;
        }
        if(hour == x)
        {
            r = hour_ratio;
        }

        strip.setPixelColor(x, r, g, b);
    }

    strip.show();
    delay(40);
}

void editHour()
{
    if(edit_time_hour == 0)
    {
        edit_time_hour = rtc[2];
        edit_time_hour = (edit_time_hour > 24 ? edit_time_hour-24 : edit_time_hour);
    }

    if(btn_down_short)
    {
        edit_time_hour = (edit_time_hour > 23 ? edit_time_hour = 1 : edit_time_hour + 1);
    }

    clearNeo();
    if(edit_time_hour > 12)
    {
        strip.setPixelColor(edit_time_hour-13 , 120, 0, 120);
    }
    else
    {
        strip.setPixelColor(edit_time_hour-1 , 255, 0, 0);
    }
    strip.show();
    delay(40);
}

void editMinute()
{
    if(edit_time_min == 0)
    {
        edit_time_min = rtc[1];
    }

    if(btn_down_short)
    {
        edit_time_min = (edit_time_min >= 59 ? edit_time_min = 1 : edit_time_min + 1);
    }

    int minute_ratio = map(((edit_time_min % 5)*10), 0, 50, 0, 255);
    int minute = (edit_time_min/5);

    clearNeo();
    strip.setPixelColor(minute-1, 0, 0, 255-minute_ratio);
    strip.setPixelColor(minute , 0, 0, minute_ratio);
    strip.show();
    delay(40);
}

void showBrightness()
{
    clearNeo();
    strip.setPixelColor(0, 255, 0, 0);
    strip.setPixelColor(1, 255, 0, 0);
    strip.setPixelColor(2, 255, 0, 0);
    strip.setPixelColor(3, 255, 0, 0);
    strip.setPixelColor(4, 0, 255, 0);
    strip.setPixelColor(5, 0, 255, 0);
    strip.setPixelColor(6, 0, 255, 0);
    strip.setPixelColor(7, 0, 255, 0);
    strip.setPixelColor(8, 0, 0, 255);
    strip.setPixelColor(9, 0, 0, 255);
    strip.setPixelColor(10, 0, 0, 255);
    strip.setPixelColor(11, 0, 0, 255);
    strip.show();
    delay(100);
}

void editBrightness()
{
    if(btn_down_short)
    {
        brightness = (brightness >= 236 ? brightness = 20 : brightness + 20);
        strip.setBrightness(brightness);
    }


    edit_brightness_state = (edit_brightness_state >= 12 ? edit_brightness_state = 1 : edit_brightness_state + 1);
    int p = edit_brightness_state;

    clearNeo();
    strip.setPixelColor(0, (p == 1 ? 255 : 50), 0, 0);
    strip.setPixelColor(1, (p == 2 ? 255 : 50), 0, 0);
    strip.setPixelColor(2, (p == 3 ? 255 : 50), 0, 0);
    strip.setPixelColor(3, (p == 4 ? 255 : 50), 0, 0);
    strip.setPixelColor(4, 0, (p == 5 ? 255 : 50), 0);
    strip.setPixelColor(5, 0, (p == 6 ? 255 : 50), 0);
    strip.setPixelColor(6, 0, (p == 7 ? 255 : 50), 0);
    strip.setPixelColor(7, 0, (p == 8 ? 255 : 50), 0);
    strip.setPixelColor(8, 0, 0, (p == 9 ? 255 : 50));
    strip.setPixelColor(9, 0, 0, (p == 10 ? 255 : 50));
    strip.setPixelColor(10, 0, 0, (p == 11 ? 255 : 50));
    strip.setPixelColor(11, 0, 0, (p == 12 ? 255 : 50));
    strip.show();
    delay(50);
}

void showTemperature()
{
    clearNeo();
    for(int x=0; x < 12; x++)
    {
        strip.setPixelColor(x, 15, 15, 0);
    }

    int temp = (int)(((int)temperature * 9)/5) + 32;

    if(temp > 0 && temp <= 12)
    {
        strip.setPixelColor(temp, 255, 0, 0);
    }
    else if(temp > 12 && temp <= 99)
    {
        int first_int = nthDigit(temp, 1)-1;
        int second_int = nthDigit(temp, 2)-1;
        if(first_int == second_int)
        {
            strip.setPixelColor(nthDigit(temp, 1)-1, 255, 0, 255);
        }
        else
        {
            strip.setPixelColor(nthDigit(temp, 1)-1, 255, 0, 0);
            strip.setPixelColor(nthDigit(temp, 2)-1, 0, 0, 255);
        }
    }
    strip.show();
    delay(40);
}

void showHumidity()
{
    clearNeo();
    for(int x=0; x < 12; x++)
    {
        strip.setPixelColor(x, 0, 0, 15);
    }

    int hum = (int)humidity;

    if(hum > 0 && hum <= 12)
    {
        strip.setPixelColor(hum, 255, 0, 0);
    }
    else if(hum > 12 && hum <= 99)
    {
        int first_int = nthDigit(hum, 1)-1;
        int second_int = nthDigit(hum, 2)-1;
        if(first_int == second_int)
        {
            strip.setPixelColor(first_int, 255, 0, 255);
        }
        else
        {
            strip.setPixelColor(first_int, 255, 0, 0);
            strip.setPixelColor(second_int, 0, 0, 255);
        }
    }
    strip.show();
    delay(40);
}

int nthDigit(int x, int n)
{
    if(x <= 0 || x >= 100)
    {
        return 0;
    }
    if(x > 0 && x < 10)
    {
        return x;
    }
    if(n == 2)
    {
        return x-floor(x/10)*10;
    }
    if(n == 1)
    {
        return floor(x/10);
    }
}

void clearNeo()
{
    strip.setPixelColor(0, 0, 0, 0);
    strip.setPixelColor(1, 0, 0, 0);
    strip.setPixelColor(2, 0, 0, 0);
    strip.setPixelColor(3, 0, 0, 0);
    strip.setPixelColor(4, 0, 0, 0);
    strip.setPixelColor(5, 0, 0, 0);
    strip.setPixelColor(6, 0, 0, 0);
    strip.setPixelColor(7, 0, 0, 0);
    strip.setPixelColor(8, 0, 0, 0);
    strip.setPixelColor(9, 0, 0, 0);
    strip.setPixelColor(10, 0, 0, 0);
    strip.setPixelColor(11, 0, 0, 0);
}

void checkButtonState()
{
    //Is the button being press right now
    bool btn_is_pressed = digitalRead(BTN_PIN) == LOW ? false : true;

    //If the button long press was registered in the last loop, stop it in this loop
    if(btn_down_long)
    {
        btn_down_long = false;
    }

    //If a long press was registered in the last loop, and user is still pushing, ignore it
    if(!btn_ignore)
    {
        //If the button is being pressed now and was not being pressed before, start counting press time
        if(btn_is_pressed && !btn_was_down)
        {
            btn_down_started = millis();
            tone(BUZZER_PIN, 2000); delay(200); noTone(BUZZER_PIN);
        }

        //If button is not pressed now and was pressed before, register short press
        if(!btn_is_pressed && btn_was_down)
        {
            btn_down_short = true;
        }
        else
        {
            btn_down_short = false;
        }

        //If button is pressed now and has been pressed for more than 2 sec, register long press
        if(btn_is_pressed && btn_was_down && (millis() - btn_down_started) > 2000)
        {
            btn_down_long = true;

            //Ignore the button press until the user lets go
            btn_ignore = true;
            tone(BUZZER_PIN, 2000); delay(200); noTone(BUZZER_PIN);
            tone(BUZZER_PIN, 2000); delay(200); noTone(BUZZER_PIN);
        }
        else
        {
            btn_down_long = false;
        }
    }

    //If the user last did a long press and now they have let go, do not ignore button press anymore
    if(btn_was_down && !btn_is_pressed)
    {
        btn_ignore = false;
    }

    //Let this loops button state be known in the next loop
    btn_was_down = btn_is_pressed;
}

void getDhtData()
{
    dht11.read(DHT_PIN, &temperature, &humidity, NULL);
}

Unusual Led Ring Arduino Clock, Temperature, and Humidity meter









Raspberry Pi 5 7 Inch Touch Screen IPS 1024x600 HD LCD HDMI-compatible Display for RPI 4B 3B+ OPI 5 AIDA64 PC Secondary Screen(Without Speaker)
BUY NOW


- Comments(0)
- Likes(0)
More by Mirko Pavleski
-
 Arduino 3D Printed self Balancing Cube
Self-balancing devices are electronic devices that use sensors and motors to keep themselves balanc...
Arduino 3D Printed self Balancing Cube
Self-balancing devices are electronic devices that use sensors and motors to keep themselves balanc...
-
 Elecrow All-in-One Arduino Starter Kit Review - 20 Projects & 16 Modules
This time I will describe a simple and practical way to enter the world of microcontrollers, specif...
Elecrow All-in-One Arduino Starter Kit Review - 20 Projects & 16 Modules
This time I will describe a simple and practical way to enter the world of microcontrollers, specif...
-
 ESP32-C3 Color Detector with TCS34725, Real-Time RGB Detection & Web Interface
Color detection is a fundamental task in many embedded systems – from industrial sorting machines t...
ESP32-C3 Color Detector with TCS34725, Real-Time RGB Detection & Web Interface
Color detection is a fundamental task in many embedded systems – from industrial sorting machines t...
-
 DIY ESP32 Telegram Flood Protection System - Smart Home Automation
Recently I had an unpleasant experience in my home, specifically my ground floor was flooded as a r...
DIY ESP32 Telegram Flood Protection System - Smart Home Automation
Recently I had an unpleasant experience in my home, specifically my ground floor was flooded as a r...
-
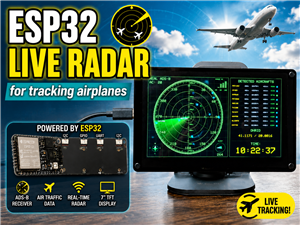 Real-Time Air Traffic Radar using ESP32 + ADS-B Data
ADS-B, which stands for Automatic Dependent Surveillance-Broadcast, is the modern standard for trac...
Real-Time Air Traffic Radar using ESP32 + ADS-B Data
ADS-B, which stands for Automatic Dependent Surveillance-Broadcast, is the modern standard for trac...
-
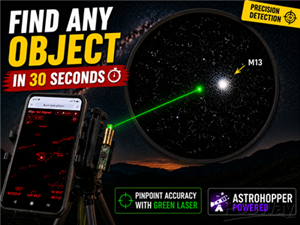 DIY Green Laser Night Sky Object Finder - Find Stars & Galaxies Instantly with great accuracy
As an amateur astronomer, especially at the beginning, the most difficult part of observing the nig...
DIY Green Laser Night Sky Object Finder - Find Stars & Galaxies Instantly with great accuracy
As an amateur astronomer, especially at the beginning, the most difficult part of observing the nig...
-
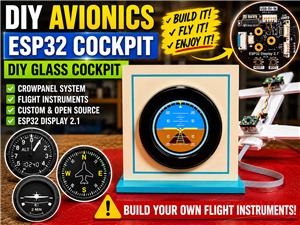 DIY Avionics Simulator with ESP32 - Artificial Horizon, Compass & Altimeter
The inspiration for this project comes from classical aircraft cockpit instruments used for navigat...
DIY Avionics Simulator with ESP32 - Artificial Horizon, Compass & Altimeter
The inspiration for this project comes from classical aircraft cockpit instruments used for navigat...
-
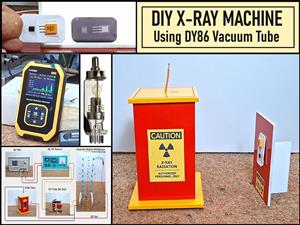 DIY Miniature X-Ray Machine using a TV Vacuum Tube DY86
An X-ray machine (or radiograph) is a quick, painless medical test that produces images of the struc...
DIY Miniature X-Ray Machine using a TV Vacuum Tube DY86
An X-ray machine (or radiograph) is a quick, painless medical test that produces images of the struc...
-
 Simple SDR Receiver Using 2x NE612 - Dual Conversion, Superheterodyne (0.1–30 MHz)
SDR (Software Defined Radio) is a radio system in which most of the functions of a classic radio (f...
Simple SDR Receiver Using 2x NE612 - Dual Conversion, Superheterodyne (0.1–30 MHz)
SDR (Software Defined Radio) is a radio system in which most of the functions of a classic radio (f...
-
 DIY Vintage TV VU Meter with peak indicators
Some time ago in one of my projects I presented you a way to turn a black and white old mini TV int...
DIY Vintage TV VU Meter with peak indicators
Some time ago in one of my projects I presented you a way to turn a black and white old mini TV int...
-
 DIY Tesla Coil based Plasma Rife Machine
In several of my previous videos, I presented you with different ways to make a Rife Machine, from ...
DIY Tesla Coil based Plasma Rife Machine
In several of my previous videos, I presented you with different ways to make a Rife Machine, from ...
-
 ESP32 Analog VU Meter – Smooth Needle, Real Audio Response (DIY Build)
In several of my previous videos I have shown you how to make analog VU meters emulated on differen...
ESP32 Analog VU Meter – Smooth Needle, Real Audio Response (DIY Build)
In several of my previous videos I have shown you how to make analog VU meters emulated on differen...
-
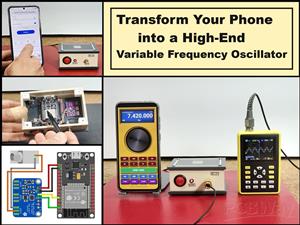 The Ultimate Smartphone VFO ESP32 & Si5351 Wireless Control
Variable frequency oscillators (VFOs) are commonly used in radio transmitters and receivers, especi...
The Ultimate Smartphone VFO ESP32 & Si5351 Wireless Control
Variable frequency oscillators (VFOs) are commonly used in radio transmitters and receivers, especi...
-
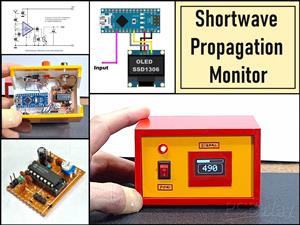 DIY Shortwave Propagation Monitor - Measure Ionosphere Conditions
Shortwave Propagation is the way radio waves in the 3 to 30 MHz range travel from point A to point ...
DIY Shortwave Propagation Monitor - Measure Ionosphere Conditions
Shortwave Propagation is the way radio waves in the 3 to 30 MHz range travel from point A to point ...
-
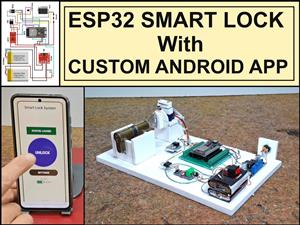 Professional grade Smart Lock with ESP32, BLE and Android App Control
An electronic codelock is a security device that grants access using a numerical sequence—a PIN cod...
Professional grade Smart Lock with ESP32, BLE and Android App Control
An electronic codelock is a security device that grants access using a numerical sequence—a PIN cod...
-
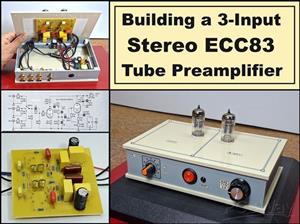 Building a 3-Input Stereo ECC83 (12AX7) Tube Preamp
Some time ago I presented you a project for a 3W stereo tube amplifier with a GU32 output vacuum t...
Building a 3-Input Stereo ECC83 (12AX7) Tube Preamp
Some time ago I presented you a project for a 3W stereo tube amplifier with a GU32 output vacuum t...
-
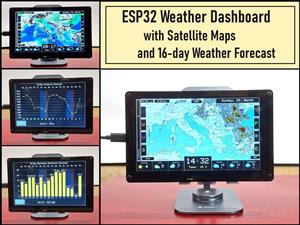 ESP32 Weather Dashboard with Satellite Maps and 16-day Weather Forecast
As you can see from my previous videos, besides Electronics, my fields of experimentation and proje...
ESP32 Weather Dashboard with Satellite Maps and 16-day Weather Forecast
As you can see from my previous videos, besides Electronics, my fields of experimentation and proje...
-
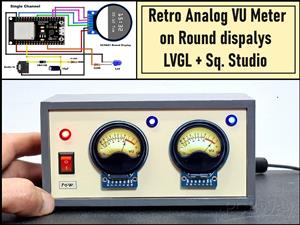 Retro Analog VU Meter on Round dispalys (ESP32 and GC9A01)
Recently, in one of my previous videos I presented you a Retro VU Meter project on round displays ...
Retro Analog VU Meter on Round dispalys (ESP32 and GC9A01)
Recently, in one of my previous videos I presented you a Retro VU Meter project on round displays ...
-
Programmable Mist Maker - XIAO / QT PY Extension
1084 2 1 -
RadioHAT - Raspberry Pi radio development platform
902 0 2 -
-
-
-
-
ARPS-2 – Arduino-Compatible Robot Project Shield for Arduino UNO
3340 0 6 -
A Compact Charging Breakout Board For Waveshare ESP32-C3
3954 3 8 -
AI-driven LoRa & LLM-enabled Kiosk & Food Delivery System
4341 2 2