


|
|
Arduino Nano R3 |
x 1 | |
|
|
Resistor 330 ohm |
x 4 | |

|
AI-1440-TWT-24V-2-RPUI AUDIO, INC.
|
x 1 | |
|
|
LED (generic) |
x 37 | |
|
|
Push Button |
x 1 |

|
arduino IDEArduino
|
|

|
Soldering Iron Kit |
How to make simplest Arduino European Roulette Game ( 37 Leds )
Roulette is a casino game named after the French word meaning little wheel which was likely developed from the Italian game Biribi. In the game, a player may choose to place a bet on a single number, various groupings of numbers, the color red or black, whether the number is odd or even, or if the numbers are high (19–36) or low (1–18). To determine the winning number, a croupier spins a wheel in one direction, then spins a ball in the opposite direction around a tilted circular track running around the outer edge of the wheel.
There are two popular roulette wheels: American and European. The European wheel has only one zero while the American wheel has two zeroes. Also the number sequence is different.
This time I will present you how to make an electronic version European roulette, where the movement of the ball is simulated by successive lighting of LEDs.

Note that you can see the original project at "www.theohupkens.nl/English/RouletteWheel.html" and I have only slightly modified the code by adding another level of spin duration. In one of my previous videos (https://www.youtube.com/watch?v=H_85lFRJ9T8&t=7s) I also presented Arduino Roulette, but it was much more complicated and difficult to make.

This time is used the Charlieplexing technique, also known as tristate multiplexing, reduced pin-count LED multiplexing, complementary LED drive and crossplexing. This is a technique for driving a multiplexed display in which relatively few I/O pins on a microcontroller are used to drive an big array of LEDs.
Thanks to this technique, the 74HC595 shift registers are omitted this time and the device is incredibly simple to build. It contains only a few components:
- Arduino Nano microcontroller
- 37 Leds
- five resistors
- Button,
- and Speaker

A few words about the way of connecting the diodes. The first diode is connected directly to the D11 pin and ground through a suitable resistor. The remaining 36 diodes are divided into 4 groups of 9 diodes. The cathodes of each group through a resistor are connected to A1 to A4 analog pins. The anodes of each group are connected sequentially (for example: Led2, Led11, Led20, Led29 together and connected to D2 pin of Arduino) and those 9 terminals are connected to D2 to D10 pins of the Arduino.
If you want to make a PCB for this project, or for any other electronic project, PCBway is a great choice for you. PCBway is one of the most experienced PCB manufacturing company in China in field of PCB prototype and fabrication. They have a large online community where you can find a Open Source projects, and you can also share your project there. From my personal experience I can tell you that on this community you can find many useful projects.

Now let's see how the device works in reality:
After startup four leds will rotate for a short period of time. After starting, four LEDs will rotate for a short period of time, after which one diode will remain lit. To turn the ball (LED) we have to press the button and the moment we release it the game starts. There are three levels that regulate the duration of the ball spin. If the button is pressed for less than 0.5 seconds, the rotation speed is the lowest, from 0.5 to 5 seconds the rotation speed is normal, and finally if we keep the button pressed for more than 5 seconds, it will take a minute and more to stop the ball.
During the whole time while the ball is moving, a characteristic sound is emitted through the speaker.
In the following, you can see the way in which the device is made
Finally, the entire device is installed in a suitable box made of PVC board with a thickness of 3 mm and covered with self-adhesive colored wallpaper

How to make simplest Arduino European Roulette Game ( 37 Leds )


Raspberry Pi 5 7 Inch Touch Screen IPS 1024x600 HD LCD HDMI-compatible Display for RPI 4B 3B+ OPI 5 AIDA64 PC Secondary Screen(Without Speaker)
BUY NOW


- Comments(0)
- Likes(1)
More by Mirko Pavleski
-
 Arduino 3D Printed self Balancing Cube
Self-balancing devices are electronic devices that use sensors and motors to keep themselves balanc...
Arduino 3D Printed self Balancing Cube
Self-balancing devices are electronic devices that use sensors and motors to keep themselves balanc...
-
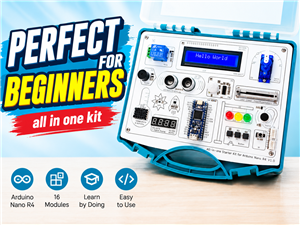 Elecrow All-in-One Arduino Starter Kit Review - 20 Projects & 16 Modules
This time I will describe a simple and practical way to enter the world of microcontrollers, specif...
Elecrow All-in-One Arduino Starter Kit Review - 20 Projects & 16 Modules
This time I will describe a simple and practical way to enter the world of microcontrollers, specif...
-
 ESP32-C3 Color Detector with TCS34725, Real-Time RGB Detection & Web Interface
Color detection is a fundamental task in many embedded systems – from industrial sorting machines t...
ESP32-C3 Color Detector with TCS34725, Real-Time RGB Detection & Web Interface
Color detection is a fundamental task in many embedded systems – from industrial sorting machines t...
-
 DIY ESP32 Telegram Flood Protection System - Smart Home Automation
Recently I had an unpleasant experience in my home, specifically my ground floor was flooded as a r...
DIY ESP32 Telegram Flood Protection System - Smart Home Automation
Recently I had an unpleasant experience in my home, specifically my ground floor was flooded as a r...
-
 Real-Time Air Traffic Radar using ESP32 + ADS-B Data
ADS-B, which stands for Automatic Dependent Surveillance-Broadcast, is the modern standard for trac...
Real-Time Air Traffic Radar using ESP32 + ADS-B Data
ADS-B, which stands for Automatic Dependent Surveillance-Broadcast, is the modern standard for trac...
-
 DIY Green Laser Night Sky Object Finder - Find Stars & Galaxies Instantly with great accuracy
As an amateur astronomer, especially at the beginning, the most difficult part of observing the nig...
DIY Green Laser Night Sky Object Finder - Find Stars & Galaxies Instantly with great accuracy
As an amateur astronomer, especially at the beginning, the most difficult part of observing the nig...
-
 DIY Avionics Simulator with ESP32 - Artificial Horizon, Compass & Altimeter
The inspiration for this project comes from classical aircraft cockpit instruments used for navigat...
DIY Avionics Simulator with ESP32 - Artificial Horizon, Compass & Altimeter
The inspiration for this project comes from classical aircraft cockpit instruments used for navigat...
-
 DIY Miniature X-Ray Machine using a TV Vacuum Tube DY86
An X-ray machine (or radiograph) is a quick, painless medical test that produces images of the struc...
DIY Miniature X-Ray Machine using a TV Vacuum Tube DY86
An X-ray machine (or radiograph) is a quick, painless medical test that produces images of the struc...
-
 Simple SDR Receiver Using 2x NE612 - Dual Conversion, Superheterodyne (0.1–30 MHz)
SDR (Software Defined Radio) is a radio system in which most of the functions of a classic radio (f...
Simple SDR Receiver Using 2x NE612 - Dual Conversion, Superheterodyne (0.1–30 MHz)
SDR (Software Defined Radio) is a radio system in which most of the functions of a classic radio (f...
-
 DIY Vintage TV VU Meter with peak indicators
Some time ago in one of my projects I presented you a way to turn a black and white old mini TV int...
DIY Vintage TV VU Meter with peak indicators
Some time ago in one of my projects I presented you a way to turn a black and white old mini TV int...
-
 DIY Tesla Coil based Plasma Rife Machine
In several of my previous videos, I presented you with different ways to make a Rife Machine, from ...
DIY Tesla Coil based Plasma Rife Machine
In several of my previous videos, I presented you with different ways to make a Rife Machine, from ...
-
 ESP32 Analog VU Meter – Smooth Needle, Real Audio Response (DIY Build)
In several of my previous videos I have shown you how to make analog VU meters emulated on differen...
ESP32 Analog VU Meter – Smooth Needle, Real Audio Response (DIY Build)
In several of my previous videos I have shown you how to make analog VU meters emulated on differen...
-
 The Ultimate Smartphone VFO ESP32 & Si5351 Wireless Control
Variable frequency oscillators (VFOs) are commonly used in radio transmitters and receivers, especi...
The Ultimate Smartphone VFO ESP32 & Si5351 Wireless Control
Variable frequency oscillators (VFOs) are commonly used in radio transmitters and receivers, especi...
-
 DIY Shortwave Propagation Monitor - Measure Ionosphere Conditions
Shortwave Propagation is the way radio waves in the 3 to 30 MHz range travel from point A to point ...
DIY Shortwave Propagation Monitor - Measure Ionosphere Conditions
Shortwave Propagation is the way radio waves in the 3 to 30 MHz range travel from point A to point ...
-
 Professional grade Smart Lock with ESP32, BLE and Android App Control
An electronic codelock is a security device that grants access using a numerical sequence—a PIN cod...
Professional grade Smart Lock with ESP32, BLE and Android App Control
An electronic codelock is a security device that grants access using a numerical sequence—a PIN cod...
-
 Building a 3-Input Stereo ECC83 (12AX7) Tube Preamp
Some time ago I presented you a project for a 3W stereo tube amplifier with a GU32 output vacuum t...
Building a 3-Input Stereo ECC83 (12AX7) Tube Preamp
Some time ago I presented you a project for a 3W stereo tube amplifier with a GU32 output vacuum t...
-
 ESP32 Weather Dashboard with Satellite Maps and 16-day Weather Forecast
As you can see from my previous videos, besides Electronics, my fields of experimentation and proje...
ESP32 Weather Dashboard with Satellite Maps and 16-day Weather Forecast
As you can see from my previous videos, besides Electronics, my fields of experimentation and proje...
-
 Retro Analog VU Meter on Round dispalys (ESP32 and GC9A01)
Recently, in one of my previous videos I presented you a Retro VU Meter project on round displays ...
Retro Analog VU Meter on Round dispalys (ESP32 and GC9A01)
Recently, in one of my previous videos I presented you a Retro VU Meter project on round displays ...
-
Programmable Mist Maker - XIAO / QT PY Extension
1086 2 1 -
RadioHAT - Raspberry Pi radio development platform
909 0 2 -
-
-
-
-
ARPS-2 – Arduino-Compatible Robot Project Shield for Arduino UNO
3343 0 6 -
A Compact Charging Breakout Board For Waveshare ESP32-C3
3959 3 8 -
AI-driven LoRa & LLM-enabled Kiosk & Food Delivery System
4343 2 2


