


|
|
3.7v Rechargeable Battery |
x 1 | |
|
|
130 Micro Toy Motor |
x 1 | |
|
|
ON/OFF SPST Switch |
x 1 | |
|
|
TP4056 Charging Module |
x 1 | |
|
|
3D Printed PartsPcbway
|
x 1 |

|
fusion360 |
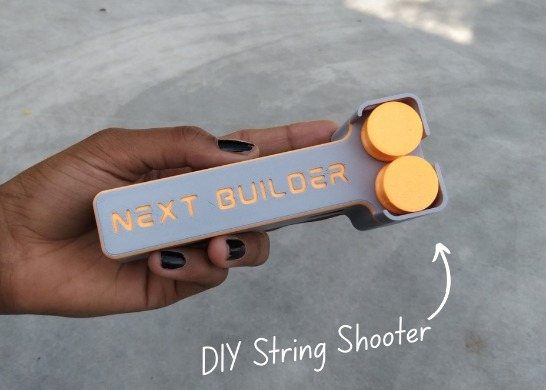
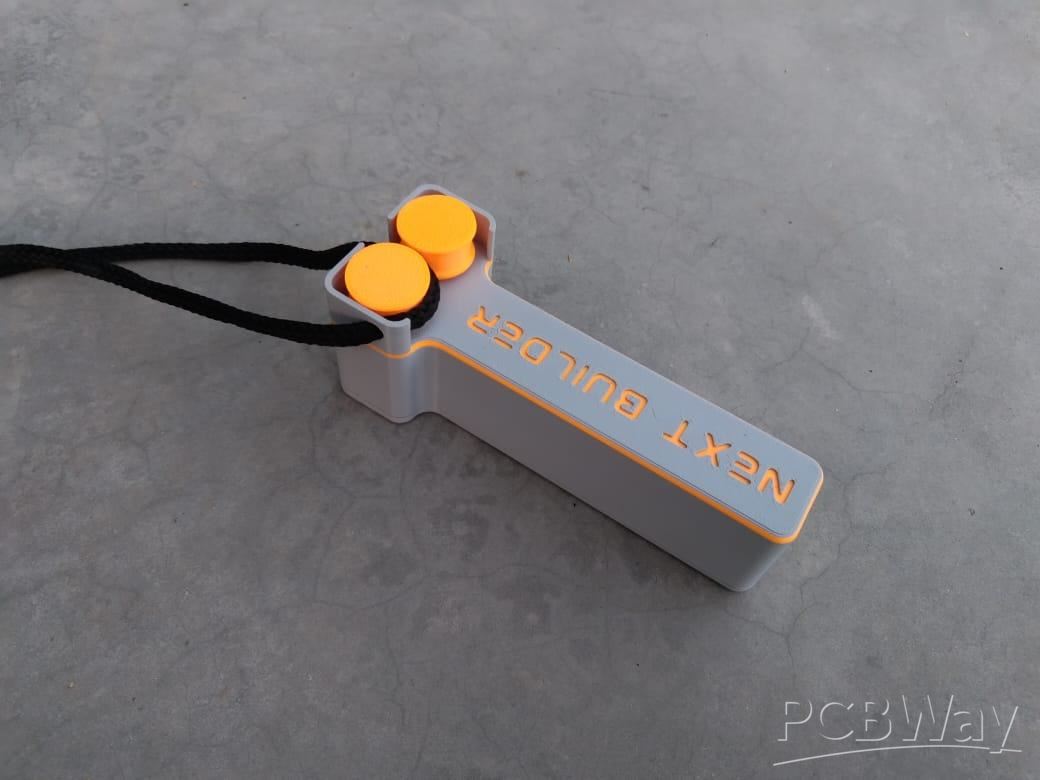
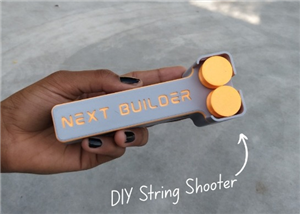
DIY String Shooter
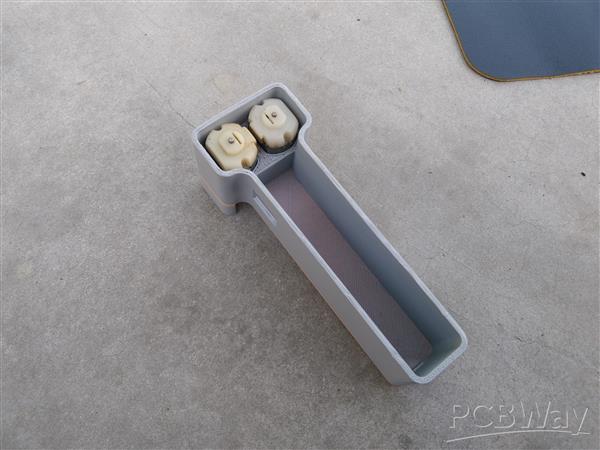
This is my DIY 3D Printed String Shooter—a fun little project I made using two micro dc toy motor. It’s a compact and easy-to-use tool that shoots a string using two rotating drums.
The idea behind this project was to create something playful but also useful for experiments, school demos, or just to enjoy as a creative weekend build. It doesn't use any complex electronics or mechanisms—just a simple twist-and-shoot system that works surprisingly well!
If you enjoy building cool stuff, this is a great project to try out. It’s beginner-friendly, quick to assemble, and works using common materials you probably already have.
Supplies

Step 1: CAD & 3D Printing

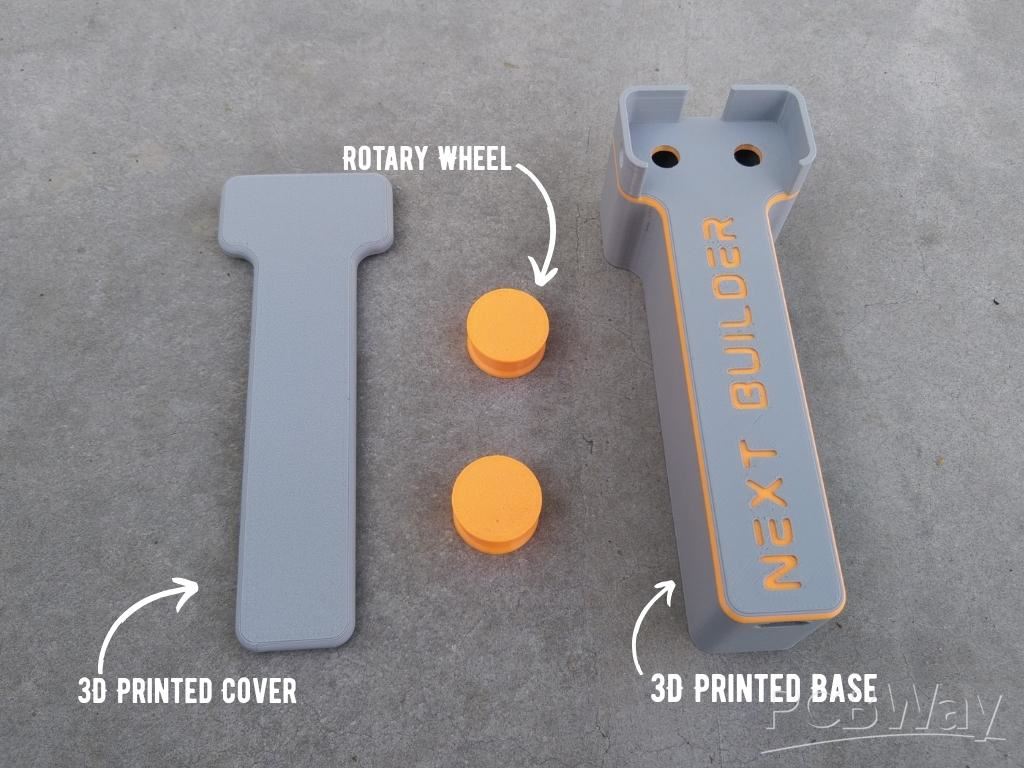
To start this project, I designed the DIY String Shooter using Fusion 360. It’s a simple and compact design that’s easy to print and assemble.
For 3D Printing, You can directly download the required STL files below:
- Housing.stl
- Cover.stl
- Wheel.stl
CAD Design
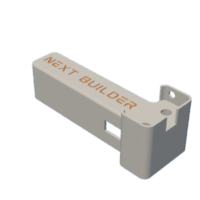 Housing.stl
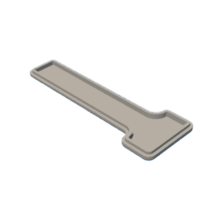 Cover.stl
 Wheel.stl
Step 2: Motor Assembly

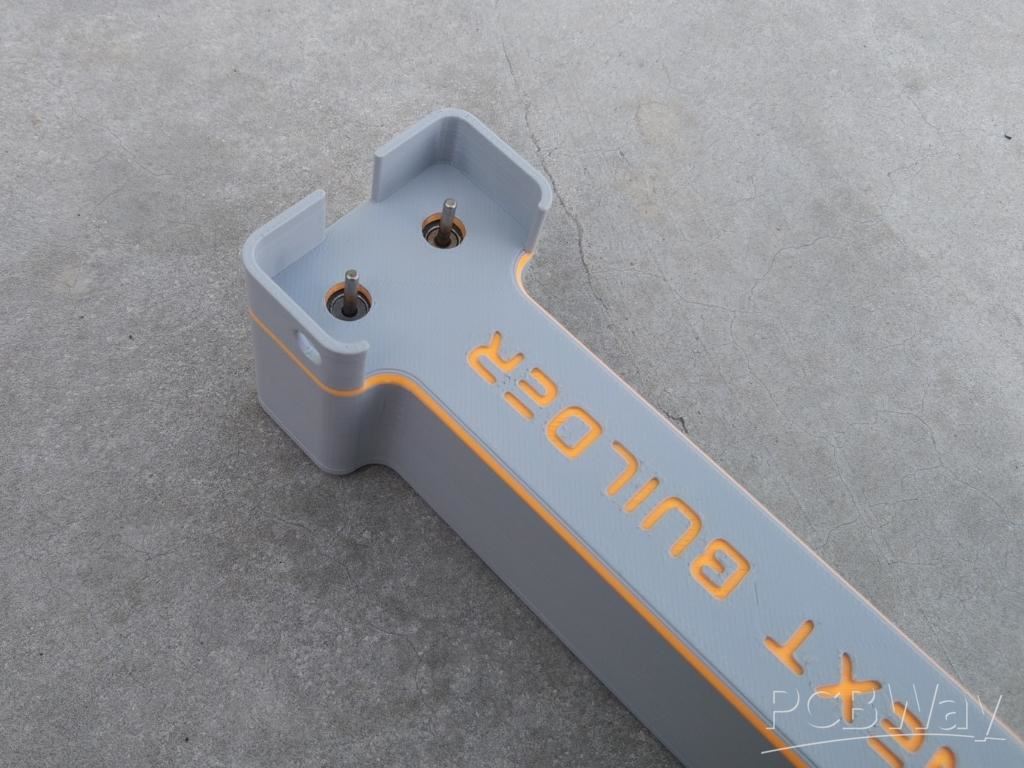
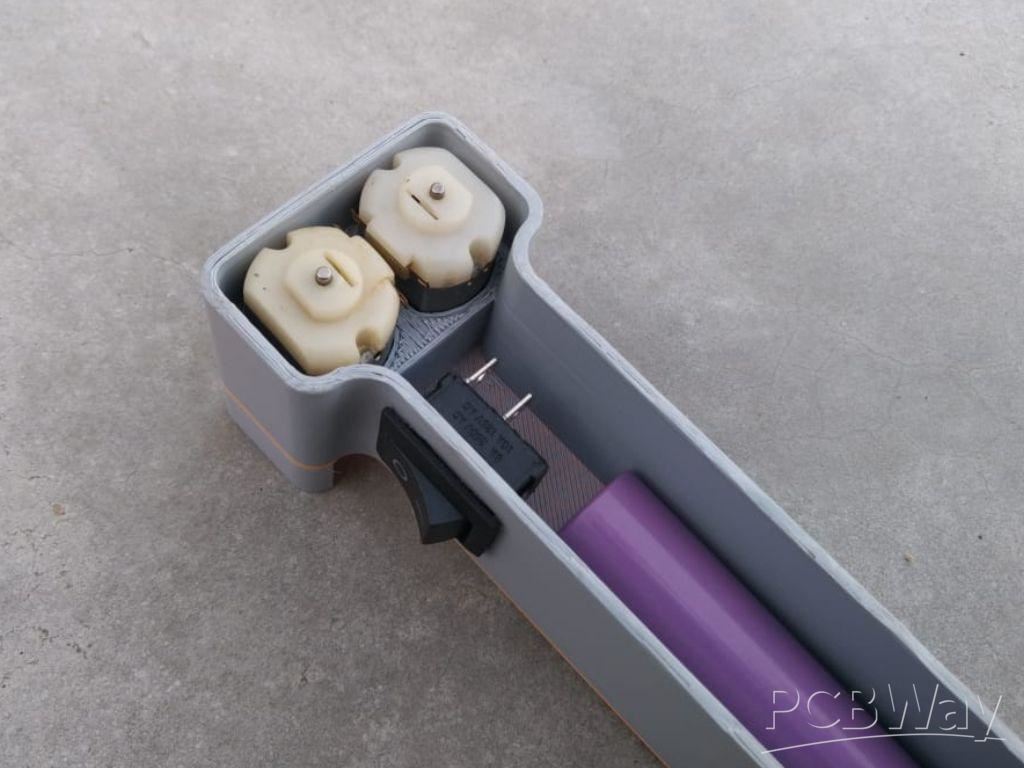
After getting the 3D printed parts, I started with assembling the DC toy motors. Place both motors into their slots on the base. They should fit perfectly in the spaces designed for them. Once placed, apply a small amount of super glue to hold them in position. Make sure not to get glue on the motor shafts, as that can stop them from spinning. Let the glue dry properly before moving on.
Step 3: Charging Module Assembly
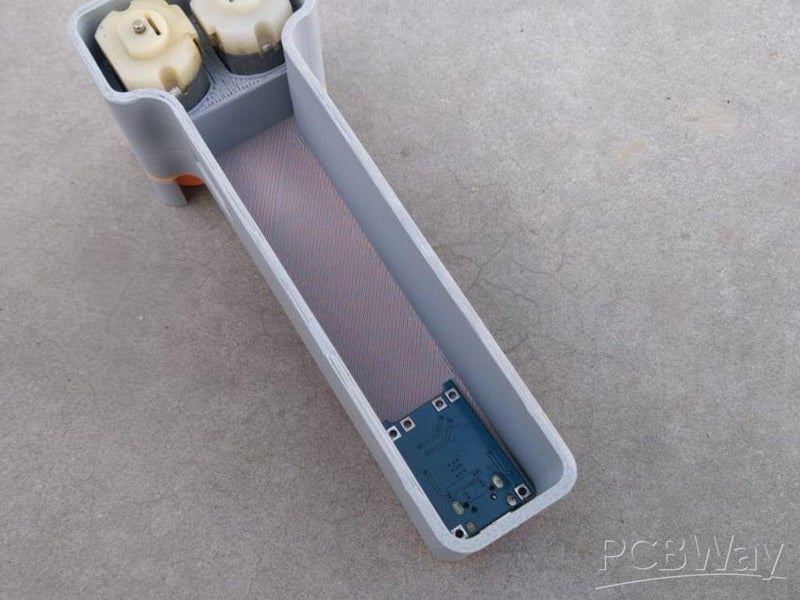
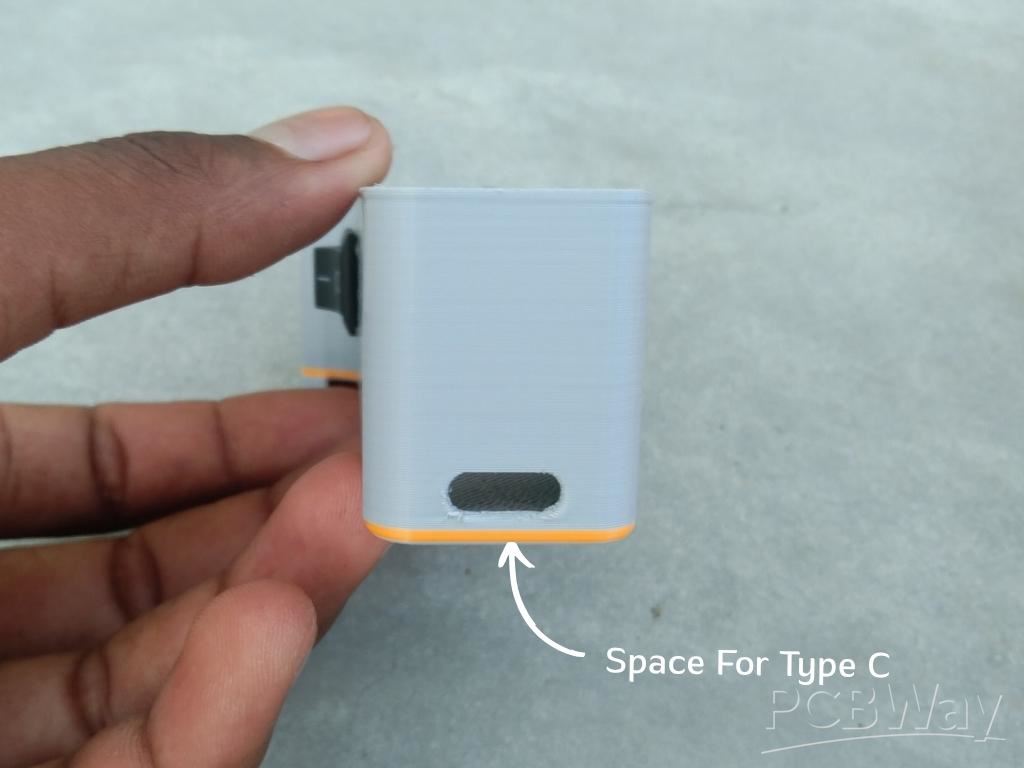
Once the motors are securely in place, it's time to Secure the TP4056 charging module. Locate the dedicated slot for the module on the base. On the back side, you’ll see a cutout perfectly shaped for the Type-C port. Carefully align the port with the cutout so it fits nicely. Once aligned, use a small amount of super glue to fix the module in place. Make sure the port is straight and accessible from the outside. Let the glue dry completely before moving on.
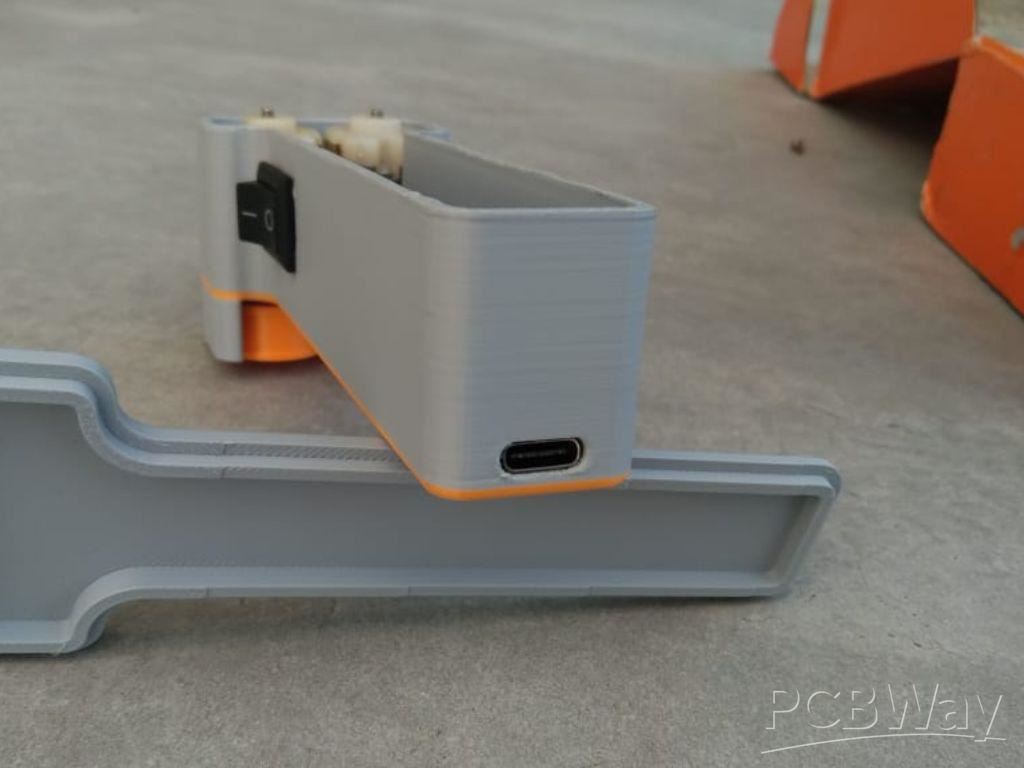
Step 4: Switch Assembly
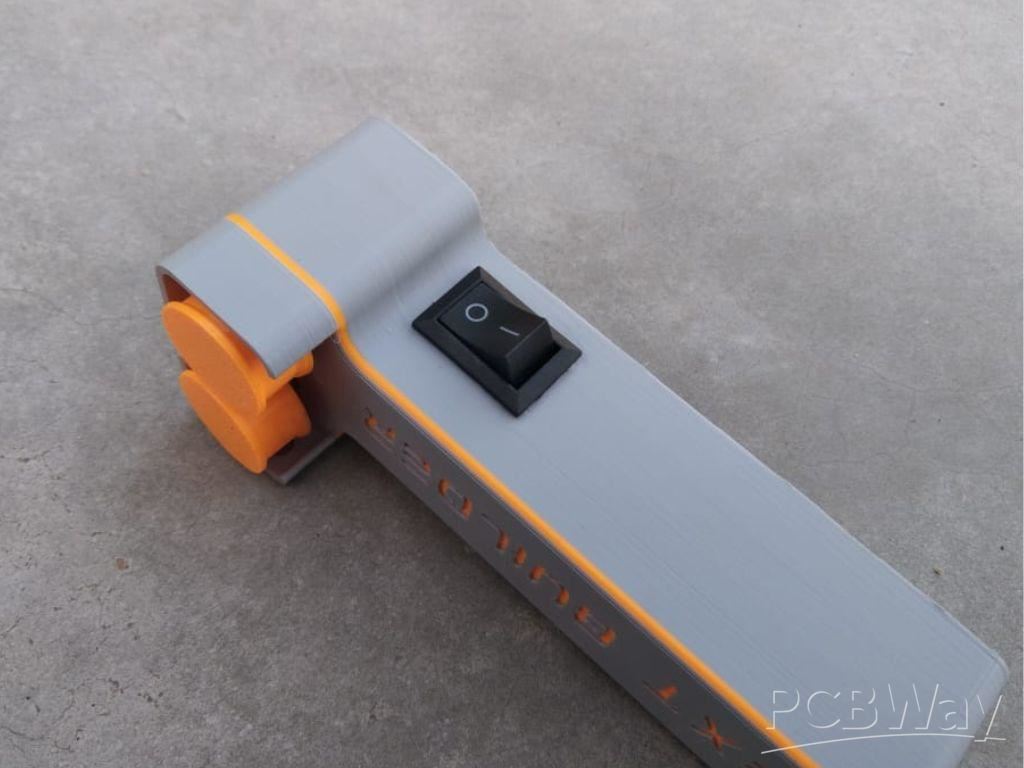
Next, install the ON/OFF SPST rocker switch into its dedicated slot on the body. Simply align the switch with the cutout and gently press it into place. The slot is designed to hold the switch tightly, so it should snap in and stay firm without any extra support.
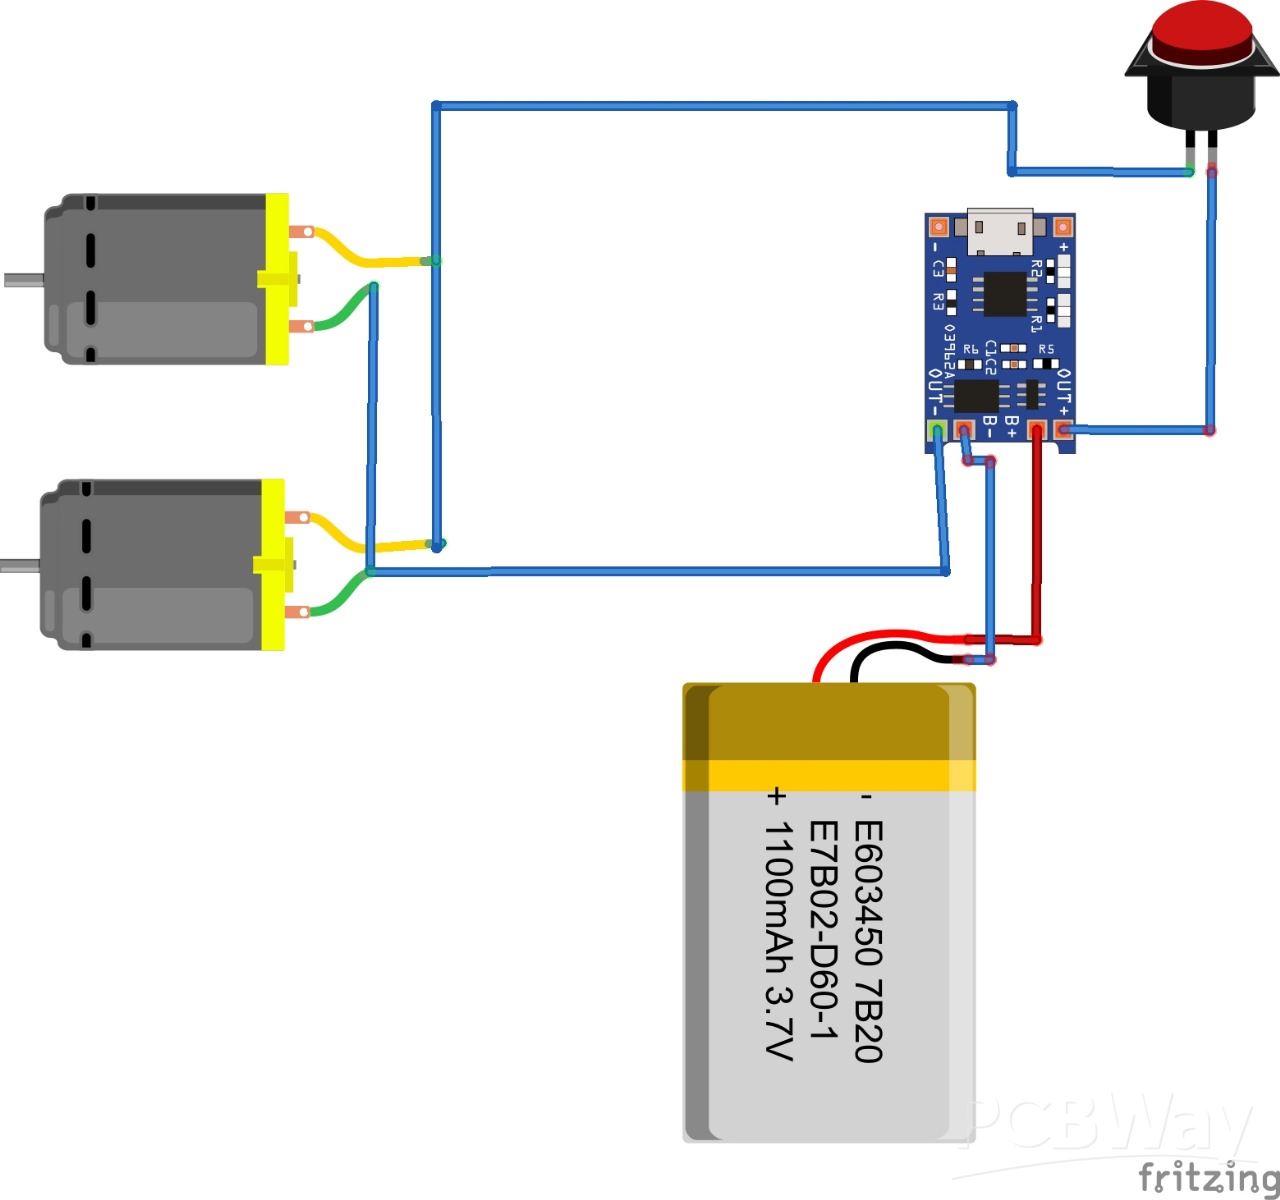
Step 5: Connection

The connections in this project are pretty simple and easy to follow. Take a look at the connection diagram above to see how everything is connected. You’ll need to connect the motors, the TP4056 charging module, battery, and the rocker switch together.
Start by connecting the motors in parallel, then connect them to the switch. The switch will go between the battery output and the motors, so you can turn the device ON and OFF. The TP4056 module will be connected to the battery and also handle the charging through the Type-C port. Make sure to solder the wires properly or use tight connectors, and keep the connections neat.
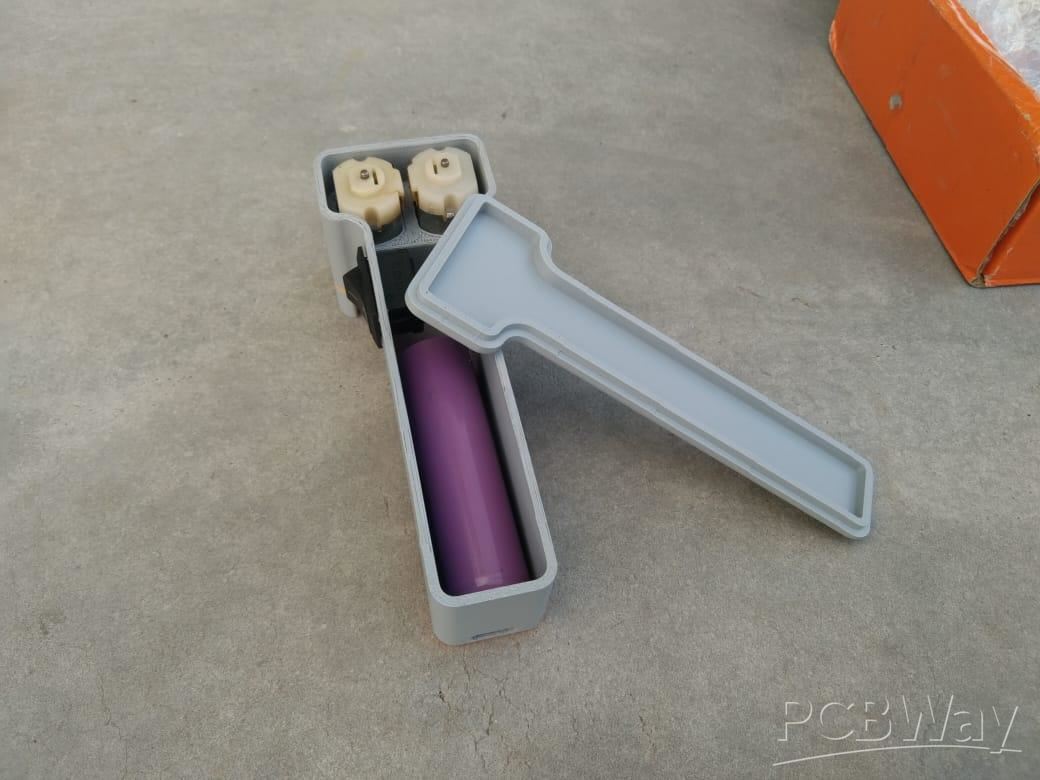
Step 6: Battery Assembly

After completing all the wiring, it's time to attach the battery. While there’s no fixed slot for the battery, there is an empty space in the design where the battery fits nicely. Place the battery in that area, making sure it doesn’t block any moving parts or wires.
To secure it, you can use a hot glue gun or double-sided tape—whichever is easier for you. Make sure the battery is firmly attached and doesn’t move around when the shooter is in use.
Step 7: Final Assembly
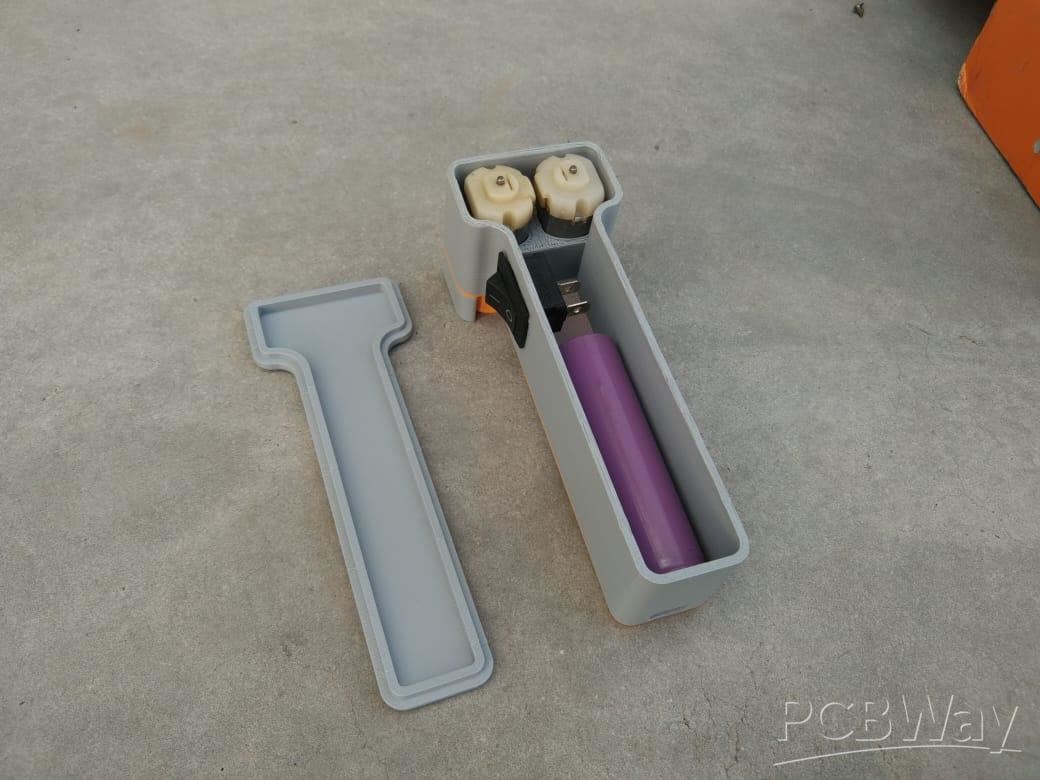
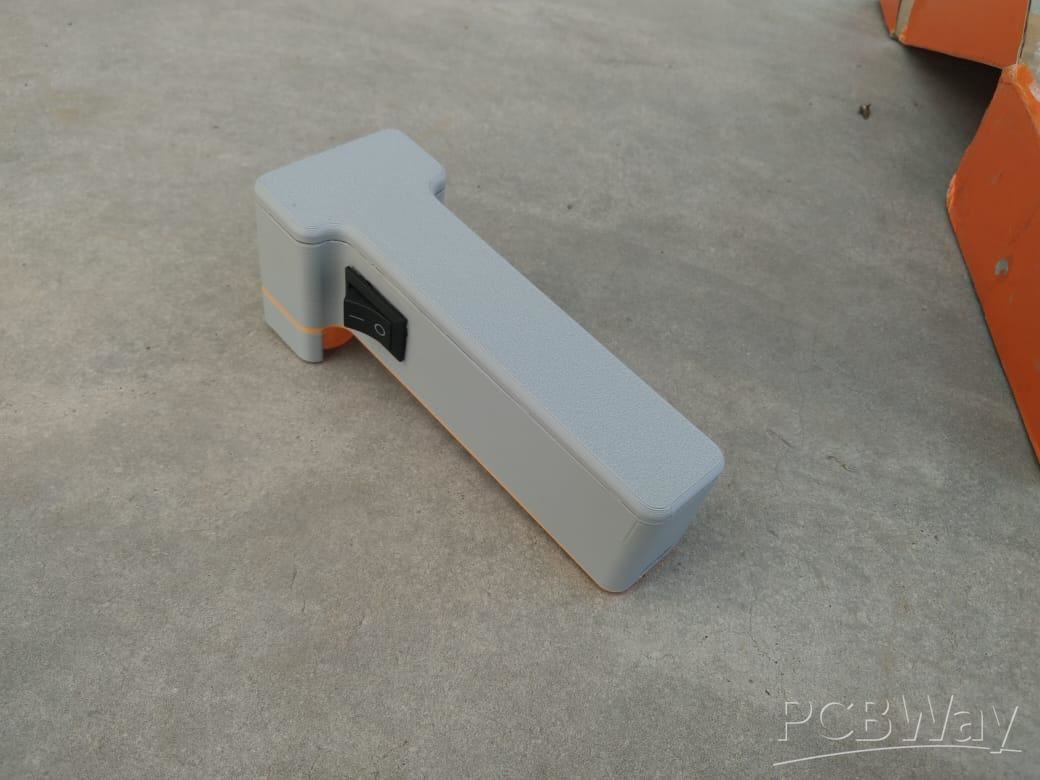
Now that everything is done, it’s time to close the base. Take the bottom cover and place it over the main body. Make sure all the wires and the battery are inside properly so the cover fits well. Once it’s in the right position, use a small amount of super glue around the edges to stick it in place. Hold it for a few seconds until the glue dries.
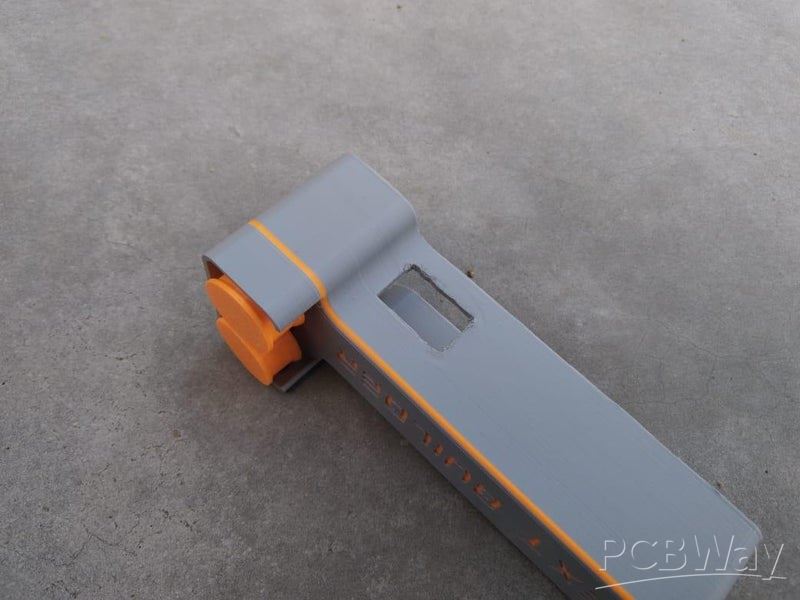
Step 8: Rotary Wheel Assembly
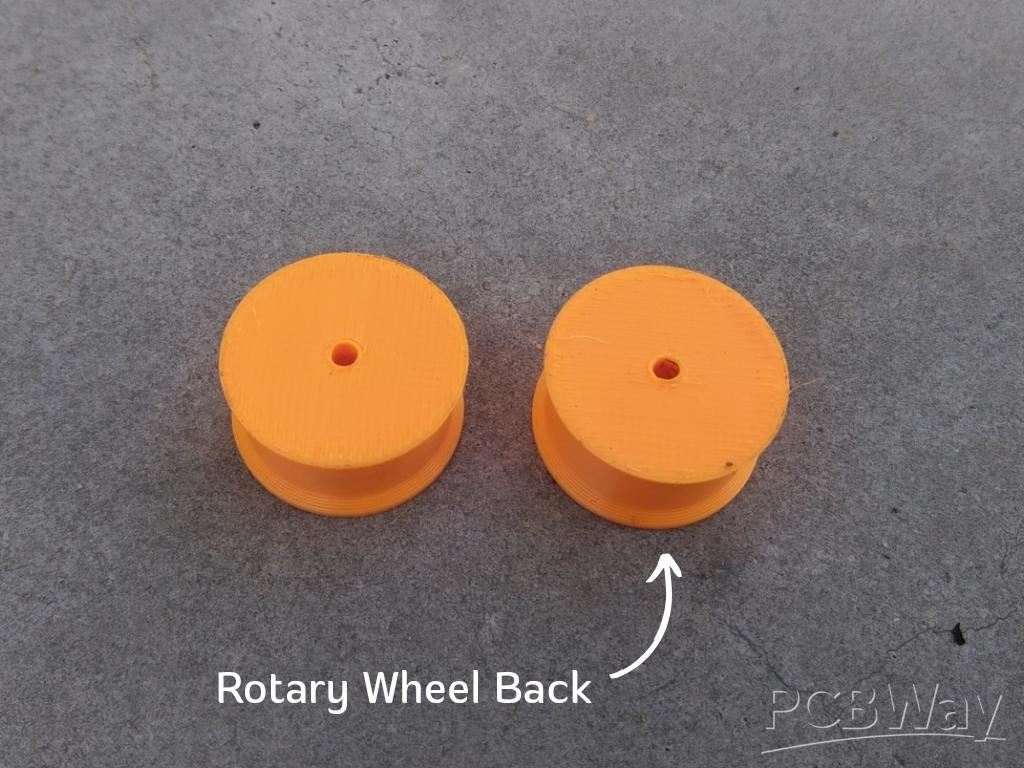
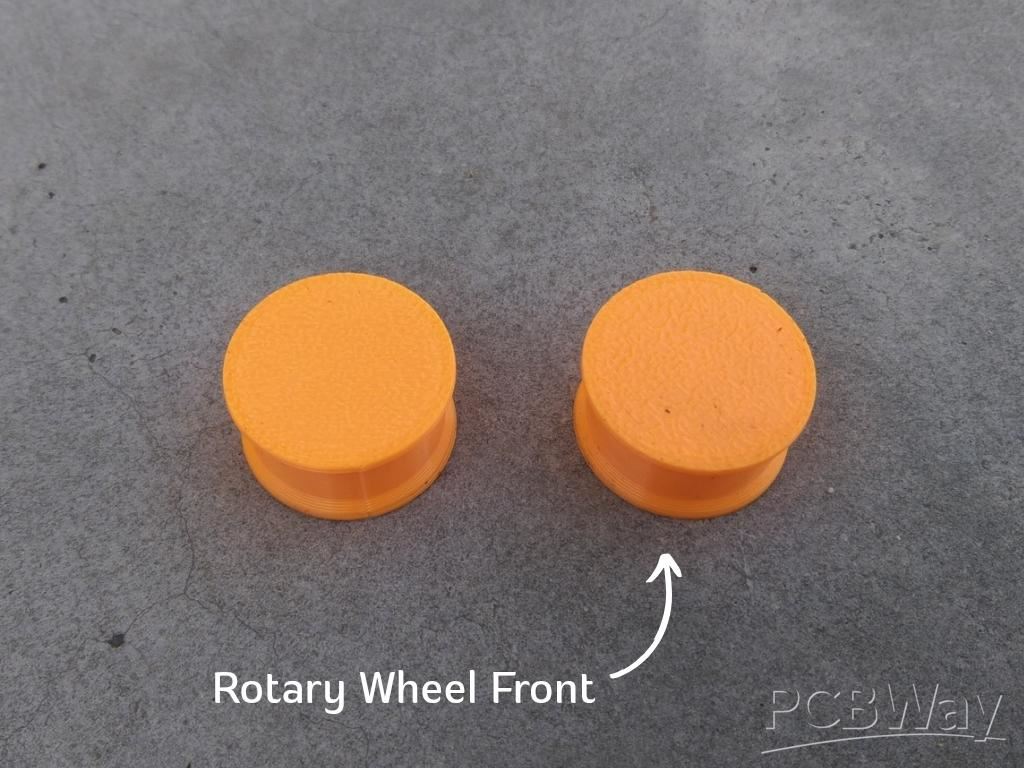
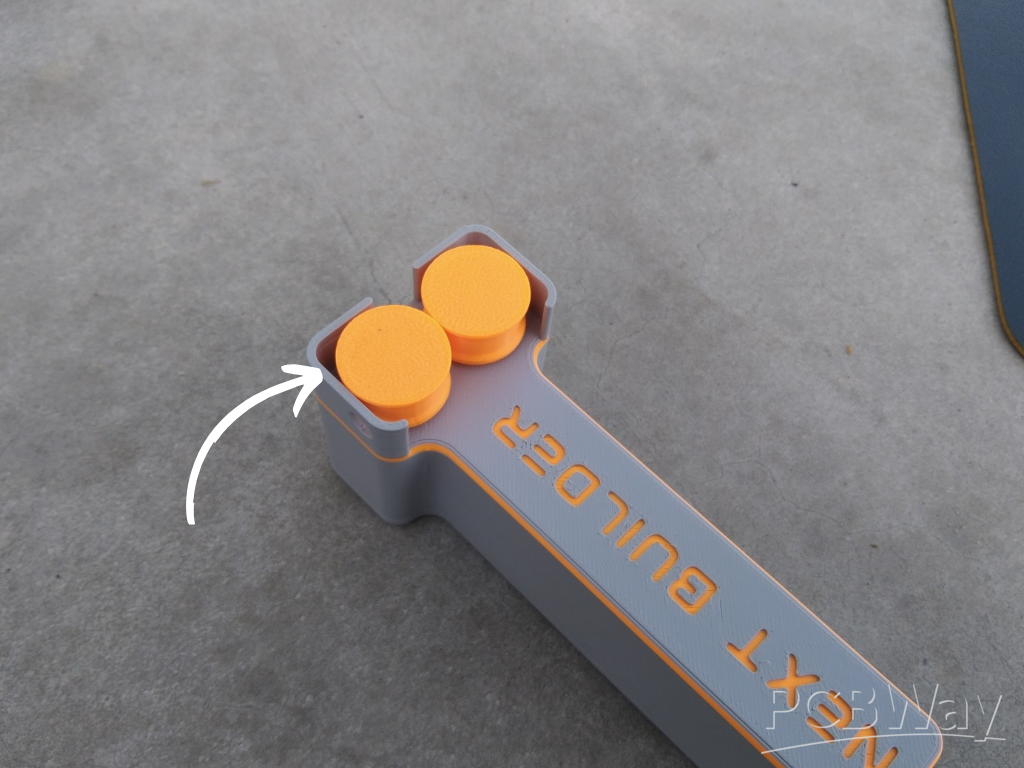
Now it’s time to add the main part — the rotary wheels. Each wheel has a small hole that fits perfectly on the DC motor shaft. Just line up the hole with the motor shaft and gently press it in. It should fit tightly and stay in place. Do the same for both wheels. Make sure they can spin freely and are not loose.
Step 9: String Making
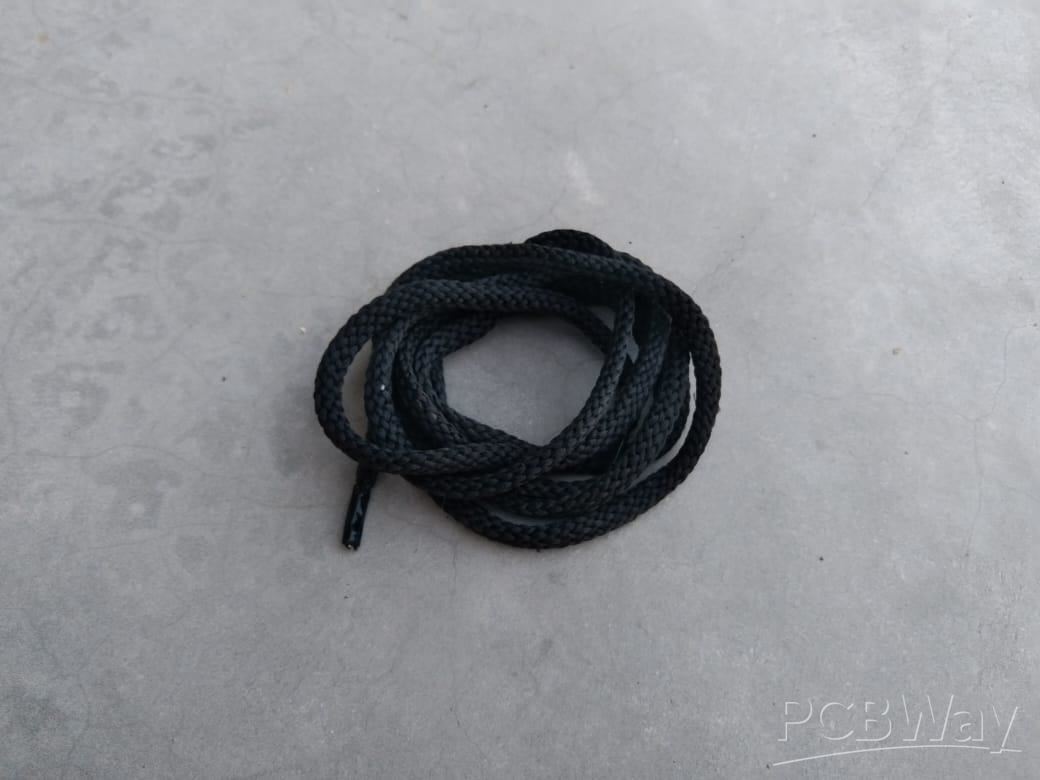
Now it’s time to make the string for the shooter. Take a piece of yarn 🧶 — the same type that’s often used for knitting sweaters. It’s easy to find and works great for this project. Cut about 1.5 to 2 meters of yarn.
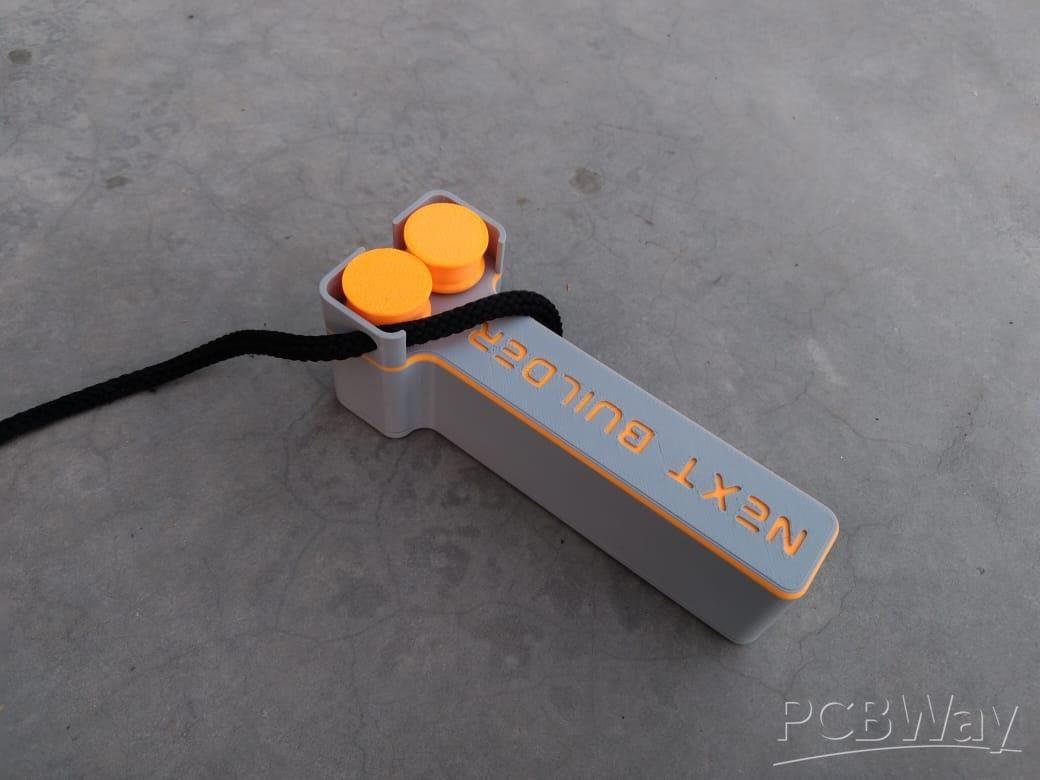
Pass one end of the yarn through the hole on the right side, then thread it through the rotary wheels. After that, bring both ends together and stick them using a small amount of super glue. Let the glue dry properly so the string forms a strong loop.
Step 10: Testing
Now it’s time to test your DIY String Shooter! First, make sure the battery is fully charged using the Type-C port. A full battery helps the motors run smoothly and gives the best performance.
Once charged, press the ON switch. The rotary wheels will start spinning fast, and your string will shoot into the air. It’s really fun to watch it work!
In my case, I used a rope instead of yarn because yarn wasn’t available. It still works, but for the best results, I recommend using yarn or a soft, flexible thread. That way, the string moves better and flies more easily through the air. Try testing it a few times and experiment with different - different string lengths or materials to see what works best.
Now your string shooter is ready—have fun and enjoy!
Conclusion
This was a fun and creative project that shows how simple parts like a DC motor, yarn, and a 3D printed design can come together to make something cool and playful. It’s easy to build, fun to use, and a great weekend project for makers of all ages.
I hope you enjoyed building it as much as I did. Feel free to customize the design, try different string materials, or even add more features. If you liked this project, don’t forget to share it and let me know what you think.
Happy making 🤞🏻
DIY String Shooter
Project images are for reference only. Actual production is based on the manufacturing files on the project page.
Please review the designer's notes (e.g., PCB thickness) and select the appropriate options.
PCBWay is not responsible
for issues caused by unsuitable parameter selections.
For more important ordering information, please refer to
Read More


Raspberry Pi 5 7 Inch Touch Screen IPS 1024x600 HD LCD HDMI-compatible Display for RPI 4B 3B+ OPI 5 AIDA64 PC Secondary Screen(Without Speaker)
BUY NOW


- Comments(0)
- Likes(1)
More by Kishan Pratap Singh
-
 A Compact Charging Breakout Board For Waveshare ESP32-C3
The Waveshare ESP32-C3 Mini development board is a powerful and compact solution for modern IoT and ...
A Compact Charging Breakout Board For Waveshare ESP32-C3
The Waveshare ESP32-C3 Mini development board is a powerful and compact solution for modern IoT and ...
-
 World's Smallest 1S Battery Charger
This is a very small 1S lithium battery charger board designed for projects where space is extremely...
World's Smallest 1S Battery Charger
This is a very small 1S lithium battery charger board designed for projects where space is extremely...
-
 DIY Smart Battery Charger
In today's world, batteries are an integral part of our lives, powering everything from our smartpho...
DIY Smart Battery Charger
In today's world, batteries are an integral part of our lives, powering everything from our smartpho...
-
 DIY 3D Printed Keychain Light
Hello Friends, welcome back in my new Instructables. Today I'm going to build my own smallest & ...
DIY 3D Printed Keychain Light
Hello Friends, welcome back in my new Instructables. Today I'm going to build my own smallest & ...
-
 DIY 3D Printed Compact Size Bluetooth speaker
Hello Friends, My self Kishan Pratap Singh. I developed my new project. Kindly let me know your thou...
DIY 3D Printed Compact Size Bluetooth speaker
Hello Friends, My self Kishan Pratap Singh. I developed my new project. Kindly let me know your thou...
-
 200w Mini Smart Inverter PCB
Introducing our Mini Inverter PCB, a compact and efficient solution for portable power needs. This c...
200w Mini Smart Inverter PCB
Introducing our Mini Inverter PCB, a compact and efficient solution for portable power needs. This c...
-
 A Compact Charging Breakout Board For Waveshare ESP32-C3 (V2 – Improved Manufacturability)
The Waveshare ESP32-C3 Mini is an excellent choice for compact IoT projects. However, one limitation...
A Compact Charging Breakout Board For Waveshare ESP32-C3 (V2 – Improved Manufacturability)
The Waveshare ESP32-C3 Mini is an excellent choice for compact IoT projects. However, one limitation...
-
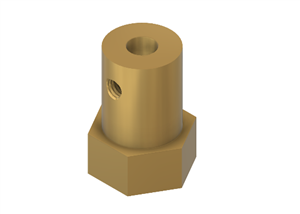
 Custom Coupler for BO Motor to Robot Wheel
Standard robot wheels are widely used in educational and DIY robotic platforms, but they are not alw...
Custom Coupler for BO Motor to Robot Wheel
Standard robot wheels are widely used in educational and DIY robotic platforms, but they are not alw...
-
 Custom Coupler for N20 Gear Motor to Robot Wheel
These rubber wheels are commonly used in small robotic mobile platforms such as 2WD and 4WD robots. ...
Custom Coupler for N20 Gear Motor to Robot Wheel
These rubber wheels are commonly used in small robotic mobile platforms such as 2WD and 4WD robots. ...
-
 Ultra-Compact RGB Button LED PCB (NeoPixel Compatible)
I designed this tiny RGB button LED PCB to make adding colorful, addressable lighting to projects si...
Ultra-Compact RGB Button LED PCB (NeoPixel Compatible)
I designed this tiny RGB button LED PCB to make adding colorful, addressable lighting to projects si...
-
 Ultra Compact Boost Converter Module
This project features an ultra-compact, high-efficiency boost converter module designed using the TP...
Ultra Compact Boost Converter Module
This project features an ultra-compact, high-efficiency boost converter module designed using the TP...
-
 PCBWay 11th Anniversary LED Badge – Services Edition 🎉
This project is a custom-designed PCB badge created to celebrate PCBWay’s 11th anniversary and highl...
PCBWay 11th Anniversary LED Badge – Services Edition 🎉
This project is a custom-designed PCB badge created to celebrate PCBWay’s 11th anniversary and highl...
-
 OrbitClock – a Tiny Space-Inspired IoT Environment Clock
Time and space are deeply connected — satellites orbit Earth to keep our clocks synchronized with in...
OrbitClock – a Tiny Space-Inspired IoT Environment Clock
Time and space are deeply connected — satellites orbit Earth to keep our clocks synchronized with in...
-
 DIY Compact UPS for Wifi Router (Easy To Build)
In villages and towns where electricity cut-offs are a daily challenge, one of the first things to g...
DIY Compact UPS for Wifi Router (Easy To Build)
In villages and towns where electricity cut-offs are a daily challenge, one of the first things to g...
-
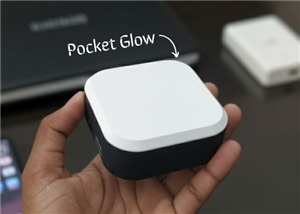 Pocket Glow: a perfect camping light
The call of the wild is always exciting, but it also comes with challenges – like needing the right ...
Pocket Glow: a perfect camping light
The call of the wild is always exciting, but it also comes with challenges – like needing the right ...
-
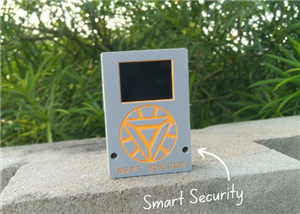 Face Recognition Door Lock with Smartphone Notification
Have you ever wished your home security system felt as futuristic and intelligent as JARVIS from Iro...
Face Recognition Door Lock with Smartphone Notification
Have you ever wished your home security system felt as futuristic and intelligent as JARVIS from Iro...
-
 DIY String Shooter
This is my DIY 3D Printed String Shooter—a fun little project I made using two micro dc toy motor. I...
DIY String Shooter
This is my DIY 3D Printed String Shooter—a fun little project I made using two micro dc toy motor. I...
-
 PCBWay 11th Anniversary LED Badge 🎉
This project is a custom-designed PCBWay 11th Anniversary Badge, created to celebrate 11 years of PC...
PCBWay 11th Anniversary LED Badge 🎉
This project is a custom-designed PCBWay 11th Anniversary Badge, created to celebrate 11 years of PC...
-
Programmable Mist Maker - XIAO / QT PY Extension
1066 2 1 -
RadioHAT - Raspberry Pi radio development platform
877 0 2 -
-
-
-
-
ARPS-2 – Arduino-Compatible Robot Project Shield for Arduino UNO
3330 0 6 -
A Compact Charging Breakout Board For Waveshare ESP32-C3
3938 3 8 -
AI-driven LoRa & LLM-enabled Kiosk & Food Delivery System
4326 2 2


