


|
|
GBJ3510YANGJIE(扬杰)
|
x 1 | |
|
|
12v 10a Relay |
x 1 |

|
KiCad 8.0KiCad
|
DIY Smart Battery Charger
In today's world, batteries are an integral part of our lives, powering everything from our smartphones to electric vehicles. Having a reliable and efficient battery charger is essential to ensure optimal performance and longevity. In this project, we've developed a versatile smart battery charger that can be used to charge batteries ranging from 12V to 24V. This DIY project combines advanced electronics and user-friendly design to provide a convenient and effective charging solution.
The smart battery charger features:
Wide Voltage Compatibility: Capable of charging batteries from 12V to 24V.
Automatic Charging: Automatically adjusts charging parameters based on battery voltage and current.
Overcharge Protection: Prevents battery damage by automatically stopping charging when the battery is fully charged.
Buzzer Reminder: Also Remind, when the battery is full charged.
Compact Design: Small and portable, making it easy to use in various settings.
Let's start by design the PCB, first I designed the PCB in Kicad 8 Software. And after successfully design the PCB I visited Pcbway. PCBWay is a leading online PCB manufacturing service that provides high-quality printed circuit boards (PCBs) at lowest prices. They offer a wide range of PCB, PCBA, 3D Printing, CNC, Flex PCB. PCBWay is known for its quick turnaround times, excellent customer service, and online design tools that make it easy for engineers and hobbyists to create and order PCBs. I received my PCB in just one week.
Now it's time to Assembly the PCB. You can also choose pcbway assembly service or if you want to assemble it yourself then you have to order a stencil also for a better results. First match the stencil with solder pads & apply a small amount of solder paste. And now place all the components on there place according to BOM File. After placing all the components to it's place, now I use a Miniware MHP30 Hot Plate to melt the solder paste and solder the components.
Now after successfully Soldering the SMD components, it's time to solder the through hole component, you can check the BOM File for all comments details. Let's start by placing all comments one by one at there right place. After placing start with the soldering of the components using miniware TS80P Soldering Iron. Cut the extra part of the components & clean it properly using ISO propyal alcohol.
Now do the connection between transformer & the PCB;)
Let's understand the transformer wires first. In some transformer there're three wires (12-0-12). And in some transformer there're two wires only (12-0), if we coustmized it according to our needs.
First, If we use (12-12) at once together then the output will be 24v and it will be used to charge the battery around this voltage.
Second, if we use (12-0) wire at once together then the output will be 12v and it will be used to charge the battery around this voltage.
Now let's understand the PCB connection there're three wires connector also, marked as (12-0-12). Connect the wires according to your needs, for example if I have to charge the battery which have a voltage around 12v so I will connect the transformer 12-0 wire to 12-0 connector of PCB. I hope you understand the 24v battery charging Connection also.
Now let's understand how to do the calibration of the circuit. Calibration mins set the charging voltage & Auto Cut off voltage. The first Potentiometer is for set the charging voltage, by rotating this clock wise & anti clock wise you can increase and decrease the voltage. The second Potentiometer is for, set the Auto Cut off voltage, rotate it slowly to clock wise until the green LED turns on. Hope you understand it clearly.
Now our PCB is ready for charge any kind of battery. Connect the transformer with the AC power supply and connect the output wires with battery. When the battery will be charged fully, the green LED will be start glowing & the buzzer will be start to generating the sound also.
By following the steps outlined in this article and leveraging the services of PCBWay for PCB fabrication, you can create a reliable and efficient charger that meets your specific needs. Hope you enjoyed this article. Support me for more cool projects, Like this article & do follow.
DIY Smart Battery Charger
Project images are for reference only. Actual production is based on the manufacturing files on the project page.
Please review the designer's notes (e.g., PCB thickness) and select the appropriate options.
PCBWay is not responsible
for issues caused by unsuitable parameter selections.
For more important ordering information, please refer to
Read More


Raspberry Pi 5 7 Inch Touch Screen IPS 1024x600 HD LCD HDMI-compatible Display for RPI 4B 3B+ OPI 5 AIDA64 PC Secondary Screen(Without Speaker)
BUY NOW


- Comments(1)
- Likes(8)
- 5 USER VOTES
- YOUR VOTE 0.00 0.00

-
4design
-
5usability
-
6creativity
-
7content

-
10design
-
10usability
-
10creativity
-
10content

-
10design
-
10usability
-
10creativity
-
10content
-
10design
-
10usability
-
10creativity
-
10content
-
10design
-
10usability
-
10creativity
-
10content
More by Kishan Pratap Singh
-
 A Compact Charging Breakout Board For Waveshare ESP32-C3
The Waveshare ESP32-C3 Mini development board is a powerful and compact solution for modern IoT and ...
A Compact Charging Breakout Board For Waveshare ESP32-C3
The Waveshare ESP32-C3 Mini development board is a powerful and compact solution for modern IoT and ...
-
 World's Smallest 1S Battery Charger
This is a very small 1S lithium battery charger board designed for projects where space is extremely...
World's Smallest 1S Battery Charger
This is a very small 1S lithium battery charger board designed for projects where space is extremely...
-
 DIY Smart Battery Charger
In today's world, batteries are an integral part of our lives, powering everything from our smartpho...
DIY Smart Battery Charger
In today's world, batteries are an integral part of our lives, powering everything from our smartpho...
-
 DIY 3D Printed Keychain Light
Hello Friends, welcome back in my new Instructables. Today I'm going to build my own smallest & ...
DIY 3D Printed Keychain Light
Hello Friends, welcome back in my new Instructables. Today I'm going to build my own smallest & ...
-
 DIY 3D Printed Compact Size Bluetooth speaker
Hello Friends, My self Kishan Pratap Singh. I developed my new project. Kindly let me know your thou...
DIY 3D Printed Compact Size Bluetooth speaker
Hello Friends, My self Kishan Pratap Singh. I developed my new project. Kindly let me know your thou...
-
 200w Mini Smart Inverter PCB
Introducing our Mini Inverter PCB, a compact and efficient solution for portable power needs. This c...
200w Mini Smart Inverter PCB
Introducing our Mini Inverter PCB, a compact and efficient solution for portable power needs. This c...
-
 A Compact Charging Breakout Board For Waveshare ESP32-C3 (V2 – Improved Manufacturability)
The Waveshare ESP32-C3 Mini is an excellent choice for compact IoT projects. However, one limitation...
A Compact Charging Breakout Board For Waveshare ESP32-C3 (V2 – Improved Manufacturability)
The Waveshare ESP32-C3 Mini is an excellent choice for compact IoT projects. However, one limitation...
-
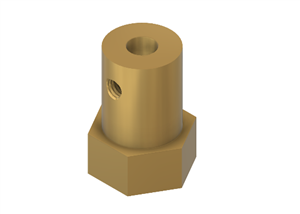
 Custom Coupler for BO Motor to Robot Wheel
Standard robot wheels are widely used in educational and DIY robotic platforms, but they are not alw...
Custom Coupler for BO Motor to Robot Wheel
Standard robot wheels are widely used in educational and DIY robotic platforms, but they are not alw...
-
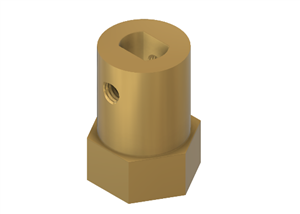
 Custom Coupler for N20 Gear Motor to Robot Wheel
These rubber wheels are commonly used in small robotic mobile platforms such as 2WD and 4WD robots. ...
Custom Coupler for N20 Gear Motor to Robot Wheel
These rubber wheels are commonly used in small robotic mobile platforms such as 2WD and 4WD robots. ...
-
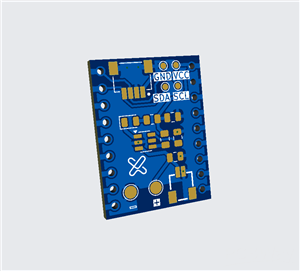
 Ultra-Compact RGB Button LED PCB (NeoPixel Compatible)
I designed this tiny RGB button LED PCB to make adding colorful, addressable lighting to projects si...
Ultra-Compact RGB Button LED PCB (NeoPixel Compatible)
I designed this tiny RGB button LED PCB to make adding colorful, addressable lighting to projects si...
-
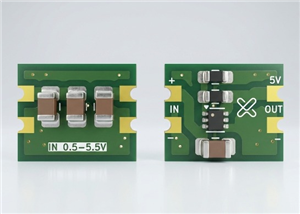 Ultra Compact Boost Converter Module
This project features an ultra-compact, high-efficiency boost converter module designed using the TP...
Ultra Compact Boost Converter Module
This project features an ultra-compact, high-efficiency boost converter module designed using the TP...
-
 PCBWay 11th Anniversary LED Badge – Services Edition 🎉
This project is a custom-designed PCB badge created to celebrate PCBWay’s 11th anniversary and highl...
PCBWay 11th Anniversary LED Badge – Services Edition 🎉
This project is a custom-designed PCB badge created to celebrate PCBWay’s 11th anniversary and highl...
-
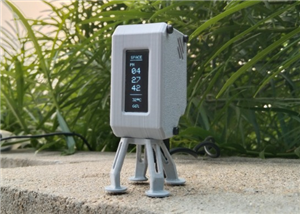 OrbitClock – a Tiny Space-Inspired IoT Environment Clock
Time and space are deeply connected — satellites orbit Earth to keep our clocks synchronized with in...
OrbitClock – a Tiny Space-Inspired IoT Environment Clock
Time and space are deeply connected — satellites orbit Earth to keep our clocks synchronized with in...
-
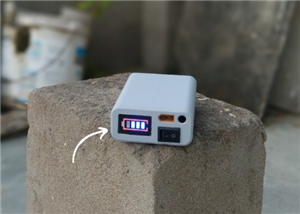 DIY Compact UPS for Wifi Router (Easy To Build)
In villages and towns where electricity cut-offs are a daily challenge, one of the first things to g...
DIY Compact UPS for Wifi Router (Easy To Build)
In villages and towns where electricity cut-offs are a daily challenge, one of the first things to g...
-
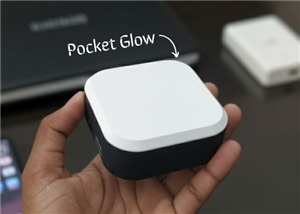 Pocket Glow: a perfect camping light
The call of the wild is always exciting, but it also comes with challenges – like needing the right ...
Pocket Glow: a perfect camping light
The call of the wild is always exciting, but it also comes with challenges – like needing the right ...
-
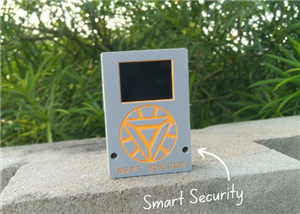 Face Recognition Door Lock with Smartphone Notification
Have you ever wished your home security system felt as futuristic and intelligent as JARVIS from Iro...
Face Recognition Door Lock with Smartphone Notification
Have you ever wished your home security system felt as futuristic and intelligent as JARVIS from Iro...
-
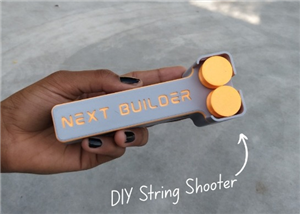 DIY String Shooter
This is my DIY 3D Printed String Shooter—a fun little project I made using two micro dc toy motor. I...
DIY String Shooter
This is my DIY 3D Printed String Shooter—a fun little project I made using two micro dc toy motor. I...
-
 PCBWay 11th Anniversary LED Badge 🎉
This project is a custom-designed PCBWay 11th Anniversary Badge, created to celebrate 11 years of PC...
PCBWay 11th Anniversary LED Badge 🎉
This project is a custom-designed PCBWay 11th Anniversary Badge, created to celebrate 11 years of PC...
-
Programmable Mist Maker - XIAO / QT PY Extension
1106 2 1 -
RadioHAT - Raspberry Pi radio development platform
917 0 2 -
-
-
-
-
ARPS-2 – Arduino-Compatible Robot Project Shield for Arduino UNO
3348 0 6 -
A Compact Charging Breakout Board For Waveshare ESP32-C3
3963 3 8 -
AI-driven LoRa & LLM-enabled Kiosk & Food Delivery System
4354 2 2


