


|
|
3W 3.7V LED LinkCree
|
x 1 | |
|
|
500mAh lipo battery |
x 1 | |
|
|
3 pin Mini Slide Switch |
x 1 | |
|
|
TP4056 Charging Module |
x 1 | |
|
|
30 AWG Silicon Wire |
x 1 |

|
fusion360 |
DIY 3D Printed Keychain Light
Hello Friends, welcome back in my new Instructables. Today I'm going to build my own smallest & 3D Printed Keychain light with inbuilt 500mah lipo battery. And trust me guys this project is going to be an amazing because I used the powerful Cree LED. Since everyone knows that how powerful Cree LED Is. Make one for yourself and enjoy!
My Self Kishan Pratap Singh, Currently I'm a student of Intermediate College. I started to make a videos on YouTube from Class 9th & I gained upto 67k Subscription after 2 Years of Hard Work by making short videos. But channel is still not monetized, so I decided to take a help of any other's tech Creator. I found a person who said that he will be monetize my YouTube channel. I trust on him & he hacked my YouTube channel via Fraud.But I didn't Give UP and started a New Channel NEXT BUILDER on YouTube. And Thankyou very much to PCBWAY Who supported me after hacking my channel. I request you guys to keep supporting me on Instructables & YouTube also.Do you know what's the reason to build this keychain light? Let me tell you, sometimes we go outside for camping or any other things. Then we need a emergency light also, if we forgot the emergency light then this tiny keychain light will helps us alot. Since it's attached to a keychain, it's always within reach, eliminating the need to search for a flashlight for light. It’s handy for tasks like unlocking doors in the dark, reading menus in dim restaurants, or checking the car's engine at night.
Step 1: Design EnclosureSince I wanna make it as small as possible so I decided to choose 3d Printing for long term use & durability. I started to design it's enclosure using Autodesk Fusion 360.
Step 2: Print EnclosureAfter successfully design the enclosure of this project. I visited to Pcbway to order the 3d Printed Parts at very affordable price. I submitted the enclosure design to there website & After a week I received my package from Pcbway and the quality of enclosure is really mind blowing. You can also order your own PCB, PCBA, 3d Printing, CNC and much more from PCBWAY. Just use the link to get $5 exclusive discount coupon. Click here

Step 3: Prepare LEDI'm using high power 3w Cree LED with high luminous. Since it will consume a lot of battery power, wo I'll recommend to use 1w led for longer backup.

The LED PCB has two solder pads with polarity marked on it.First tin the terminals apply a small amount of solder on the tip of your soldering iron.Then solder the wires with the correct polarity. You may see the above image for your referenceNow connect the both wires of LED with the lipo battery
Step 4: Charging Module ConnectionHere I'm Using TP4056 Charging Module to charge the lipo battery safely.

The charging has also two solder pads with polarity marked on it.First tin the both terminal and apply a small amount of flux for better results.Now solder the battery wires with the charging Module, as shown in the image for your reference.
Step 5: Switch ConnectionI'm using mini 3 pin slide switch to turn on & turn off the LED.

Mini slide switch has 3 pins to connect the wires.First tin the two terminal of the slide switch one from middle & second one from any side you prefer.Now solder the wires to both pins of slide switch.Connect the battery wire on middle and led wire to side pin.
Step 6: Place ComponentsNow start to place all the components one by one in 3d Printed Case.
First place the charging Module in the case, make sure the charging pin is on the point of the hole.Now please the lipo battery in the case and fix it using double side tape.Now fix the slide switch to it's place and glue it using super glue.Now Close the enclosure properly using super glue.
Step 7: Project TestingNow our project is successful completed. Now plug the Micro USB to charging Module and charge the battery fully before use. And as you can see the light is too high.
DIY 3D Printed Keychain Light
*PCBWay community is a sharing platform. We are not responsible for any design issues and parameter issues (board thickness, surface finish, etc.) you choose.


Raspberry Pi 5 7 Inch Touch Screen IPS 1024x600 HD LCD HDMI-compatible Display for RPI 4B 3B+ OPI 5 AIDA64 PC Secondary Screen(Without Speaker)
BUY NOW


- Comments(0)
- Likes(1)
More by Kishan Pratap Singh
-
 A Compact Charging Breakout Board For Waveshare ESP32-C3
The Waveshare ESP32-C3 Mini development board is a powerful and compact solution for modern IoT and ...
A Compact Charging Breakout Board For Waveshare ESP32-C3
The Waveshare ESP32-C3 Mini development board is a powerful and compact solution for modern IoT and ...
-
 World's Smallest 1S Battery Charger
This is a very small 1S lithium battery charger board designed for projects where space is extremely...
World's Smallest 1S Battery Charger
This is a very small 1S lithium battery charger board designed for projects where space is extremely...
-
 DIY Smart Battery Charger
In today's world, batteries are an integral part of our lives, powering everything from our smartpho...
DIY Smart Battery Charger
In today's world, batteries are an integral part of our lives, powering everything from our smartpho...
-
 DIY 3D Printed Keychain Light
Hello Friends, welcome back in my new Instructables. Today I'm going to build my own smallest & ...
DIY 3D Printed Keychain Light
Hello Friends, welcome back in my new Instructables. Today I'm going to build my own smallest & ...
-
 DIY 3D Printed Compact Size Bluetooth speaker
Hello Friends, My self Kishan Pratap Singh. I developed my new project. Kindly let me know your thou...
DIY 3D Printed Compact Size Bluetooth speaker
Hello Friends, My self Kishan Pratap Singh. I developed my new project. Kindly let me know your thou...
-
 200w Mini Smart Inverter PCB
Introducing our Mini Inverter PCB, a compact and efficient solution for portable power needs. This c...
200w Mini Smart Inverter PCB
Introducing our Mini Inverter PCB, a compact and efficient solution for portable power needs. This c...
-
 A Compact Charging Breakout Board For Waveshare ESP32-C3 (V2 – Improved Manufacturability)
The Waveshare ESP32-C3 Mini is an excellent choice for compact IoT projects. However, one limitation...
A Compact Charging Breakout Board For Waveshare ESP32-C3 (V2 – Improved Manufacturability)
The Waveshare ESP32-C3 Mini is an excellent choice for compact IoT projects. However, one limitation...
-
 Custom Coupler for BO Motor to Robot Wheel
Standard robot wheels are widely used in educational and DIY robotic platforms, but they are not alw...
Custom Coupler for BO Motor to Robot Wheel
Standard robot wheels are widely used in educational and DIY robotic platforms, but they are not alw...
-
 Custom Coupler for N20 Gear Motor to Robot Wheel
These rubber wheels are commonly used in small robotic mobile platforms such as 2WD and 4WD robots. ...
Custom Coupler for N20 Gear Motor to Robot Wheel
These rubber wheels are commonly used in small robotic mobile platforms such as 2WD and 4WD robots. ...
-
 Ultra-Compact RGB Button LED PCB (NeoPixel Compatible)
I designed this tiny RGB button LED PCB to make adding colorful, addressable lighting to projects si...
Ultra-Compact RGB Button LED PCB (NeoPixel Compatible)
I designed this tiny RGB button LED PCB to make adding colorful, addressable lighting to projects si...
-
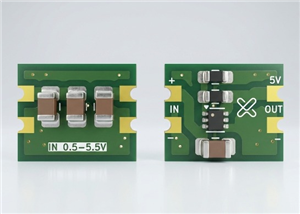 Ultra Compact Boost Converter Module
This project features an ultra-compact, high-efficiency boost converter module designed using the TP...
Ultra Compact Boost Converter Module
This project features an ultra-compact, high-efficiency boost converter module designed using the TP...
-
 PCBWay 11th Anniversary LED Badge – Services Edition 🎉
This project is a custom-designed PCB badge created to celebrate PCBWay’s 11th anniversary and highl...
PCBWay 11th Anniversary LED Badge – Services Edition 🎉
This project is a custom-designed PCB badge created to celebrate PCBWay’s 11th anniversary and highl...
-
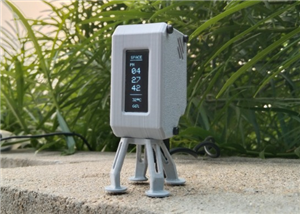 OrbitClock – a Tiny Space-Inspired IoT Environment Clock
Time and space are deeply connected — satellites orbit Earth to keep our clocks synchronized with in...
OrbitClock – a Tiny Space-Inspired IoT Environment Clock
Time and space are deeply connected — satellites orbit Earth to keep our clocks synchronized with in...
-
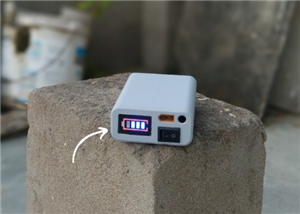 DIY Compact UPS for Wifi Router (Easy To Build)
In villages and towns where electricity cut-offs are a daily challenge, one of the first things to g...
DIY Compact UPS for Wifi Router (Easy To Build)
In villages and towns where electricity cut-offs are a daily challenge, one of the first things to g...
-
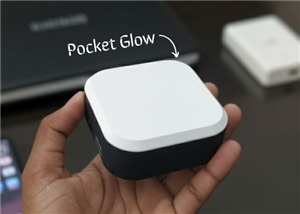 Pocket Glow: a perfect camping light
The call of the wild is always exciting, but it also comes with challenges – like needing the right ...
Pocket Glow: a perfect camping light
The call of the wild is always exciting, but it also comes with challenges – like needing the right ...
-
 Face Recognition Door Lock with Smartphone Notification
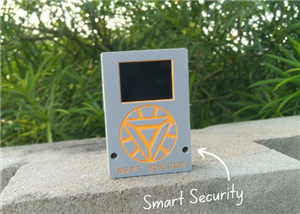
Have you ever wished your home security system felt as futuristic and intelligent as JARVIS from Iro...
Face Recognition Door Lock with Smartphone Notification
Have you ever wished your home security system felt as futuristic and intelligent as JARVIS from Iro...
-
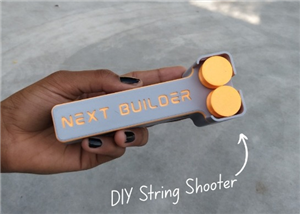 DIY String Shooter
This is my DIY 3D Printed String Shooter—a fun little project I made using two micro dc toy motor. I...
DIY String Shooter
This is my DIY 3D Printed String Shooter—a fun little project I made using two micro dc toy motor. I...
-
 PCBWay 11th Anniversary LED Badge 🎉
This project is a custom-designed PCBWay 11th Anniversary Badge, created to celebrate 11 years of PC...
PCBWay 11th Anniversary LED Badge 🎉
This project is a custom-designed PCBWay 11th Anniversary Badge, created to celebrate 11 years of PC...
-
Programmable Mist Maker - XIAO / QT PY Extension
171 0 0 -
RadioHAT - Raspberry Pi radio development platform
180 0 1 -
-
-
-
-
ARPS-2 – Arduino-Compatible Robot Project Shield for Arduino UNO
2766 0 5 -
A Compact Charging Breakout Board For Waveshare ESP32-C3
3273 3 8 -
AI-driven LoRa & LLM-enabled Kiosk & Food Delivery System
3528 2 2


