


|
|
Function generator module |
x 1 | |
|
|
STM32 frequency meter from previous project |
x 1 | |
|
|
Trimmer Potentiometer, 10 kohm |
x 1 | |
|
|
Rotary potentiometer |
x 3 | |
|
|
2x2 Switch |
x 1 | |
|
|
6x2 Switch |
x 1 |

|
Soldering Iron Kit |
|

|
arduino IDEArduino
|
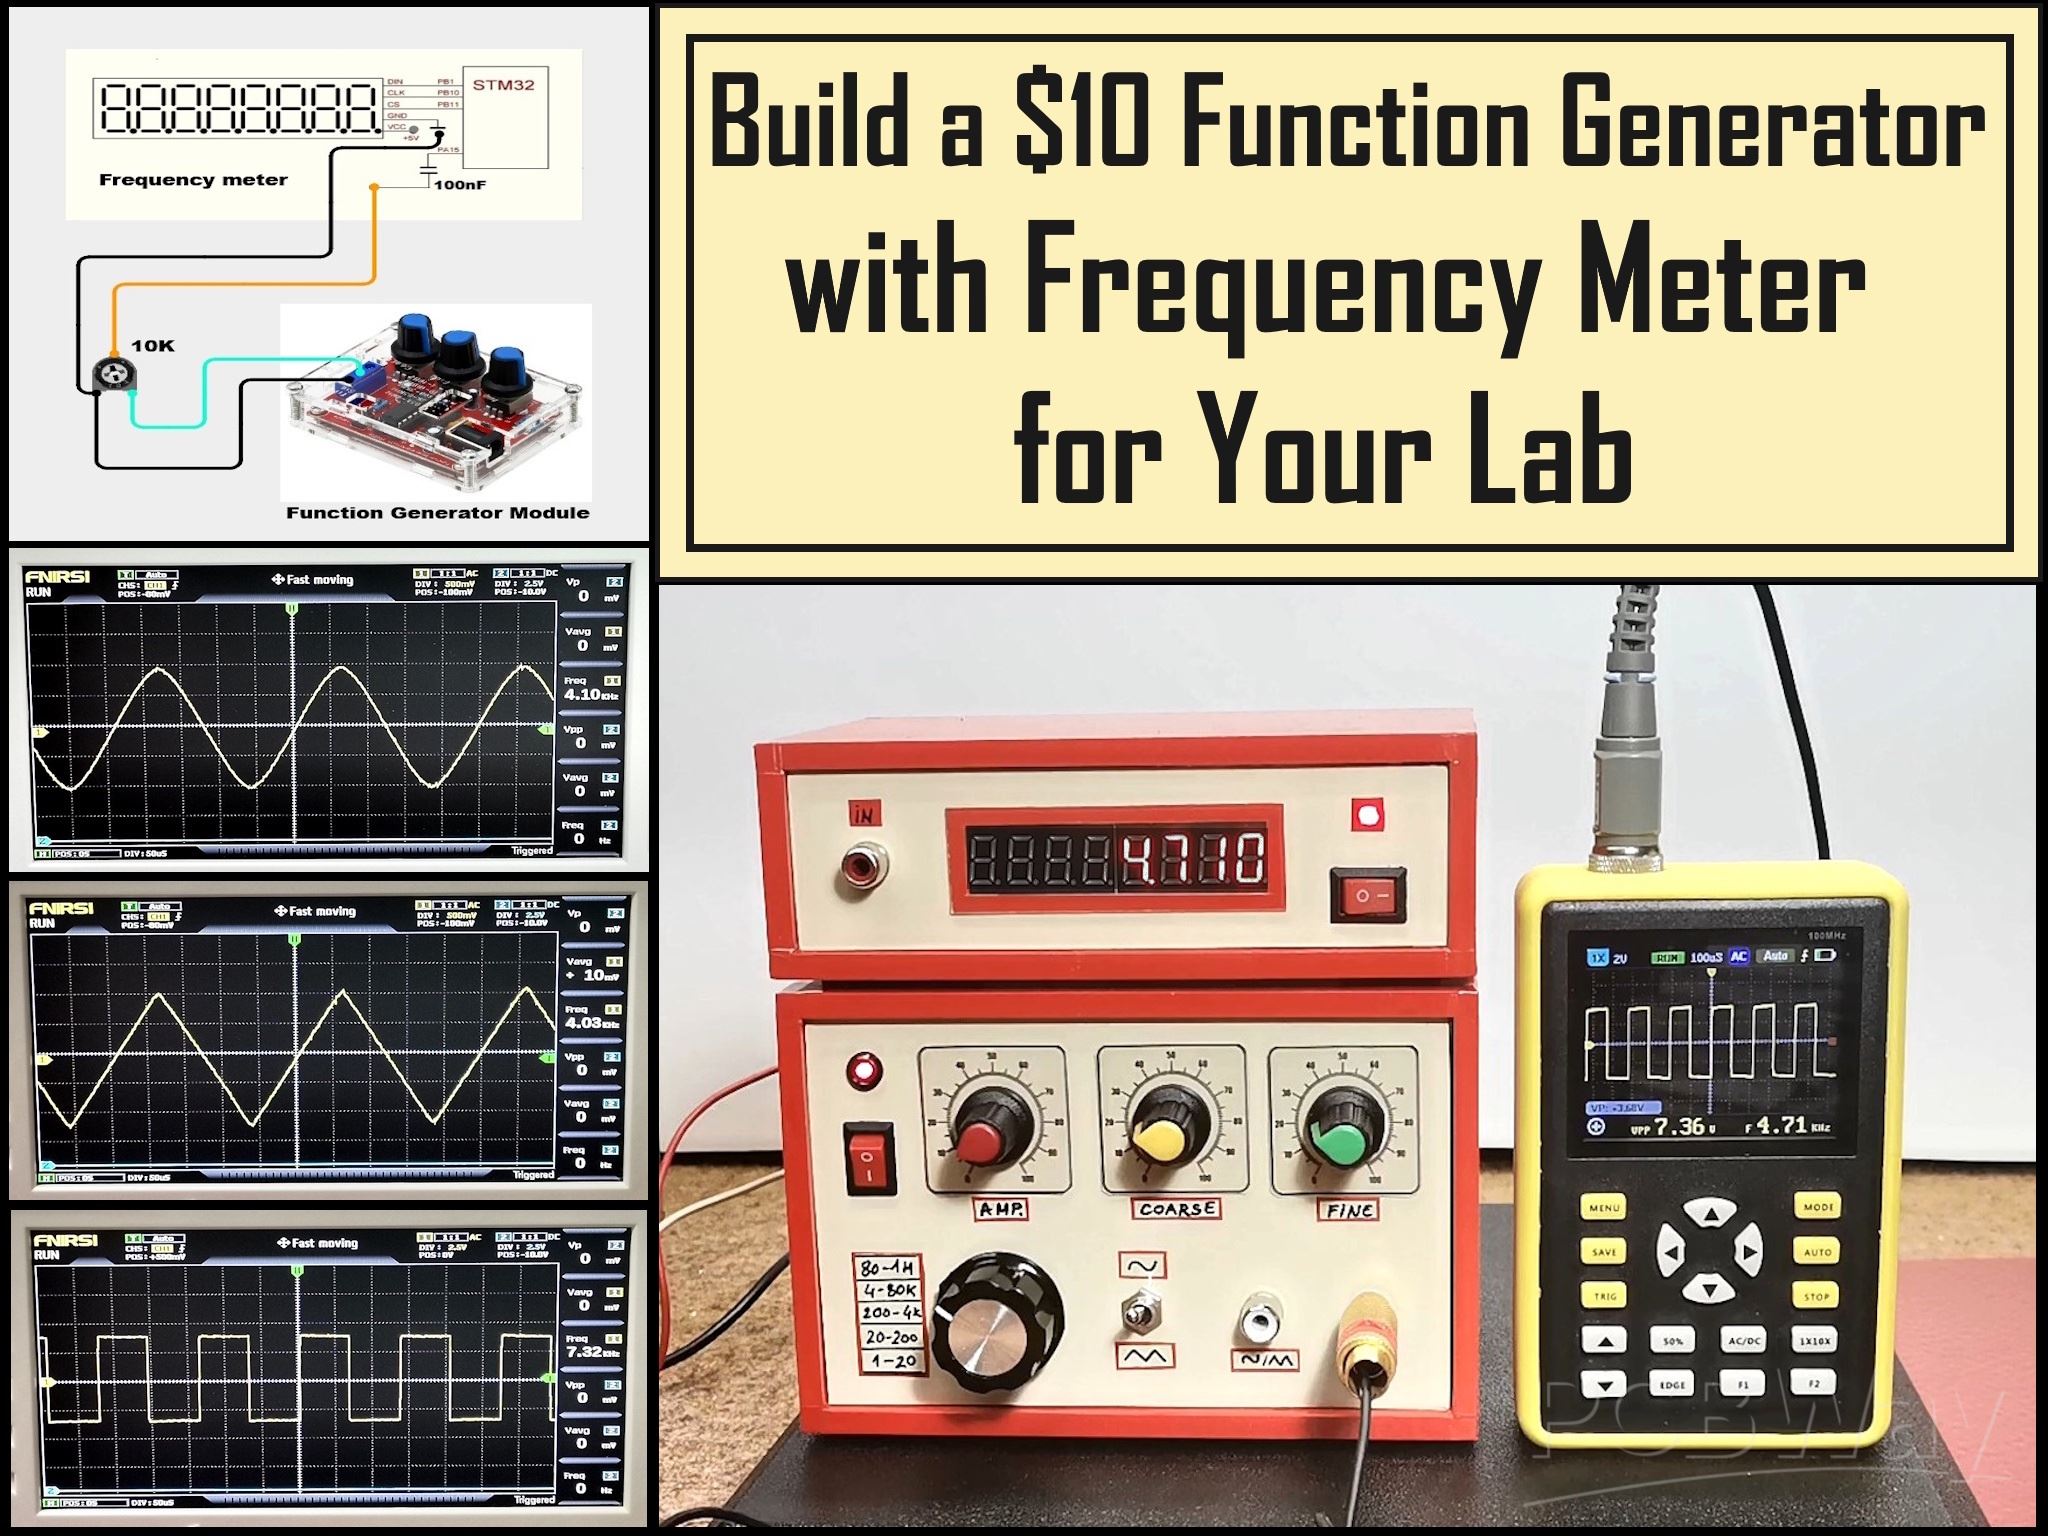
Build a $10 Function Generator with Frequency Meter for Your Lab
A function generator is a piece of electronic test equipment used to generate various types of electrical waveforms over a wide range of frequencies. It's an indispensable tool for anyone involved in electronics or electrical engineering for electronic design and testing. The most common waveforms produced are Sine, Square and Triangular wave.
A rectangular signal can be easily generated with discrete components, standard ICs, and microcontrollers, while for precise generation of sine and triangle waveforms are most often used specialized ICs. Such is the case here, where the XR-2206 specialized chip is used for this purpose, which, although a bit outdated, performs its function perfectly.
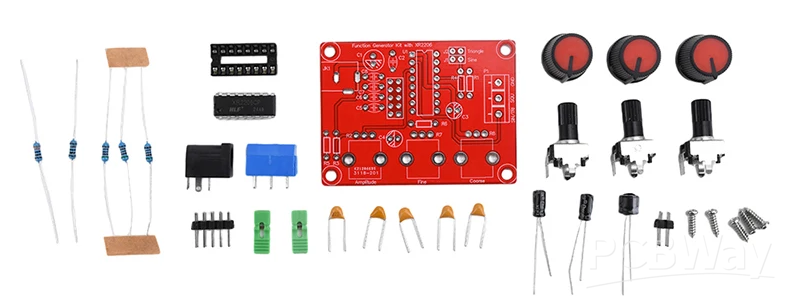
This is a cheap kit for making a function generator that costs less than $5 total. The kit contains all the necessary parts as well as a circuit diagram and can be made in less than an hour.
A rectangular signal can be easily generated with discrete components, standard ICs, and microcontrollers, while for precise generation of sine and triangle waveforms are most often used specialized ICs. Such is the case here, where the XR-2206 specialized chip is used for this purpose, which, although a bit outdated, performs its function perfectly.
This is a cheap kit for making a function generator that costs less than $5 total. The kit contains all the necessary parts as well as a circuit diagram and can be made in less than an hour.
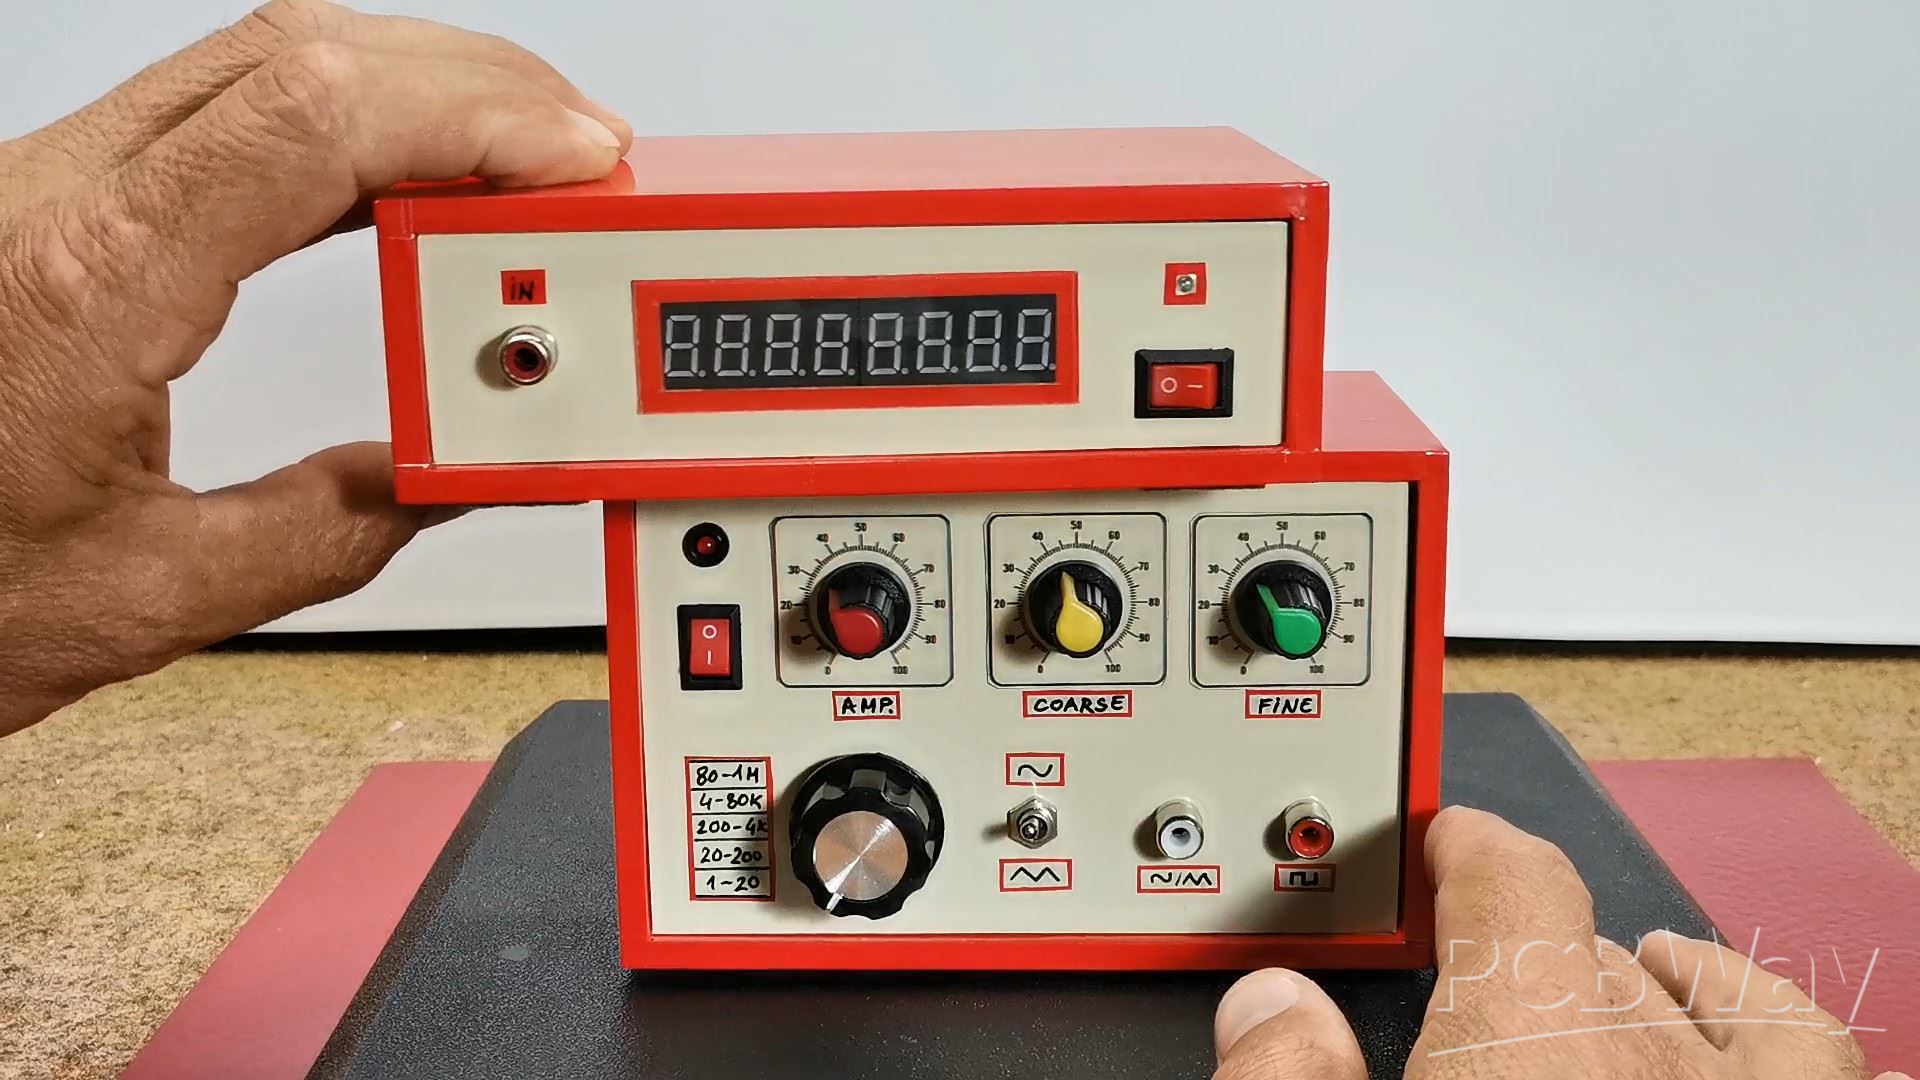
Here is what this module looks like mounted in a larger housing with a clear and easy-to-understand front panel for easier operation. I replaced the jumpers with a switch for selecting the frequency range as well as a switch for selecting between a sine and triangle signal on the corresponding output. Of course, there are also potentiometers for amplification, coarse and fine tuning of the generated frequency.
This project is sponsored by PCBWay . PCBWay officially launches the first-ever 3D Printing Design Contest. All 3D printing enthusiasts can participate in both categories: design a 3D model based on PCBWay’s official mascot "Eon," or create your very own original character. For the best projects are provided valuable prizes ranging from 200 to 500 dollars + certificates. PCBWay has all the services you need to create your project at the best price.

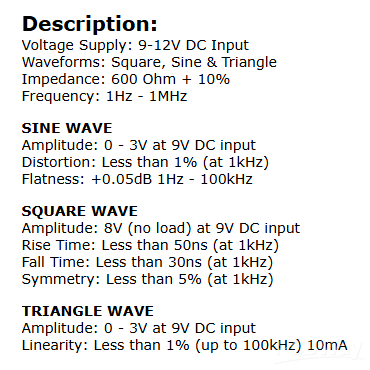
In short, the specifications of this device are: power supply from 9 to 12 Volts, sine and triangle waves with an amplitude of 0 to 3 V, and a rectangular signal with an amplitude of 8 Volts. Distortion and linearity of the signal are less than 1% up to 100 Kilohertz.
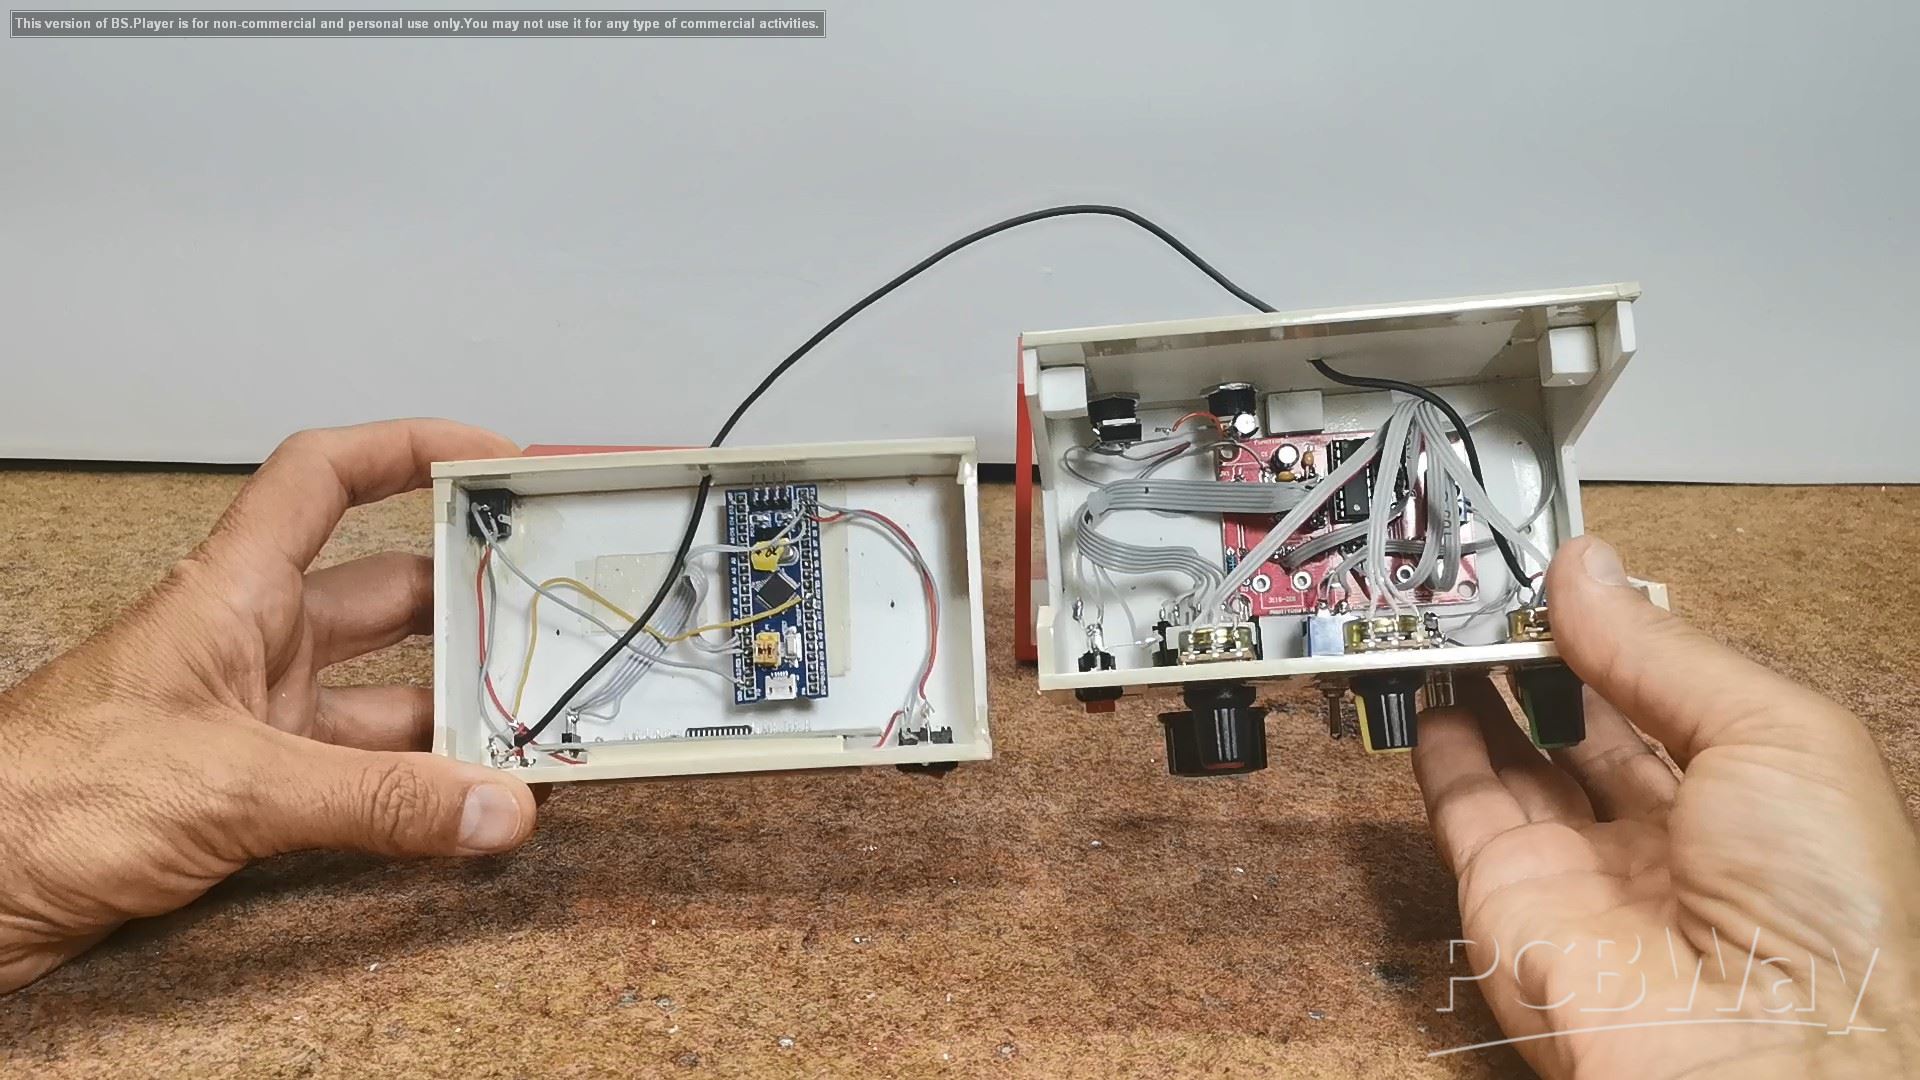
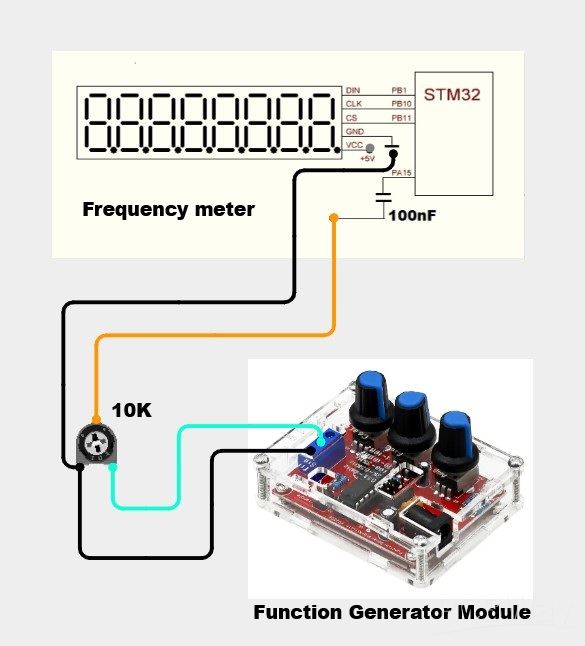
The device made in this way works great, but it has one big drawback, which is the inability to precisely adjust the frequency of the output signal. So I came up with the idea of using a device from one of my previous projects , which is actually a frequency meter, on which we will be able to read the exact set output frequency. Like the previous kit, this device costs about 5 dollars and consists only of an STM32 microcontroller and an 8-digit 7-segment display. Thus, the entire device will have professional features and will cost less than 10 dollars. You can watch the frequency meter project in one of my previous videos at the given link.
The frequency meter reads the rectangular shape of the signal most easily, so we will use this output from the generator. As I mentioned earlier, the generated rectangular signal has a constant amplitude of 8 Volts, so to adjust it to the level of the microcontroller, we simply use a small trimmer potentiometer in a voltage divider circuit.
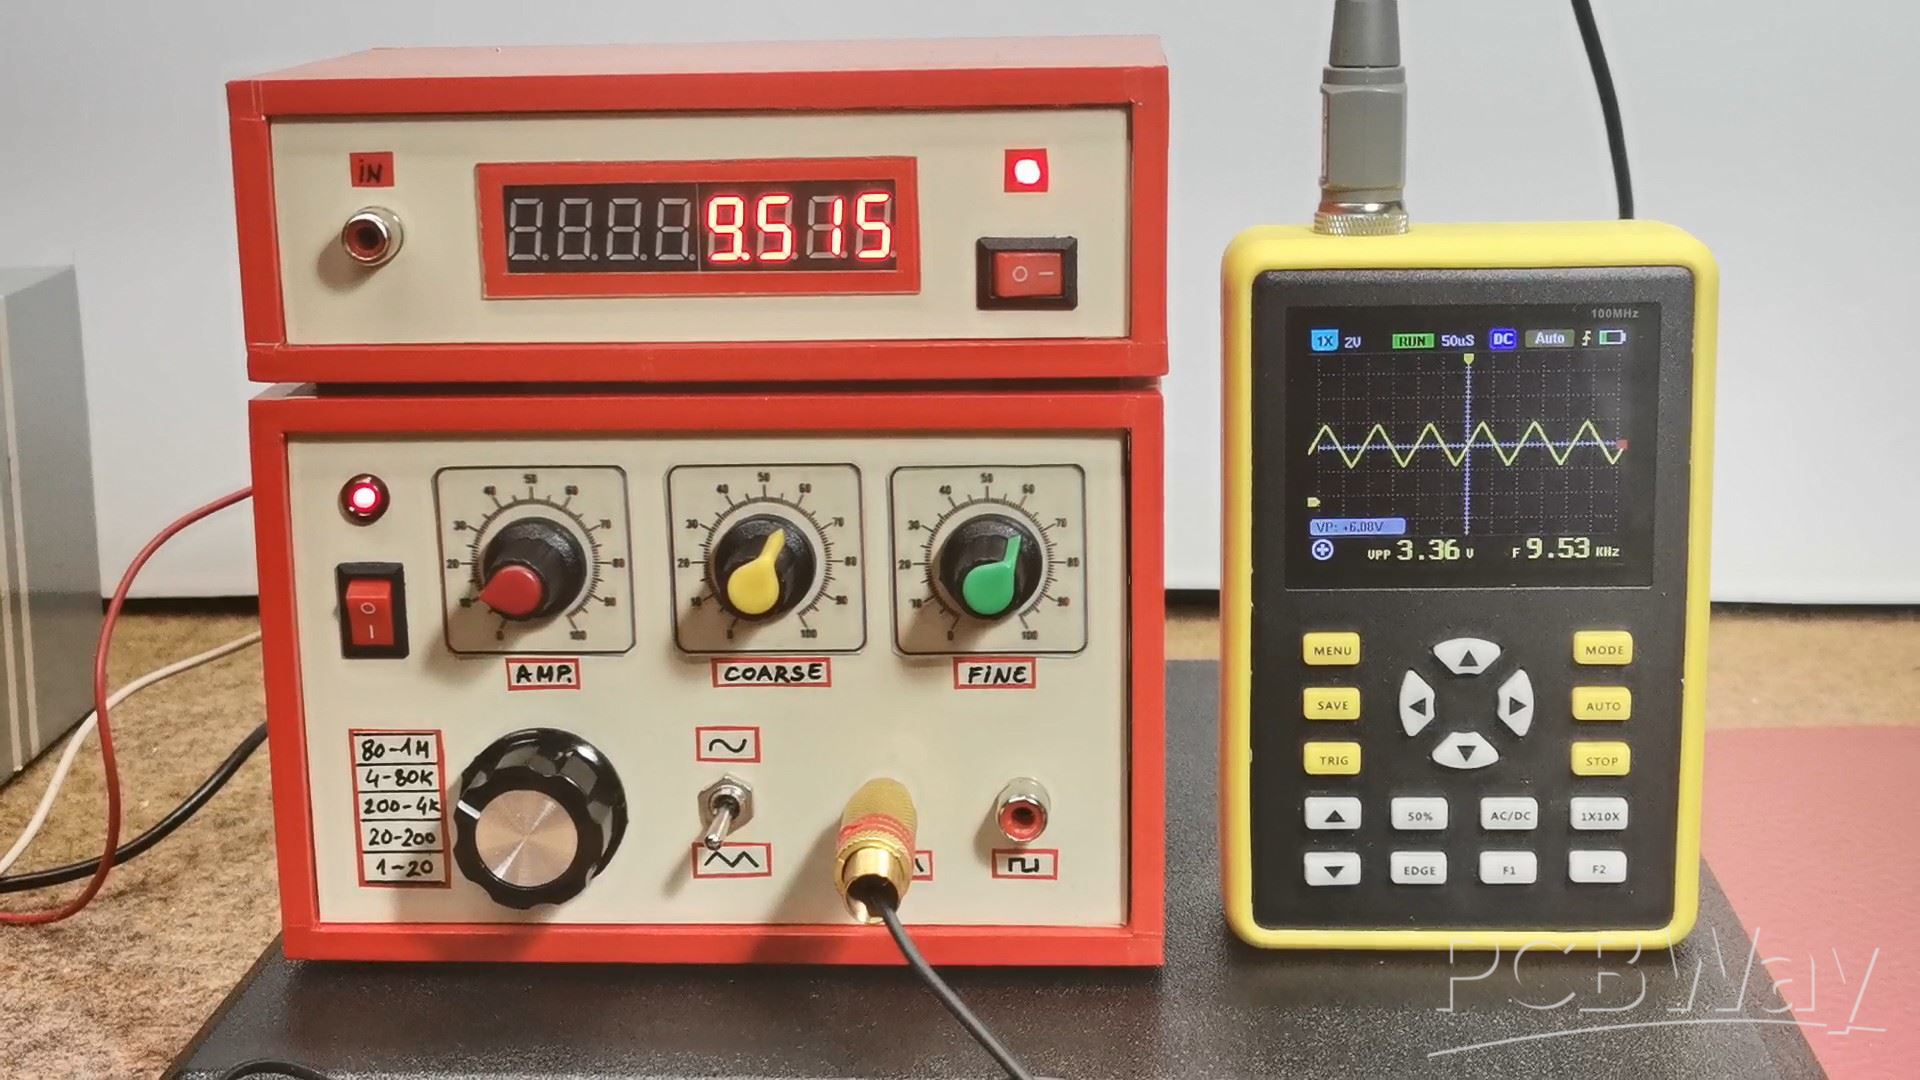
Now let's see how the device works in real conditions. If we have connected everything exactly according to the instructions, the device works immediately and the selected frequency is displayed on the display.

Let me just remind you that the frequency reading is done every 500 milliseconds, so we have to wait a little while for an accurate reading. With the switch we select the range and with the coarse and fine potentiometers we precisely set the desired frequency. With the first potentiometer the amplitude of the sine and triangular signals is adjusted, and it must not exceed 3 volts to avoid signal distortion. The amplitude of the rectangular signal is constant and is 8V, but here too we can set a potentiometer and regulate the value.
Next, I will test the shape, amplitude, and frequency of the output signals using an oscilloscope to ensure the complete functionality of the device.
And finally a short conclusion: This affordable and easy-to-build function generator delivers professional performance with sine, triangle, and square waveforms, all while staying under a $10 budget—perfect for any electronics lab!
Build a $10 Function Generator with Frequency Meter for Your Lab


Raspberry Pi 5 7 Inch Touch Screen IPS 1024x600 HD LCD HDMI-compatible Display for RPI 4B 3B+ OPI 5 AIDA64 PC Secondary Screen(Without Speaker)
BUY NOW


- Comments(1)
- Likes(0)
More by Mirko Pavleski
-
 Arduino 3D Printed self Balancing Cube
Self-balancing devices are electronic devices that use sensors and motors to keep themselves balanc...
Arduino 3D Printed self Balancing Cube
Self-balancing devices are electronic devices that use sensors and motors to keep themselves balanc...
-
 Retro Analog VU Meter on Round dispalys (ESP32 and GC9A01)
Recently, in one of my previous videos I presented you a Retro VU Meter project on round displays ...
Retro Analog VU Meter on Round dispalys (ESP32 and GC9A01)
Recently, in one of my previous videos I presented you a Retro VU Meter project on round displays ...
-
 Ultimate 2-Player Reaction Timer with WS2812B LED Strips & Arduino
Arcade reaction game is a genre of play designed to test a player's physical response time and hand...
Ultimate 2-Player Reaction Timer with WS2812B LED Strips & Arduino
Arcade reaction game is a genre of play designed to test a player's physical response time and hand...
-
 Building a Vintage Tube-Style Internet Radio with Raspberry Pi & Rotary Encoder
Internet radio (also known as web radio or net radio) is a digital audio service transmitted via th...
Building a Vintage Tube-Style Internet Radio with Raspberry Pi & Rotary Encoder
Internet radio (also known as web radio or net radio) is a digital audio service transmitted via th...
-
 DIY Smart Code Lock with CrowPanel 1.28 ESP32 Rotary Display
A code lock is a keyless security device—either mechanical or electronic—that restricts access to d...
DIY Smart Code Lock with CrowPanel 1.28 ESP32 Rotary Display
A code lock is a keyless security device—either mechanical or electronic—that restricts access to d...
-
 SDR Panadapter for Vintage Tube Radios – Step-by-Step Tutorial
A radio panadapter (or panoramic adapter) is a device or software tool used in amateur radio and ot...
SDR Panadapter for Vintage Tube Radios – Step-by-Step Tutorial
A radio panadapter (or panoramic adapter) is a device or software tool used in amateur radio and ot...
-
 Oscilloscope Clock Simulation on a Round ESP32 Display
An oscilloscope clock is a circuit that turns an old analog oscilloscope into a stylish, retro-them...
Oscilloscope Clock Simulation on a Round ESP32 Display
An oscilloscope clock is a circuit that turns an old analog oscilloscope into a stylish, retro-them...
-
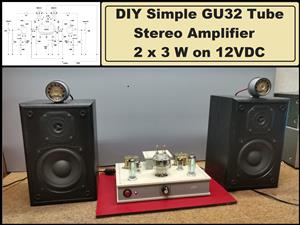 DIY Simple GU32 Tube Stereo Amplifier (2x3W on 12VDC)
Vacuum tube amplifiers are often favored for their smooth harmonic distortion, especially in the low...
DIY Simple GU32 Tube Stereo Amplifier (2x3W on 12VDC)
Vacuum tube amplifiers are often favored for their smooth harmonic distortion, especially in the low...
-
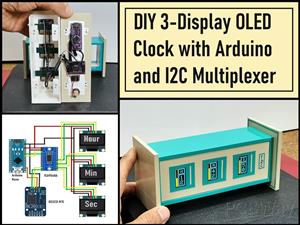 DIY 3-Display OLED Clock with Arduino and I2C Multiplexer
In this video I want to present you another unusual clock to add to my large collection of such DIY...
DIY 3-Display OLED Clock with Arduino and I2C Multiplexer
In this video I want to present you another unusual clock to add to my large collection of such DIY...
-
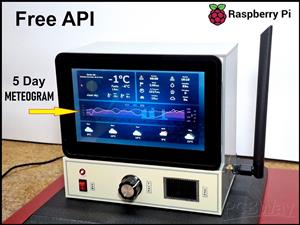 Build a 5-Day forecast Raspberry Pi Weather Dashboard (Step-by-Step)
Recently in one of my previous videos,I introduced you to the 7 inch Elecrow Pi Terminal and how to...
Build a 5-Day forecast Raspberry Pi Weather Dashboard (Step-by-Step)
Recently in one of my previous videos,I introduced you to the 7 inch Elecrow Pi Terminal and how to...
-
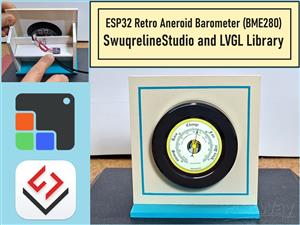 ESP32 Aneroid Barometer using Squareline Studio and LVGL on CrowPanel Round display
A barometer is a scientific instrument used to measure atmospheric pressure. Rising Pressure genera...
ESP32 Aneroid Barometer using Squareline Studio and LVGL on CrowPanel Round display
A barometer is a scientific instrument used to measure atmospheric pressure. Rising Pressure genera...
-
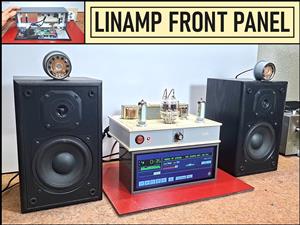 LINAMP Project – Winamp-Style Audio Front Panel on Raspberry Pi 5
Winamp is one of the most iconic and historically significant digital media players ever created. I...
LINAMP Project – Winamp-Style Audio Front Panel on Raspberry Pi 5
Winamp is one of the most iconic and historically significant digital media players ever created. I...
-
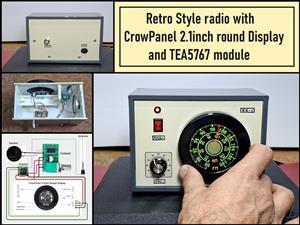 Retro Style radio with CrowPanel 2.1inch round Display (TEA5767)
Some time ago I presented you a clock project with CrowPanel 2.1inch-HMI ESP32 Rotary Display 480*4...
Retro Style radio with CrowPanel 2.1inch round Display (TEA5767)
Some time ago I presented you a clock project with CrowPanel 2.1inch-HMI ESP32 Rotary Display 480*4...
-
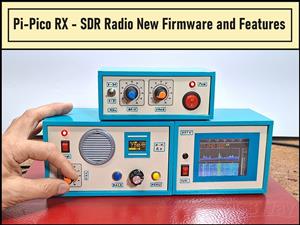 Pi-Pico RX - SDR Radio with New Firmware and Features
A few months ago I presented you a wonderful SDR radio project by DawsonJon 101 Things. In short, i...
Pi-Pico RX - SDR Radio with New Firmware and Features
A few months ago I presented you a wonderful SDR radio project by DawsonJon 101 Things. In short, i...
-
 How to make simple Variable HIGH VOLTAGE Power Supply
High Voltage Power Supply is usually understood as a device that is capable of generating a voltage...
How to make simple Variable HIGH VOLTAGE Power Supply
High Voltage Power Supply is usually understood as a device that is capable of generating a voltage...
-
 DIY 5-Day Rainfall Forecast Device - ESP32 E-Paper Project
In several of my previous projects I have presented ways to make weather stations, but this time I ...
DIY 5-Day Rainfall Forecast Device - ESP32 E-Paper Project
In several of my previous projects I have presented ways to make weather stations, but this time I ...
-
 Build simple Retro Style VFO (Variable frequency oscillator) with Crowoanel 1.28 inch Round Display
Today I received a shipment with a Small round LCD display from Elecrow. The device is packed in tw...
Build simple Retro Style VFO (Variable frequency oscillator) with Crowoanel 1.28 inch Round Display
Today I received a shipment with a Small round LCD display from Elecrow. The device is packed in tw...
-
 Human vs Robot – Rock Paper Scissors with MyCobot 280 M5Stack
Today I received a package containing the few Elephant Robotics products. The shipment is well pack...
Human vs Robot – Rock Paper Scissors with MyCobot 280 M5Stack
Today I received a package containing the few Elephant Robotics products. The shipment is well pack...
-
-
ARPS-2 – Arduino-Compatible Robot Project Shield for Arduino UNO
1297 0 4 -
A Compact Charging Breakout Board For Waveshare ESP32-C3
1814 3 7 -
AI-driven LoRa & LLM-enabled Kiosk & Food Delivery System
1805 2 0 -
-
-
-
ESP32-C3 BLE Keyboard - Battery Powered with USB-C Charging
1980 0 1 -


