


Smart Payment Display Using P10 LED Matrix and ESP12F
Introduction
The Smart Payment Display is an innovative system designed to automate and simplify payment status notifications for businesses. It uses an ESP12F microcontroller, a P10 LED matrix display, and a server-based system to display real-time updates about payment transactions. This project provides an efficient way for businesses, such as retail stores, parking lots, or service counters, to confirm payments visually, ensuring quick and transparent communication with customers.
For Full Project:
https://electronicsworkshops.com/2024/10/26/smart-payment-display-using-p10-led-matrix-and-esp12f/

Key Components
ESP12F Microcontroller:
A low-power Wi-Fi-enabled microcontroller that serves as the brain of the project, managing network communication and controlling the display.
P10 LED Matrix Display:
A 32x16 LED panel used to visually display messages such as payment status and amount. Its bright output makes it suitable for both indoor and outdoor environments.
Server:
A backend system (cloud-based or local) that processes and stores payment transaction details. It provides an API endpoint for the ESP12F to fetch payment statuses.
Power Supply:
A stable power source to drive the ESP12F and the LED matrix display.
Wi-Fi Network:
Provides internet connectivity for the ESP12F to communicate with the server.
PCB Manufacturer
PCBWAY is a highly skilled company specializing in PCB manufacturing. They offer their services at incredibly low prices, such as providing 10 PCBs for only $5. Additionally, new members receive a $5 bonus. The website allows customers to upload their Gerber Files and place orders.
ORDER LINK

PCBWAY is known for producing PCBs of exceptional quality and maintaining high standards, which is why many people trust them for their PCB and PCBA needs.
Below are some of my PCB’S manufactured by PCBWAY and I am fully satisfied by their Quality of service they provide.
Working Principle

System Initialization:
When the system is powered on, the ESP12F connects to the Wi-Fi network using pre-configured credentials.
Once connected, the microcontroller is ready to interact with the server.
Payment Monitoring:
A server handles payment information. This could be from an online payment gateway or a Point of Sale (POS) system integrated with the backend.
When a customer makes a payment, the server updates the transaction status.
Data Retrieval:
The ESP12F sends periodic requests to the server via a RESTful API to fetch the latest payment status. The request might include specific identifiers like transaction IDs to retrieve relevant data.
The server responds with payment details, including the status (e.g., “Paid” or “Pending”) and the transaction amount.
Data Processing:
The ESP12F processes the server response. If the payment status is marked as “Paid,” the amount is extracted. If no payment is detected, the system displays a default message such as “Awaiting Payment.”
Display Update:
The ESP12F sends the processed data to the P10 LED matrix for display.
For example, if the payment is successful, the display shows:
“Payment Received: Rs. 500”
If the payment is pending, it displays:
“Awaiting Payment...”
Real-Time Feedback:
The system continuously polls the server at regular intervals (e.g., every 10 seconds) to ensure the display reflects real-time updates.
Error Handling:
If the server is unreachable or the response is invalid, the display shows an error message like “Connection Error” to inform users of a potential issue.
Applications
Automation: Removes the need for manual confirmation of payments, reducing errors and improving efficiency.
Real-Time Updates: Reflects the latest payment status almost instantly.
User-Friendly Interface: Provides a clear and visible display for customers and staff.
Scalability: Can be easily integrated with various payment systems and expanded for multiple counters.
Low Cost: Utilizes affordable hardware components and a simple software architecture.
PCB Files

3D files

Real Image

Manufacturing Files
Gerber
gerberDownload
Order Directly from PCB WAY
I have already uploaded all these required manufacturing files in PCBWAY website. You can easily go to the below link and place you order, and get your Own Home Automation PCB manufactured from one of the best pcb manufacturer PCBWAY
ORDER NOW…..
For Full Project:
https://electronicsworkshops.com/2024/10/26/smart-payment-display-using-p10-led-matrix-and-esp12f/
Conclusion
This project demonstrates how smart IoT systems can transform payment processing into a transparent and efficient experience.
Smart Payment Display Using P10 LED Matrix and ESP12F
*PCBWay community is a sharing platform. We are not responsible for any design issues and parameter issues (board thickness, surface finish, etc.) you choose.


Raspberry Pi 5 7 Inch Touch Screen IPS 1024x600 HD LCD HDMI-compatible Display for RPI 4B 3B+ OPI 5 AIDA64 PC Secondary Screen(Without Speaker)
BUY NOW


- Comments(0)
- Likes(0)
More by Rabin Poudel
-
 Automatic Water Pump Control System Using ESP-12F
IntroductionWater scarcity and wastage are major challenges in residential, agricultural, and indust...
Automatic Water Pump Control System Using ESP-12F
IntroductionWater scarcity and wastage are major challenges in residential, agricultural, and indust...
-
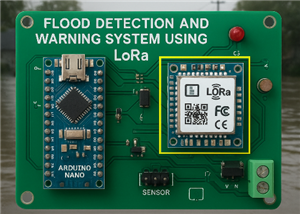 Flood Detection and warning system using LORA and Arduino
IntroductionFloods are one of the most devastating natural disasters, causing immense damage to life...
Flood Detection and warning system using LORA and Arduino
IntroductionFloods are one of the most devastating natural disasters, causing immense damage to life...
-
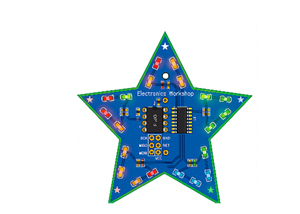 DIY LED Decoration Tiny Star PCB Project
IntroductionThe Tiny Star PCB is a small and fun DIY electronics project that is perfect for hobbyis...
DIY LED Decoration Tiny Star PCB Project
IntroductionThe Tiny Star PCB is a small and fun DIY electronics project that is perfect for hobbyis...
-
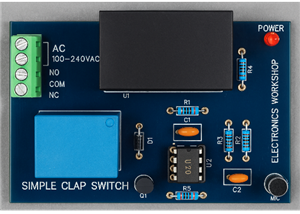 Simple and Cheap Clap Switch Circuit
IntroductionThe Simple and Cheap Clap Switch Circuit is a practical and fun DIY electronics project ...
Simple and Cheap Clap Switch Circuit
IntroductionThe Simple and Cheap Clap Switch Circuit is a practical and fun DIY electronics project ...
-
 Arduino-based Mist Maker and Hand Dryer
IntroductionIn today’s world, automation and hygiene have become essential, especially in public pla...
Arduino-based Mist Maker and Hand Dryer
IntroductionIn today’s world, automation and hygiene have become essential, especially in public pla...
-
 MPL3115A2 Barometric Pressure, Altitude, and Temperature Sensor
IntroductionThe MPL3115A2 is a highly accurate, low-power digital barometric pressure sensor from NX...
MPL3115A2 Barometric Pressure, Altitude, and Temperature Sensor
IntroductionThe MPL3115A2 is a highly accurate, low-power digital barometric pressure sensor from NX...
-
 E-Speaker Using ESP32
IntroductionThe E-Speaker is a smart, portable, and versatile audio system built using the ESP32 mic...
E-Speaker Using ESP32
IntroductionThe E-Speaker is a smart, portable, and versatile audio system built using the ESP32 mic...
-
 Heart Rate Monitor Circuit Using Photoplethysmography (PPG)
IntroductionHeart rate is a vital physiological parameter that reflects the health and fitness of an...
Heart Rate Monitor Circuit Using Photoplethysmography (PPG)
IntroductionHeart rate is a vital physiological parameter that reflects the health and fitness of an...
-
 Automated Greenhouse Control System using ESP32
IntroductionAn automated greenhouse control system leverages technology to optimize plant growth con...
Automated Greenhouse Control System using ESP32
IntroductionAn automated greenhouse control system leverages technology to optimize plant growth con...
-
 STD CH330N USB to Serial Converter 5V
IntroductionThe CH330N is a versatile USB-to-serial converter chip that simplifies interfacing betwe...
STD CH330N USB to Serial Converter 5V
IntroductionThe CH330N is a versatile USB-to-serial converter chip that simplifies interfacing betwe...
-
 KY-032 Obstacle avoidance sensor module
IntroductionIntroduction to Obstacle Avoidance SensorsObstacle avoidance sensors are essential compo...
KY-032 Obstacle avoidance sensor module
IntroductionIntroduction to Obstacle Avoidance SensorsObstacle avoidance sensors are essential compo...
-
 BC547 BASED WATER LEVEL INDICATOR
IntroductionA water level indicator using a BC547 transistor is a simple and effective electronic pr...
BC547 BASED WATER LEVEL INDICATOR
IntroductionA water level indicator using a BC547 transistor is a simple and effective electronic pr...
-
 How to Design Own Arduino Wifi shield PCB
OverviewArduino wifi shield connects the Arduino with a wifi chip through the serial communication p...
How to Design Own Arduino Wifi shield PCB
OverviewArduino wifi shield connects the Arduino with a wifi chip through the serial communication p...
-
 DIY Air Quality Tester
OverviewIn this project “DIY Air Quality Tester” we use Node MCU microcontroller and air quality sen...
DIY Air Quality Tester
OverviewIn this project “DIY Air Quality Tester” we use Node MCU microcontroller and air quality sen...
-
 Digital Clock Using Arduino
OverviewIn this project, “Digital clock using Arduino” we will make a PCB board for digital clock an...
Digital Clock Using Arduino
OverviewIn this project, “Digital clock using Arduino” we will make a PCB board for digital clock an...
-
 Bluetooth Controlled car using Arduino
OverviewA Bluetooth Controlled Car Using Arduino is a fascinating DIY project that involves building...
Bluetooth Controlled car using Arduino
OverviewA Bluetooth Controlled Car Using Arduino is a fascinating DIY project that involves building...
-
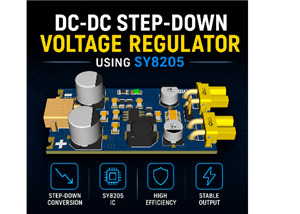 DC-DC Step-Down Voltage Regulator Using SY8205
IntroductionModern electronic systems require stable and efficient power supplies to ensure reliable...
DC-DC Step-Down Voltage Regulator Using SY8205
IntroductionModern electronic systems require stable and efficient power supplies to ensure reliable...
-
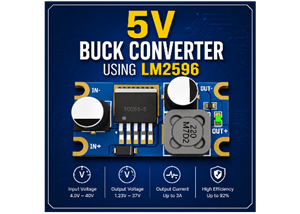 5V Buck Converter Using LM2596
IntroductionIf you need to convert 12V, 24V, or any higher DC voltage into a stable 5V output, the L...
5V Buck Converter Using LM2596
IntroductionIf you need to convert 12V, 24V, or any higher DC voltage into a stable 5V output, the L...
-
Programmable Mist Maker - XIAO / QT PY Extension
785 1 0 -
RadioHAT - Raspberry Pi radio development platform
627 0 1 -
-
-
-
-
ARPS-2 – Arduino-Compatible Robot Project Shield for Arduino UNO
3101 0 6 -
A Compact Charging Breakout Board For Waveshare ESP32-C3
3721 3 8 -
AI-driven LoRa & LLM-enabled Kiosk & Food Delivery System
4039 2 2


