


Bluetooth Controlled car using Arduino
Overview
A Bluetooth Controlled Car Using Arduino is a fascinating DIY project that involves building a remote-controlled car using an Arduino board and enabling wireless control through Bluetooth technology. This project merges electronics, programming, and wireless communication, making it an excellent educational and hobbyist endeavor
Introduction
Welcome to the fascinating world of robotics and DIY electronics! In this exciting project, we’ll take you on a thrilling journey of building your very own “Bluetooth Controlled Robot using Arduino.” Harnessing the power of Arduino and the versatility of Bluetooth technology, you’ll be able to control your robot effortlessly from your smartphone or tablet.
This project is perfect for tech enthusiasts, robotics hobbyists, students, and anyone curious about exploring the realms of automation and remote control. By the end of this guide, you’ll have a fully functional robot that responds to your commands through a seamless Bluetooth connection.
With step-by-step instructions, detailed illustrations, and hands-on demonstrations, you’ll not only learn how to assemble the robot but also gain valuable insights into programming and electronics. From maneuvering the robot in different directions to adding cool features like obstacle detection, the possibilities are endless.
Block Diagram
The block diagram of Bluetooth Controlled Car Using Arduino is :

Explanation of the components:
Bluetooth Device: This component represents a device capable of Bluetooth communication, such as a smartphone or a Bluetooth remote control. The user interacts with this device to send commands to the car wirelessly.
Bluetooth Communication: The Bluetooth module, usually an HC-05, enables wireless communication between the Arduino and the Bluetooth device. It receives the commands from the Bluetooth device and sends them to the Arduino for processing.
Arduino Board: The Arduino serves as the brain of the system. It receives the commands from the Bluetooth module and processes them to control the motors and react to sensor inputs, if any.
Motor Driver: The motor driver (e.g., L298N) is an essential component for controlling the motors. It takes the control signals from the Arduino and converts them into appropriate voltage levels and currents to drive the motors.
Motorized Wheels: These are the wheels of the car that are connected to the DC motors. The motorized wheels are responsible for the car’s movement.
Motor Control Signals: These signals are generated by the Arduino and control the speed and direction of the DC motors. By varying these signals, the Arduino can make the car move forward, backward, turn left, turn right, or stop.
Motor Drivers: The motor drivers receive the control signals from the Arduino and act as power amplifiers to drive the DC motors connected to the wheels. They provide the necessary current and voltage levels to make the motors rotate as per the commands from the Arduino.
Power Supply: This is the power source for the entire system. It supplies power to the Arduino, the motor driver, and the motors. Usually, a battery pack is used to power the car.
Working Principle
The Bluetooth controlled car receives commands from a Bluetooth-enabled device (smartphone, remote control, etc.), and these commands are processed by the Arduino. The Arduino then generates motor control signals, which are sent to the motor driver to drive the DC motors. The motorized wheels move the car accordingly. Additionally, if there are any sensor inputs, the Arduino can use this feedback to adapt the car’s movement, such as avoiding obstacles when detected by the sensors.
For full project go to the link :
https://electronicsworkshops.com/2023/07/25/bluetooth-controlled-car-using-arduino/
Bluetooth Controlled car using Arduino
Project images are for reference only. Actual production is based on the manufacturing files on the project page.
Please review the designer's notes (e.g., PCB thickness) and select the appropriate options.
PCBWay is not responsible
for issues caused by unsuitable parameter selections.
For more important ordering information, please refer to
Read More


Raspberry Pi 5 7 Inch Touch Screen IPS 1024x600 HD LCD HDMI-compatible Display for RPI 4B 3B+ OPI 5 AIDA64 PC Secondary Screen(Without Speaker)
BUY NOW

- Comments(0)
- Likes(2)
More by Rabin Poudel
-
 Automatic Water Pump Control System Using ESP-12F
IntroductionWater scarcity and wastage are major challenges in residential, agricultural, and indust...
Automatic Water Pump Control System Using ESP-12F
IntroductionWater scarcity and wastage are major challenges in residential, agricultural, and indust...
-
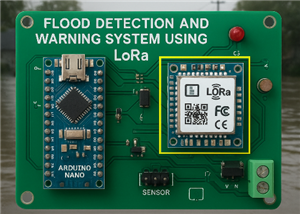 Flood Detection and warning system using LORA and Arduino
IntroductionFloods are one of the most devastating natural disasters, causing immense damage to life...
Flood Detection and warning system using LORA and Arduino
IntroductionFloods are one of the most devastating natural disasters, causing immense damage to life...
-
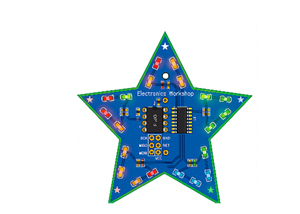 DIY LED Decoration Tiny Star PCB Project
IntroductionThe Tiny Star PCB is a small and fun DIY electronics project that is perfect for hobbyis...
DIY LED Decoration Tiny Star PCB Project
IntroductionThe Tiny Star PCB is a small and fun DIY electronics project that is perfect for hobbyis...
-
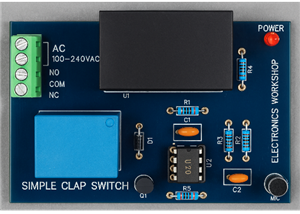 Simple and Cheap Clap Switch Circuit
IntroductionThe Simple and Cheap Clap Switch Circuit is a practical and fun DIY electronics project ...
Simple and Cheap Clap Switch Circuit
IntroductionThe Simple and Cheap Clap Switch Circuit is a practical and fun DIY electronics project ...
-
 Arduino-based Mist Maker and Hand Dryer
IntroductionIn today’s world, automation and hygiene have become essential, especially in public pla...
Arduino-based Mist Maker and Hand Dryer
IntroductionIn today’s world, automation and hygiene have become essential, especially in public pla...
-
 MPL3115A2 Barometric Pressure, Altitude, and Temperature Sensor
IntroductionThe MPL3115A2 is a highly accurate, low-power digital barometric pressure sensor from NX...
MPL3115A2 Barometric Pressure, Altitude, and Temperature Sensor
IntroductionThe MPL3115A2 is a highly accurate, low-power digital barometric pressure sensor from NX...
-
 E-Speaker Using ESP32
IntroductionThe E-Speaker is a smart, portable, and versatile audio system built using the ESP32 mic...
E-Speaker Using ESP32
IntroductionThe E-Speaker is a smart, portable, and versatile audio system built using the ESP32 mic...
-
 Heart Rate Monitor Circuit Using Photoplethysmography (PPG)
IntroductionHeart rate is a vital physiological parameter that reflects the health and fitness of an...
Heart Rate Monitor Circuit Using Photoplethysmography (PPG)
IntroductionHeart rate is a vital physiological parameter that reflects the health and fitness of an...
-
 Automated Greenhouse Control System using ESP32
IntroductionAn automated greenhouse control system leverages technology to optimize plant growth con...
Automated Greenhouse Control System using ESP32
IntroductionAn automated greenhouse control system leverages technology to optimize plant growth con...
-
 STD CH330N USB to Serial Converter 5V
IntroductionThe CH330N is a versatile USB-to-serial converter chip that simplifies interfacing betwe...
STD CH330N USB to Serial Converter 5V
IntroductionThe CH330N is a versatile USB-to-serial converter chip that simplifies interfacing betwe...
-
 KY-032 Obstacle avoidance sensor module
IntroductionIntroduction to Obstacle Avoidance SensorsObstacle avoidance sensors are essential compo...
KY-032 Obstacle avoidance sensor module
IntroductionIntroduction to Obstacle Avoidance SensorsObstacle avoidance sensors are essential compo...
-
 BC547 BASED WATER LEVEL INDICATOR
IntroductionA water level indicator using a BC547 transistor is a simple and effective electronic pr...
BC547 BASED WATER LEVEL INDICATOR
IntroductionA water level indicator using a BC547 transistor is a simple and effective electronic pr...
-
 How to Design Own Arduino Wifi shield PCB
OverviewArduino wifi shield connects the Arduino with a wifi chip through the serial communication p...
How to Design Own Arduino Wifi shield PCB
OverviewArduino wifi shield connects the Arduino with a wifi chip through the serial communication p...
-
 DIY Air Quality Tester
OverviewIn this project “DIY Air Quality Tester” we use Node MCU microcontroller and air quality sen...
DIY Air Quality Tester
OverviewIn this project “DIY Air Quality Tester” we use Node MCU microcontroller and air quality sen...
-
 Digital Clock Using Arduino
OverviewIn this project, “Digital clock using Arduino” we will make a PCB board for digital clock an...
Digital Clock Using Arduino
OverviewIn this project, “Digital clock using Arduino” we will make a PCB board for digital clock an...
-
 Bluetooth Controlled car using Arduino
OverviewA Bluetooth Controlled Car Using Arduino is a fascinating DIY project that involves building...
Bluetooth Controlled car using Arduino
OverviewA Bluetooth Controlled Car Using Arduino is a fascinating DIY project that involves building...
-
 Design a Magnetic Sensor Using S411A
IntroductionMagnetic sensors are widely used in modern electronic systems for detecting the presence...
Design a Magnetic Sensor Using S411A
IntroductionMagnetic sensors are widely used in modern electronic systems for detecting the presence...
-
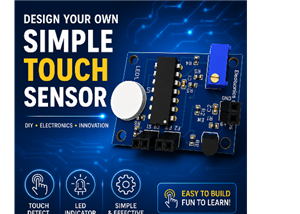 Design Simple Touch Sensor Using LM324
IntroductionTouch sensors have become an essential part of modern electronic devices, replacing trad...
Design Simple Touch Sensor Using LM324
IntroductionTouch sensors have become an essential part of modern electronic devices, replacing trad...
-
Programmable Mist Maker - XIAO / QT PY Extension
1061 2 1 -
RadioHAT - Raspberry Pi radio development platform
867 0 2 -
-
-
-
-
ARPS-2 – Arduino-Compatible Robot Project Shield for Arduino UNO
3323 0 6 -
A Compact Charging Breakout Board For Waveshare ESP32-C3
3933 3 8 -
AI-driven LoRa & LLM-enabled Kiosk & Food Delivery System
4320 2 2


