


|
fusion360 |
|
|
|
WLEDAircoookie
|
|

|
Smart Soldering Iron TS101-BC2 |
|
|
MHP50-A5 Mini Hot Plate PreheaterMiniware
|
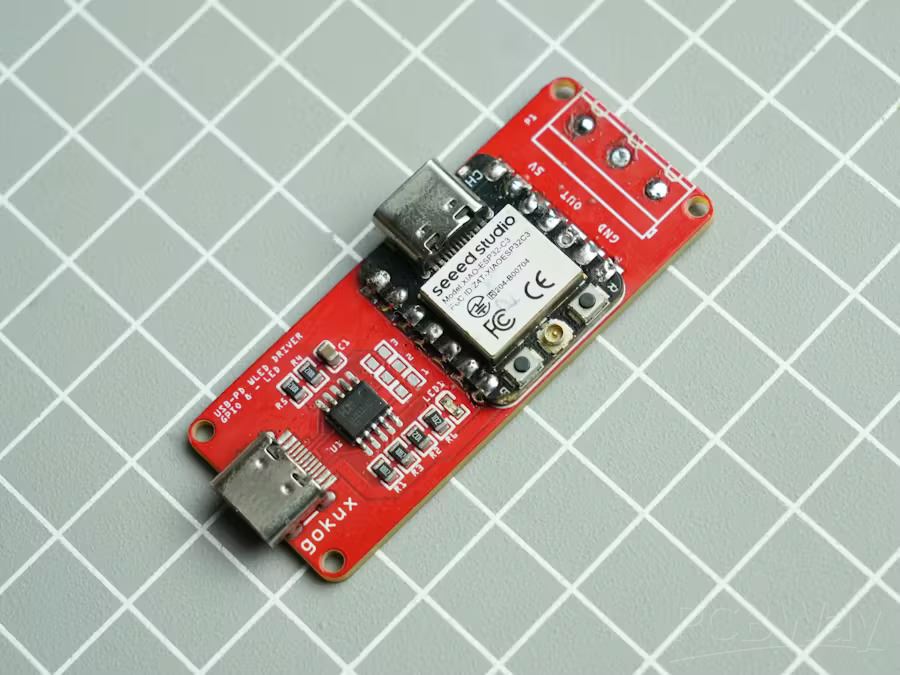
Plug and Play USB-C PD WLED Driver – Community Innovation Share
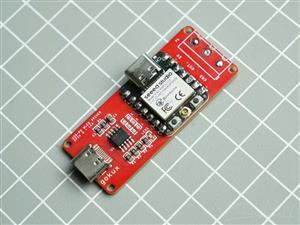
This project focuses on building a compact WLED driver PCB with USB-C Power Delivery (PD) support. Instead of using a bulky external power supply, the board can be powered directly from a USB-C PD charger, making it ideal for clean, portable, and plug-and-play LED installations.
The XIAO ESP32-C3 is used to run the WLED firmware, providing wireless control, effects, and configuration through Wi-Fi. With a minimal component count and PD capability, this design is perfect for compact lighting projects and learning about USB-C PD integration.
How It Works
The PCB combines the CH224K USB-C PD controller with the XIAO ESP32-C3. The CH224K negotiates the required voltage from a USB-C PD charger, while the ESP32-C3 runs WLED and controls addressable LEDs such as WS2812B. Once powered, the ESP32-C3 boots WLED, creates a Wi-Fi interface, and allows full LED control using the WLED app or web interface.
Key Features
- USB-C Power Delivery input
- No external power supply required
- ESP32-C3 running WLED firmware
- Compact and minimal PCB design
- Plug-and-play LED controller
- Ideal for small and portable LED setups
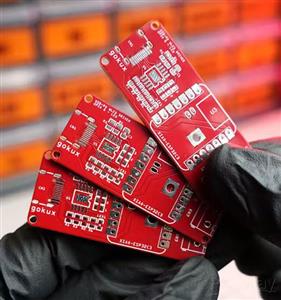
PCB Design
The PCB was designed using EasyEDA, following the schematic shown earlier. After completing the layout, the Gerber files were generated for fabrication. The design keeps trace routing clean and compact to ensure stable PD negotiation and reliable ESP32 operation.
WLED Installation
Connect the XIAO ESP32-C3 to your computer and open the WLED web installer from GitHub.
- Select ESP32-C3 as the board
- Choose the correct COM port
- Install WLED
- Enter your Wi-Fi SSID and password
- A detailed WLED installation guide is available here: https://www.instructables.com/WLED-ON-XIAO-ESP32/
WLED Setup
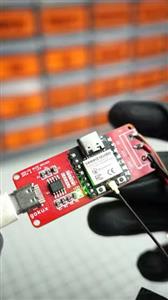
- Plug a USB-C PD charger (5 V / 3 A) into the board
- The CH224K negotiates the required voltage
- The green LED indicates power
- WLED boots and broadcasts its Wi-Fi hotspot
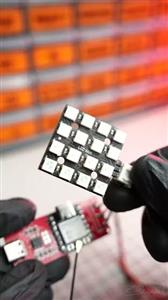
- Set GPIO 8 as the data output pin for WS2812B LEDs in WLED settings
Connecting the LED
LEDs can be connected either via wire terminals or by soldering directly to the PCB. The 5V, DATA (OUT), and GND pins are clearly labeled. Ensure correct polarity and secure connections before powering up.
Conclusion
This Plug and Play USB-C PD WLED Driver is a compact and elegant solution for powering addressable LEDs using nothing more than a USB-C charger. It removes the need for bulky adapters while providing full WLED functionality, making it ideal for portable lighting, desk setups, and compact decorative projects.
Credit & Acknowledgement
This project is shared for educational and community reference purposes.
Complete Design & Engineering Credit: Gokul
Community Shared By: Bholu
This article is shared to respectfully acknowledge and highlight the original creator’s work within the PCBWay community, encouraging learning, experimentation, and collaboration.
Plug and Play USB-C PD WLED Driver – Community Innovation Share
*PCBWay community is a sharing platform. We are not responsible for any design issues and parameter issues (board thickness, surface finish, etc.) you choose.


Raspberry Pi 5 7 Inch Touch Screen IPS 1024x600 HD LCD HDMI-compatible Display for RPI 4B 3B+ OPI 5 AIDA64 PC Secondary Screen(Without Speaker)
BUY NOW


- Comments(0)
- Likes(0)
More by Nirmal Maa
-
 Tiny Power meter V2 – Community Innovation Share
Tiny Power Meter V2 is a compact and practical power measurement device designed to work with XT60 c...
Tiny Power meter V2 – Community Innovation Share
Tiny Power Meter V2 is a compact and practical power measurement device designed to work with XT60 c...
-
 VC-02 Module Based Home Automation
In this guide, I’ll take you through the process of building a project using a custom-designed PCB, ...
VC-02 Module Based Home Automation
In this guide, I’ll take you through the process of building a project using a custom-designed PCB, ...
-
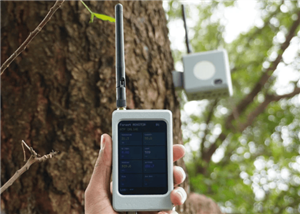 Forest Guard – Gateway (Receiver) – Community Innovation Share
This project presents the Forest Guard Gateway, a receiver unit designed to collect data from multip...
Forest Guard – Gateway (Receiver) – Community Innovation Share
This project presents the Forest Guard Gateway, a receiver unit designed to collect data from multip...
-
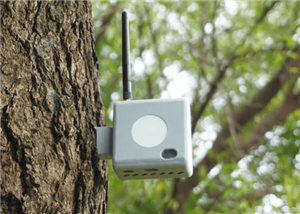 Forest Guard – Node (Transmitter) – Community Innovation Share
This project introduces the Forest Guard Monitoring Node, a compact and autonomous transmitter desig...
Forest Guard – Node (Transmitter) – Community Innovation Share
This project introduces the Forest Guard Monitoring Node, a compact and autonomous transmitter desig...
-
 Plug and Play USB-C PD WLED Driver – Community Innovation Share
This project focuses on building a compact WLED driver PCB with USB-C Power Delivery (PD) support. I...
Plug and Play USB-C PD WLED Driver – Community Innovation Share
This project focuses on building a compact WLED driver PCB with USB-C Power Delivery (PD) support. I...
-
 ESP32-Based Drone PCB – Community Innovation Share
Shared by: Bholu, A B-Tech Student in University of California, Los Angeles (UCLA)Original Design &a...
ESP32-Based Drone PCB – Community Innovation Share
Shared by: Bholu, A B-Tech Student in University of California, Los Angeles (UCLA)Original Design &a...
-
 RGB tube light PCB - Panalize under 100*100mm
I'm excited to unveil my latest PCB design—a game-changer for standard tube lights! This custom-desi...
RGB tube light PCB - Panalize under 100*100mm
I'm excited to unveil my latest PCB design—a game-changer for standard tube lights! This custom-desi...
-
 DIY low cost Smart watch
Hello, PCBWay Community! I am thrilled to share my Homemade Smartwatch project with all of you. This...
DIY low cost Smart watch
Hello, PCBWay Community! I am thrilled to share my Homemade Smartwatch project with all of you. This...
-
 4x2 Channel Remote Controller – Receiver Part
The receiver circuit for this 4x2 channel remote controller enables reliable wireless communication ...
4x2 Channel Remote Controller – Receiver Part
The receiver circuit for this 4x2 channel remote controller enables reliable wireless communication ...
-
 DIY Low Cost Transmitter
Introducing a versatile 4x2 channel remote controller, ideal for managing RC toys, robotics, Arduino...
DIY Low Cost Transmitter
Introducing a versatile 4x2 channel remote controller, ideal for managing RC toys, robotics, Arduino...
-
 DIY Smartwatch Using ESP8266
This project demonstrates how to build a basic smartwatch using the ESP8266 microcontroller. The wat...
DIY Smartwatch Using ESP8266
This project demonstrates how to build a basic smartwatch using the ESP8266 microcontroller. The wat...
-
 Offline Voice-Controlled Home Automation System
In this project, we’ll explore an offline voice-controlled home automation system that allows you to...
Offline Voice-Controlled Home Automation System
In this project, we’ll explore an offline voice-controlled home automation system that allows you to...
-
 Advance Arduino Nano Board
Presenting the Arduino Nano – a modern and smart version of the Arduino Nano with an array of powerf...
Advance Arduino Nano Board
Presenting the Arduino Nano – a modern and smart version of the Arduino Nano with an array of powerf...
-
 VC-02 Module Based Home Automation second version
I’m excited to share my latest home automation system, which offers complete offline voice control u...
VC-02 Module Based Home Automation second version
I’m excited to share my latest home automation system, which offers complete offline voice control u...
-
 I build Split clock using Arduino
My split clock project is a fascinating endeavor whereI combined mine passion for electronics and pr...
I build Split clock using Arduino
My split clock project is a fascinating endeavor whereI combined mine passion for electronics and pr...
-
 Notify Me using ESP Now Communication
I built this coolest device using node MCU. This is a Notification Sending device with the help of N...
Notify Me using ESP Now Communication
I built this coolest device using node MCU. This is a Notification Sending device with the help of N...
-
 Alexa Voice Command Based Ultra Smart Home Automation using Nano ESP32
Hey Guys, Today's In this project I'm going to build Ultra Smart Home Automation Using Arduino Nano ...
Alexa Voice Command Based Ultra Smart Home Automation using Nano ESP32
Hey Guys, Today's In this project I'm going to build Ultra Smart Home Automation Using Arduino Nano ...
-
ESP32-C3 BLE Keyboard - Battery Powered with USB-C Charging
73 0 0 -
Tiny Power meter V2 – Community Innovation Share
44 0 0 -
-
mammoth-3D SLM Voron Toolhead – Manual Drill & Tap Edition
340 0 0 -
-
-
-
Tester for Touch Screen Digitizer without using microcontroller
529 2 2 -
Audio reactive glow LED wristband/bracelet with NFC / RFID-Tags
494 0 1


