Air Quality station (e-paper and Home Assistant)
Overview
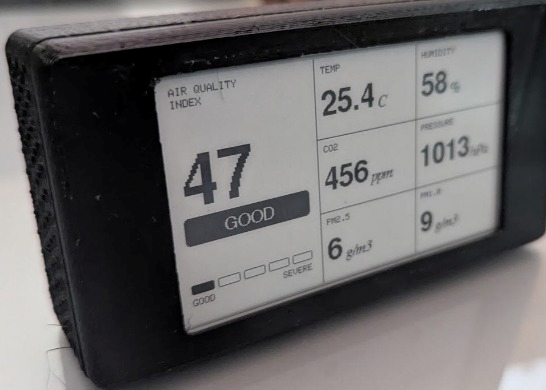
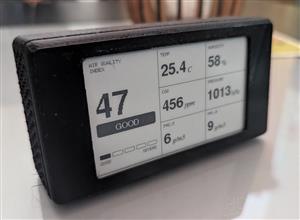
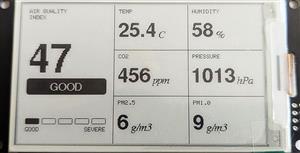
This DIY air quality monitoring system integrates precision sensors with a connected processing platform and a low-power e paper display.
it monitors :
- temperature
- pressure
- humidity
- CO2 level
- air quality (particules/dust)
System Architecture
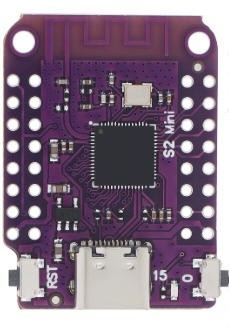
Processing Unit (Core): The ESP32 S2 Lolin mini manages the sensors.
It offers native Wi-Fi connectivity, ideal for sending data to dashboards (Home Assistant, InfluxDB, or MQTT). Its architecture enables efficient management of peripherals via SPI and I2C interfaces.
But for this project I prefered a simple e-paper display without any connection to Wifi !
Display:
3.7-inch E-Paper (240x416): Electronic ink technology allowing for static data display with zero power consumption between refreshes, ensuring a clear and readable interface.
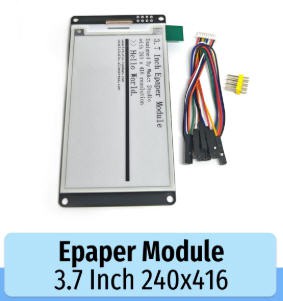
Air Quality Sensors:
SCD40: Photoacoustic sensor for CO2 concentration, temperature, and relative humidity.
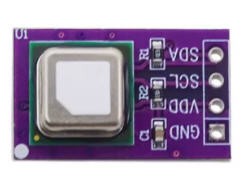
Plantower PMS5003: Laser scattering sensor for measuring fine particulate matter (PM1.0, PM2.5, PM10).
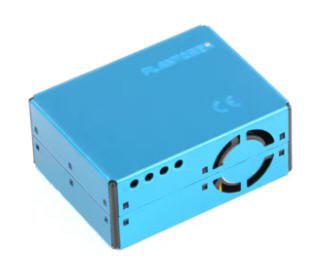
Complementary Environmental Sensors:
BME280: Precision measurement of barometric pressure, humidity, and temperature.
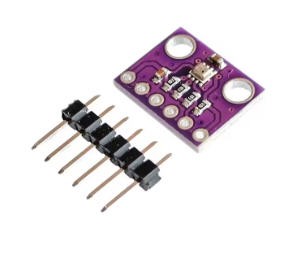
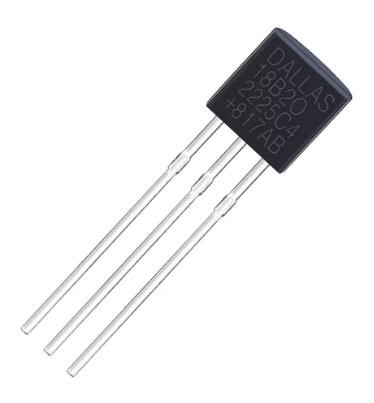
DS18B20: Digital temperature sensor using a 1-Wire interface, ideal for remote measurement or isolated thermal reference.
Schematics
it couldn't be simpler: only one resistor + sensors + ESP32 !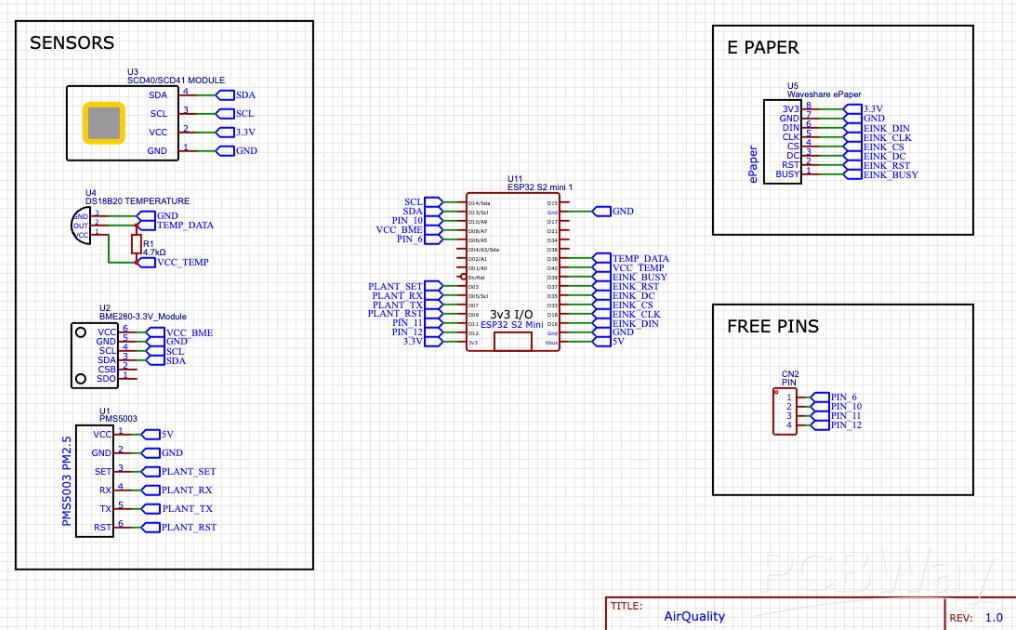
Implementation Considerations
Power Management: The PMS5003 consumes significant current during startup (approx. 100mA). The USB power source and the ESP32’s onboard voltage regulator can handle this peak load.
Bus Sharing:
The BME280 and SCD40 typically use the I2C bus. (they don't have the same addresses so do not conflict)
The E-Paper uses an SPI interface, allowing it to function simultaneously with the I2C sensors without pin communication interference.
Airflow: The PMS5003 requires constant airflow to function accurately. When designing the enclosure, the inlet and outlet are unobstructed and air circulates freely around the temperature and CO2 sensors.
PCB
The PCB can be bought at PCBWay directly from this project page.
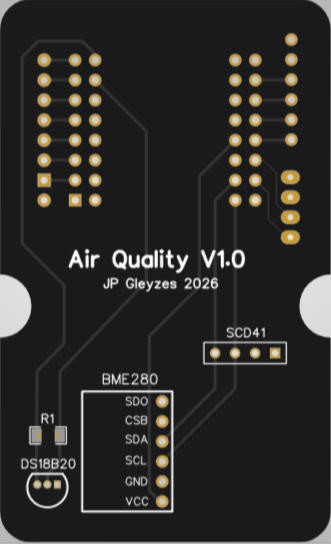
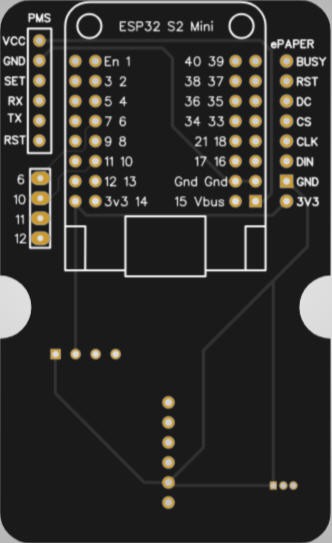
The PCB was kindly sponsored by PCBWay and is as usual of excellent quality.

and if you are new to PCBWay please use this affiliated link : https://pcbway.com/g/o35z4O
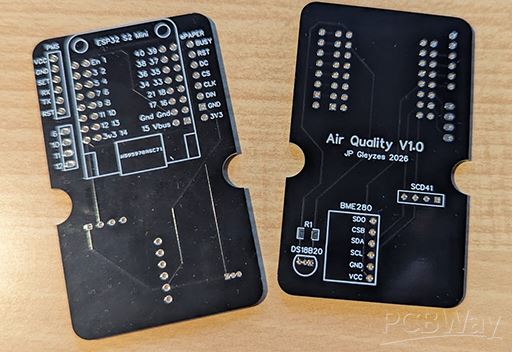
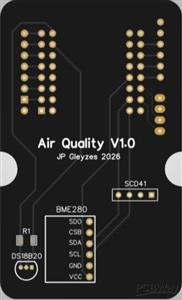
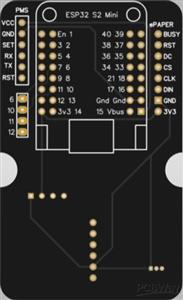
As you can see corners are "rounded" in order to fit into the 3d printed enclosure. The PCB is delivered CNC milled with this exact shape. No screws are needed for the PCB to fit into the enclosure.
Soldering the PCB is easy. Sensors go on both sides:
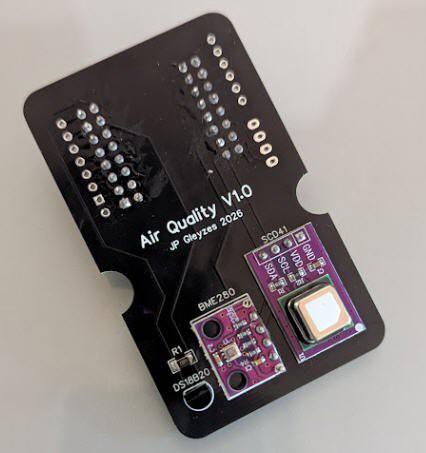
Result is a clean and compact setup.
Enclosure
You can print the enclosure, the PCB will fit inside
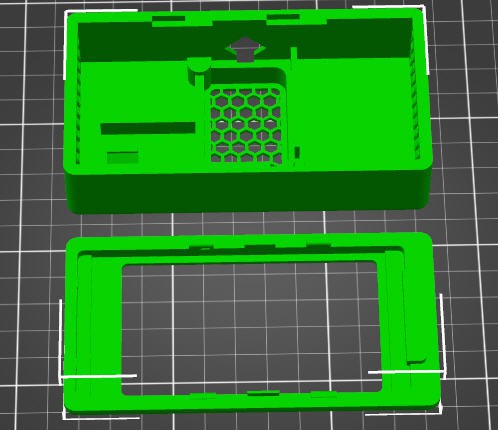
All the sensors fit into the box, venting holes are preset to help air to circulate into the Plantower laser particules sensor and the CO2 sensor.
Here is the box once closed
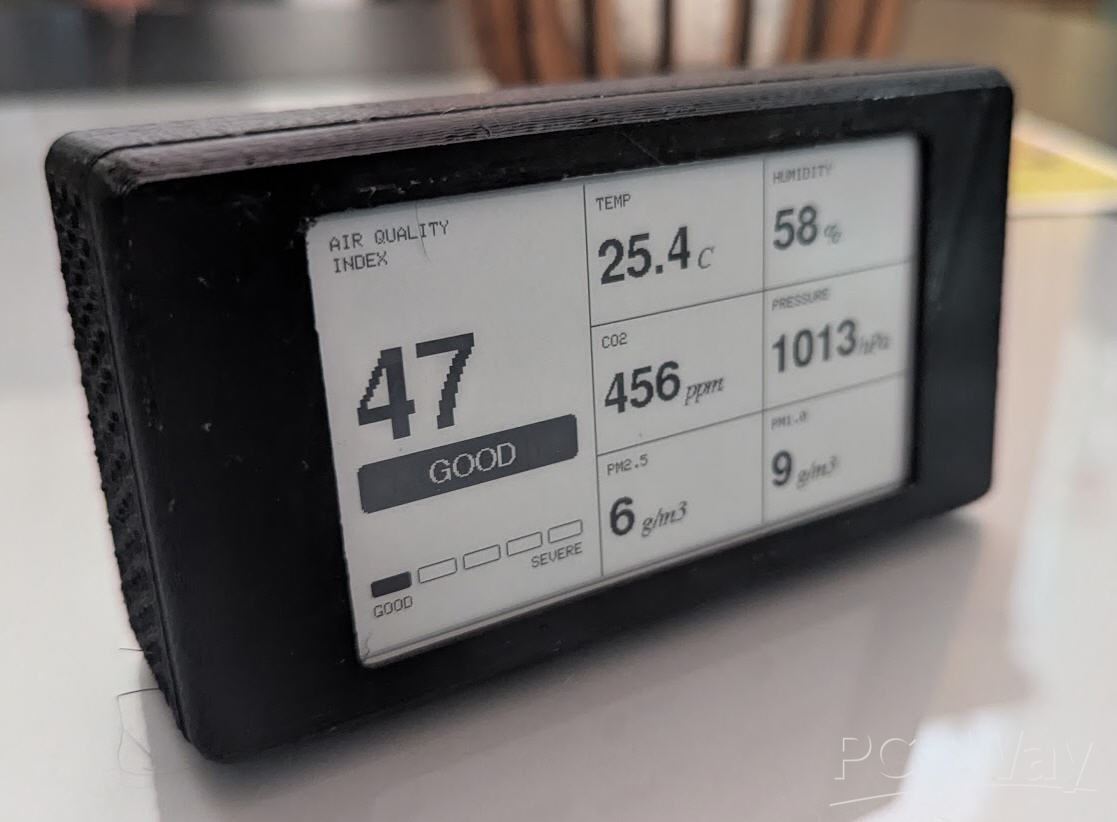
Software :
Source code for the ESP32-S2 is quite simple and is available on my github pages
main characteristics are :
* ============================================================================
* ESP32-S2 Environmental & Air Quality Monitoring Station
* ============================================================================
*
* Description:
* A comprehensive environmental monitoring station utilizing an E-Paper display.
* The firmware implements a non-blocking asynchronous state machine to manage
* sensor warm-up sequences, take stable multi-sample averages, and refresh the UI.
*
* Integrated Hardware:
* - SCD4x : CO2, Temperature & Humidity (I2C)
* - BME280 : Pressure, Temperature & Humidity (I2C)
* - Plantower PMS5003 : PM1.0 & PM2.5 Particulate Matter (HardwareSerial)
* - DS18B20 : High-precision Temperature (OneWire)
* - E-Paper : Screen display (SPI via GxEPD2)
*
* Architecture & Power Strategy:
* This device is designed for MAINS POWER (USB / Wall Adapter).
*
* Workflow:
* Boot -> Init Sensors -> Async Warm-up & Multi-sampling -> Render E-Ink -> Deep Sleep
*
* ============================================================================
You will probably have to calibrate the D18D20 temperature sensor and more importantly the BME280 to take into account the difference of pressure between your location and sea level.
Two constants are provided :
//*****************************************************************************
// CONST
//*****************************************************************************
#define DS18B20_OFFSET -0.4 //calibration offset for temperature sensor
#define PRESSURE_OFFSET 24 //compensation of pressure to sea level
configuration
by default the firmware acts as a standalone device not connected to internet.
If you want to connect to Thingspeak and/or to your Home Assistant then you will have to activate the options you want
go to "wifi" section and uncomment these lines and enter your credentials
//*****************************************************************************
// WIFI (To be completed)
//*****************************************************************************
#define USE_THINGSPEAK //Uncomment if you wish to use it.
#define USE_MQTT //Uncomment if you wish to use it.
// --- Wifi config ---
const char* ssid = "Your SSID";
const char* password = "your password";
ThingSpeak
If you want to connect to thingspeak, you will have to create an account then a new channel, get its number and its API Write key. Then select the fields to display as shown below.
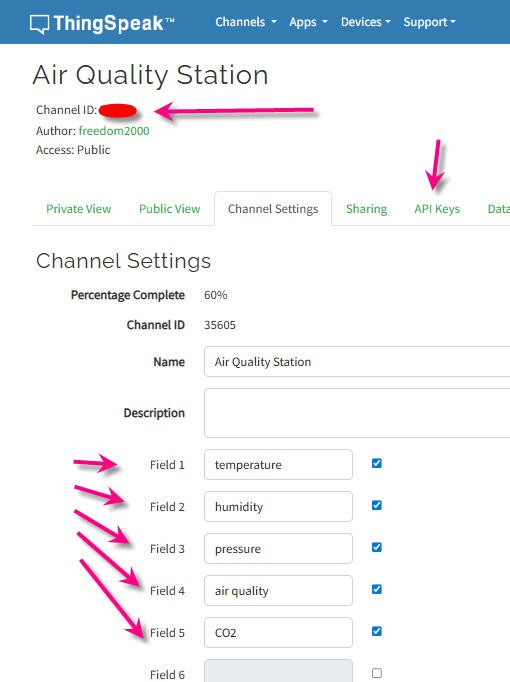
enter these values here :
#ifdef USE_THINGSPEAK
#include "ThingSpeak.h"
unsigned long myChannelNumber = 11111;
const char* myWriteAPIKey = "yourAPIkey";
And you are good to go, compile and have a look at your channel !
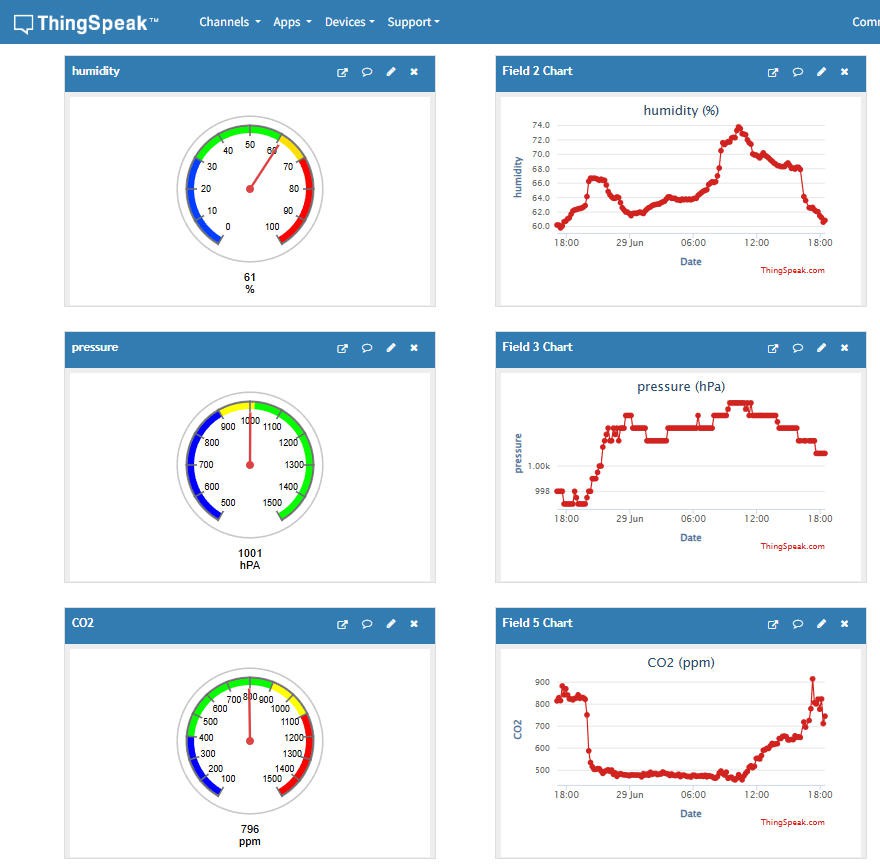
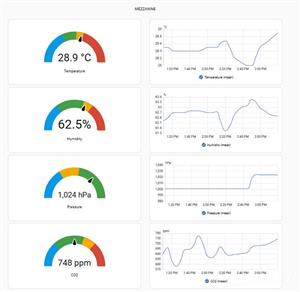
Note that I have added "gauge widgets" to have an overview of each sensor as well as the graphs for long term trends.
Do what you want it's easy.
Home Assistant
Be aware that home assistant integration is easy into the firmware but quite complex in home assistant itself !
for the firmware side
- integrate the pubSubClient Library
- uncomment the USE_MQTT line (as seen above)
- enter your MQTT credentials
#ifdef USE_MQTT
#include //http://pubsubclient.knolleary.net/
// MQTT Credentials -- These will override the global settings
const char* mqtt_server = "192.168.1.174"; //http://192.168.1.174:8123
#define mqtt_port 1883 // Default MQTT port is 1883
#define MQTT_USER "mqtt_broker"
#define MQTT_PASSWORD "your MQTT password"
#define MQTT_RECEIVER_CH "garden/cmd" //reserved for future use (control and command)
WiFiClient wifiClient;
PubSubClient mqttClient(wifiClient);
#endif
And you can compile again, your code will try to connect to the MQTT server into Home assistant and "register" the sensors as MQTT integration
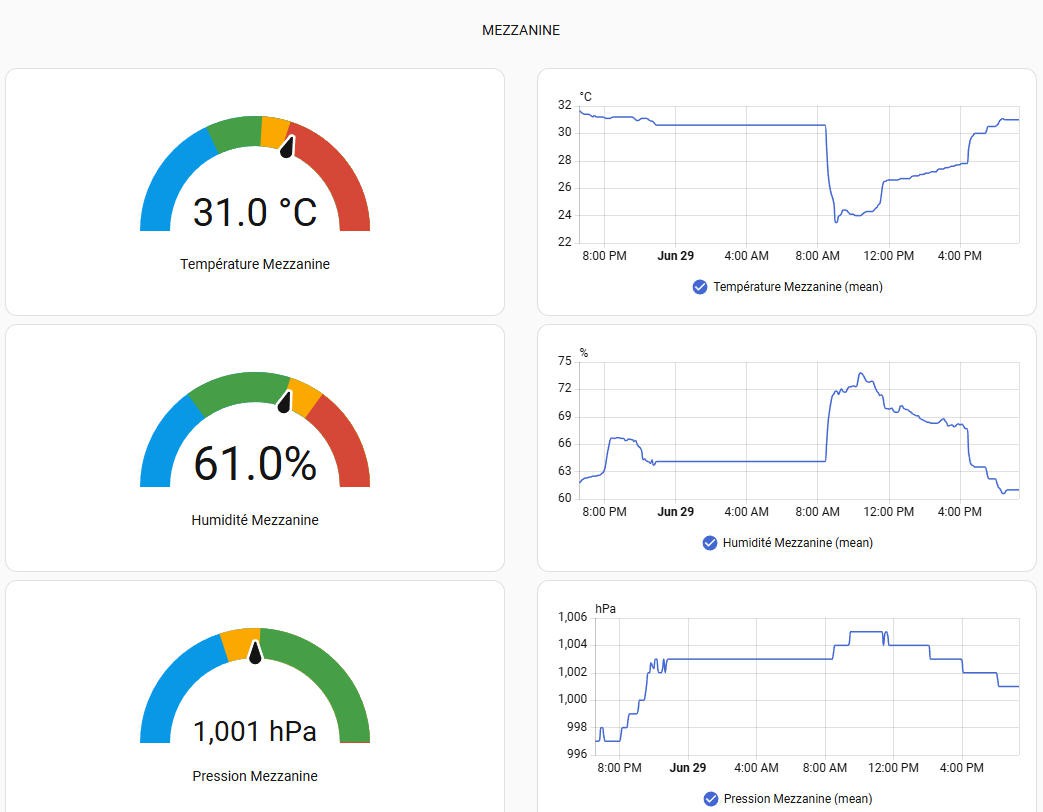
But to get these graphs you will need to configure Home Assistant !
As it is quite long it will be explained into this log.
Note that if you are familiar with Home Assistant and your MQTT broker is running, you can skip this log as your sensors will be automatically discovered when connected to your Wifi !
Air Quality station (e-paper and Home Assistant)
Project images are for reference only. Actual production is based on the manufacturing files on the project page.
Please review the designer's notes (e.g., PCB thickness) and select the appropriate options.
PCBWay is not responsible
for issues caused by unsuitable parameter selections.
For more important ordering information, please refer to
Read More









Raspberry Pi 5 7 Inch Touch Screen IPS 1024x600 HD LCD HDMI-compatible Display for RPI 4B 3B+ OPI 5 AIDA64 PC Secondary Screen(Without Speaker)
BUY NOW


- Comments(0)
- Likes(2)
More by Jean-Pierre Gleyzes
-
 RC radial engine spark plug heater
BackgroundMy friend bought this wonderful engine from UMS_technologiesIt's a 7 cylinders star engine...
RC radial engine spark plug heater
BackgroundMy friend bought this wonderful engine from UMS_technologiesIt's a 7 cylinders star engine...
-
 Convert a DC motor into a stepper one
This project is a way to convert a DC motor into a stepper motor.Of course "conversion" will not be ...
Convert a DC motor into a stepper one
This project is a way to convert a DC motor into a stepper motor.Of course "conversion" will not be ...
-
 OpenxSensor variometer and telemetry for RC planes
Ever wanted a very cheap variometer on your RC glider ?battery voltage monitoring ?extra RC channels...
OpenxSensor variometer and telemetry for RC planes
Ever wanted a very cheap variometer on your RC glider ?battery voltage monitoring ?extra RC channels...
-
 A water based tide clock (3d model)
Full details are available on this project page : https://www.pcbway.com/project/shareproject/A_wate...
A water based tide clock (3d model)
Full details are available on this project page : https://www.pcbway.com/project/shareproject/A_wate...
-
 A water based tide clock
SpecificationsTide clocks are generally built from a quartz clock mechanism with an approximate peri...
A water based tide clock
SpecificationsTide clocks are generally built from a quartz clock mechanism with an approximate peri...
-
 ESP32-S3 3 x ADXL357 acquisition board
SpecificationMy son wanted a high accuracy accelerometer board to characterize a vibrating pot.Here ...
ESP32-S3 3 x ADXL357 acquisition board
SpecificationMy son wanted a high accuracy accelerometer board to characterize a vibrating pot.Here ...
-
 ESP32 Linky Teleinfo (TIC) to MQTT – Real-Time Home Assistant Integration
The teleinfo component allows you to retrieve data from a French electrical counter using Teleinform...
ESP32 Linky Teleinfo (TIC) to MQTT – Real-Time Home Assistant Integration
The teleinfo component allows you to retrieve data from a French electrical counter using Teleinform...
-
 Air Quality station (e-paper and Home Assistant)
OverviewThis DIY air quality monitoring system integrates precision sensors with a connected process...
Air Quality station (e-paper and Home Assistant)
OverviewThis DIY air quality monitoring system integrates precision sensors with a connected process...
-
 2S LiPo High-Current Power Box with two Sbus inputs
Project Overview: 2S LiPo High-Current Power Box with two Sbus inputsThis circuit is a high-performa...
2S LiPo High-Current Power Box with two Sbus inputs
Project Overview: 2S LiPo High-Current Power Box with two Sbus inputsThis circuit is a high-performa...
-
 Power box for big RC plane
Project Overview: 2S LiPo High-Current Power BoxThis circuit is a high-performance power distributio...
Power box for big RC plane
Project Overview: 2S LiPo High-Current Power BoxThis circuit is a high-performance power distributio...
-
 A bluetooth Joystick for TX16s radio (or others)
This project is kind of follow on of this one : Buddy Box for Radiomaster TX16sI decided to write an...
A bluetooth Joystick for TX16s radio (or others)
This project is kind of follow on of this one : Buddy Box for Radiomaster TX16sI decided to write an...
-
 Radiomaster TX16s buddy box (master/trainer and more)
I wanted a wireless buddy box for my Radiomaster TX16sThis buddy box would allow to wireless link tw...
Radiomaster TX16s buddy box (master/trainer and more)
I wanted a wireless buddy box for my Radiomaster TX16sThis buddy box would allow to wireless link tw...
-
 "perpetual" motion ball
Browsing internet and youtube, I found this mind blowing "perpetual motion" device designed by Willi...
"perpetual" motion ball
Browsing internet and youtube, I found this mind blowing "perpetual motion" device designed by Willi...
-
 Freon: Freeze On Neck - 3d printed box top
Freon project is fully describbed on this project page
Freon: Freeze On Neck - 3d printed box top
Freon project is fully describbed on this project page
-
 Freon: Freeze On Neck - 3d printed box bottom
Freon project is fully described on this project page
Freon: Freeze On Neck - 3d printed box bottom
Freon project is fully described on this project page
-
 Freon: Freeze On Neck personal cooler
DescriptionAre you tired of sweltering through hot days, feeling uncomfortable and unproductive?Imag...
Freon: Freeze On Neck personal cooler
DescriptionAre you tired of sweltering through hot days, feeling uncomfortable and unproductive?Imag...
-
 ESP32_StarMotor_glow plugs heater _ V2
BackgroundMy friend bought this wonderful engine from UMS_technologiesIt's a 7 cylinders star engine...
ESP32_StarMotor_glow plugs heater _ V2
BackgroundMy friend bought this wonderful engine from UMS_technologiesIt's a 7 cylinders star engine...
-
 RC plane CoG finder
IntroductionAs an intro here is a video of the system runningand another using the LCD displayA litt...
RC plane CoG finder
IntroductionAs an intro here is a video of the system runningand another using the LCD displayA litt...
-
Émetteur Récepteur Optique Expérimental (communication UART ATtiny + fibre optique)
138 0 1 -
SmallOLED - Live PC Stats, Animated Clocks & Audio Visualizer
986 0 3 -
"Talking Multimeter": Arduino-Based Speech Add-on for Multimeters with SCPI Protocol
563 0 1 -
Programmable Mist Maker - XIAO / QT PY Extension
3033 2 3 -
RadioHAT - Raspberry Pi radio development platform
2582 0 4 -
-
-