
|
|
ESP32-C3 Super MiniExpressif
|
x 1 | |
|
|
HC-SR04 |
x 1 |
|
|
Telegram |
|

|
arduino IDEArduino
|
|
|
|
DeepSeek |
|

|
Smart Soldering Iron TS101-BC2 |
|

|
Soldering Iron Wire |
Level detector with ultrasonic sensor and telegram
Crea una alarma que te notifique cuando se le terminara la comida a tu perro en Telegram
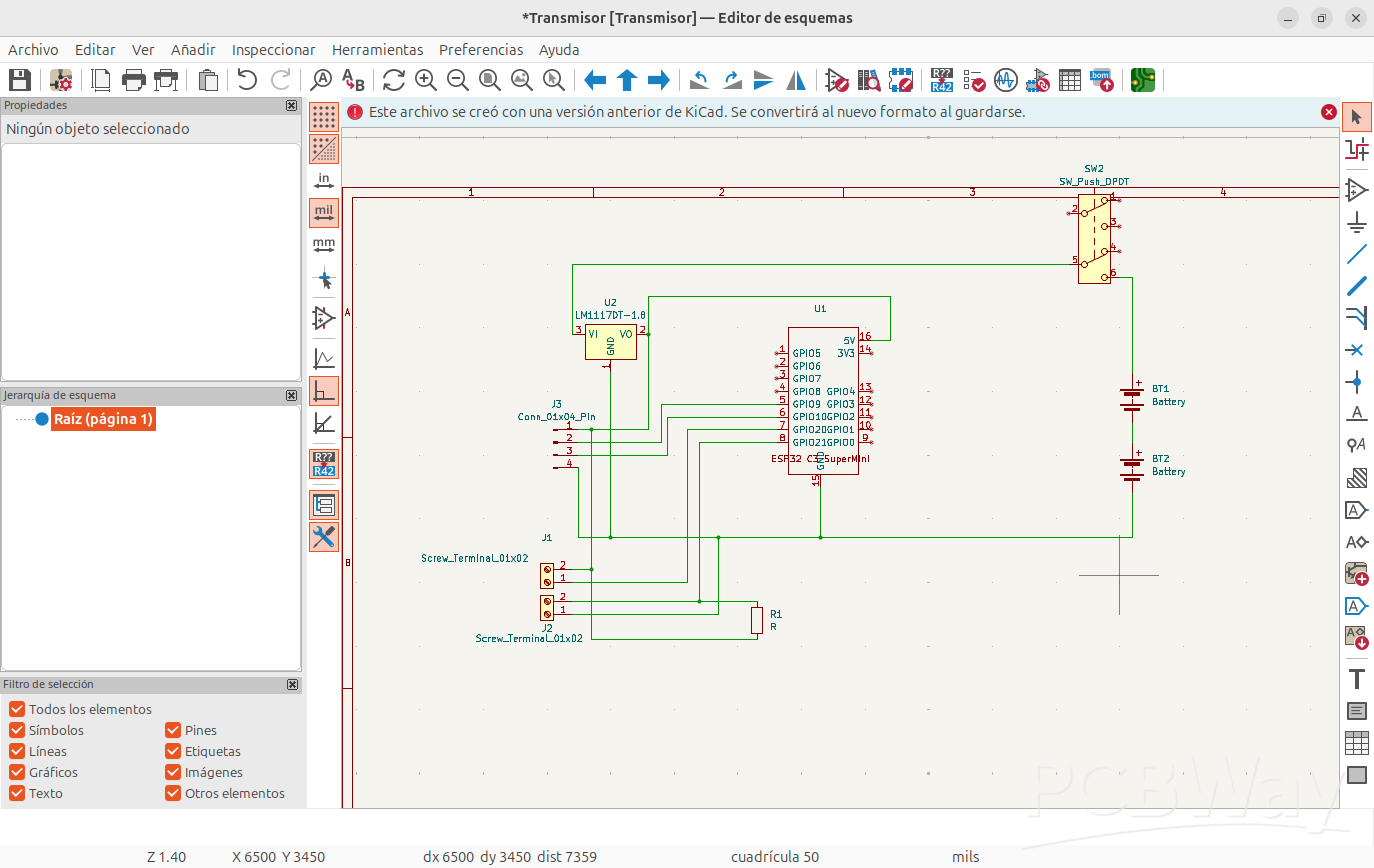
Con esta tarjeta puedes conectar un sensor ultrasonico HCSR04 al microcontrolador ESP 32 C3 (yo utilizo la versión Supermini) y así poder enviar una notificación a un grupo de Telegram cuando se detecte un objeto.
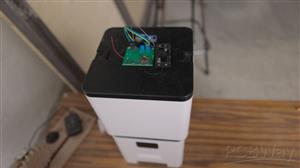
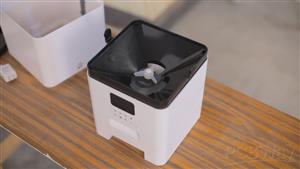
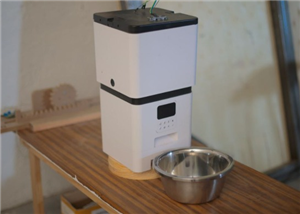
Te propongo utilizar este sistema para adaptarlo a un dispensador de alimento para perros pues así sera muy fácil saber aunque estés lejos cuando se terminara la comida y poder tomar tus precauciones y no se quede con hambre tu amigo peludo.
Aquí encuentras todo lo que necesitas para llevar a cabo la practica en protoboard o en circuito hecho en PCB.
Para la creación del código me apoye de la AI (DeepSeek), y en el tutorial te muestro como hacer la vinculación paso a paso con Telegram para que tengas las notificaciones sin falla.
Materiales:
1 Esp 32 C3
1 Sensor HCSR04
Jumpers
Materiales circuito PCB:
1 Esp32 C3
2 Borneras
1 Resistencias THT
4 Pines hembra
1 Porta pilas AA
1 Regulador voltaje AMS1117
1 Switch cola raton SMD
Promp DeepSeek:
Necesito que crees un programa en ide arduino para un circuito que tiene un sensor ultrasonico HCSR04 y que es controlado por el ESP32 C3,en donde el trigger esta conectado al gpio9, y el eco esta en el GPIO10, este programa enviara una señal para encender un led que esta integrado en el GPIO8 si y solo si se detecto un objeto desde los 16 cm hasta los 40cm,después se apagara el led y posteriormente a la detección del objeto esperara 4 segundos y deja de censar y posteriormente continua con el ciclo para volver a detectar, pero si el objeto detectado esta a 15 cm o menos no encenderá el led y estará detectando el sensor sin pausas solo en este caso, si se sale de rango mayor a 40 cm deberá estar apagado el led y por ultimo se repite el ciclo después de cada detección y eso MISMO QUE HACE EL LED también lo hará AHORA CON EL ENVÍO DE UNA NOTIFICACIÓN QUE LLEGARA A UN GRUPO DE TELEGRAM UTILIZANDO LAS LIBRERÍAS <WiFi.h> <HTTPClient.h> <WiFiClientSecure.h>, IMPORTANTE!!!! ESTA NOTIFICACIÓN tiene que hacer exactamente lo mismo que realiza el led y posteriormente continua con el resto del programa y solo se tiene que enviar la notificación de los 16 a 40cm, el SSID es , el password , el botToken (TU BOT TOKEN AQUI )y el ChatId (TU CHATID)
Link para obtener el ID del chat:
https://api.telegram.org/botTU_TOKEN_AQUI/getUpdates
Para mas detalles visita el siguiente tutorial completo:
#include <WiFi.h>
#include <HTTPClient.h>
#include <WiFiClientSecure.h>

// Definición de pines (existente)
const int trigPin = 9;
const int echoPin = 10;
const int ledPin = 8;

// Configuración WiFi y Telegram (modificado)
const char* ssid = "Ck Red";
const char* password = "balambalam";
const String botToken = "8123816132:AAGRNVa6B8WS6Ar22RSKnTtoYalX8bPMTSs";
const String chatId = "-1002345900797";

// Variables para el sensor (existente)
long duration;
int distance;
bool pausaActiva = false;
unsigned long tiempoPausa = 0;

// Cliente seguro para Telegram (existente)
WiFiClientSecure client;

void setup() {
  // Configuración inicial existente
  pinMode(trigPin, OUTPUT);
  pinMode(echoPin, INPUT);
  pinMode(ledPin, OUTPUT);
  digitalWrite(ledPin, LOW);
  Serial.begin(115200);

  // Configuración WiFi (existente)
  WiFi.begin(ssid, password);
  while (WiFi.status() != WL_CONNECTED) {
    delay(500);
    Serial.print(".");
  }
  Serial.println("WiFi conectado");

  client.setInsecure();
}

// Función para enviar notificaciones (existente)
void sendTelegramMessage(String message) {
  if (WiFi.status() == WL_CONNECTED) {
    HTTPClient https;
    String url = "https://api.telegram.org/bot" + botToken + "/sendMessage";

    https.begin(client, url);
    https.addHeader("Content-Type", "application/x-www-form-urlencoded");

    String postData = "chat_id=" + chatId + "&text=" + message;
    int httpCode = https.POST(postData);

    if (httpCode > 0) {
      Serial.print("Mensaje enviado: ");
      Serial.println(message);
    }

    https.end();
  }
}

void loop() {
  // Lógica existente sin modificaciones
  if(pausaActiva && (millis() - tiempoPausa) < 4000) {
    return;
  }
  pausaActiva = false;

  digitalWrite(trigPin, LOW);
  delayMicroseconds(2);
  digitalWrite(trigPin, HIGH);
  delayMicroseconds(10);
  digitalWrite(trigPin, LOW);

  duration = pulseIn(echoPin, HIGH);
  distance = duration * 0.034 / 2;

  Serial.print("Distancia: ");
  Serial.print(distance);
  Serial.println(" cm");

  // Lógica modificada (solo notificación en 16-40 cm)
  if (distance > 0 && distance <= 18) {
    digitalWrite(ledPin, HIGH);
    delay(50);
  }
  else if (distance > 18 && distance <= 40) {
    digitalWrite(ledPin, HIGH);
    sendTelegramMessage("🔔 Guau Guau ya NO tengo comida!!! " + String(distance) + "cm"); // Notificación única
    tiempoPausa = millis();
    pausaActiva = true;
    delay(1000);
    digitalWrite(ledPin, LOW);
    delay(10000);
  }
  else {
    digitalWrite(ledPin, HIGH);
    delay(50);
  }
}
Level detector with ultrasonic sensor and telegram
Project images are for reference only. Actual production is based on the manufacturing files on the project page.
Please review the designer's notes (e.g., PCB thickness) and select the appropriate options.
PCBWay is not responsible
for issues caused by unsuitable parameter selections.
For more important ordering information, please refer to
Read More









Raspberry Pi 5 7 Inch Touch Screen IPS 1024x600 HD LCD HDMI-compatible Display for RPI 4B 3B+ OPI 5 AIDA64 PC Secondary Screen(Without Speaker)
BUY NOW


- Comments(0)
- Likes(1)
More by Catia Diaz
-
 Led strip 5630 SMD with screw terminal
This project is designed for 2 things. The first is so that people can practice soldering SMD compon...
Led strip 5630 SMD with screw terminal
This project is designed for 2 things. The first is so that people can practice soldering SMD compon...
-
 Motion detector and notification on Telegram
Crea una alarma que te notifique en Telegram cuando alguien es detectado sin permiso en tu propiedad...
Motion detector and notification on Telegram
Crea una alarma que te notifique en Telegram cuando alguien es detectado sin permiso en tu propiedad...
-
 Level detector with ultrasonic sensor and telegram
Crea una alarma que te notifique cuando se le terminara la comida a tu perro en TelegramCon esta tar...
Level detector with ultrasonic sensor and telegram
Crea una alarma que te notifique cuando se le terminara la comida a tu perro en TelegramCon esta tar...
-
 Bluetooth control for LED lights or motors with ESP32 C3
Con esta tarjeta puedes controlar vía Bluetooth motores o luces led con ayuda del ESP32 C3 (yo utili...
Bluetooth control for LED lights or motors with ESP32 C3
Con esta tarjeta puedes controlar vía Bluetooth motores o luces led con ayuda del ESP32 C3 (yo utili...
-
 Control de luces led con servidor web y ESP32 C3
Te comparto todos los archivos que necesitas para realizar esta practica, encontraras 2 códigos de p...
Control de luces led con servidor web y ESP32 C3
Te comparto todos los archivos que necesitas para realizar esta practica, encontraras 2 códigos de p...
-
 CIRCUIT WITH ESP32 C3 TO CONTROL ELECTRIC LOCK
I will apply this circuit to build a safe to store the phone and thus not use it for a long time and...
CIRCUIT WITH ESP32 C3 TO CONTROL ELECTRIC LOCK
I will apply this circuit to build a safe to store the phone and thus not use it for a long time and...
-
 Tarjeta para controlar un motor para Ruleta con ESP32 C3 Super Mini
Lista de materiales completa:2 Capacitores SMD 1206 100nF5 Borneras 3.5 mm de 2 terminales1 Buzzer S...
Tarjeta para controlar un motor para Ruleta con ESP32 C3 Super Mini
Lista de materiales completa:2 Capacitores SMD 1206 100nF5 Borneras 3.5 mm de 2 terminales1 Buzzer S...
-
 Tira led circular 2835 de 12V
Lista de materiales para la PCB:6 Leds 2835 (naranja)2 Resistencias 1206 100 Ohms1 Bornera 2 tornill...
Tira led circular 2835 de 12V
Lista de materiales para la PCB:6 Leds 2835 (naranja)2 Resistencias 1206 100 Ohms1 Bornera 2 tornill...
-
 Números aleatorios para dinámicas divertidas de participación
Lista de materiales completa:5 Borneras de 2 terminales cada una2 Cap 100n (SMD 1206)2 Resistencias ...
Números aleatorios para dinámicas divertidas de participación
Lista de materiales completa:5 Borneras de 2 terminales cada una2 Cap 100n (SMD 1206)2 Resistencias ...
-
 Numeros aleatorios matriz-
Se trata de una PCB con esp32 que permite controlar una matriz de leds ws2812bLista de materiales co...
Numeros aleatorios matriz-
Se trata de una PCB con esp32 que permite controlar una matriz de leds ws2812bLista de materiales co...
-
 Esp 32 wireless communication card
Here you can see more details of the programming process
Esp 32 wireless communication card
Here you can see more details of the programming process
-
 Card for LED light sequence and memory game
Here you can find the complete tutorial to see how this game works.Characteristics of the assembly o...
Card for LED light sequence and memory game
Here you can find the complete tutorial to see how this game works.Characteristics of the assembly o...
-
 Timer with 5-position selector and ESP 32 C3 super mini
Full tutorial in the following video
Timer with 5-position selector and ESP 32 C3 super mini
Full tutorial in the following video
-
 USB Charger
Its a charger with a 7 segments display to stop with the time the charge, its controlled with a esp3...
USB Charger
Its a charger with a 7 segments display to stop with the time the charge, its controlled with a esp3...
-
 PCB for charging AA rechargeable batteries
With this card you can charge from 1 to 5 AA batteries independently. With the charger you can selec...
PCB for charging AA rechargeable batteries
With this card you can charge from 1 to 5 AA batteries independently. With the charger you can selec...
-
 H bridge module to control crank
With the help of this H-bridge circuit we can control the rotation of a motor, and better yet, if we...
H bridge module to control crank
With the help of this H-bridge circuit we can control the rotation of a motor, and better yet, if we...
-
 Design to control 7 segment display with switches
One way to connect a 7-segment display is using cables and switches.In order to form a number you wi...
Design to control 7 segment display with switches
One way to connect a 7-segment display is using cables and switches.In order to form a number you wi...
-
 Wireless control for motor dc
It is a pair of PCBs that allow transmitting a signal that is sent through 4 buttons and received by...
Wireless control for motor dc
It is a pair of PCBs that allow transmitting a signal that is sent through 4 buttons and received by...
-
Émetteur Récepteur Optique Expérimental (communication UART ATtiny + fibre optique)
150 0 1 -
SmallOLED - Live PC Stats, Animated Clocks & Audio Visualizer
1000 0 3 -
"Talking Multimeter": Arduino-Based Speech Add-on for Multimeters with SCPI Protocol
574 0 1 -
Programmable Mist Maker - XIAO / QT PY Extension
3044 2 3 -
RadioHAT - Raspberry Pi radio development platform
2590 0 4 -
-
-