


|
|
ESP32-C3ESPRESSIF INC
|
x 1 | |
|
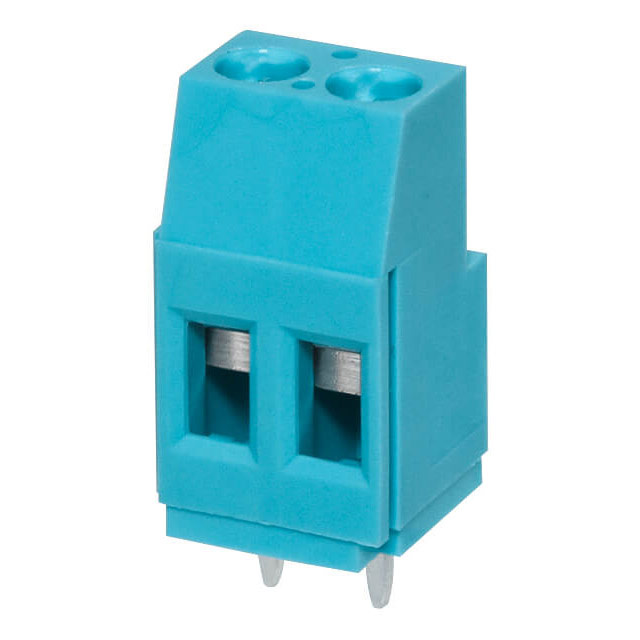
TB009-508-02BESame Sky (Formerly CUI Devices)
|
x 5 | |
|
|
L9110 |
x 1 |

|
Soldering Iron Wire |
|

|
Soldering iron (generic) |
|

|
arduino IDEArduino
|
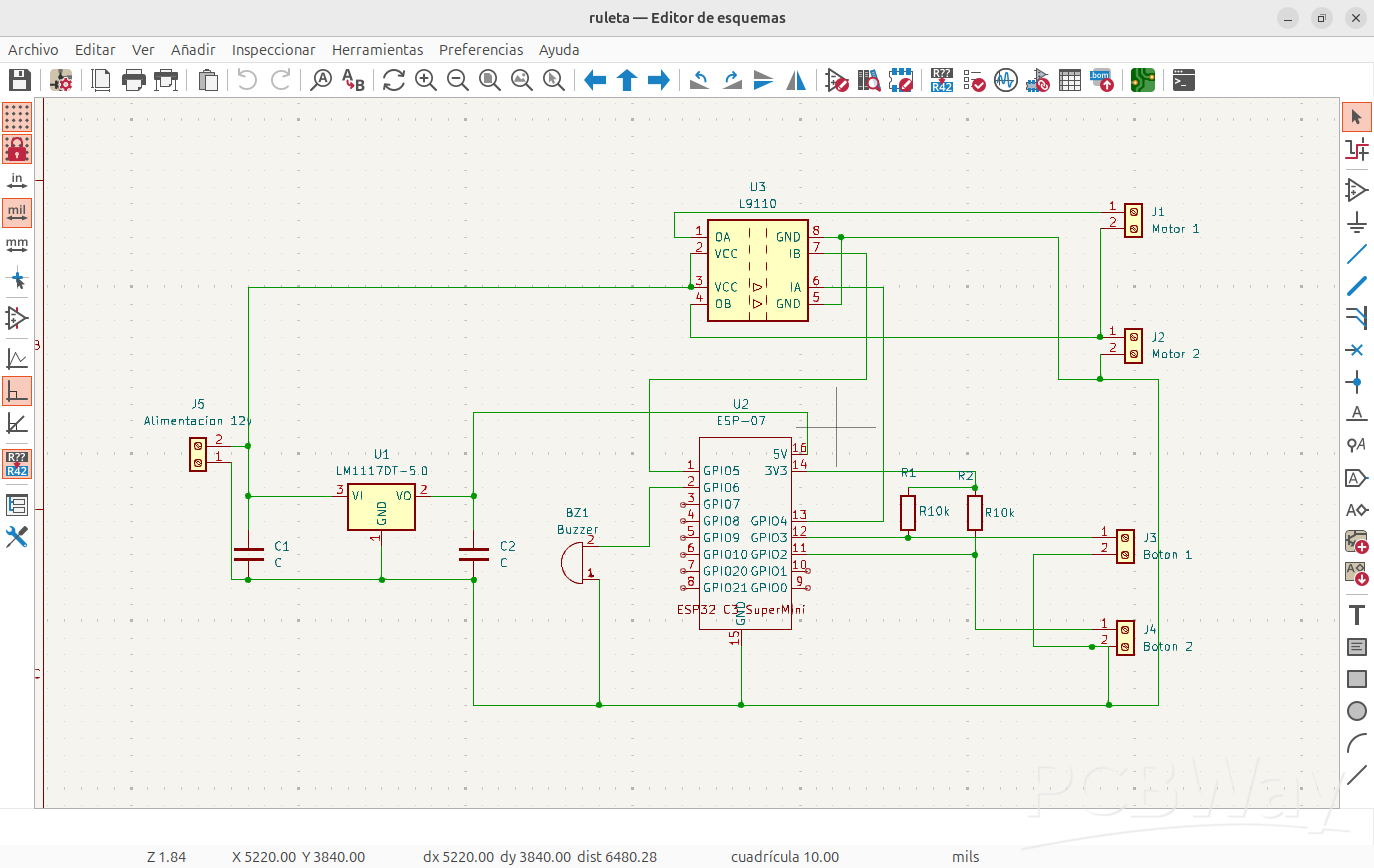
Bluetooth control for LED lights or motors with ESP32 C3
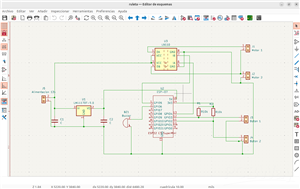
Con esta tarjeta puedes controlar vía Bluetooth motores o luces led con ayuda del ESP32 C3 (yo utilizo la versión super mini), para ello necesitamos crear una App, yo utilice la plataforma de RemoteXY.
Aparte realice un mecanismo de piñón cremallera para poder controlarlo con motor, el diseño lo corte con CNC, y te comparto también el archivo.
Aquí encuentras todo lo que necesitas para llevar a cabo la practica en protoboard de encender Leds vía Bluetooth y el controlar motor con un circuito hecho en PCB.
Para la creación de la App me apoye de la AI, para completar el promp necesitas sacar el código de RemoteXY (Te enseño como hacerlo en el vídeo)
Nota!
Archivo para el corte en CNC lo comparto en la descripción del vídeo
Materiales para practica en Protoboard:
- 1 Esp 32 C3
- 2 leds 5mm
- 2 Resistencias 1K
- 1 Smartphone
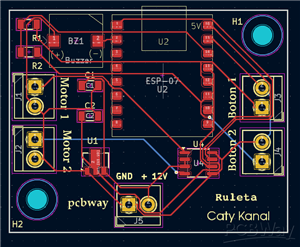
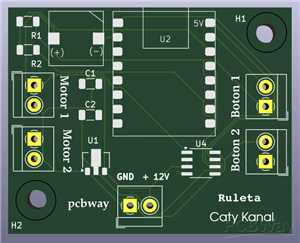
Materiales circuito PCB para motores:
- 1 Esp32 C3
- 5 Borneras
- 1 Buzzer 9650
- 2 Resistencias 1206
- 2 Capacitores 1206
- 1 Puente H L9110
- 1 Regulador voltaje AMS1117
Promp DeepSeek:
Tengo un circuito en el que el ESP32 C3 tiene conectado en el gpio 4 un led y en el gpio 5 otro led, estos leds serán activados por una aplicación de remotexy cuando se presiona el botón 1 enciende el led de gpio4 y cuando se suelta deja de encender, el otro botón controla al led gpio5 completa el programa si tengo ya esta parte del código /*
(Aquí se pega la parte del código que generas en RemoteXY)
Para mas detalles visita el siguiente tutorial completo:
/*
   -- New project --

   This source code of graphical user interface
   has been generated automatically by RemoteXY editor.
   To compile this code using RemoteXY library 3.1.13 or later version
   download by link http://remotexy.com/en/library/
   To connect using RemoteXY mobile app by link http://remotexy.com/en/download/
     - for ANDROID 4.15.01 or later version;
     - for iOS 1.12.1 or later version;

   This source code is free software; you can redistribute it and/or
   modify it under the terms of the GNU Lesser General Public
   License as published by the Free Software Foundation; either
   version 2.1 of the License, or (at your option) any later version.
*/

//////////////////////////////////////////////
//        RemoteXY include library          //
//////////////////////////////////////////////

// you can enable debug logging to Serial at 115200
//#define REMOTEXY__DEBUGLOG

// RemoteXY select connection mode and include library
#define REMOTEXY_MODE__ESP32CORE_BLE

#include <BLEDevice.h>

// RemoteXY connection settings
#define REMOTEXY_BLUETOOTH_NAME "RemoteXY"

#include <RemoteXY.h>

// RemoteXY GUI configuration
#pragma pack(push, 1)
uint8_t RemoteXY_CONF[] =   // 38 bytes
  { 255,2,0,0,0,31,0,19,0,0,0,0,31,1,106,200,1,1,2,0,
  1,17,82,24,24,0,2,31,0,1,69,81,24,24,0,2,31,0 };

// this structure defines all the variables and events of your control interface
struct {

    // input variables
  uint8_t boton1; // =1 if button pressed, else =0
  uint8_t boton2; // =1 if button pressed, else =0

    // other variable
  uint8_t connect_flag;  // =1 if wire connected, else =0

} RemoteXY;
#pragma pack(pop)

/////////////////////////////////////////////
//           END RemoteXY include          //
/////////////////////////////////////////////

#define PIN_LED1 4  // GPIO para el primer LED
#define PIN_LED2 5  // GPIO para el segundo LED

void setup()
{
  RemoteXY_Init();

  // Configurar pines de los LEDs como salida
  pinMode(PIN_LED1, OUTPUT);
  pinMode(PIN_LED2, OUTPUT);

  // Apagar los LEDs inicialmente
  digitalWrite(PIN_LED1, LOW);
  digitalWrite(PIN_LED2, LOW);
}

void loop()
{
  RemoteXY_Handler();

  // Control del LED en GPIO4 con boton1
  if (RemoteXY.boton1 == 1) {
    digitalWrite(PIN_LED1, HIGH);  // Encender LED1 cuando boton1 está presionado
  } else {
    digitalWrite(PIN_LED1, LOW);   // Apagar LED1 cuando boton1 no está presionado
  }

  // Control del LED en GPIO5 con boton2
  if (RemoteXY.boton2 == 1) {
    digitalWrite(PIN_LED2, HIGH);  // Encender LED2 cuando boton2 está presionado
  } else {
    digitalWrite(PIN_LED2, LOW);   // Apagar LED2 cuando boton2 no está presionado
  }

  // Pequeña pausa para evitar parpadeos
  RemoteXY_delay(10);
}
Bluetooth control for LED lights or motors with ESP32 C3
*PCBWay community is a sharing platform. We are not responsible for any design issues and parameter issues (board thickness, surface finish, etc.) you choose.


- Comments(0)
- Likes(1)
More by Catia Diaz
-
 Led strip 5630 SMD with screw terminal
This project is designed for 2 things. The first is so that people can practice soldering SMD compon...
Led strip 5630 SMD with screw terminal
This project is designed for 2 things. The first is so that people can practice soldering SMD compon...
-
 Motion detector and notification on Telegram
Crea una alarma que te notifique en Telegram cuando alguien es detectado sin permiso en tu propiedad...
Motion detector and notification on Telegram
Crea una alarma que te notifique en Telegram cuando alguien es detectado sin permiso en tu propiedad...
-
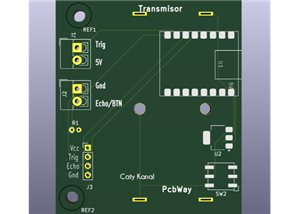
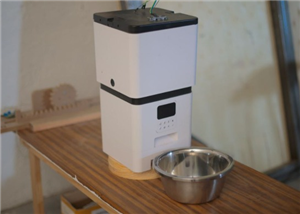 Level detector with ultrasonic sensor and telegram
Crea una alarma que te notifique cuando se le terminara la comida a tu perro en TelegramCon esta tar...
Level detector with ultrasonic sensor and telegram
Crea una alarma que te notifique cuando se le terminara la comida a tu perro en TelegramCon esta tar...
-
 Bluetooth control for LED lights or motors with ESP32 C3
Con esta tarjeta puedes controlar vía Bluetooth motores o luces led con ayuda del ESP32 C3 (yo utili...
Bluetooth control for LED lights or motors with ESP32 C3
Con esta tarjeta puedes controlar vía Bluetooth motores o luces led con ayuda del ESP32 C3 (yo utili...
-
 Control de luces led con servidor web y ESP32 C3
Te comparto todos los archivos que necesitas para realizar esta practica, encontraras 2 códigos de p...
Control de luces led con servidor web y ESP32 C3
Te comparto todos los archivos que necesitas para realizar esta practica, encontraras 2 códigos de p...
-
 CIRCUIT WITH ESP32 C3 TO CONTROL ELECTRIC LOCK
I will apply this circuit to build a safe to store the phone and thus not use it for a long time and...
CIRCUIT WITH ESP32 C3 TO CONTROL ELECTRIC LOCK
I will apply this circuit to build a safe to store the phone and thus not use it for a long time and...
-
 Tarjeta para controlar un motor para Ruleta con ESP32 C3 Super Mini
Lista de materiales completa:2 Capacitores SMD 1206 100nF5 Borneras 3.5 mm de 2 terminales1 Buzzer S...
Tarjeta para controlar un motor para Ruleta con ESP32 C3 Super Mini
Lista de materiales completa:2 Capacitores SMD 1206 100nF5 Borneras 3.5 mm de 2 terminales1 Buzzer S...
-
 Tira led circular 2835 de 12V
Lista de materiales para la PCB:6 Leds 2835 (naranja)2 Resistencias 1206 100 Ohms1 Bornera 2 tornill...
Tira led circular 2835 de 12V
Lista de materiales para la PCB:6 Leds 2835 (naranja)2 Resistencias 1206 100 Ohms1 Bornera 2 tornill...
-
 Números aleatorios para dinámicas divertidas de participación
Lista de materiales completa:5 Borneras de 2 terminales cada una2 Cap 100n (SMD 1206)2 Resistencias ...
Números aleatorios para dinámicas divertidas de participación
Lista de materiales completa:5 Borneras de 2 terminales cada una2 Cap 100n (SMD 1206)2 Resistencias ...
-
 Numeros aleatorios matriz-
Se trata de una PCB con esp32 que permite controlar una matriz de leds ws2812bLista de materiales co...
Numeros aleatorios matriz-
Se trata de una PCB con esp32 que permite controlar una matriz de leds ws2812bLista de materiales co...
-
 Esp 32 wireless communication card
Here you can see more details of the programming process
Esp 32 wireless communication card
Here you can see more details of the programming process
-
 Card for LED light sequence and memory game
Here you can find the complete tutorial to see how this game works.Characteristics of the assembly o...
Card for LED light sequence and memory game
Here you can find the complete tutorial to see how this game works.Characteristics of the assembly o...
-
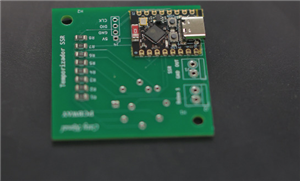
 Timer with 5-position selector and ESP 32 C3 super mini
Full tutorial in the following video
Timer with 5-position selector and ESP 32 C3 super mini
Full tutorial in the following video
-
 USB Charger
Its a charger with a 7 segments display to stop with the time the charge, its controlled with a esp3...
USB Charger
Its a charger with a 7 segments display to stop with the time the charge, its controlled with a esp3...
-
 PCB for charging AA rechargeable batteries
With this card you can charge from 1 to 5 AA batteries independently. With the charger you can selec...
PCB for charging AA rechargeable batteries
With this card you can charge from 1 to 5 AA batteries independently. With the charger you can selec...
-
 H bridge module to control crank
With the help of this H-bridge circuit we can control the rotation of a motor, and better yet, if we...
H bridge module to control crank
With the help of this H-bridge circuit we can control the rotation of a motor, and better yet, if we...
-
 Design to control 7 segment display with switches
One way to connect a 7-segment display is using cables and switches.In order to form a number you wi...
Design to control 7 segment display with switches
One way to connect a 7-segment display is using cables and switches.In order to form a number you wi...
-
 Wireless control for motor dc
It is a pair of PCBs that allow transmitting a signal that is sent through 4 buttons and received by...
Wireless control for motor dc
It is a pair of PCBs that allow transmitting a signal that is sent through 4 buttons and received by...
-
-
-
-
Tester for Touch Screen Digitizer without using microcontroller
333 2 2 -
Audio reactive glow LED wristband/bracelet with NFC / RFID-Tags
314 0 1 -
-
-


