


|
|
LM317 |
x 1 | |
|
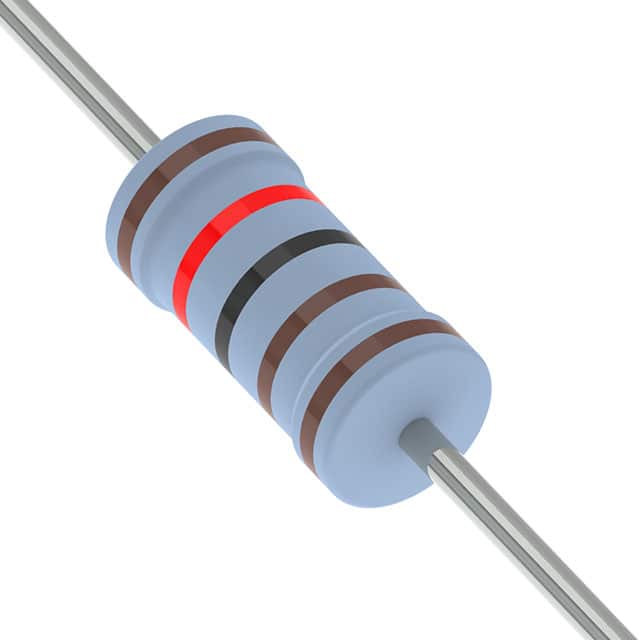
MFR-25FBF52-1K2YAGEO
|
x 1 | |
|
|
Two silver wires |
x 1 | |
|
|
19V Power supply from Laptop PC |
x 1 |

|
Soldering iron |
|

|
Soldering Iron Wire Welding Lead Roll |
How to make Simplest Colloidal Silver Generator
Colloidal silver is a suspension of tiny silver particles in a liquid medium, usually water. It has been used for various medicinal and health purposes for centuries, dating back to ancient civilizations. Its antimicrobial properties make it a popular alternative remedy for a wide range of ailments. Some claimed benefits and uses of colloidal silver include:
- Antibacterial, Antiviral, and Antifungal properties
- Immune system support
- Skin conditions like acne, eczema, and psoriasis,
- Eye infections
- Chronic sinus infections, etc...
This time I will present you the simplest way to make a cheap colloidal silver generator, which can be made by anyone who can solder a few points. Essentially, colloidal silver is a solution of water with a trace amount of pure silver in it.
It can be made through the process of electrolysis using a very small amount of electrical current with pure silver electrodes immersed in distilled water. Usually the cost of a commercial device like this is several hundred dollars, and you can make one for less than ten dollars, only this device will not include a timer and automatic electrode polarity switching.

To make this simple device we need only a few components that can be easily obtained:
- A glass container (jar) preferably with a plastic lid
- Some kind of simple plugs (connectors) that are not necessarily intended for high currents
- Two silver wires of a certain length
- Power supply from an old laptop computer 19V
- LM317 3 terminal adjustable regulator which is the "Heart" of the device
- and a 1.2K resistor (brown, red, red, gold)
The last two components are easily available at any electronics store or online, and together cost less than a dollar.
It is also desirable to mix the water in the tank in some way, and I think the simplest way to do this is with a small aquarium air pump.

As I mentioned before, colloidal silver is made using electrolysis by placing two electrodes of pure silver in distilled water and passing a very weak controlled current of no more than 1 milliampere into the circuit. We get a constant current using the LM317 integrated circuit and a resistor, whose value we can calculate using one of the many online calculators (https://www.petervis.com/electronics%20guides/calculators/lm317t/lm317-current-limiter.html), or according to the formula:
To calculate Current Limit:
I=1.25/R
According to the formula it is easy to calculate that the value of the resistor should be 1250 ohms to get a current of 1 milliamp. We will use a 1200 ohm (1.2 Kiloohm) resistor because that is the closest standard resistor value.
And now let's see how the device works in real conditions. First, we fill the jar with a certain amount of distilled water that has a ppm concentration close to zero. Then we turn on the power supply and the process of electrolysis in the jar begins. In fact, we don't see that, so to be sure, we will first measure the current flowing through the circuit.

As can be seen on the instrument, the value of the current in the circuit is exactly 1 milliamp, which means that the connection is OK, and the electrolysis (actually the silvering of the water) has begun. We should not forget that every fifteen minutes we should change the polarity of the electrodes, so that the process runs faster. Now, after two hours from the start of the operation of the circuit, I will measure the ppm value with the help of this TDS meter, which is otherwise mostly used to check the quality of water in aquariums.

We see that currently the value is 17.7ppm, which means that some more time should pass to get the desired value of around 20ppm. This testing is done only once at the beginning, and then we know how long it takes to get a certain concentration of silver particles in the water. The concentration of commercial colloidal silver products usually ranges from 10 to 30 ppm.
It is important to note that the safety and efficacy of colloidal silver are still under investigation, and its use as a medical treatment is not supported by mainstream medical authorities. If you are considering using colloidal silver for any purpose, it is recommended to consult with a healthcare professional to understand the potential risks and benefits associated with its use.
In one of the following videos I will present you an advanced Arduino Colloidal Silver device with changable controlled current, automatic changing the polarity of the electrodes, as well as timer for automatic shutdown at a certain pre-defined time.


How to make Simplest Colloidal Silver Generator


Raspberry Pi 5 7 Inch Touch Screen IPS 1024x600 HD LCD HDMI-compatible Display for RPI 4B 3B+ OPI 5 AIDA64 PC Secondary Screen(Without Speaker)
BUY NOW


- Comments(1)
- Likes(0)
More by Mirko Pavleski
-
 Arduino 3D Printed self Balancing Cube
Self-balancing devices are electronic devices that use sensors and motors to keep themselves balanc...
Arduino 3D Printed self Balancing Cube
Self-balancing devices are electronic devices that use sensors and motors to keep themselves balanc...
-
 DIY Avionics Simulator with ESP32 - Artificial Horizon, Compass & Altimeter
The inspiration for this project comes from classical aircraft cockpit instruments used for navigat...
DIY Avionics Simulator with ESP32 - Artificial Horizon, Compass & Altimeter
The inspiration for this project comes from classical aircraft cockpit instruments used for navigat...
-
 DIY Miniature X-Ray Machine using a TV Vacuum Tube DY86
An X-ray machine (or radiograph) is a quick, painless medical test that produces images of the struc...
DIY Miniature X-Ray Machine using a TV Vacuum Tube DY86
An X-ray machine (or radiograph) is a quick, painless medical test that produces images of the struc...
-
 Simple SDR Receiver Using 2x NE612 - Dual Conversion, Superheterodyne (0.1–30 MHz)
SDR (Software Defined Radio) is a radio system in which most of the functions of a classic radio (f...
Simple SDR Receiver Using 2x NE612 - Dual Conversion, Superheterodyne (0.1–30 MHz)
SDR (Software Defined Radio) is a radio system in which most of the functions of a classic radio (f...
-
 DIY Vintage TV VU Meter with peak indicators
Some time ago in one of my projects I presented you a way to turn a black and white old mini TV int...
DIY Vintage TV VU Meter with peak indicators
Some time ago in one of my projects I presented you a way to turn a black and white old mini TV int...
-
 DIY Tesla Coil based Plasma Rife Machine
In several of my previous videos, I presented you with different ways to make a Rife Machine, from ...
DIY Tesla Coil based Plasma Rife Machine
In several of my previous videos, I presented you with different ways to make a Rife Machine, from ...
-
 ESP32 Analog VU Meter – Smooth Needle, Real Audio Response (DIY Build)
In several of my previous videos I have shown you how to make analog VU meters emulated on differen...
ESP32 Analog VU Meter – Smooth Needle, Real Audio Response (DIY Build)
In several of my previous videos I have shown you how to make analog VU meters emulated on differen...
-
 The Ultimate Smartphone VFO ESP32 & Si5351 Wireless Control
Variable frequency oscillators (VFOs) are commonly used in radio transmitters and receivers, especi...
The Ultimate Smartphone VFO ESP32 & Si5351 Wireless Control
Variable frequency oscillators (VFOs) are commonly used in radio transmitters and receivers, especi...
-
 DIY Shortwave Propagation Monitor - Measure Ionosphere Conditions
Shortwave Propagation is the way radio waves in the 3 to 30 MHz range travel from point A to point ...
DIY Shortwave Propagation Monitor - Measure Ionosphere Conditions
Shortwave Propagation is the way radio waves in the 3 to 30 MHz range travel from point A to point ...
-
 Professional grade Smart Lock with ESP32, BLE and Android App Control
An electronic codelock is a security device that grants access using a numerical sequence—a PIN cod...
Professional grade Smart Lock with ESP32, BLE and Android App Control
An electronic codelock is a security device that grants access using a numerical sequence—a PIN cod...
-
 Building a 3-Input Stereo ECC83 (12AX7) Tube Preamp
Some time ago I presented you a project for a 3W stereo tube amplifier with a GU32 output vacuum t...
Building a 3-Input Stereo ECC83 (12AX7) Tube Preamp
Some time ago I presented you a project for a 3W stereo tube amplifier with a GU32 output vacuum t...
-
 ESP32 Weather Dashboard with Satellite Maps and 16-day Weather Forecast
As you can see from my previous videos, besides Electronics, my fields of experimentation and proje...
ESP32 Weather Dashboard with Satellite Maps and 16-day Weather Forecast
As you can see from my previous videos, besides Electronics, my fields of experimentation and proje...
-
 Retro Analog VU Meter on Round dispalys (ESP32 and GC9A01)
Recently, in one of my previous videos I presented you a Retro VU Meter project on round displays ...
Retro Analog VU Meter on Round dispalys (ESP32 and GC9A01)
Recently, in one of my previous videos I presented you a Retro VU Meter project on round displays ...
-
 Ultimate 2-Player Reaction Timer with WS2812B LED Strips & Arduino
Arcade reaction game is a genre of play designed to test a player's physical response time and hand...
Ultimate 2-Player Reaction Timer with WS2812B LED Strips & Arduino
Arcade reaction game is a genre of play designed to test a player's physical response time and hand...
-
 Building a Vintage Tube-Style Internet Radio with Raspberry Pi & Rotary Encoder
Internet radio (also known as web radio or net radio) is a digital audio service transmitted via th...
Building a Vintage Tube-Style Internet Radio with Raspberry Pi & Rotary Encoder
Internet radio (also known as web radio or net radio) is a digital audio service transmitted via th...
-
 DIY Smart Code Lock with CrowPanel 1.28 ESP32 Rotary Display
A code lock is a keyless security device—either mechanical or electronic—that restricts access to d...
DIY Smart Code Lock with CrowPanel 1.28 ESP32 Rotary Display
A code lock is a keyless security device—either mechanical or electronic—that restricts access to d...
-
 SDR Panadapter for Vintage Tube Radios – Step-by-Step Tutorial
A radio panadapter (or panoramic adapter) is a device or software tool used in amateur radio and ot...
SDR Panadapter for Vintage Tube Radios – Step-by-Step Tutorial
A radio panadapter (or panoramic adapter) is a device or software tool used in amateur radio and ot...
-
 Oscilloscope Clock Simulation on a Round ESP32 Display
An oscilloscope clock is a circuit that turns an old analog oscilloscope into a stylish, retro-them...
Oscilloscope Clock Simulation on a Round ESP32 Display
An oscilloscope clock is a circuit that turns an old analog oscilloscope into a stylish, retro-them...
-
Programmable Mist Maker - XIAO / QT PY Extension
443 0 0 -
RadioHAT - Raspberry Pi radio development platform
343 0 1 -
-
-
-
-
ARPS-2 – Arduino-Compatible Robot Project Shield for Arduino UNO
2895 0 6 -
A Compact Charging Breakout Board For Waveshare ESP32-C3
3395 3 8 -
AI-driven LoRa & LLM-enabled Kiosk & Food Delivery System
3723 2 2


