


Topeduino - DIY Arduino Uno USB Type-C use Solder Paste Stencil
Overview
"Arduino is an open-source electronics prototyping platform based on flexible, easy-to-use hardware and software. It's intended for artists, designers, hobbyists, and anyone interested in creating interactive objects or environments."
This tutorial will take you through all the steps to build an Arduino Uno compatible "Topeduino" and how to install smd components using solder paste and stencil techniques.
Make special of Topeduino special is that it uses the USB socket type C.
Partlist

Here are the components that you will need to make Topeduino:
1 x PCB Topeduino (PCBWAY)
1x IC ATMEGA328P DIP
1x IC CH340
1x AMS1117 5V
1x Diode 1N4001 (M1)
2x Yellow LED 0603
2x Green LED 0603
1x Resetable Fuse 1A
1x XTAL 12MHz
1x XTAL 16MHz
2x R 22 Ohm
2x R 5K1 Ohm
5x R 1K Ohm
3x R 10K Ohm
7x C 0.1 uF
2x C 22 pF
2x ELCO SMD 47uF/25V
1x Tact 6x6
1x USB Type-C Socket 16 pin
2x Female Header 8 pin
1x Female Header 10 pin
1x Male Header 6 pin
1x IC Socket 28 pin
1x Barell Socket DC
Schematic

PCB & Stencil (PCBWay)
To make this project you will need to order a prototype PCB & Stencil on PCBWAY. How to order is very easy and you will get 10 pcs PCB for $5 and 1 pcs Stencil with.
Step to Order:
1. SignUp/Log in on pcbway.com
2. Open this PCB project link Topeduino
3. Check the option for make order SMD-Stencil.
4. Click add to cart.
5. Wait moment for PCB review, then Click Check Out.

Setup PCB & Stencil
Make a PCB boundary using unused PCB or ruler PCB from PCBWay you can order here.

Place the stencil at the top of the PCB then keep the position of stencil with the tape on the top.

Solder Paste
Use solder paste as the lead, I use small sized solder paste "Mechanic", before use stir it first so that the results are good.


Apply Solder Paste
Use flexible plastic or an unused credit card to apply solder paste so that it is even.


Place SMD Components
After all the solder paste is attached, it's time to place the SMD components manually, you'll need a tweezer.

For the layout of the SMD components you can follow the picture.

Reflow Use Hot Air
Avoid excessive movement and pay attention to no component changes position before you heat it with hot air gun.
On the hot air gun, set the blow strength as low as possible to avoid blowing off the flying SMD components, set the temperature to around 300 degrees Celsius.


Place Throuhole Components
Attach other trough hole components on the PCB following the pictures and symbols on the PCB.

Soldering
Solder all the component legs on the back of the PCB, for details you can follow step by step in the video.

After finish solder, cut all the long legs of the component wire.

Attach IC
The Arduino is based on the Atmega328 IC and it is also the heart of the circuit. All the processing and everything else is done by the IC. The Atmega328 has to have a arduino boot loader flashed on to it to program it using the Arduino IDE.
The arduino uno is made of three parts :
- Atmega328 IC
- Voltage Regulators
- Serial Programmer
You can purchase an Atmega328 IC with the Arduino boot-loader pre-installed or you can also install it yourself but you will need an Arudino uno to install the boot-loader. So it is recommended to get a Atmega328 with a pre-installed boot-loader.

Programming
Done! You are finish made a hardware development board "Topeduino" (Arduino Uno USB-C).

Now, time to try upload first sketch (Blink.ino) to board, to upload sketch you can use software Arduino IDE on computer.
- Open the Blink example sketch by going to: File > Examples > 01.Basics > Blink.
- Select the type of Arduino board you're using: Tools > Board > Arduino Uno.
- Select the serial/COM port that your Arduino is attached to: Tools > Port > COMxx. In this case it was COM11.
- After a second, you should see some LEDs flashing on your Arduino, followed by the message "Done Uploading" in the status bar of the Blink sketch.

Topeduino - DIY Arduino Uno USB Type-C use Solder Paste Stencil
*PCBWay community is a sharing platform. We are not responsible for any design issues and parameter issues (board thickness, surface finish, etc.) you choose.


Raspberry Pi 5 7 Inch Touch Screen IPS 1024x600 HD LCD HDMI-compatible Display for RPI 4B 3B+ OPI 5 AIDA64 PC Secondary Screen(Without Speaker)
BUY NOW


- Comments(1)
- Likes(9)
- 3 USER VOTES
- YOUR VOTE 0.00 0.00

-
10design
-
10usability
-
10creativity
-
10content
-
8design
-
10usability
-
8creativity
-
10content
-
2design
-
3usability
-
4creativity
-
5content
More by Bluino Bluino
-
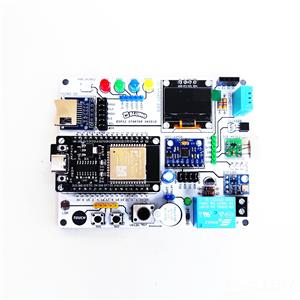 ESP32 IoT Starter Shield Version 3
Learn Basic IoT use ESP32 boards is very easy with ESP32 IoT Starter Kit board and following the 110...
ESP32 IoT Starter Shield Version 3
Learn Basic IoT use ESP32 boards is very easy with ESP32 IoT Starter Kit board and following the 110...
-
 ESP32-Cam Motor Driver Shield L293D
Android App: ESP32 Camera Wifi Robot CarTutorial Assembly:https://www.instructables.com/DIY-ESP32-Ca...
ESP32-Cam Motor Driver Shield L293D
Android App: ESP32 Camera Wifi Robot CarTutorial Assembly:https://www.instructables.com/DIY-ESP32-Ca...
-
 LED Blinking Robot Badge - Soldering Kit
This article is proudly sponsored by PCBWAY.PCBWAY make high quality prototyping PCBs for people all...
LED Blinking Robot Badge - Soldering Kit
This article is proudly sponsored by PCBWAY.PCBWAY make high quality prototyping PCBs for people all...
-
 3 Panel LED Dot Matrix MAX7219 for Common Anode Dot Matrix
Part List per Panel:1 x PCB LED Dot Matrix MAX7219 (PCBWay)1 x Led Dot Matrix 8x8 Common Anode1 x IC...
3 Panel LED Dot Matrix MAX7219 for Common Anode Dot Matrix
Part List per Panel:1 x PCB LED Dot Matrix MAX7219 (PCBWay)1 x Led Dot Matrix 8x8 Common Anode1 x IC...
-
 2 Panel LED Dot Matrix MAX7219 for Common Anode Dot Matrix
Part List per Panel:1 x PCB LED Dot Matrix MAX7219 (PCBWay)1 x Led Dot Matrix 8x8 Common Anode1 x IC...
2 Panel LED Dot Matrix MAX7219 for Common Anode Dot Matrix
Part List per Panel:1 x PCB LED Dot Matrix MAX7219 (PCBWay)1 x Led Dot Matrix 8x8 Common Anode1 x IC...
-
 IoT Basic Kit ESP8266 Wemos D1 Mini
Part List:1 x PCB IoT Basic Kit (PCBWay)1 x ESP8266 Wemos D1 Mini board1 x OLED I2C 128x641 x Humidi...
IoT Basic Kit ESP8266 Wemos D1 Mini
Part List:1 x PCB IoT Basic Kit (PCBWay)1 x ESP8266 Wemos D1 Mini board1 x OLED I2C 128x641 x Humidi...
-
 ESP32 IoT Basic Shield
Part List:1 x PCB ESP32 Basic Shield (PCBWay)1 x ESP32 DEV KIT V1 board1 x LED 5mm1 x LED 3mm1 x Act...
ESP32 IoT Basic Shield
Part List:1 x PCB ESP32 Basic Shield (PCBWay)1 x ESP32 DEV KIT V1 board1 x LED 5mm1 x LED 3mm1 x Act...
-
 Nodemcu Amica ESP8266 IoT Starter Shield
Learn Basic IoT use ESP8266 boards is very easy with Nodemcu IoT Starter Shield board and following ...
Nodemcu Amica ESP8266 IoT Starter Shield
Learn Basic IoT use ESP8266 boards is very easy with Nodemcu IoT Starter Shield board and following ...
-
 ESP32 Motor Shield 2WD
Control Robot Car 4WD Mecanum Wheel use app Android, install app here:https://play.google.com/store/...
ESP32 Motor Shield 2WD
Control Robot Car 4WD Mecanum Wheel use app Android, install app here:https://play.google.com/store/...
-
 ESP32 Motor Shield 4WD Mecanum Wheel
Control Robot Car 4WD Mecanum Wheel use app Android, install app here:https://play.google.com/store/...
ESP32 Motor Shield 4WD Mecanum Wheel
Control Robot Car 4WD Mecanum Wheel use app Android, install app here:https://play.google.com/store/...
-
 ESP32 IoT Starter Shield Ver 2.0
The difference from the previous version is that there is an additional slot for the HCSR04 ultrason...
ESP32 IoT Starter Shield Ver 2.0
The difference from the previous version is that there is an additional slot for the HCSR04 ultrason...
-
 nanBluino - DIY Arduino Nano USB Type-C
Overview"Arduino is an open-source electronics prototyping platform based on flexible, easy-to-use h...
nanBluino - DIY Arduino Nano USB Type-C
Overview"Arduino is an open-source electronics prototyping platform based on flexible, easy-to-use h...
-
 Drawbot Wifi ESP32 GRBL - Drawing Robot Plotter Pen
OverviewThe Drawbot is a drawing art robot that can draw. You will needs two stepper motors, a micro...
Drawbot Wifi ESP32 GRBL - Drawing Robot Plotter Pen
OverviewThe Drawbot is a drawing art robot that can draw. You will needs two stepper motors, a micro...
-
 Topeduino - DIY Arduino Uno USB Type-C use Solder Paste Stencil
Overview"Arduino is an open-source electronics prototyping platform based on flexible, easy-to-use h...
Topeduino - DIY Arduino Uno USB Type-C use Solder Paste Stencil
Overview"Arduino is an open-source electronics prototyping platform based on flexible, easy-to-use h...
-
 Eggbot Wifi ESP32 - Drawing Robot Plotter Pen
OverviewThe Eggbot is a drawing art robot that can draw on spherical or egg-shaped objects. You coul...
Eggbot Wifi ESP32 - Drawing Robot Plotter Pen
OverviewThe Eggbot is a drawing art robot that can draw on spherical or egg-shaped objects. You coul...
-
 ESP32 Balancing Robot Shield
Part list:1 x PCB ESP32 Balancing Robot Shield (PCBWay)1 x ESP32 DEVKIT V1 board2 x Stepper Motor Dr...
ESP32 Balancing Robot Shield
Part list:1 x PCB ESP32 Balancing Robot Shield (PCBWay)1 x ESP32 DEVKIT V1 board2 x Stepper Motor Dr...
-
 Pi Pico Starter Shield
Easy Way to Started learn Raspberry Pi Pico, based on official tutorial download Get Started Pi Pico...
Pi Pico Starter Shield
Easy Way to Started learn Raspberry Pi Pico, based on official tutorial download Get Started Pi Pico...
-
 ESP32 IoT Starter Kit
Learn Basic IoT use ESP32 boards is very easy with ESP32 IoT Starter Kit board and following the 110...
ESP32 IoT Starter Kit
Learn Basic IoT use ESP32 boards is very easy with ESP32 IoT Starter Kit board and following the 110...
-
-
-
ARPS-2 – Arduino-Compatible Robot Project Shield for Arduino UNO
2614 0 5 -
A Compact Charging Breakout Board For Waveshare ESP32-C3
3086 3 8 -
AI-driven LoRa & LLM-enabled Kiosk & Food Delivery System
3307 2 1 -
-
-
-
ESP32-C3 BLE Keyboard - Battery Powered with USB-C Charging
3385 0 2


