


|
|
BD139 |
x 1 | |
|
|
ANT14SFS20QECIT Relay & Switch
|
x 1 | |
|
|
2-Pin Screw Terminal Block |
x 1 | |
|
|
1N4007-TDiodes Inc.
|
x 1 | |
|
|
CT41G-0805-2X1-50V-0.1uF-K(N)TORCH(火炬)
|
x 1 | |
|
|
RVT1E101M0607 100UF 25VDMBJ(振宝佳)
|
x 1 |
|
|
Fritzing |
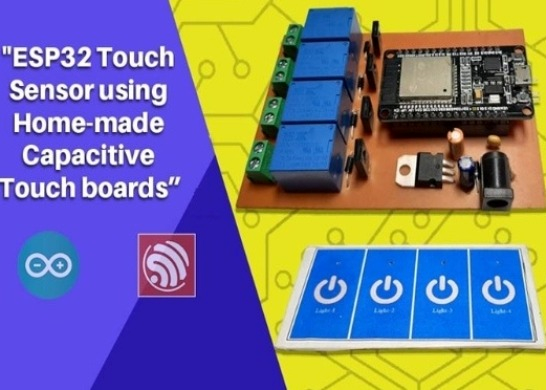
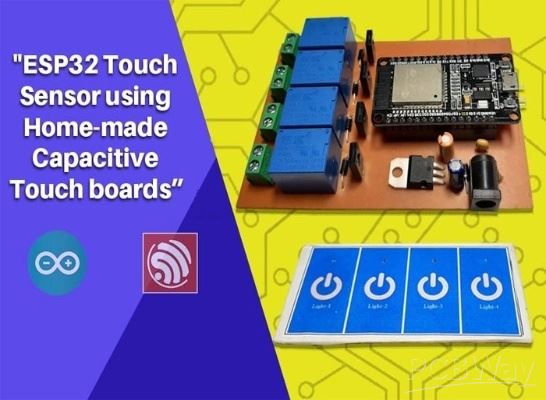
ESP32 Capacitive Touch Home Automation
Overview
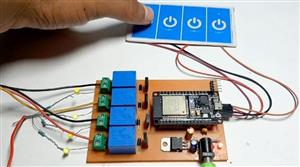
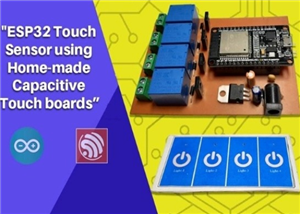
Mechanical switches wear out over time and can be prone to failure due to dust, moisture, or physical damage. Capacitive touch sensing offers a solid-state alternative with no moving parts. The ESP32 microcontroller makes this even more convenient by providing dedicated touch-enabled GPIO pins, eliminating the need for additional touch sensor ICs.This project demonstrates how to build a reliable and modern home automation system using the ESP32’s built-in capacitive touch sensing feature. Instead of traditional mechanical switches, this design allows you to control home appliances with just a touch, making it sleek, durable, and easy to integrate into smart environments. In this project, capacitive touch pads are used as inputs to control appliances such as lights or fans via a relay module. The system detects a human touch based on changes in capacitance and triggers the corresponding output.
How It Works
The ESP32 continuously monitors its touch-enabled pins. When a user touches a conductive surface connected to one of these pins, the capacitance changes. The ESP32 detects this variation and interprets it as a touch event.
Each touch input is mapped to a relay output. When a touch is detected, the ESP32 toggles the state of the relay, thereby turning the connected appliance ON or OFF.

Components Required
- ESP32 development board
- Relay module (single or multiple channels, depending on use)
- Conductive touch pads (copper plates or PCB traces)
- Resistors (if needed for stability)
- Power supply (5V/3.3V as required)
- Connecting wires
- Optional: PCB for a clean and permanent setup
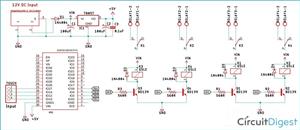
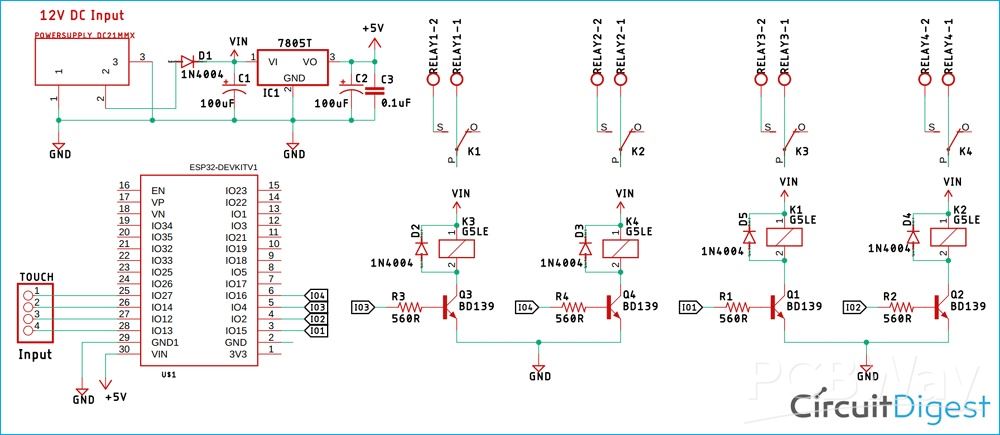
Circuit Description
The touch pads are connected directly to the ESP32’s touch GPIO pins. These pins are internally configured to detect capacitance changes, so no external touch controller is required.
The relay module is connected to standard digital GPIO pins. When a touch is detected, the ESP32 sends a HIGH or LOW signal to the relay module, which switches the appliance accordingly.
Proper isolation must be ensured when working with AC loads. Always use a relay module with optocoupler protection for safety.

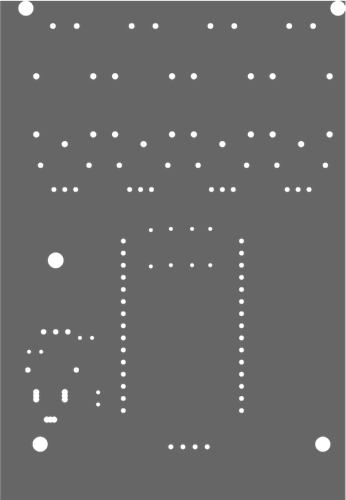
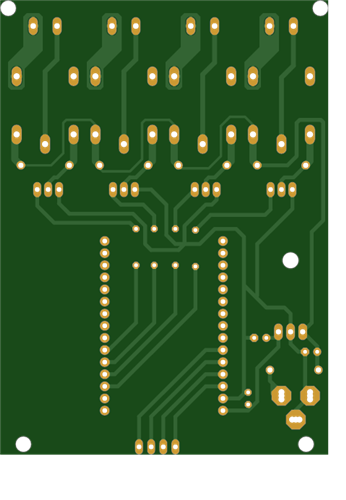
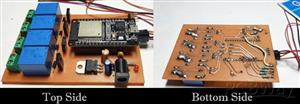
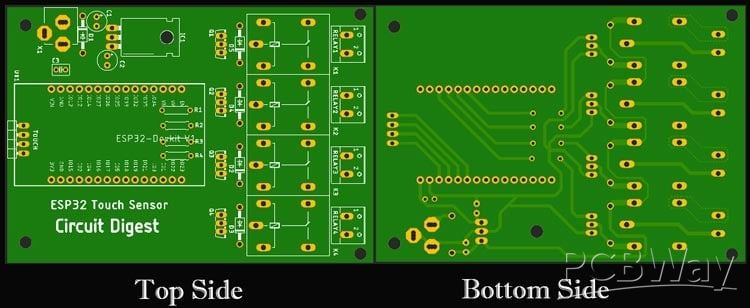
PCB Design Considerations
For a professional and robust build, designing a custom PCB is recommended. The touch pads can be implemented directly as copper areas on the PCB, which improves sensitivity and consistency.
Keep these points in mind:
- Use larger copper areas for better touch response
- Maintain proper spacing between touch pads to avoid interference
- Route relay control traces away from touch input traces to reduce noise
- Include mounting holes and clear labelling for usability
Programming the ESP32
The ESP32 is programmed using the Arduino IDE or ESP-IDF. The code reads touch values from the pins and compares them against a threshold. When the value drops below the threshold (indicating a touch), the corresponding relay is toggled.
Debouncing logic should be included to prevent multiple triggers from a single touch. You can also add features like long-touch detection or multi-touch control for advanced functionality.

Applications
- This project can be used in:
- Home automation panels
- Smart switches
- Touch-based control boards
- IoT-enabled devices
- Modern interior designs where aesthetics matter
Advantages
- No mechanical wear and tear
- Sleek and modern interface
- Low cost due to no external touch IC
- Easy to scale for multiple inputs
- Reliable and responsive
Conclusion
This ESP32 capacitive touch sensor project is a practical and elegant solution for modern home automation. By combining touch sensing with relay control, you can create a user-friendly interface that replaces traditional switches with a more durable and visually appealing alternative. With a custom PCB, this project can be transformed into a professional-grade product suitable for real-world deployment.
You can further enhance this system by adding Wi-Fi connectivity, enabling remote control through a mobile app or integration with smart home platforms. Explore creative DIY PCB projects and innovative ESP32 projects to enhance your electronics skills and build smart, real-world applications.
ESP32 Capacitive Touch Home Automation
*PCBWay community is a sharing platform. We are not responsible for any design issues and parameter issues (board thickness, surface finish, etc.) you choose.


Raspberry Pi 5 7 Inch Touch Screen IPS 1024x600 HD LCD HDMI-compatible Display for RPI 4B 3B+ OPI 5 AIDA64 PC Secondary Screen(Without Speaker)
BUY NOW

- Comments(1)
- Likes(1)
More by Jobit Joseph
-
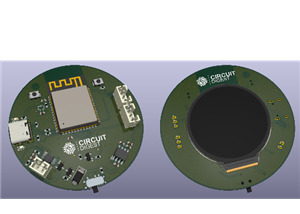
 How to build a Wearable Air Quality Monitor Pendant using STM32 & SGP40 Sensor
This DIY Wearable Air Quality Monitor Pendant is a compact, battery-powered device designed to conti...
How to build a Wearable Air Quality Monitor Pendant using STM32 & SGP40 Sensor
This DIY Wearable Air Quality Monitor Pendant is a compact, battery-powered device designed to conti...
-
 Smart Digital Ludo Game Board with Multicolour PCB
Ludo, a beloved childhood game, holds a special place in our hearts with its simple and engaging gam...
Smart Digital Ludo Game Board with Multicolour PCB
Ludo, a beloved childhood game, holds a special place in our hearts with its simple and engaging gam...
-
 Electronic Dice with BLE Connectivity
Many of us fondly remember the joy of playing board games like Snakes and Ladders or Ludo during our...
Electronic Dice with BLE Connectivity
Many of us fondly remember the joy of playing board games like Snakes and Ladders or Ludo during our...
-
 3D printed Enclosure Backplate for Riden RD60xx power supplies
3D printed Enclosure for Riden RD60xx power supplies such as RD6006, RD6012, RD6018, RD6024 and RD60...
3D printed Enclosure Backplate for Riden RD60xx power supplies
3D printed Enclosure for Riden RD60xx power supplies such as RD6006, RD6012, RD6018, RD6024 and RD60...
-
 3D printed Enclosure for Riden RD60xx power supplies
 such as RD6006, RD6012, RD6018, RD6024 and RD60...
3D printed Enclosure for Riden RD60xx power supplies
3D printed Enclosure for Riden RD60xx power supplies such as RD6006, RD6012, RD6018, RD6024 and RD60...
-
 Suzuki Ignis Universal Armrest No Screw Adapter
I own a 2024 Suzuki Ignis. When I searched for an armrest for my car I couldn't find any domesticall...
Suzuki Ignis Universal Armrest No Screw Adapter
I own a 2024 Suzuki Ignis. When I searched for an armrest for my car I couldn't find any domesticall...
-
 Wireless Potentiostat for Electrochemical Analysis
This wireless potentiostat is based on the ADuCM355 SoC from Analog Devices, tailored for portable e...
Wireless Potentiostat for Electrochemical Analysis
This wireless potentiostat is based on the ADuCM355 SoC from Analog Devices, tailored for portable e...
-
 160 Channel Configurable DAC Controller
The DAC controller board features 160 individually controllable 16-bit DAC output. It can output vol...
160 Channel Configurable DAC Controller
The DAC controller board features 160 individually controllable 16-bit DAC output. It can output vol...
-
 ESP32 IoT Water Flow Meter with Real-Time Monitoring
OverviewThis project demonstrates how to build a smart water flow meter using an ESP32 microcontroll...
ESP32 IoT Water Flow Meter with Real-Time Monitoring
OverviewThis project demonstrates how to build a smart water flow meter using an ESP32 microcontroll...
-
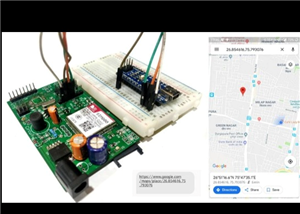 DIY GSM GPS Location Tracker with Arduino
Project OverviewThis project demonstrates how to build a simple and reliable location tracking syste...
DIY GSM GPS Location Tracker with Arduino
Project OverviewThis project demonstrates how to build a simple and reliable location tracking syste...
-
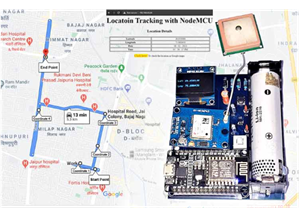 IoT GPS Tracker with NodeMCU and Google Maps
OverviewThis project demonstrates how to build an IoT-based GPS tracking system using a NodeMCU (ESP...
IoT GPS Tracker with NodeMCU and Google Maps
OverviewThis project demonstrates how to build an IoT-based GPS tracking system using a NodeMCU (ESP...
-
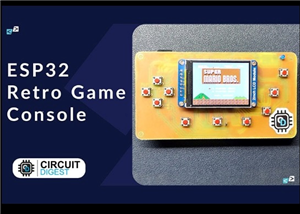 ESP32 Retro Game Console with OLED Display
OverviewThis project demonstrates how to build a compact, handheld retro gaming console using the ES...
ESP32 Retro Game Console with OLED Display
OverviewThis project demonstrates how to build a compact, handheld retro gaming console using the ES...
-
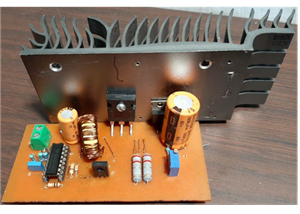 High Power Boost Converter Using TL494
OverviewThis project demonstrates the design and implementation of a high-power, high-efficiency DC-...
High Power Boost Converter Using TL494
OverviewThis project demonstrates the design and implementation of a high-power, high-efficiency DC-...
-
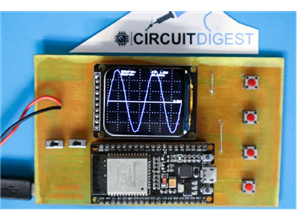 DIY ESP32 Oscilloscope Project
OverviewThis project demonstrates how to build a simple and affordable oscilloscope using an ESP32. ...
DIY ESP32 Oscilloscope Project
OverviewThis project demonstrates how to build a simple and affordable oscilloscope using an ESP32. ...
-
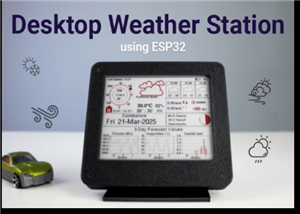 ESP32 Desktop Weather Station
Project OverviewBuild a compact desktop weather station using an ESP32 that measures temperature, hu...
ESP32 Desktop Weather Station
Project OverviewBuild a compact desktop weather station using an ESP32 that measures temperature, hu...
-
 ESP32 Capacitive Touch Home Automation
OverviewMechanical switches wear out over time and can be prone to failure due to dust, moisture, or...
ESP32 Capacitive Touch Home Automation
OverviewMechanical switches wear out over time and can be prone to failure due to dust, moisture, or...
-
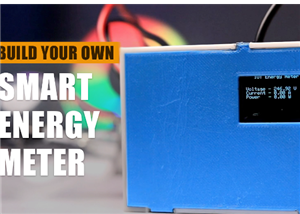 ESP32-Powered Smart Energy Meter for Real-Time Monitoring
ESP32-Powered Smart Energy Meter for Accurate Consumption TrackingIn modern electronics and IoT appl...
ESP32-Powered Smart Energy Meter for Real-Time Monitoring
ESP32-Powered Smart Energy Meter for Accurate Consumption TrackingIn modern electronics and IoT appl...
-
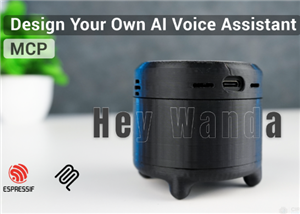 Build Your Own ESP32 AI Voice Assistant with MCP Integration
Project OverviewThe ESP32 AI Voice Assistant with MCP Integration is an advanced voice-controlled sm...
Build Your Own ESP32 AI Voice Assistant with MCP Integration
Project OverviewThe ESP32 AI Voice Assistant with MCP Integration is an advanced voice-controlled sm...
-
Programmable Mist Maker - XIAO / QT PY Extension
801 1 0 -
RadioHAT - Raspberry Pi radio development platform
645 0 1 -
-
-
-
-
ARPS-2 – Arduino-Compatible Robot Project Shield for Arduino UNO
3112 0 6 -
A Compact Charging Breakout Board For Waveshare ESP32-C3
3731 3 8 -
AI-driven LoRa & LLM-enabled Kiosk & Food Delivery System
4057 2 2


