


|
|
ESP32-LyraTEspressif Systems
|
x 1 | |
|
|
MicroSD Card |
x 1 | |
|
|
4Ω / 3W Audio Speaker |
x 1 | |
|
|
5V Power Supply |
x 1 | |
|
|
jumper Wires |
x 1 |

|
arduino IDEArduino
|
Smart Jukebox Using ESP32-LyraT Mini
Project description
Overview
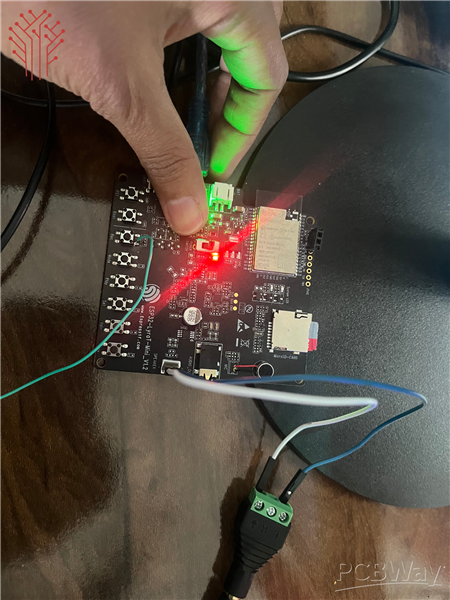
Here is the detailed description of the smart jukebox that is based on ESP32, Unlike most of the jukebox our there this one supports the Micro SD card, buttons, BLE along with Wifi all enabled in a compact PCB. Using this the final product is without the messy wires and form factor is also reasonable.
In this particular Jukebox device, it reads the data directly from the Micro SD card and the output is via the inbuilt speaker or via 3.5 mm hack. The physical buttons on the device helps to navigate through songs/ tracks.
Why ESP32-LyraT Mini?
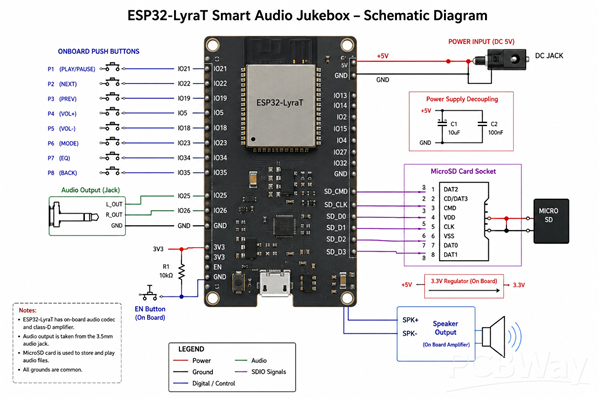
Most DIY audio projects use an Arduino or bare ESP32 paired with a separate MP3 decoder module like the DFPlayer. This works, but adds complexity and limits audio quality. The ESP32-LyraT Mini integrates everything:
ES8311 audio codec — clean stereo output
Onboard push buttons — direct GPIO-mapped controls
MicroSD slot — no external module needed
Built-in amplifier output — drives speakers directly
Wi-Fi + Bluetooth® capable — for future wireless expansion
The PCB design is clean, compact, and purpose-built for audio — which is exactly what a jukebox needs.
How It Works
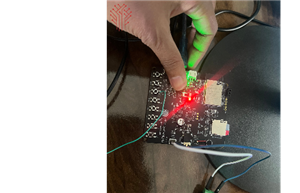
On boot, the firmware initializes the audio codec and mounts the MicroSD card. It scans the card for .mp3 or .wav files and builds a playlist automatically. The onboard buttons are mapped to playback controls — press to skip, hold to adjust volume. Audio streams directly from the SD card to the codec and out through the speaker terminals.
Signal flow: MicroSD Card → ESP32 Firmware → ES8311 Codec → Speaker / Audio Output
Hardware Requirements
ESP32-LyraT Mini v1.2 — Main controller and audio development board
MicroSD Card — Stores MP3/audio files
4Ω 3W Speaker — Used for sound output
5V Power Supply — Provides power to the system
Jumper/Connecting Wires — For hardware connections
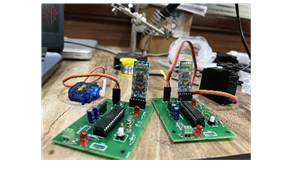
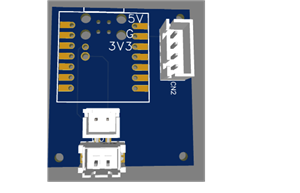
PCB & Assembly Notes
The ESP32-LyraT Mini is a well-designed board that fits cleanly into a custom enclosure. For this project, PCBWay fabricated the supporting boards used in the enclosure and power distribution stage. The quality of the boards was excellent — clean traces, proper soldermask, and accurate dimensions that matched the design files perfectly.
If you plan to expand this project into a full product — adding custom control boards, an amplifier stage, or a custom ESP32 module — PCBWay's fabrication and assembly services make it straightforward to move from prototype to production.
Firmware & Setup
- Format MicroSD card as FAT32
- Copy .mp3 files to the root directory
- Flash the firmware using ESP-IDF or Arduino IDE with ESP32 board support
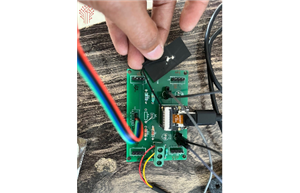
- Connect speaker to the terminal block on the board
- Power on — playback starts automatically
- The firmware uses Espressif's ESP-ADF (Audio Development Framework), which provides stable audio pipeline management, codec drivers, and SD card support out of the box.
Troubleshooting
- No audio output Check that the speaker is connected to the correct terminal block (marked on the PCB). Also confirm the volume is not set to zero in firmware — the ES8311 codec has software-controlled volume.
- MicroSD card not detected Format the card as FAT32 (not exFAT). Cards larger than 32GB may need manual FAT32 formatting using a tool like Rufus or guiformat on Windows.
- Audio is distorted or clipping Reduce the codec output gain in firmware. Driving the output too high with a low-impedance speaker causes distortion at the amplifier stage.
- Buttons not responding The onboard buttons on the LyraT Mini are active LOW. Make sure the firmware initializes them with internal pull-up resistors enabled.
- Board not recognized by computer Use a data-capable USB cable. Many cheap USB cables are charge-only and will not allow firmware flashing.
Possible Expansions
- Add an OLED display to show track name and playback status
- Enable Bluetooth A2DP to stream audio from a phone
- Add a web interface over Wi-Fi for remote track control
- Build a custom PCB enclosure with integrated buttons and display
For teams looking to take this further into a commercial audio product — integrating custom PCB layouts, power management circuits, or a polished enclosure — Embedded Software Development Services can bridge the gap between a working prototype and a production-ready device.


Smart Jukebox Using ESP32-LyraT Mini


Raspberry Pi 5 7 Inch Touch Screen IPS 1024x600 HD LCD HDMI-compatible Display for RPI 4B 3B+ OPI 5 AIDA64 PC Secondary Screen(Without Speaker)
BUY NOW


- Comments(1)
- Likes(0)
More by Chanchal kumari
-
 ESP32 RC522 RFID Access Control PCB – Compact RFID Authentication System
Project OverviewThe project is ESP32 + RC522 RFID Access Control PCB which is meant for contactle...
ESP32 RC522 RFID Access Control PCB – Compact RFID Authentication System
Project OverviewThe project is ESP32 + RC522 RFID Access Control PCB which is meant for contactle...
-
 MPU6050 custom Module
DescriptionA compact MPU6050-based accelerometer and gyroscope module designed for motion sensing, b...
MPU6050 custom Module
DescriptionA compact MPU6050-based accelerometer and gyroscope module designed for motion sensing, b...
-
 Arduino Based Wireless Servo Control PCB
Project overview This project demonstrates a compact wireless servo motor control system developed u...
Arduino Based Wireless Servo Control PCB
Project overview This project demonstrates a compact wireless servo motor control system developed u...
-
 Xiao NRF52840 Breakout Board with Battery Connector
Introduction:The Xiao NRF52840 Breakout Board with Battery Connector is a compact and practical PCB ...
Xiao NRF52840 Breakout Board with Battery Connector
Introduction:The Xiao NRF52840 Breakout Board with Battery Connector is a compact and practical PCB ...
-
 ESP32 cam with multiple gas monitoring system
IntroductionThe ESP32 CAM with Multiple Gas Monitoring System is a compact IoT-based safety and envi...
ESP32 cam with multiple gas monitoring system
IntroductionThe ESP32 CAM with Multiple Gas Monitoring System is a compact IoT-based safety and envi...
-
 Smart Jukebox Using ESP32-LyraT Mini
Project descriptionOverview Here is the detailed description of the smart jukebox that is based on ...
Smart Jukebox Using ESP32-LyraT Mini
Project descriptionOverview Here is the detailed description of the smart jukebox that is based on ...
-
Programmable Mist Maker - XIAO / QT PY Extension
229 0 0 -
RadioHAT - Raspberry Pi radio development platform
252 0 1 -
-
-
-
-
ARPS-2 – Arduino-Compatible Robot Project Shield for Arduino UNO
2809 0 5 -
A Compact Charging Breakout Board For Waveshare ESP32-C3
3312 3 8 -
AI-driven LoRa & LLM-enabled Kiosk & Food Delivery System
3594 2 2


