




|
KiCADKicad
|
|

|
arduino IDEArduino
|
Reflow hot plate controller board
Description:
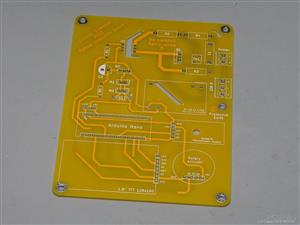
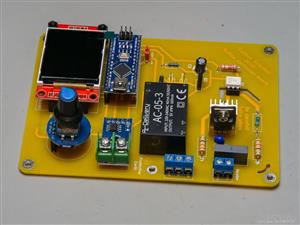
This project realizes a custom made reflow hot plate controller. I made a fancy graphical user interface for programming the heating curve and displaying the temperature in real time. The programmable reflow curve and the real-time time vs. temperature graph is shown on a 1.8" LCD. All the parameters can be set with a rotary encoder. The temperature is measured with a thermocouple via a MAX6675 module. The system also contains two outputs for fans, so at the end of the heating program, a forced cooling can be applied. The switching of the heater is done by an optocoupler-TRIAC combo.
Features:
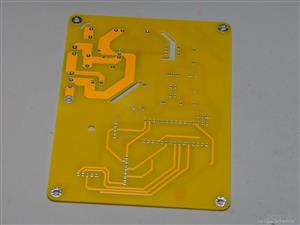
I added some gaps to the board to avoid arching at critical places. The high-current traces are at the bottom of the PCB, there is only a few high-voltage (230 V) traces on the top side and they do not carry large currents, they are only used for the switching the TRIAC. The board has 4 mounting pads at the (rounded) corners, plus there is a protective earth connection that allows an easy connection to the metal parts that should be grounded.
Good to know:
- Based on the selected power brick (5 V or 12 V), you have to choose the fans carefully to stay within the specifications of the power brick. Typically, the 5 V brick provides 600 mA and the 12 V provides 250 mA. I would recommend using the 5 V brick.
- You can add a larger heatsink to the TRIAC if you want to use it with high-power heaters. Keep in mind that the TRIAC I picked is "only" a 8 A one.
- You can also attach a tiny heatsink to the BD139 transistor, but probably it is not necessary because it switches relatively low power.
- I suggest to solder the MAX6675 module, the rotary encoder and the display directly to the PCB.
- Keep in mind that the TRIAC-side resistors must be high power resistors; 1 W at least.
- The TRIAC must be isolated from the heatsink. Use a mica sheet is something similar between the TRIAC and the heat sink. Also, leave a little gap between the PCB and the heatsink because one of the 230 V trace is running under the heatsink.
- The varistor (PTC) I picked (SIOV-S05K250) is sized for 5 A. Replace it if you use a larger load.
For all the parts and the values, check the attached BOM file. There is a very useful interactive BOM file in the attached zip file. Also, check my website for extra resources and a video explaining the board.
Check the following video where I explain everything about the board, the heater and I explain the source code line by line:
Reflow hot plate controller board
Project images are for reference only. Actual production is based on the manufacturing files on the project page.
Please review the designer's notes (e.g., PCB thickness) and select the appropriate options.
PCBWay is not responsible
for issues caused by unsuitable parameter selections.
For more important ordering information, please refer to
Read More









Raspberry Pi 5 7 Inch Touch Screen IPS 1024x600 HD LCD HDMI-compatible Display for RPI 4B 3B+ OPI 5 AIDA64 PC Secondary Screen(Without Speaker)
BUY NOW

- Comments(2)
- Likes(15)


 More by Curious Scientist
-
 USB PD Breadboard Power Supply
In this article, I show you my new creation. It is a USB PD decoy-based breadboard power supply. All...
USB PD Breadboard Power Supply
In this article, I show you my new creation. It is a USB PD decoy-based breadboard power supply. All...
-
 ADS1256 - RP2040 Custom DAQ Front Panel with GPIO
This is just a simple PCB panel that belongs to my other project which is a high-performance DAQ.A r...
ADS1256 - RP2040 Custom DAQ Front Panel with GPIO
This is just a simple PCB panel that belongs to my other project which is a high-performance DAQ.A r...
-
 ADS1256 - RP2040 Custom DAQ Front Panel without GPIO
This is just a simple PCB panel that belongs to my other project which is a high-performance DAQ.A r...
ADS1256 - RP2040 Custom DAQ Front Panel without GPIO
This is just a simple PCB panel that belongs to my other project which is a high-performance DAQ.A r...
-
 10th Anniversary Badge
I designed this small badge for PCBWay's 10th anniversary.I tried to make a deeper meaning to the bo...
10th Anniversary Badge
I designed this small badge for PCBWay's 10th anniversary.I tried to make a deeper meaning to the bo...
-
 ADS1256 - Atmega32u4 Custom DAQ board
IntroductionIn this project, I show you two things. One is a new version (v1.2) of my custom DAQ bas...
ADS1256 - Atmega32u4 Custom DAQ board
IntroductionIn this project, I show you two things. One is a new version (v1.2) of my custom DAQ bas...
-
 Debounced rotary encoder module
In this project, I show you my approach to making a rotary encoder module.One can buy different rota...
Debounced rotary encoder module
In this project, I show you my approach to making a rotary encoder module.One can buy different rota...
-
 Custom ADS1256 board with ATmega32U4
I created my own ADS1256 PCB after working with this AD converter for several years. I wanted to bui...
Custom ADS1256 board with ATmega32U4
I created my own ADS1256 PCB after working with this AD converter for several years. I wanted to bui...
-
 100 W USB PD Programmable Power Supply
In this article, I show you how I designed my own USB-PD (power delivery) programmable power supply ...
100 W USB PD Programmable Power Supply
In this article, I show you how I designed my own USB-PD (power delivery) programmable power supply ...
-
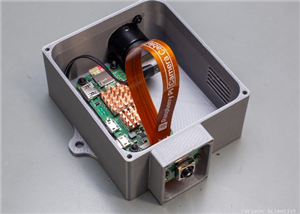 Raspberry Pi Zero 2W Bird Feeder Camera
In this article, I show you how I built my own Raspberry Pi Zero 2 W-based bird camera. The project ...
Raspberry Pi Zero 2W Bird Feeder Camera
In this article, I show you how I built my own Raspberry Pi Zero 2 W-based bird camera. The project ...
-
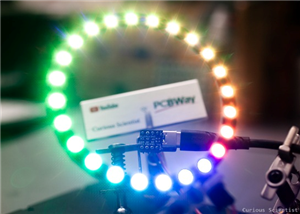 CH32V003J4M6 - Miniature microcontroller board
I wanted something small but relatively capable, and since I have some experience with the CH32V003J...
CH32V003J4M6 - Miniature microcontroller board
I wanted something small but relatively capable, and since I have some experience with the CH32V003J...
-
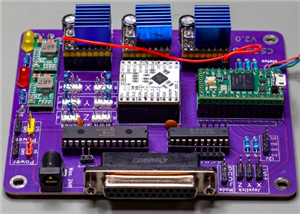 3-axis stepper motor controller with CNC pendant connectivity
In this article, I show you the updated version of my motorized microscope. In one of my older video...
3-axis stepper motor controller with CNC pendant connectivity
In this article, I show you the updated version of my motorized microscope. In one of my older video...
-
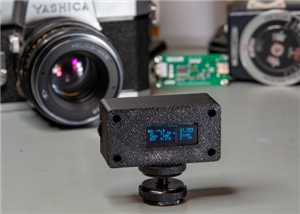 Light meter for analog cameras [CH32V006F8P6 + TSL2591]
In this article, I show you how I built my ow...
Light meter for analog cameras [CH32V006F8P6 + TSL2591]
Light meter for analog cameras [CH32V006F8P6 + TSL2591]In this article, I show you how I built my ow...
-
 5-way navigator PCB
In this article, I show you a genius way of handling multiple buttons with a microcontroller. I “dis...
5-way navigator PCB
In this article, I show you a genius way of handling multiple buttons with a microcontroller. I “dis...
-
 CH32V006K8U6 Development Board
IntroductionSo, I have been working with the CH32 microcontrollers and chips for a while, and I even...
CH32V006K8U6 Development Board
IntroductionSo, I have been working with the CH32 microcontrollers and chips for a while, and I even...
-
 PCBWay 11-year Anniversary Badge
This visual design was created by https://www.instagram.com/guiye.perez.bongiovanni/ ; however, only...
PCBWay 11-year Anniversary Badge
This visual design was created by https://www.instagram.com/guiye.perez.bongiovanni/ ; however, only...
-
 TCD1304 - STM32F401CCU6 breakout board
The recent modifications made to the circuit board design have improved its functionality and space ...
TCD1304 - STM32F401CCU6 breakout board
The recent modifications made to the circuit board design have improved its functionality and space ...
-
 TCD1304 miniature PCB rev2
The redesign of the PCB involved several key changes to improve its performance and decrease its siz...
TCD1304 miniature PCB rev2
The redesign of the PCB involved several key changes to improve its performance and decrease its siz...
-
 2-channel breadboard voltmeter
The project originally stems from my CH32 tutorial series. I started working with this chip not so l...
2-channel breadboard voltmeter
The project originally stems from my CH32 tutorial series. I started working with this chip not so l...
-
Programmable Mist Maker - XIAO / QT PY Extension
2236 2 2 -
RadioHAT - Raspberry Pi radio development platform
1926 0 4 -
-
-
-
ARPS-2 – Arduino-Compatible Robot Project Shield for Arduino UNO
4102 0 6 -
A Compact Charging Breakout Board For Waveshare ESP32-C3
4867 3 8 -
AI-driven LoRa & LLM-enabled Kiosk & Food Delivery System
5655 2 2 -





















