


|
Fusion 360Autodesk
|
Raspberry Pi Zero 2W Bird Feeder Camera
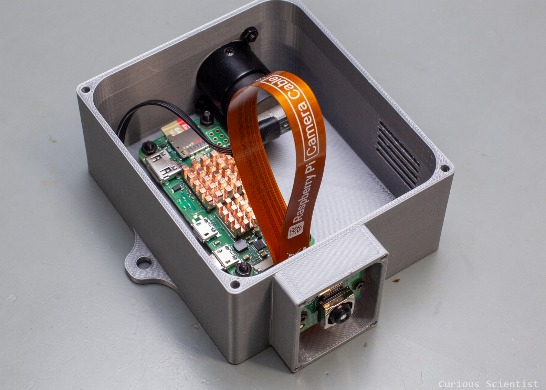
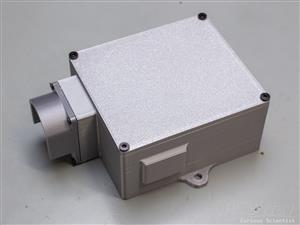
In this article, I show you how I built my own Raspberry Pi Zero 2 W-based bird camera. The project consists of a lot of different techniques, which makes it interesting to build. It requires some electronics knowledge, some CAD and 3D printing knowledge and a little bit of woodworking. The result is a fun remote bird feeder with high-resolution live feed.
I am getting more and more birds around the house. There are a few feeders around the house, but I can only take pictures from the inside through the windows. This does not always result in a good picture due to unwanted reflections and other issues. Therefore, I wanted to build a bird feeder that has a built-in camera. Sure, there are off-the-shelf devices on the internet for this exact purpose, but making my DIY version allows me to learn new techniques and have full control over my device. No subscriptions, no weird cloud services or other similar things. Actually, if I stop for a moment to justify my build, I could perhaps even say that my camera-related setup is cheaper than the off-the-shelf competitors. Perhaps some features are not that excellent, but I will discuss these details below.
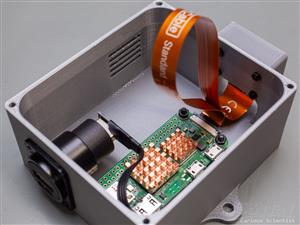
The core of the device is a Raspberry Pi Zero 2 W microcomputer and a Raspberry Pi Camera Module 3. The Pi is a powerful little device with a processor clocked at 1 GHz and 512 MB RAM. It has built-in wireless connectivity, an SD card slot, a micro HDMI port and plenty of GPIO ports. It is a really powerful device, and it is so popular that my local electronics store has limited stock, and one can only buy 1 unit per purchase. I saw other creators around the world talking about supply issues, too.
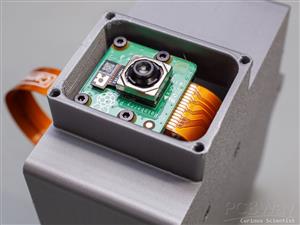
The camera is a 12 MP autofocus camera based on a Sony IMX708 sensor. It is able to record 1080p footage at 50 FPS or take still images at 4608 × 2592 pixels. With proper software, we can utilise the camera very well.
So, the camera and communication will be managed by the above devices. However, the device must be powered somehow, and we must keep in mind that it will be sitting outdoors!
Battery-only operation is not really an option because I don’t want to change and charge batteries often. Direct power supply via a power adapter is not an option either because I do not have any outlets around the house where it would make sense to place the feeder. (make footage of showing an 18165 battery and a power adapter)
Therefore, I decided to finally start getting some experience with solar panels and battery chargers. It is a bit overkill perhaps, but the system will be powered by a 12.8 V 6000 mAh LiFePO4 battery, which is managed by a 12 V 10 A PWM solar charge controller. The solar panel is a 25 W 12 V monocrystalline panel.
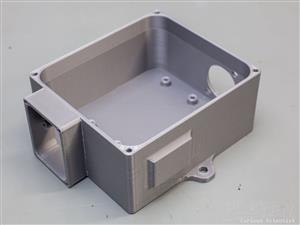
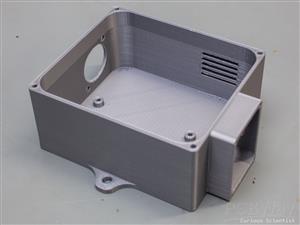
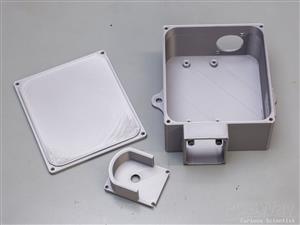
Tips for assembly:
- The lid can be attached using 4x10 mm M3 bolts
- The USB socket requires 2x10mm M3 bolts, 2x nuts and 2x washers (optional, but recommended)
- The front panel requires 4x10mm M2.5 bolts
- The camera requires 4x12mm M2 bolts, 4x nuts and 4x washers
- The Pi requires 4x10mm M3 bolts, 4x nuts and 4x plastic(!) washers
- The enclosure's mounting holes on the side are 5 mm in diameter.
- For the lid and the camera shield, it is recommended to use a drop of thread locker glue (or even regular glue) in the holes.
Raspberry Pi Zero 2W Bird Feeder Camera
*PCBWay community is a sharing platform. We are not responsible for any design issues and parameter issues (board thickness, surface finish, etc.) you choose.


Raspberry Pi 5 7 Inch Touch Screen IPS 1024x600 HD LCD HDMI-compatible Display for RPI 4B 3B+ OPI 5 AIDA64 PC Secondary Screen(Without Speaker)
BUY NOW


- Comments(0)
- Likes(0)
 More by Curious Scientist
-
 USB PD Breadboard Power Supply
In this article, I show you my new creation. It is a USB PD decoy-based breadboard power supply. All...
USB PD Breadboard Power Supply
In this article, I show you my new creation. It is a USB PD decoy-based breadboard power supply. All...
-
 ADS1256 - RP2040 Custom DAQ Front Panel with GPIO
This is just a simple PCB panel that belongs to my other project which is a high-performance DAQ.A r...
ADS1256 - RP2040 Custom DAQ Front Panel with GPIO
This is just a simple PCB panel that belongs to my other project which is a high-performance DAQ.A r...
-
 ADS1256 - RP2040 Custom DAQ Front Panel without GPIO
This is just a simple PCB panel that belongs to my other project which is a high-performance DAQ.A r...
ADS1256 - RP2040 Custom DAQ Front Panel without GPIO
This is just a simple PCB panel that belongs to my other project which is a high-performance DAQ.A r...
-
 10th Anniversary Badge
I designed this small badge for PCBWay's 10th anniversary.I tried to make a deeper meaning to the bo...
10th Anniversary Badge
I designed this small badge for PCBWay's 10th anniversary.I tried to make a deeper meaning to the bo...
-
 ADS1256 - Atmega32u4 Custom DAQ board
IntroductionIn this project, I show you two things. One is a new version (v1.2) of my custom DAQ bas...
ADS1256 - Atmega32u4 Custom DAQ board
IntroductionIn this project, I show you two things. One is a new version (v1.2) of my custom DAQ bas...
-
 Debounced rotary encoder module
In this project, I show you my approach to making a rotary encoder module.One can buy different rota...
Debounced rotary encoder module
In this project, I show you my approach to making a rotary encoder module.One can buy different rota...
-
 Custom ADS1256 board with ATmega32U4
I created my own ADS1256 PCB after working with this AD converter for several years. I wanted to bui...
Custom ADS1256 board with ATmega32U4
I created my own ADS1256 PCB after working with this AD converter for several years. I wanted to bui...
-
 Raspberry Pi Zero 2W Bird Feeder Camera
In this article, I show you how I built my own Raspberry Pi Zero 2 W-based bird camera. The project ...
Raspberry Pi Zero 2W Bird Feeder Camera
In this article, I show you how I built my own Raspberry Pi Zero 2 W-based bird camera. The project ...
-
 CH32V003J4M6 - Miniature microcontroller board
I wanted something small but relatively capable, and since I have some experience with the CH32V003J...
CH32V003J4M6 - Miniature microcontroller board
I wanted something small but relatively capable, and since I have some experience with the CH32V003J...
-
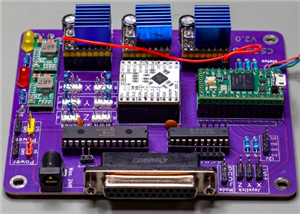 3-axis stepper motor controller with CNC pendant connectivity
In this article, I show you the updated version of my motorized microscope. In one of my older video...
3-axis stepper motor controller with CNC pendant connectivity
In this article, I show you the updated version of my motorized microscope. In one of my older video...
-
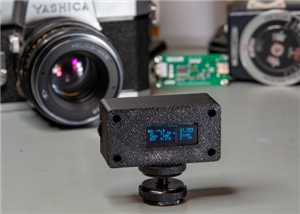 Light meter for analog cameras [CH32V006F8P6 + TSL2591]
In this article, I show you how I built my ow...
Light meter for analog cameras [CH32V006F8P6 + TSL2591]
Light meter for analog cameras [CH32V006F8P6 + TSL2591]In this article, I show you how I built my ow...
-
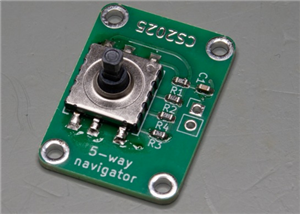 5-way navigator PCB
In this article, I show you a genius way of handling multiple buttons with a microcontroller. I “dis...
5-way navigator PCB
In this article, I show you a genius way of handling multiple buttons with a microcontroller. I “dis...
-
 CH32V006K8U6 Development Board
IntroductionSo, I have been working with the CH32 microcontrollers and chips for a while, and I even...
CH32V006K8U6 Development Board
IntroductionSo, I have been working with the CH32 microcontrollers and chips for a while, and I even...
-
 PCBWay 11-year Anniversary Badge
This visual design was created by https://www.instagram.com/guiye.perez.bongiovanni/ ; however, only...
PCBWay 11-year Anniversary Badge
This visual design was created by https://www.instagram.com/guiye.perez.bongiovanni/ ; however, only...
-
 TCD1304 - STM32F401CCU6 breakout board
The recent modifications made to the circuit board design have improved its functionality and space ...
TCD1304 - STM32F401CCU6 breakout board
The recent modifications made to the circuit board design have improved its functionality and space ...
-
 TCD1304 miniature PCB rev2
The redesign of the PCB involved several key changes to improve its performance and decrease its siz...
TCD1304 miniature PCB rev2
The redesign of the PCB involved several key changes to improve its performance and decrease its siz...
-
 2-channel breadboard voltmeter
The project originally stems from my CH32 tutorial series. I started working with this chip not so l...
2-channel breadboard voltmeter
The project originally stems from my CH32 tutorial series. I started working with this chip not so l...
-
 ADS1256 - RP2040 Custom DAQ Rear Panel
This is just a simple PCB panel that belongs to my other project which is a high-performance DAQ.A r...
ADS1256 - RP2040 Custom DAQ Rear Panel
This is just a simple PCB panel that belongs to my other project which is a high-performance DAQ.A r...
-
Programmable Mist Maker - XIAO / QT PY Extension
160 0 0 -
RadioHAT - Raspberry Pi radio development platform
172 0 1 -
-
-
-
-
ARPS-2 – Arduino-Compatible Robot Project Shield for Arduino UNO
2762 0 5 -
A Compact Charging Breakout Board For Waveshare ESP32-C3
3266 3 8 -
AI-driven LoRa & LLM-enabled Kiosk & Food Delivery System
3516 2 2


