


|
arduino IDEArduino
|
|

|
KiCad 9.0 |
|

|
OnShapeOnShape
|
|
|
|
Creality ender 3 v3 ke |
|
|
|
EasyEDA |
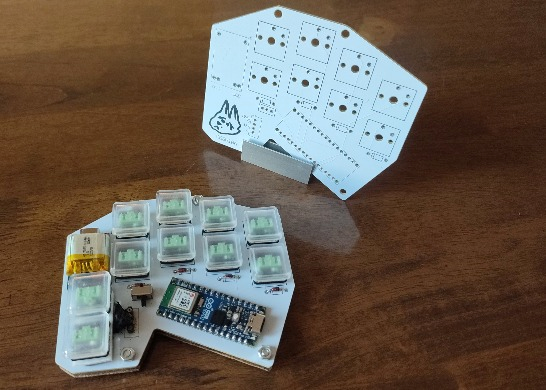
Paw-V1, the sound of one hand typing
What is it?
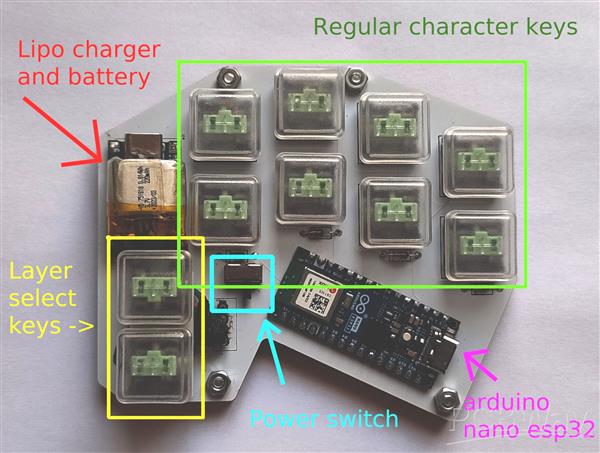
If we go according to the traditional way of sizing keyboards, my project is a 10% Bluetooth keyboard designed to be used with one hand. In order to get all the letters of the alphabet and store necessary punctuation I used two techniques:
1. Layering
2. Chording
There are two layer (sometimes called "alpha") keys that when pressed in different combinations give the eight remaining keys a unique set of letters/characters.
With 2 layer keys (A and B for explanation's sake) I have access to 4 layers:
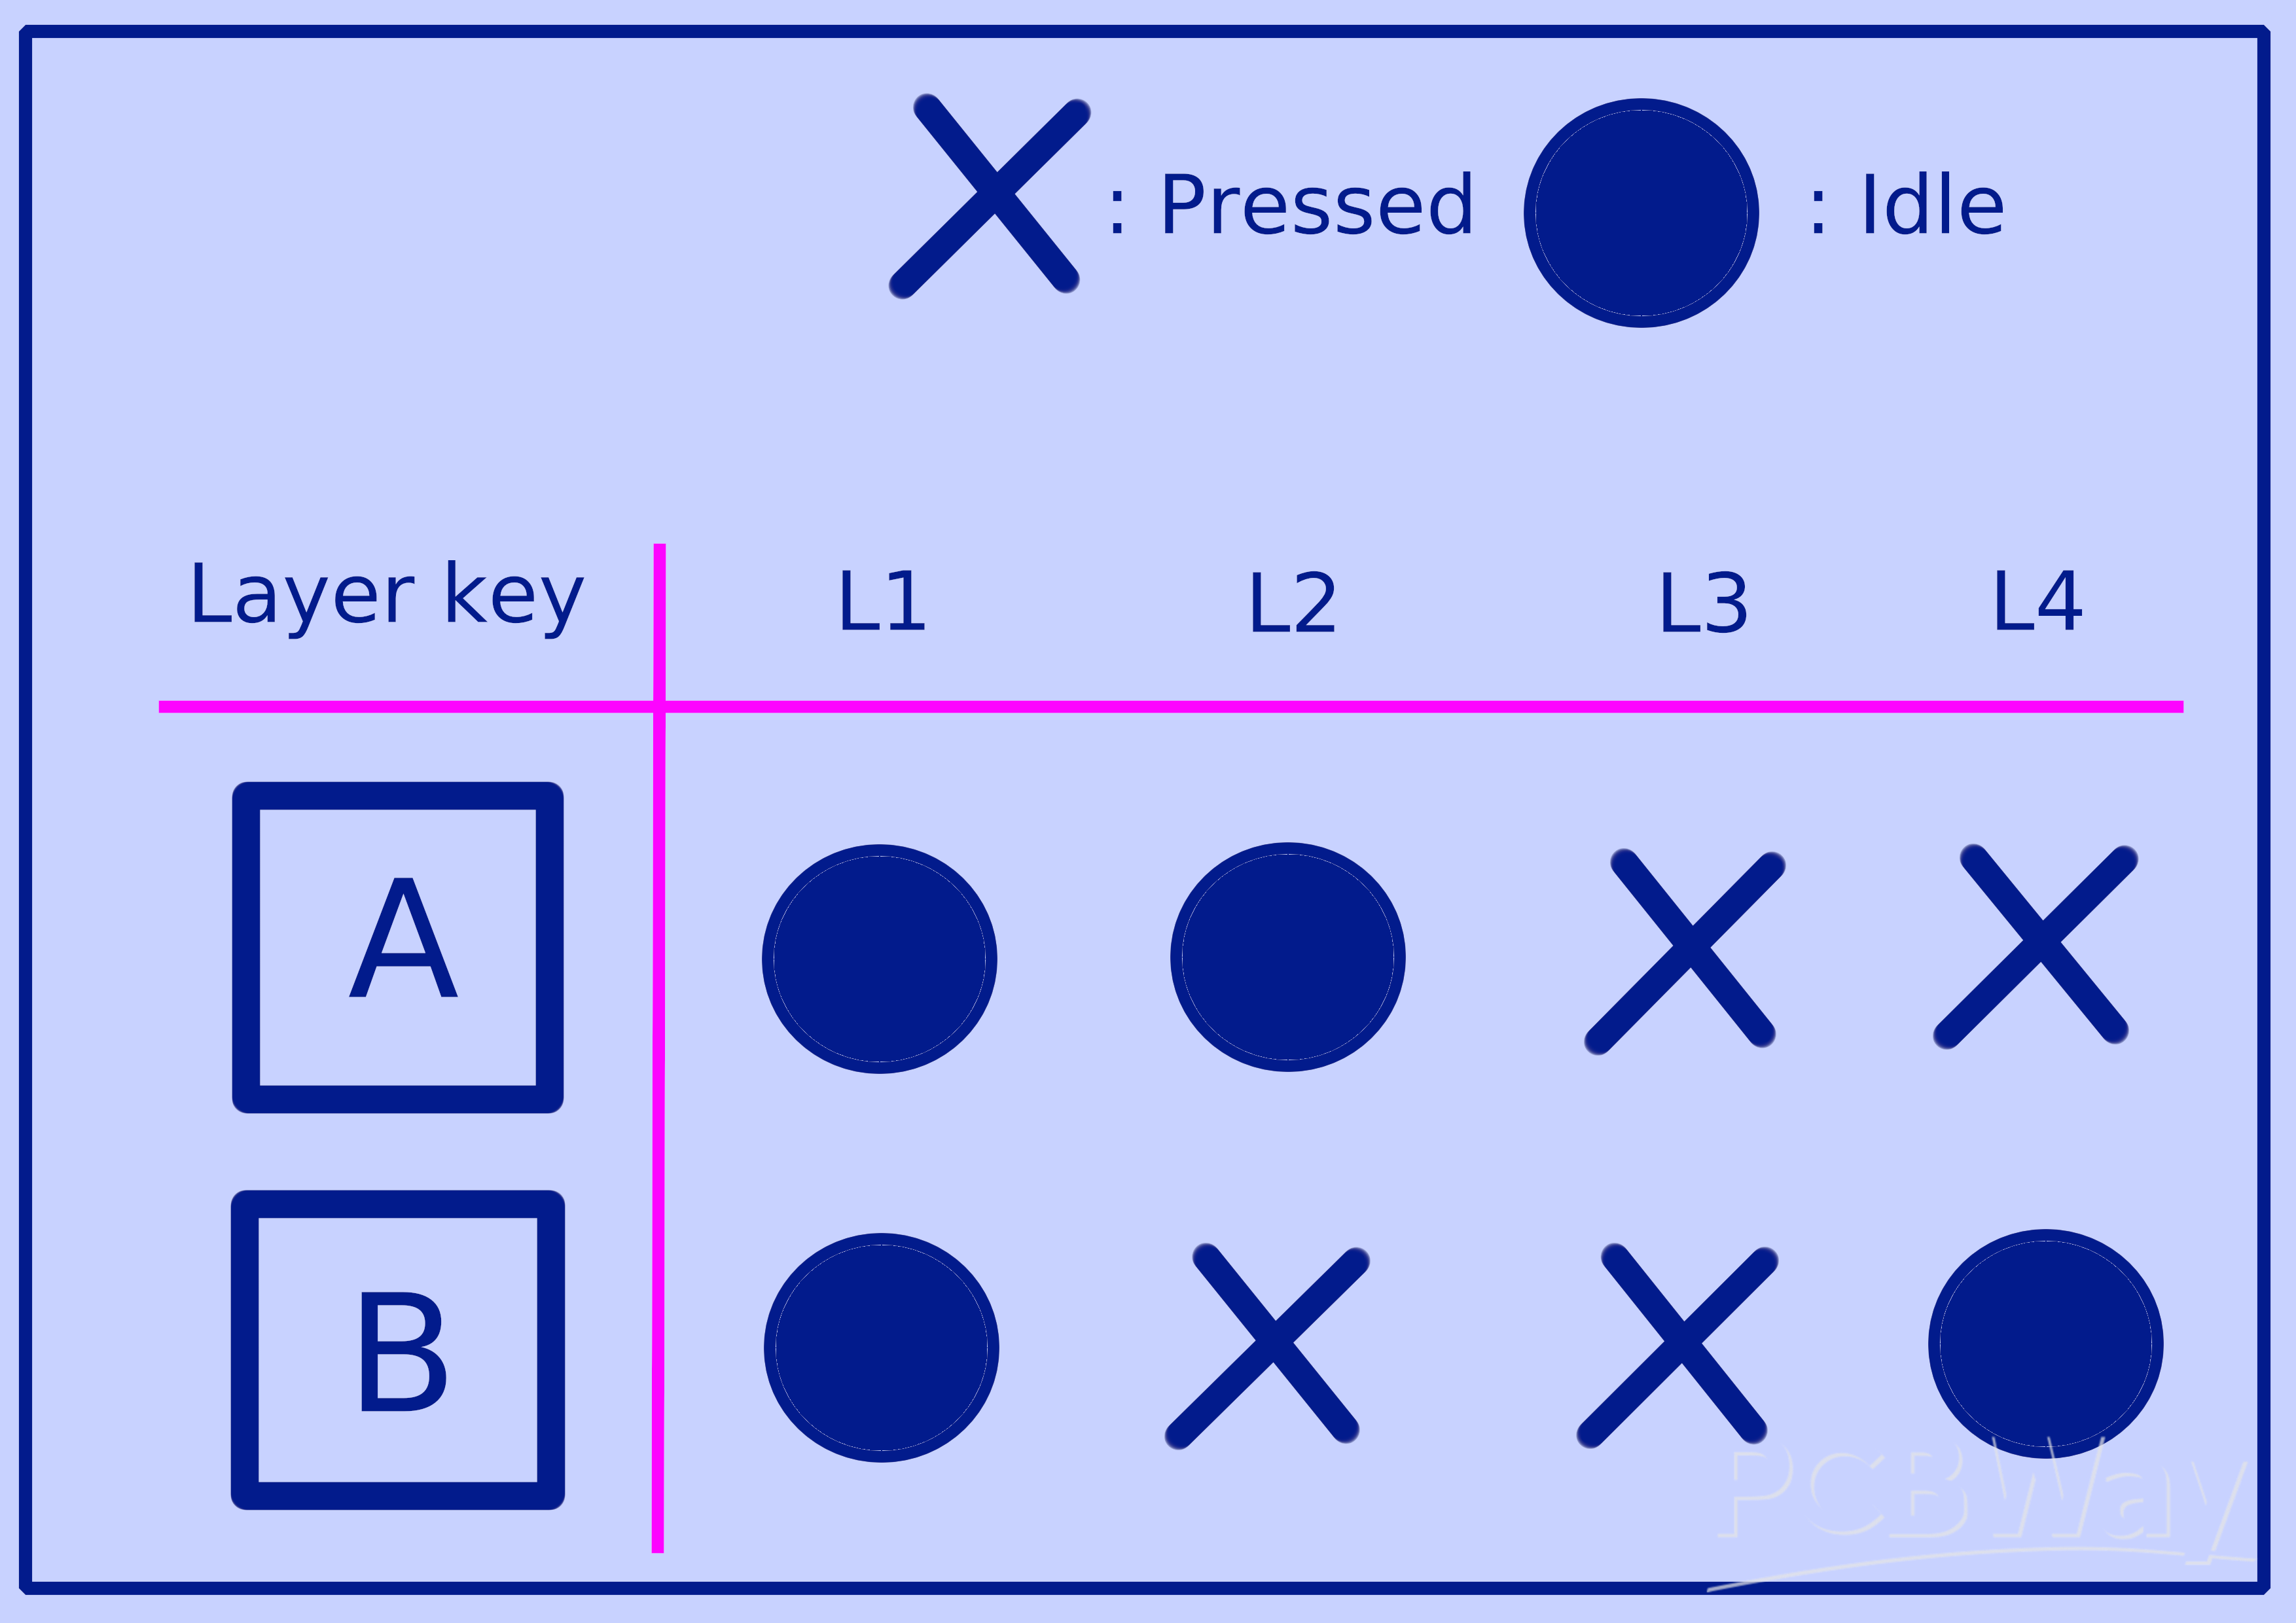
With 8 keys on each layer and 4 different layers we have 32 unique keys so far. This is more than enough for regular English text typing however for uses like programming I'd like some more keys for punctuation and symbols. This is where chording comes in.
Chording
This is when you press two keys at the same time in order to type a different character; pressing "e" and "t" to get "(" for example. I'll refer to these as key combos from now on. If we do the math assuming it's strictly 2 keys per key combo with one layer of 8 keys, by doing 8 choose 2 for every unique combination, we get a total of 28 unique key combos. if we apply this thinking to every layer we get a grand total of 112 unique key combos! Now that's way more than I personally need and it does get a little confusing beyond the first layer but 28 extra keys more than meet my needs.
Design quirks and roadblocks
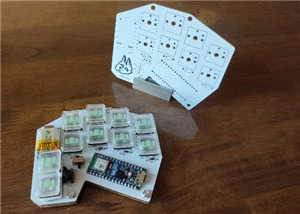
My original design used a joystick I ripped from an old console instead of the two thumb keys. It would have given me a wider range for layer selection but it was far more uncomfortable than I anticipated.
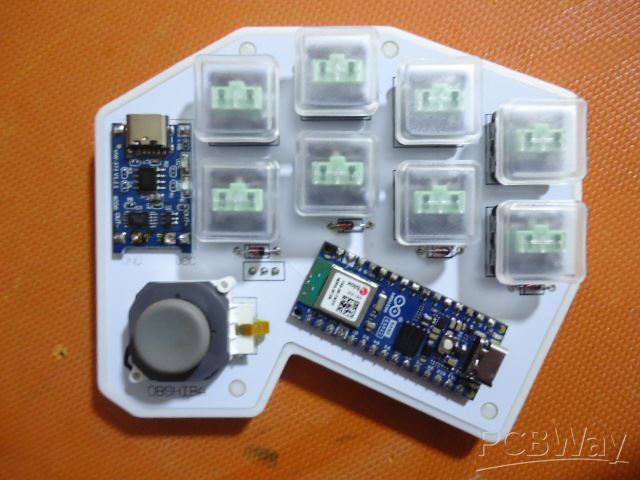
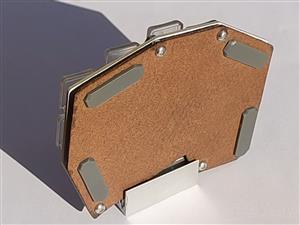
~An earlier iteration of the keyboard
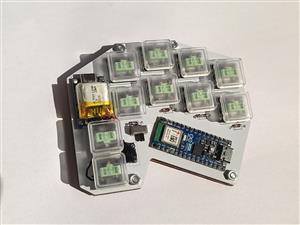
Additionally my earlier designs used a larger battery and had 3d printed cases. These earlier iterations were thicker than I would have liked so I ripped a smaller LiPo battery from a pair of old headphones and replaced the plastic case with a fiber board base. I decided to mount this new battery directly on top of the LiPo charging circuit which was when I encountered the issue of the charging circuit heating up as it charged. To remedy this I used a small piece of a sheet of mica as a barrier between the two. Mica is a heat resistant mineral often composed of lots of thin plastic-like layers. My application of this solution is far from scientific but from what I can tell there is some improvement in terms of preventing heat transfer to the battery.
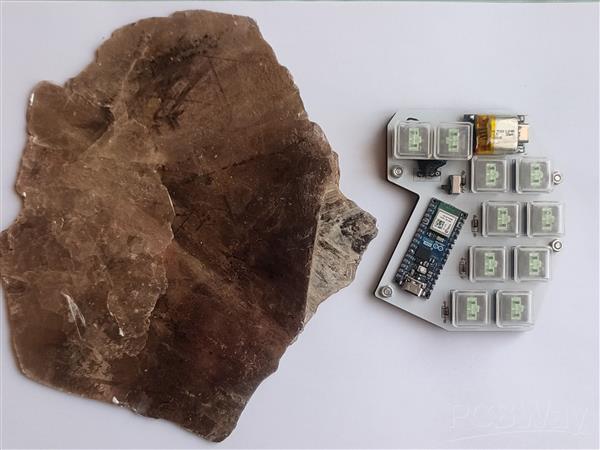
~A sheet of mica I own for some reason
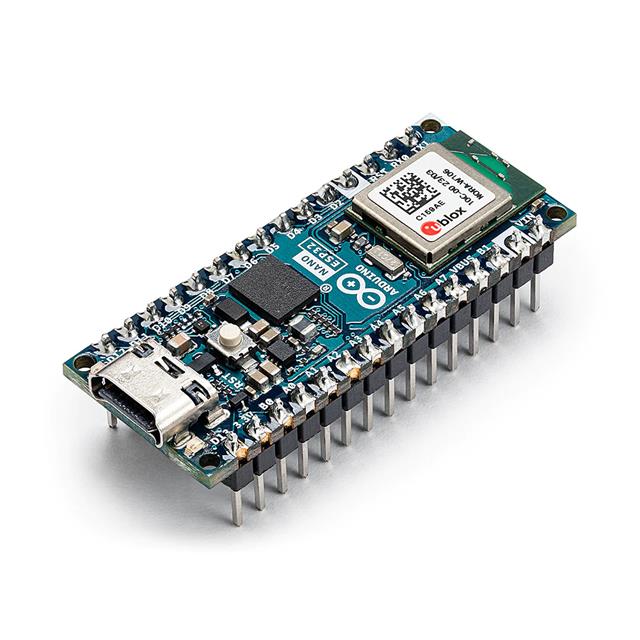
Finally, as a result of me choosing to use Arduino for this project instead of a better suited board like the Nice!nano or Raspberry pico. I could not find any approachable examples of Arduino code for this specific use case or any similar. Because of this I'm still working to make the chord typing more consistent. It's this bottleneck that led me to producing some of the most questionable (AI free) code ever written.
While I will upload my gerber files and 3d models, I wouldn't recommend using them unless you plan on using a 4 pin sensor of some kind or editing in new dedicated through holes for the two thumb keys on the pcb, as I just repurposed the analog pin connections meant for the 4 pin joystick and the edits I made are very finicky.
now for the big question...
Why?

I wish I had a more noble reason like helping people who may not have full usability of both their hands, or as some sort of accessibility device (which it can definitely be repurposed for). In reality the spark that started this project was a game of TypeRacer I lost in chemistry class... multiple games to be completely honest. That was when I first seriously considered touch typing. I would end up going down a rabbit hole of the history of keyboards, the inefficiency of qwerty, and the world of custom keyboards. I could just learn a layout on my regular keyboard but I struggled a bit to coordinate my left hand and this genuinely led me to ask myself: "do I really need my left hand?". Apparently I don't. This route just seemed a lot more fun and convoluted as well as a good excuse for me to try out pcb design for the first time with the help of PCBWay.
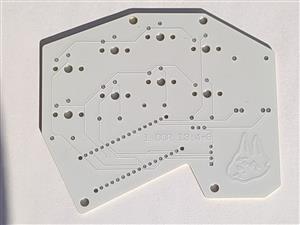
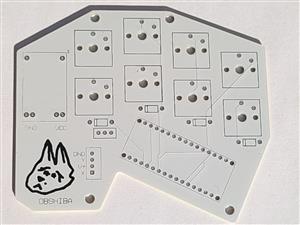
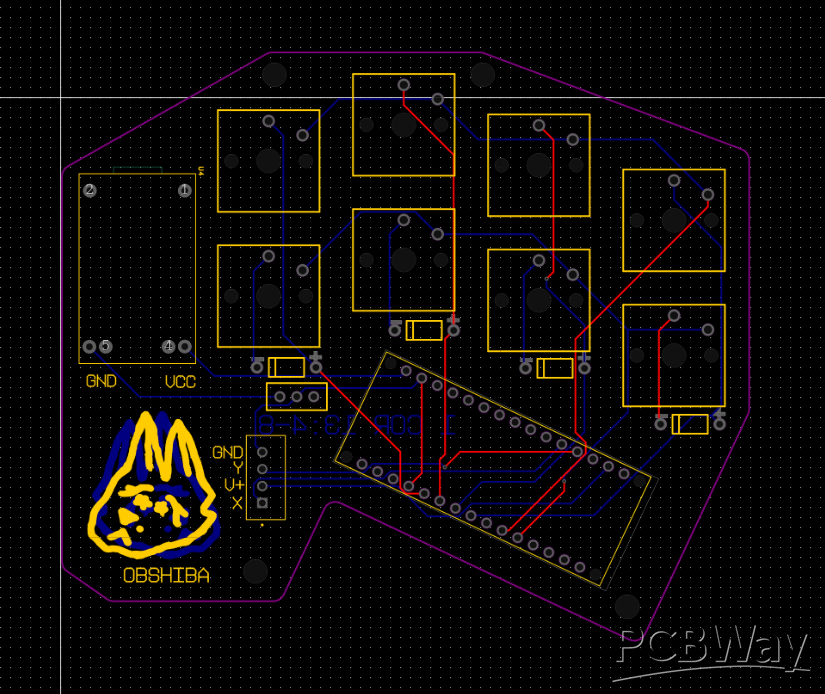
To close this off here are some screenshots of my PCB schematics:

Improvement/update
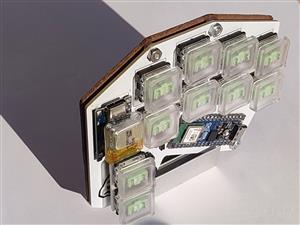
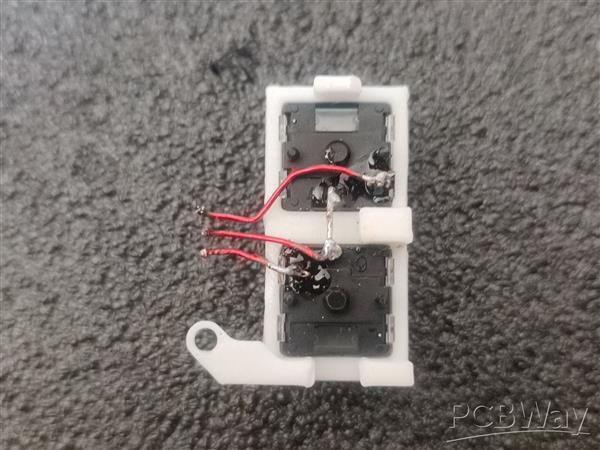
I've uploaded a new thumb key holder model that has a much more reliable fit to both the keys and the pcb itself. It's designed to be fastened to the pcb with a nut and bolt and have the buttons hand-wired to the joystick's 5V, A0, and A1 pins as shown below:
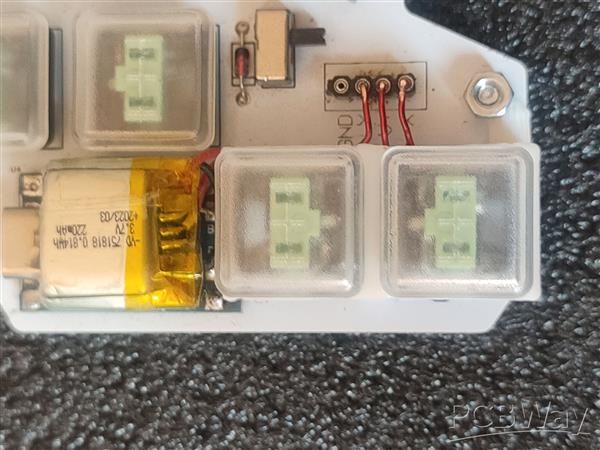
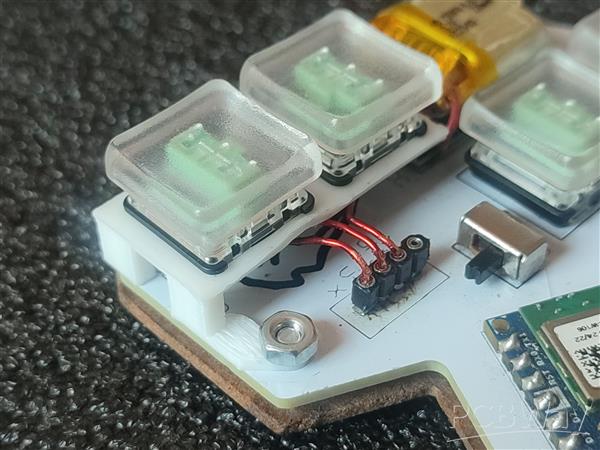
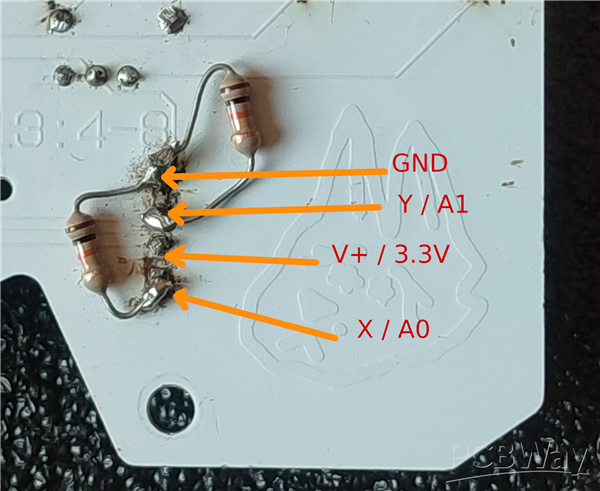
In order for the buttons to work correctly with the written code you'd also need to pull down/connect both A0 and A1 to ground through two 10K ohm resistors like this (hopefully much cleaner than I did):
Paw-V1, the sound of one hand typing
*PCBWay community is a sharing platform. We are not responsible for any design issues and parameter issues (board thickness, surface finish, etc.) you choose.


Raspberry Pi 5 7 Inch Touch Screen IPS 1024x600 HD LCD HDMI-compatible Display for RPI 4B 3B+ OPI 5 AIDA64 PC Secondary Screen(Without Speaker)
BUY NOW


- Comments(0)
- Likes(3)
- 1 USER VOTES
- YOUR VOTE 0.00 0.00

-
8design
-
7usability
-
8creativity
-
8content
More by Shiba Z
-
Programmable Mist Maker - XIAO / QT PY Extension
172 0 0 -
RadioHAT - Raspberry Pi radio development platform
182 0 1 -
-
-
-
-
ARPS-2 – Arduino-Compatible Robot Project Shield for Arduino UNO
2767 0 5 -
A Compact Charging Breakout Board For Waveshare ESP32-C3
3275 3 8 -
AI-driven LoRa & LLM-enabled Kiosk & Food Delivery System
3529 2 2


