


PICO Blasters
Greetings everyone and welcome back. meet PICO BLASTER.
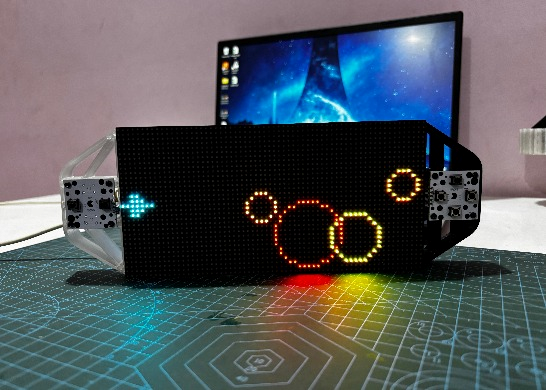
Powered by the Raspberry Pi Pico and a vibrant 64x32 LED matrix panel, this unique Game Console transports players into the retro charm of "Space Invaders."

What started as a previous microcontroller-based project has now evolved into an exciting and highly interactive gaming experience: PICO Blaster. With strategic modifications, including a newly designed button control board and a custom-built frame, this revamped Game Console device redefines the retro gaming landscape.
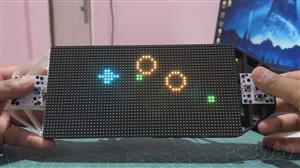
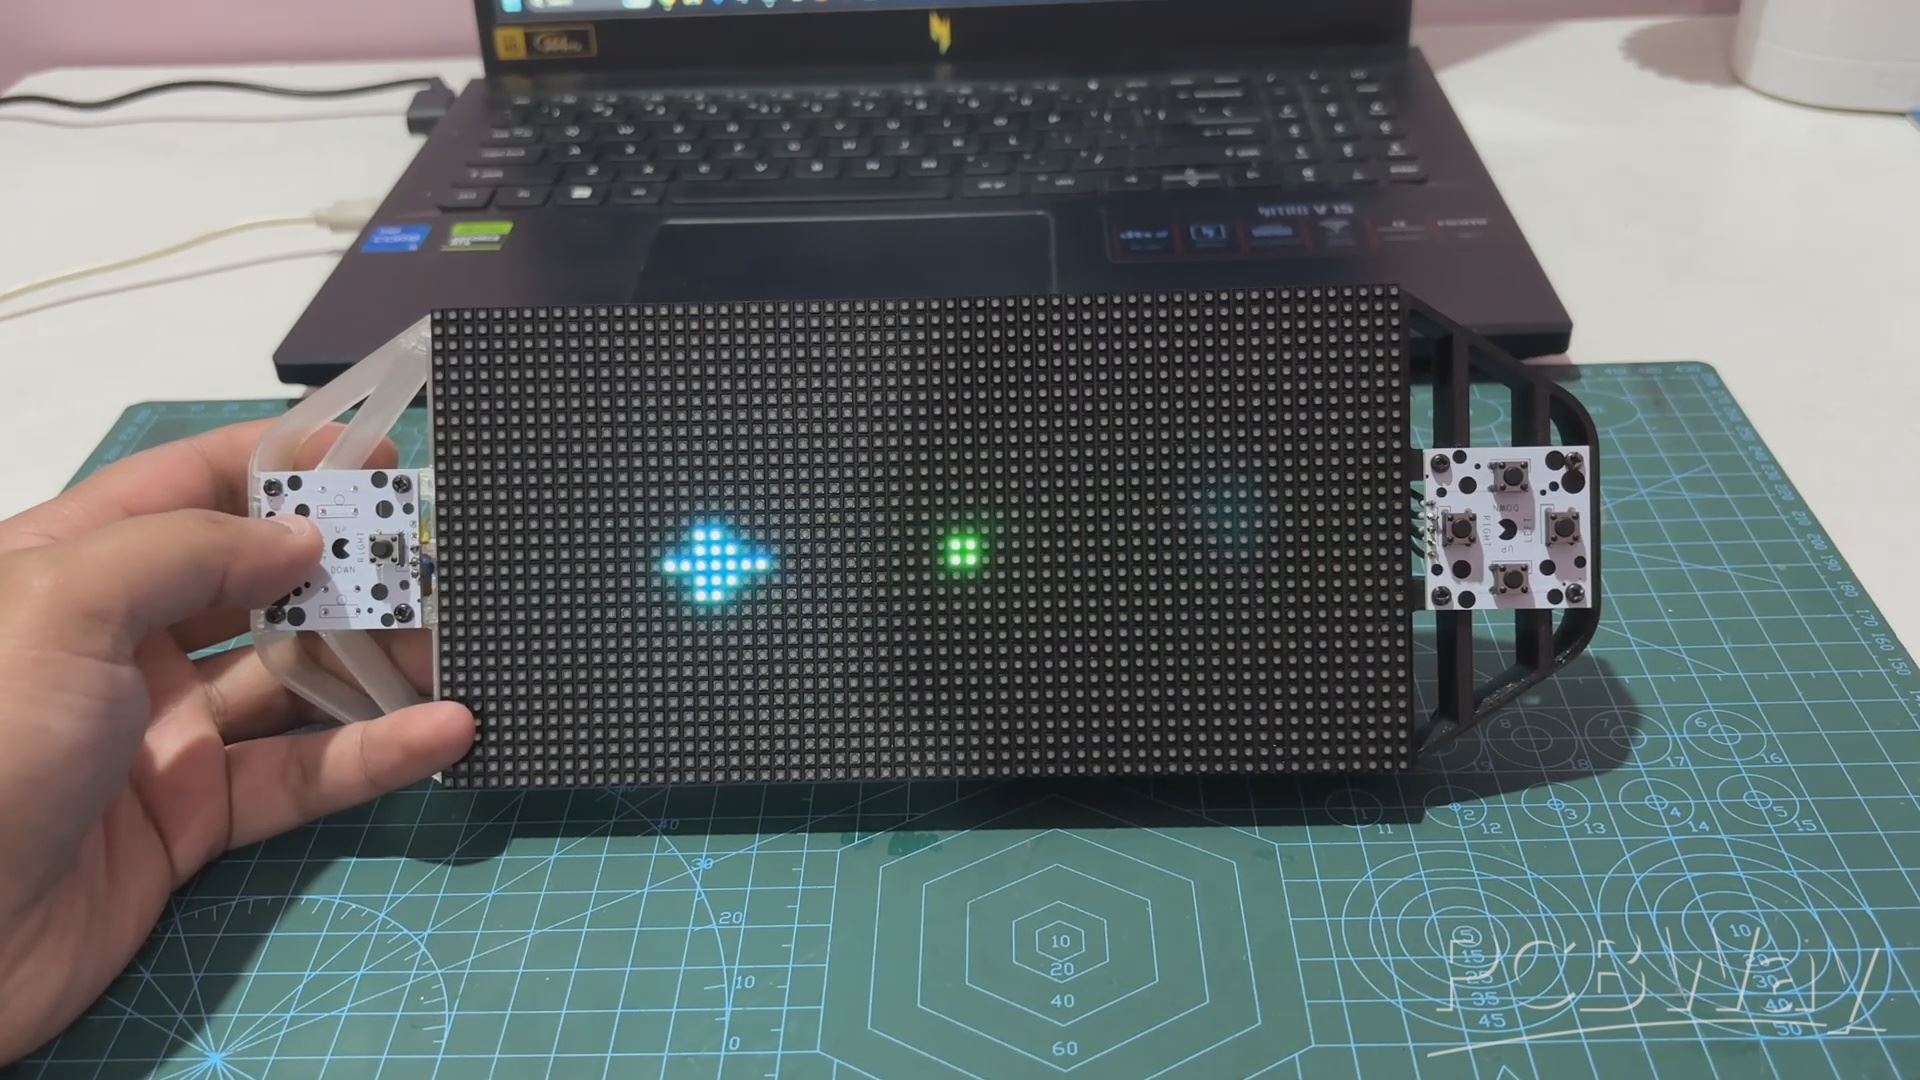
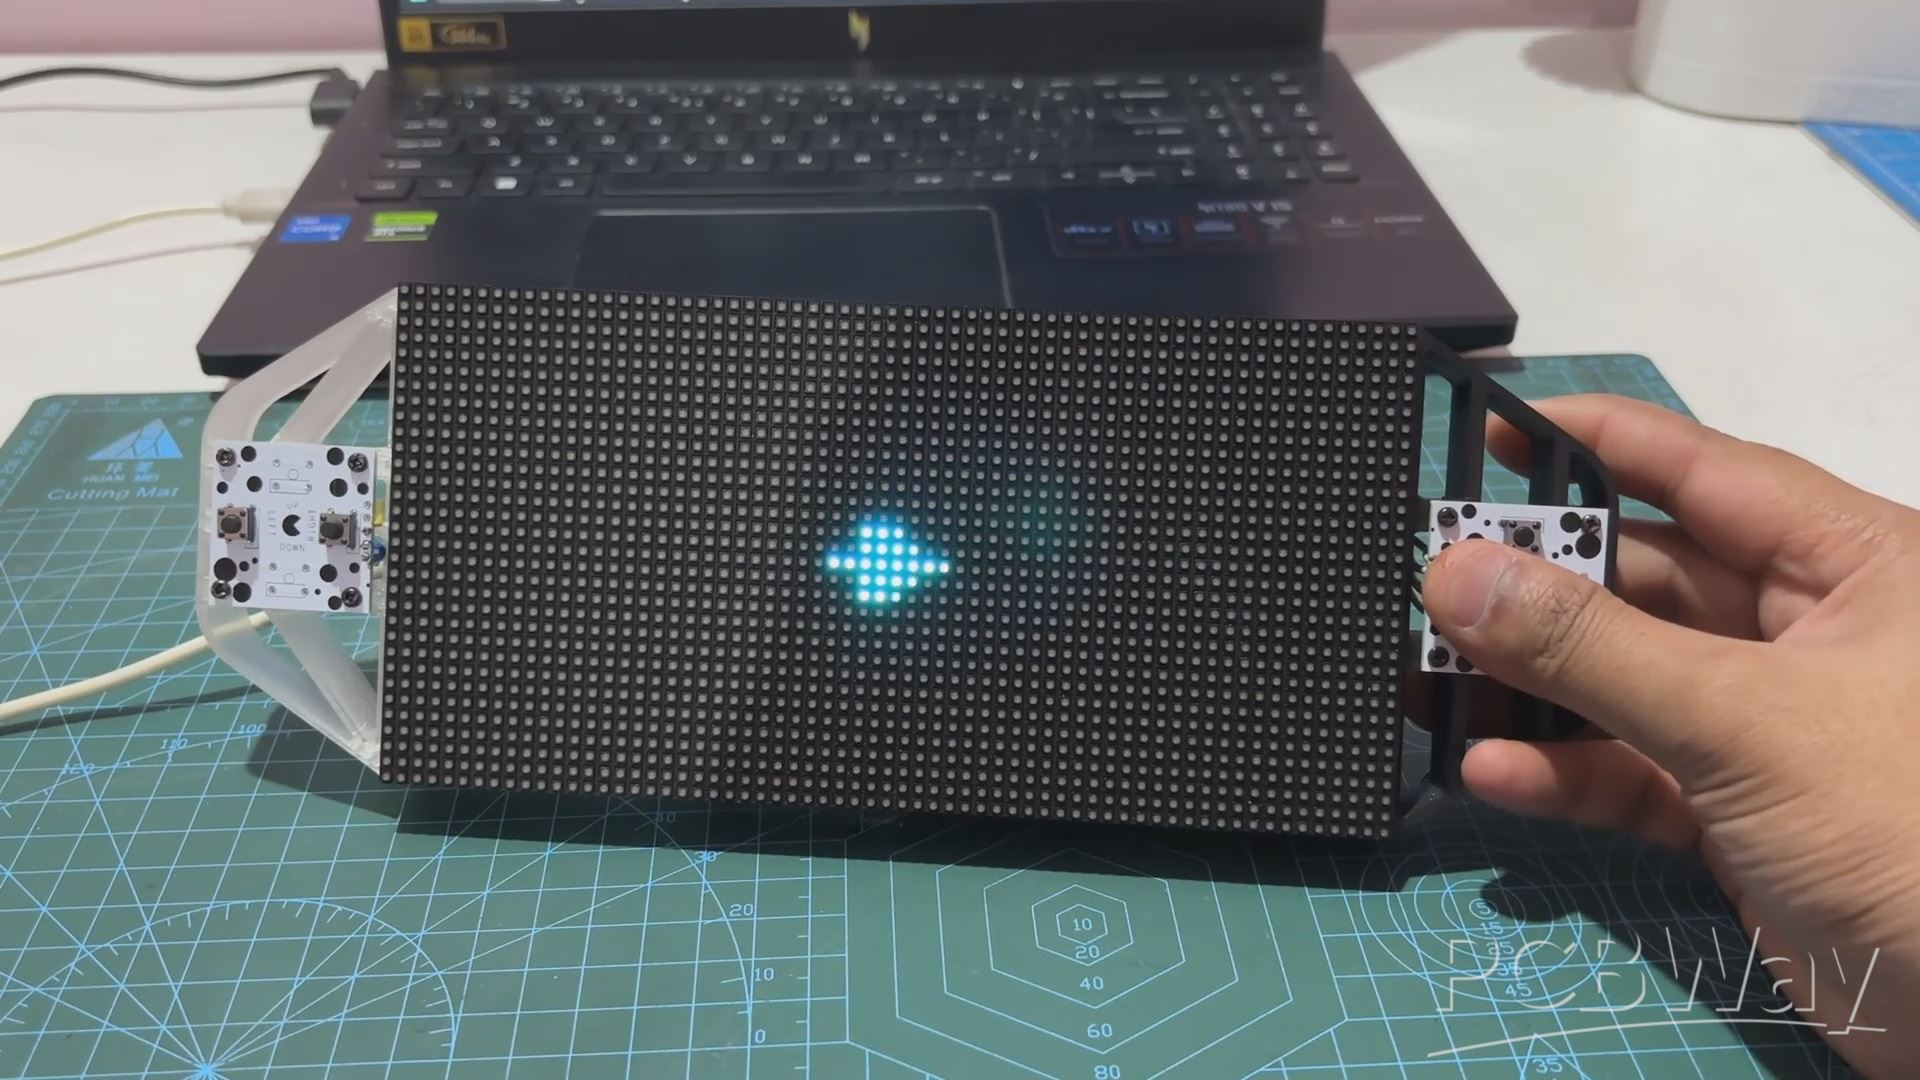
PICO Blaster brings a fresh twist to the classic "Space Invaders" concept. Players control a spacecraft using a four-directional button PCB board, allowing seamless movement across the LED matrix display. As circular projectiles in three different sizes approach from the right side, the challenge is simple yet thrilling: shoot them down before they reach the ship. Armed with two types of weapons—rapid-fire bullets and a high-impact blaster—the game tests both strategy and reflexes.
Each projectile is color-coded based on size and difficulty: the smallest orange projectiles require a single bullet, medium yellow projectiles need two, and large red projectiles demand three hits to destroy. For players under pressure, the blaster offers a powerful advantage, capable of obliterating all projectiles in its path with a single shot, though limited by a 10-second cooldown.
PICO Blaster showcases a perfect blend of creativity and technical ingenuity, offering a rewarding experience for both players and developers.
This article dives into the project's journey, from hardware modifications to gameplay mechanics, unveiling what makes this game a standout achievement.
Materials Required
These were the materials used in this project:
- Custom PCBs (Provided by PCBWAY)
- Raspberry Pi PICO 2
- RGB Matrix 64x32
- IP5306 IC
- 10uF Capacitors
- USB Micro Port
- 18650 Lithium Cell
- 18650 Cell holder SMD version
- Push Buttons
- 3D printed Parts
RGB Matrix Game Controller Project
We are reusing one of our previously built game console project. This project consists of a 64x32 RGB matrix board coupled with a PICO Driver board. For controls, we have included a D-pad Button board that is connected to the GOIO of the PICO 2.
This console has an onboard power source, which is a single 3.7V 2600mAh lithium-ion cell that powers the device, making it a portable game system that we can take anywhere and start playing.
Previously, we created a basic Snake Game for this console in which we could control a Snake. The goal was to guide the snake to eat a red dot, and as the snake munched on the red dot, its size increased. The score counter will keep track of how many dots our snake has consumed. Game over happens when the snake bites itself.
You can find out more about this project from the article below.
https://www.hackstr.io/Arnov_Sharma_makes/snake-game-console-07b378
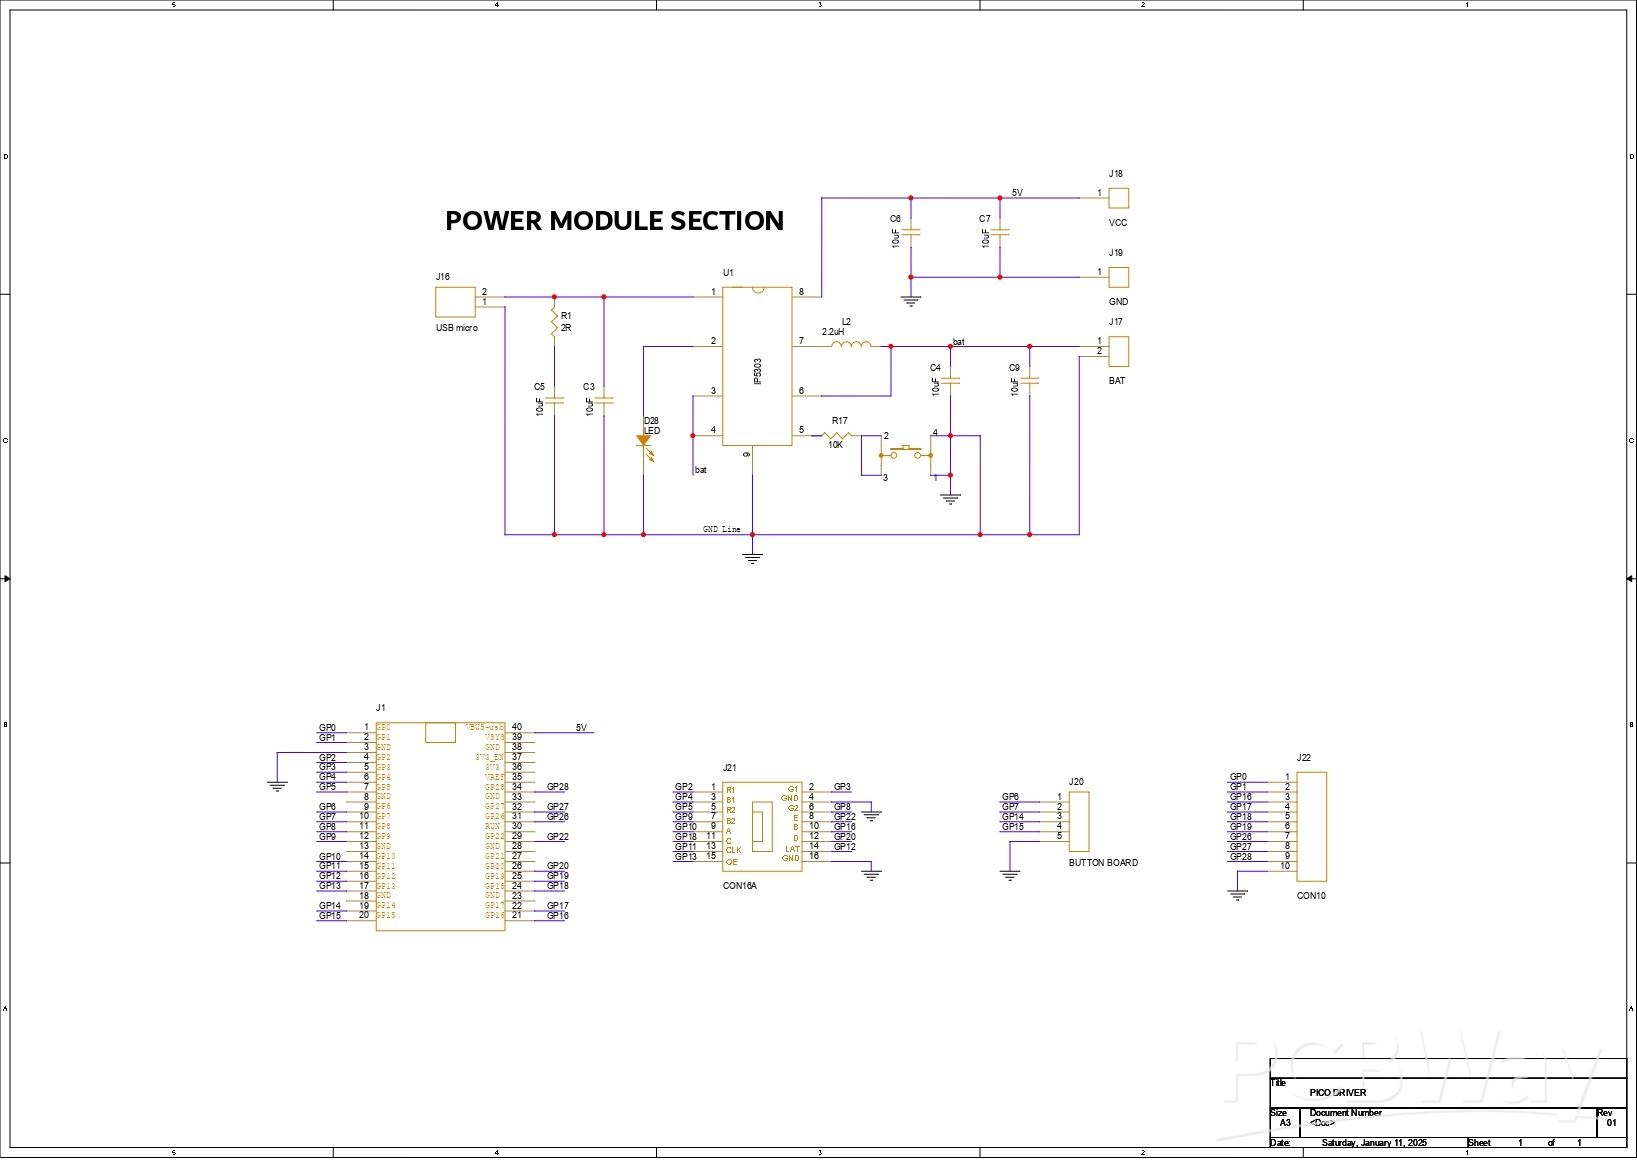
PICO DRIVER
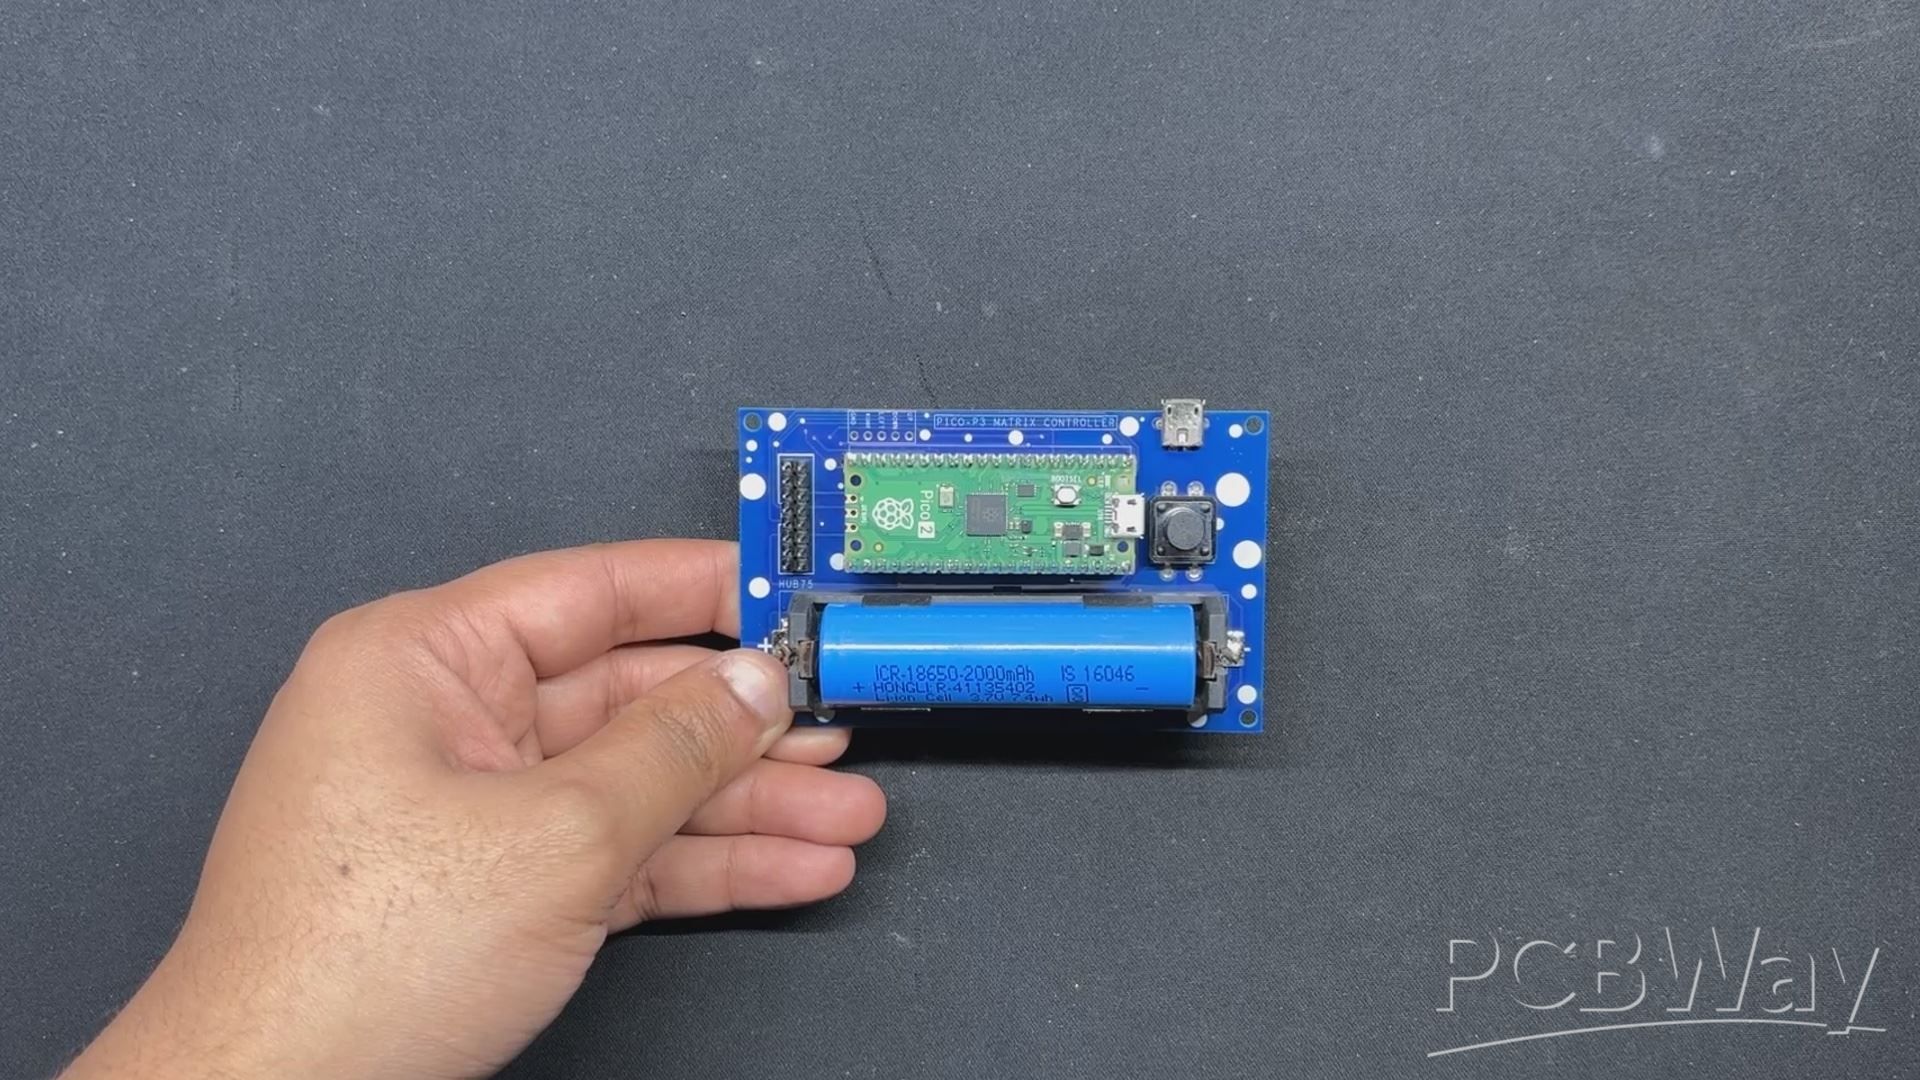
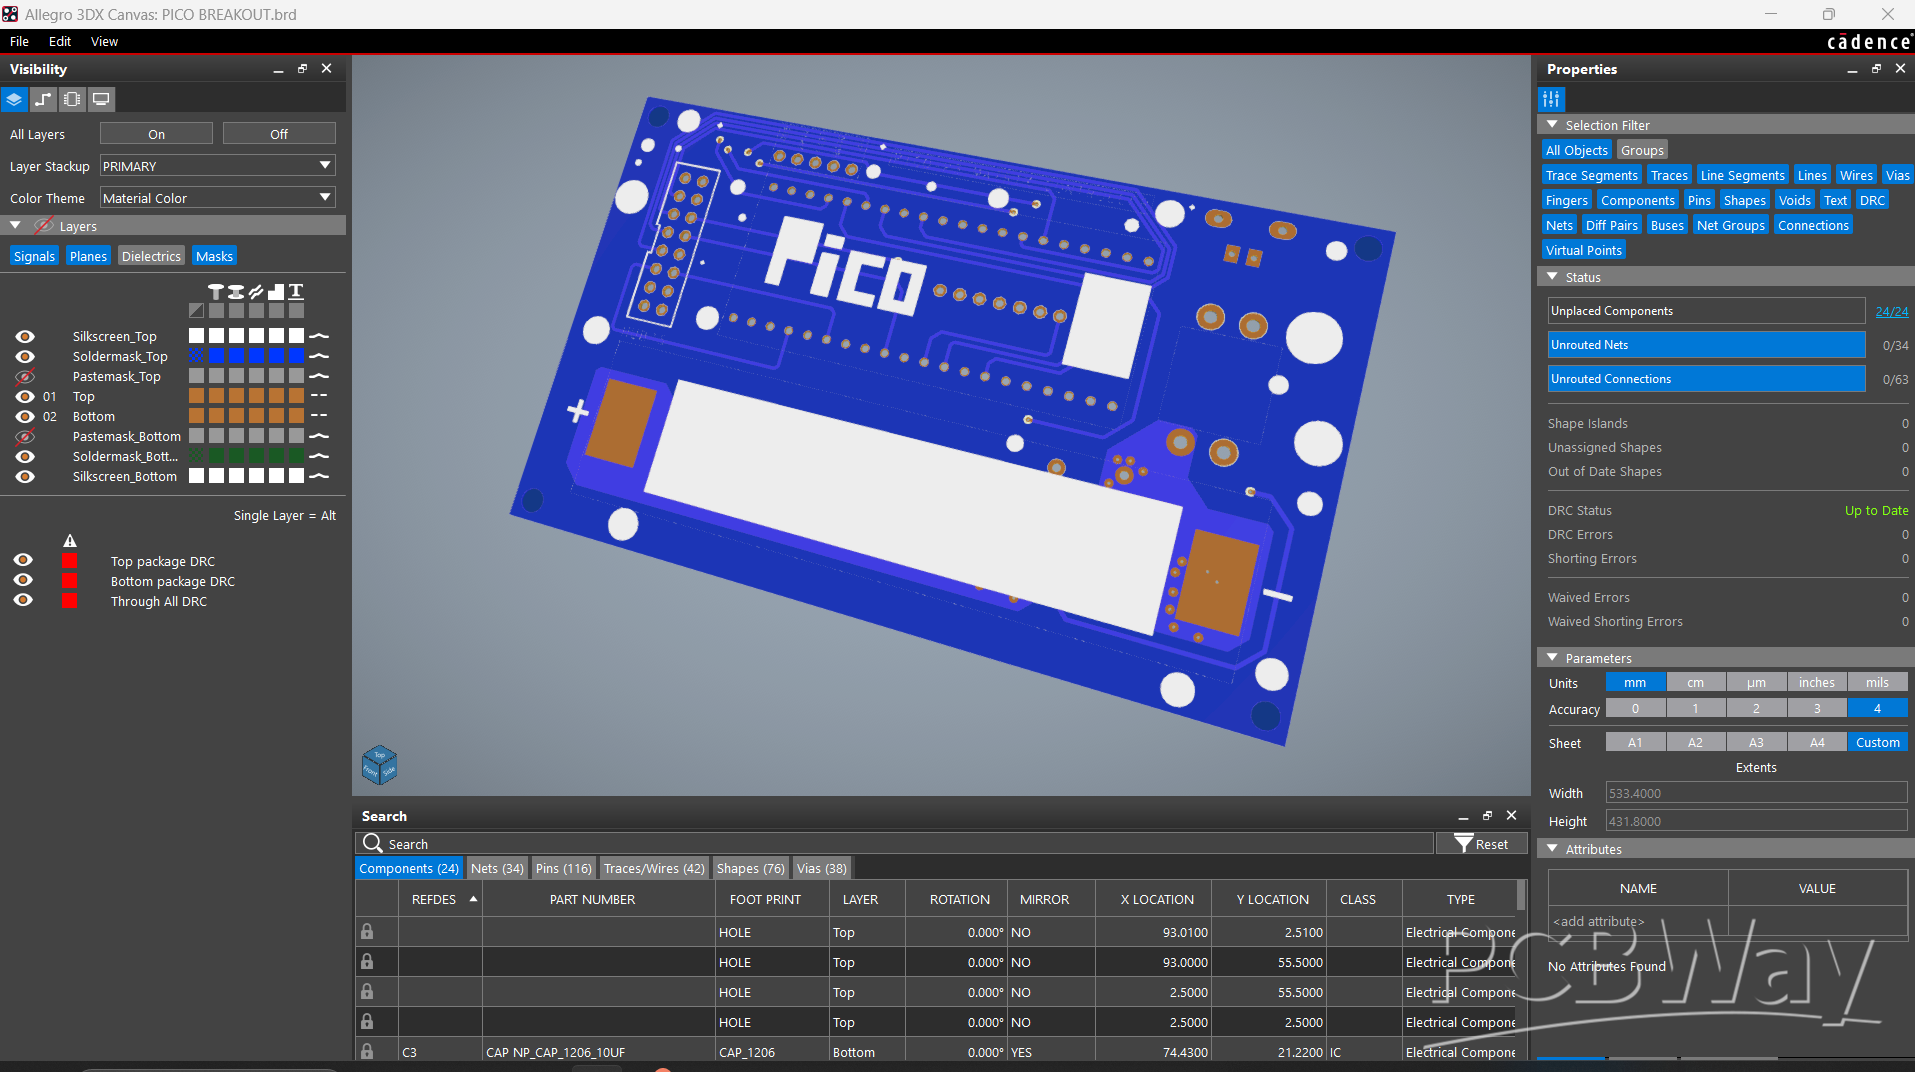
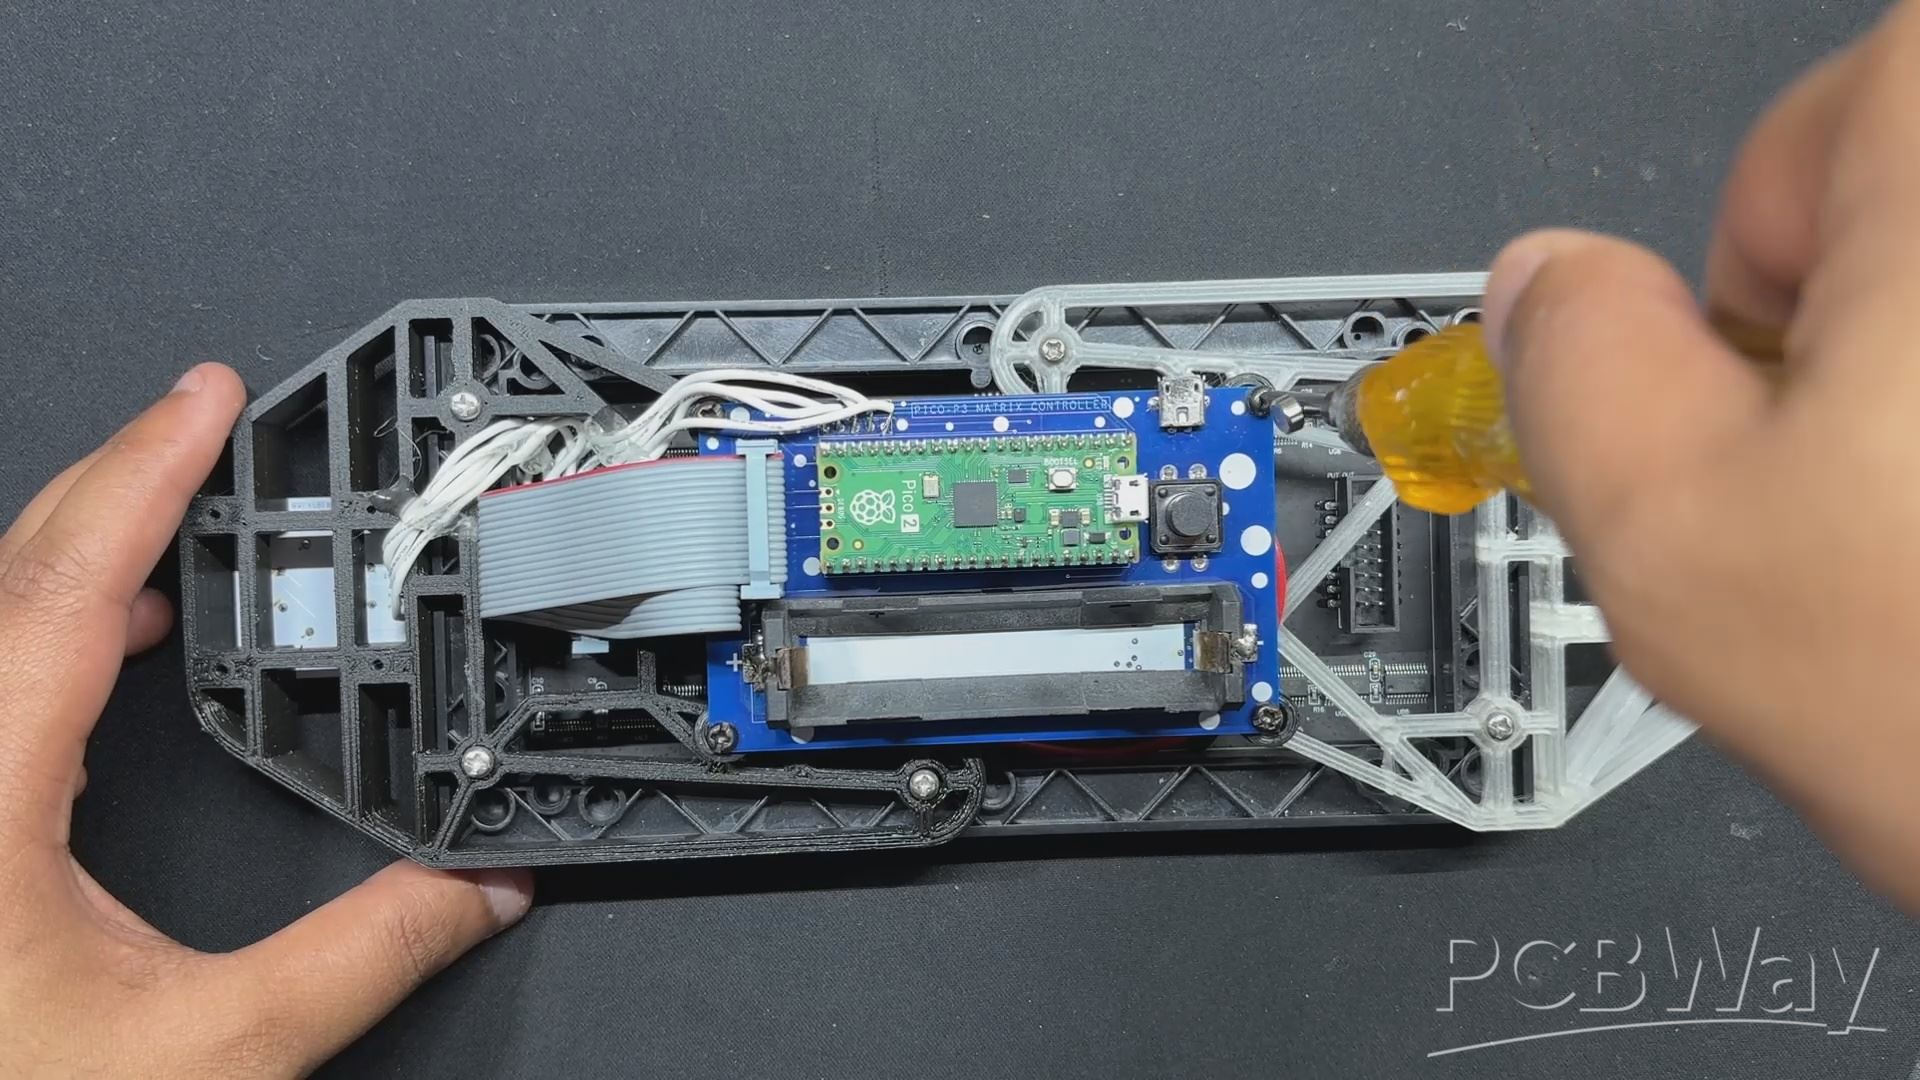
The main component of our console is the PICO Driver Board, which is essentially a breakout board for the PICO that allows us to connect an RGB matrix's HUB75 connector to the PICO. It also has a 3.7V Lithium Cell Power Management circuit, which ensures that the PICO and RGB matrix work at a consistent 5V.
For a quick overview of the PICO Driver Board's assembly process, see our prior project, where we went into detail about how the assembly was completed.
PCBWAY Service
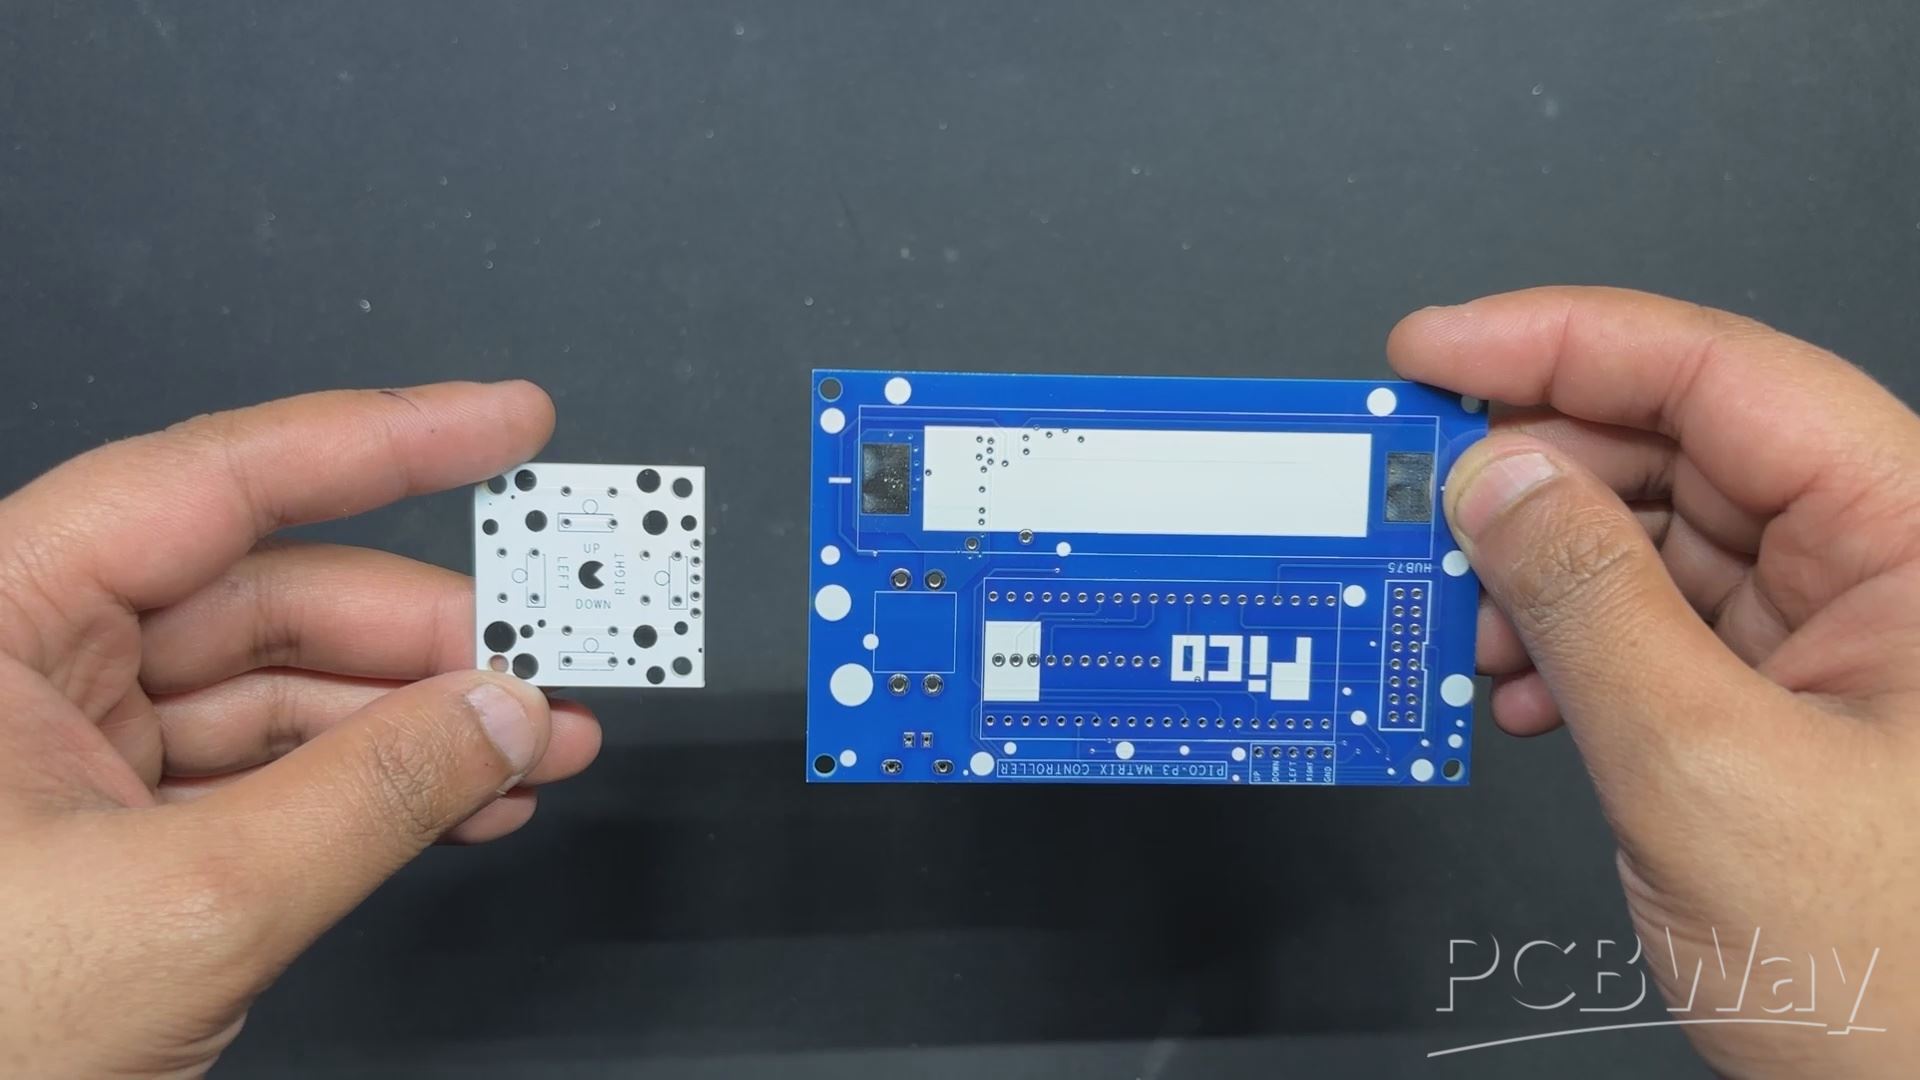
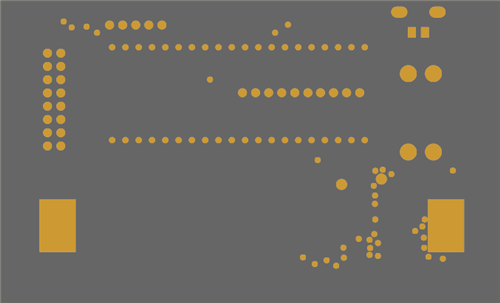
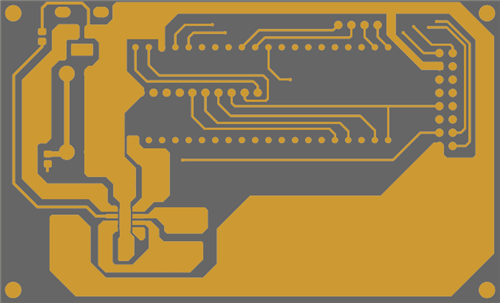
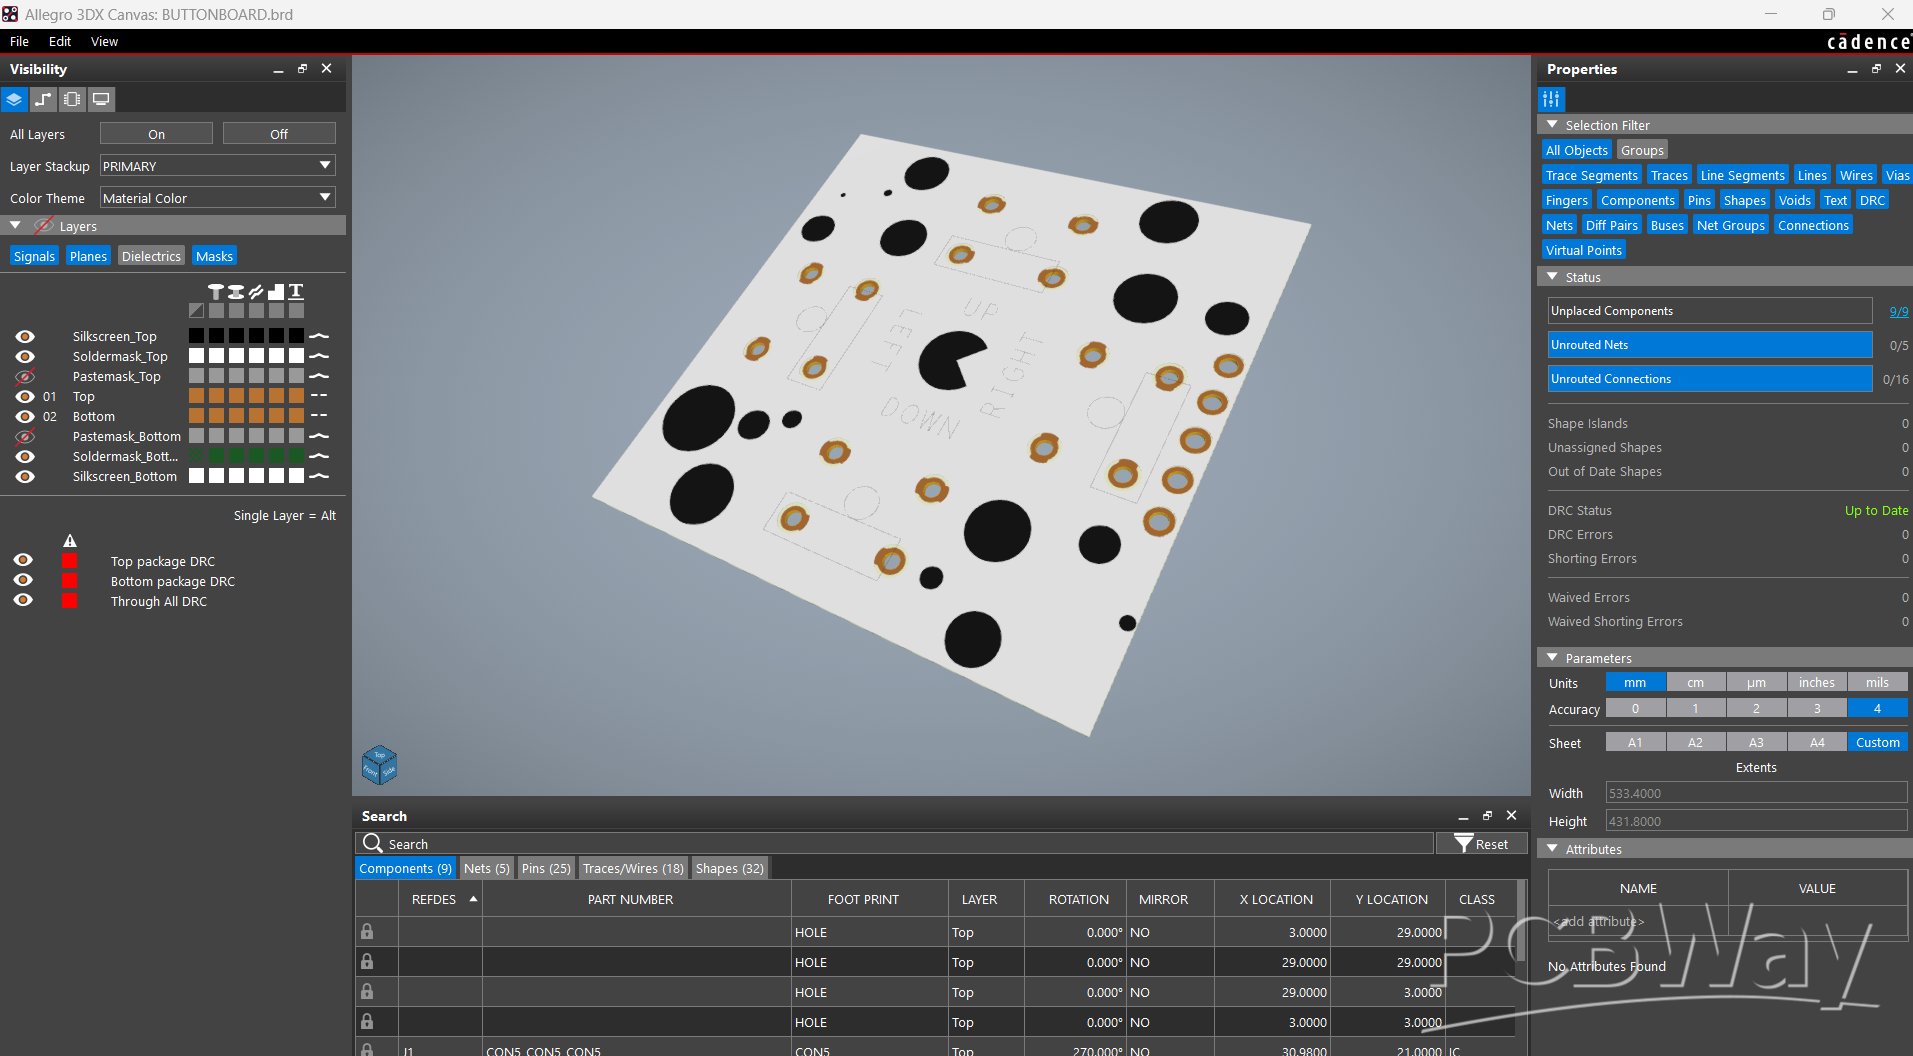
We made two PCBs for this project: the button board and the PICO driver board. Two orders were made: one for the button board and one for the PICO driver board.
The button board PCB was ordered in white solder mask and black silkscreen, while the PICO Driver PCB was ordered in blue solder mask and white silkscreen.
After placing the order, the PCBs were received within a week, and the PCB quality was pretty great.
Over the past ten years, PCBWay has distinguished themselves by providing outstanding PCB manufacturing and assembly services, becoming a trusted partner for countless engineers and designers worldwide.
Their commitment to quality and customer satisfaction has been unwavering, leading to significant growth and expansion.
You guys can check out PCBWAY if you want great PCB service at an affordable rate.
BUTTON BOARD Assembly
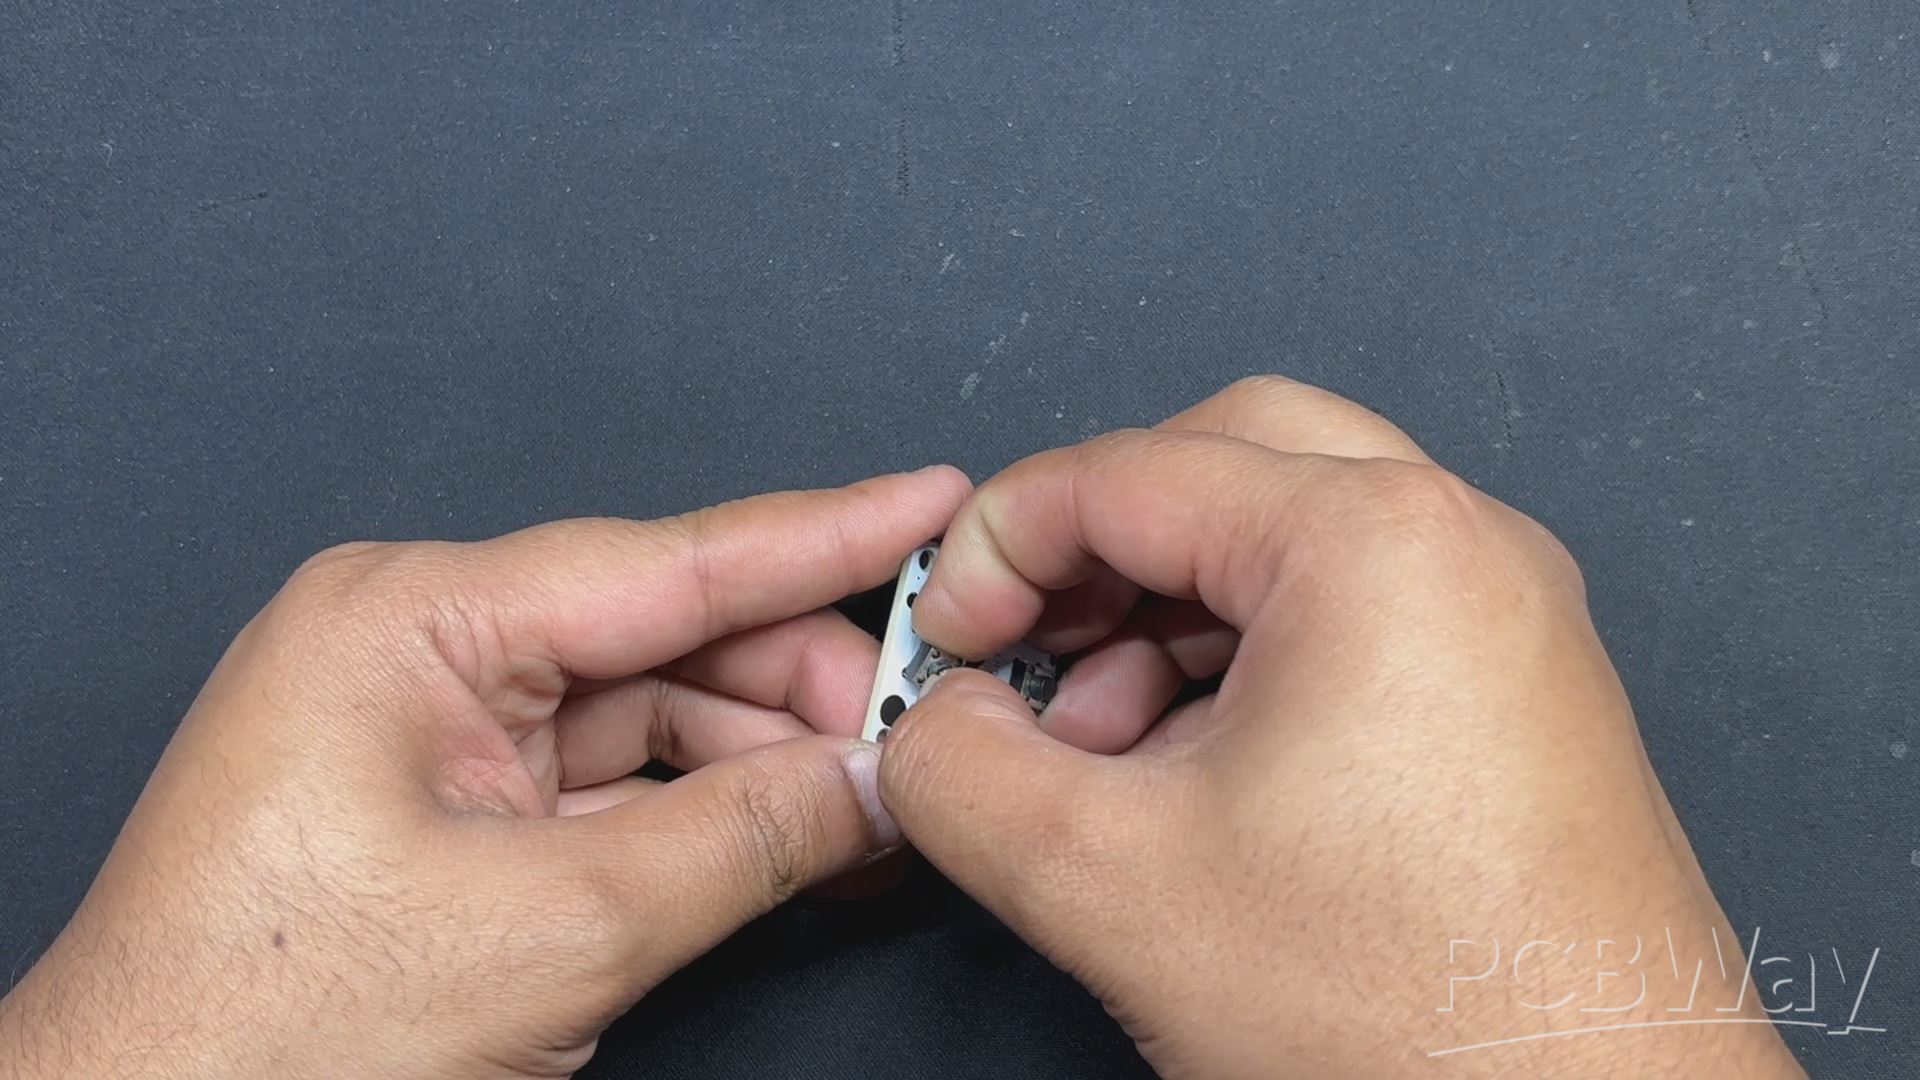
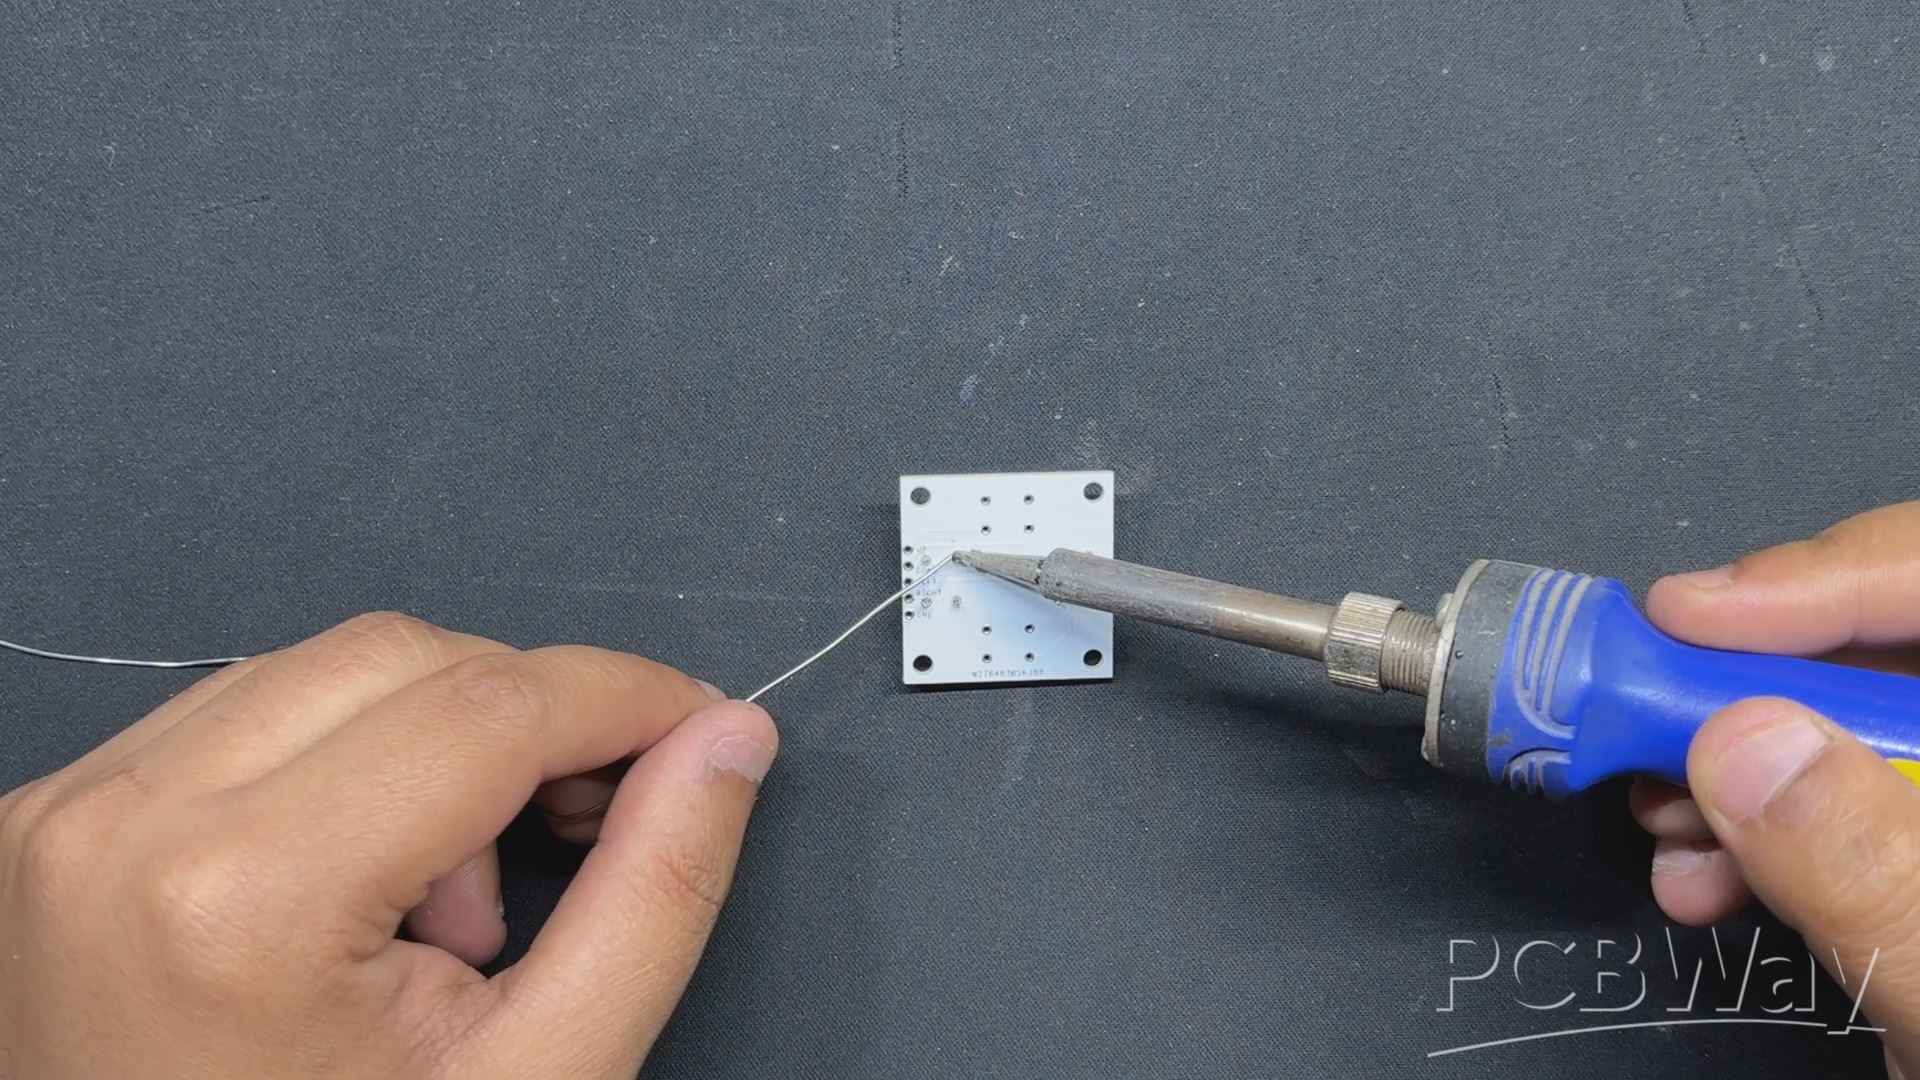
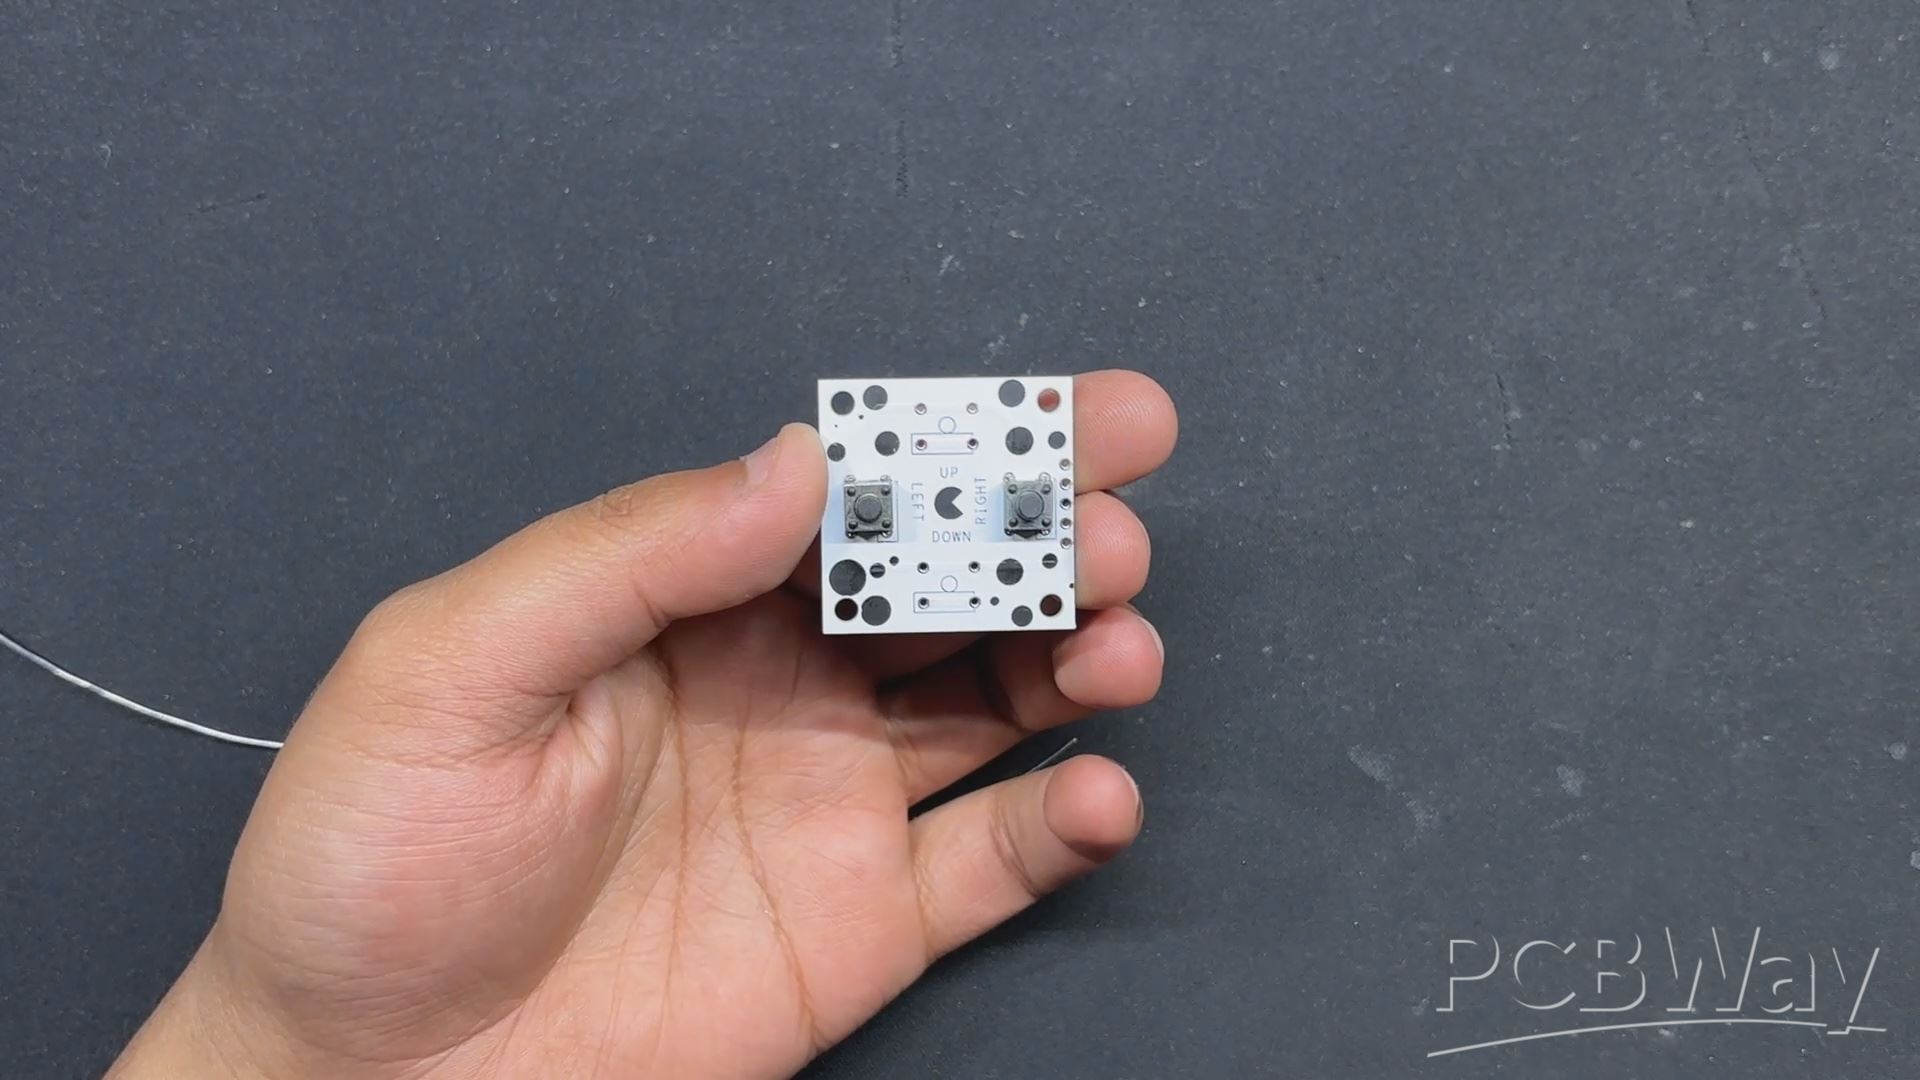
- The button board assembly process begins by placing tactile switches on the Custom Button Board.
- Flipping the board over, we solder the tactile switch pads, permanently installing them in place.
CONSOLE ASSEMBLY

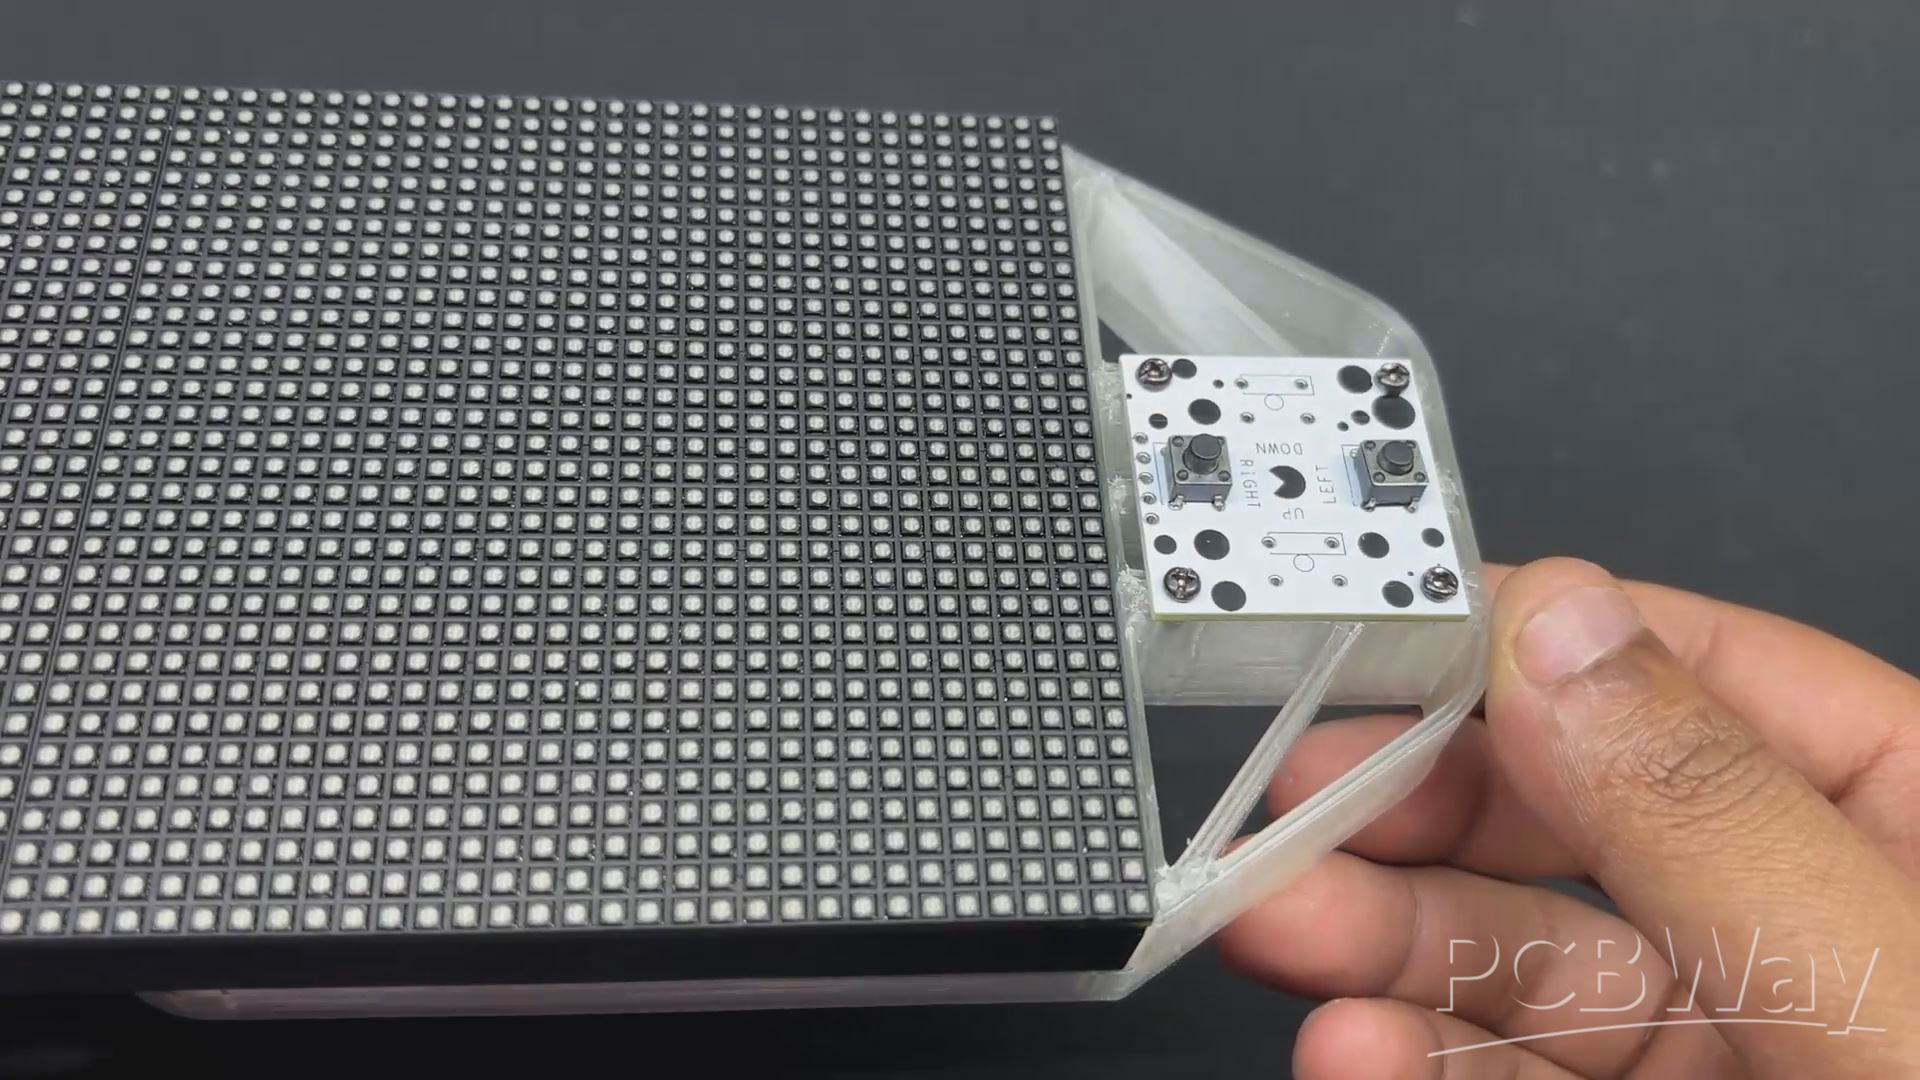
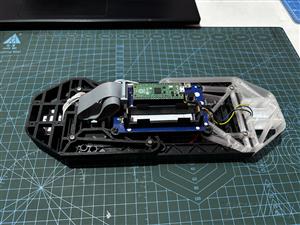
- To begin the console assembly, detach the Left Holder section of the console and remove the screws that secure the holder to the PCB and RGB Matrix.
- We then installed the new 3D-printed Left Holder in place of the prior holder mounting position, using the same screws to secure it to the PCB and RGB matrix.
- By flipping the console over, we installed the button Board PCB with two M2 screws.
WIRING
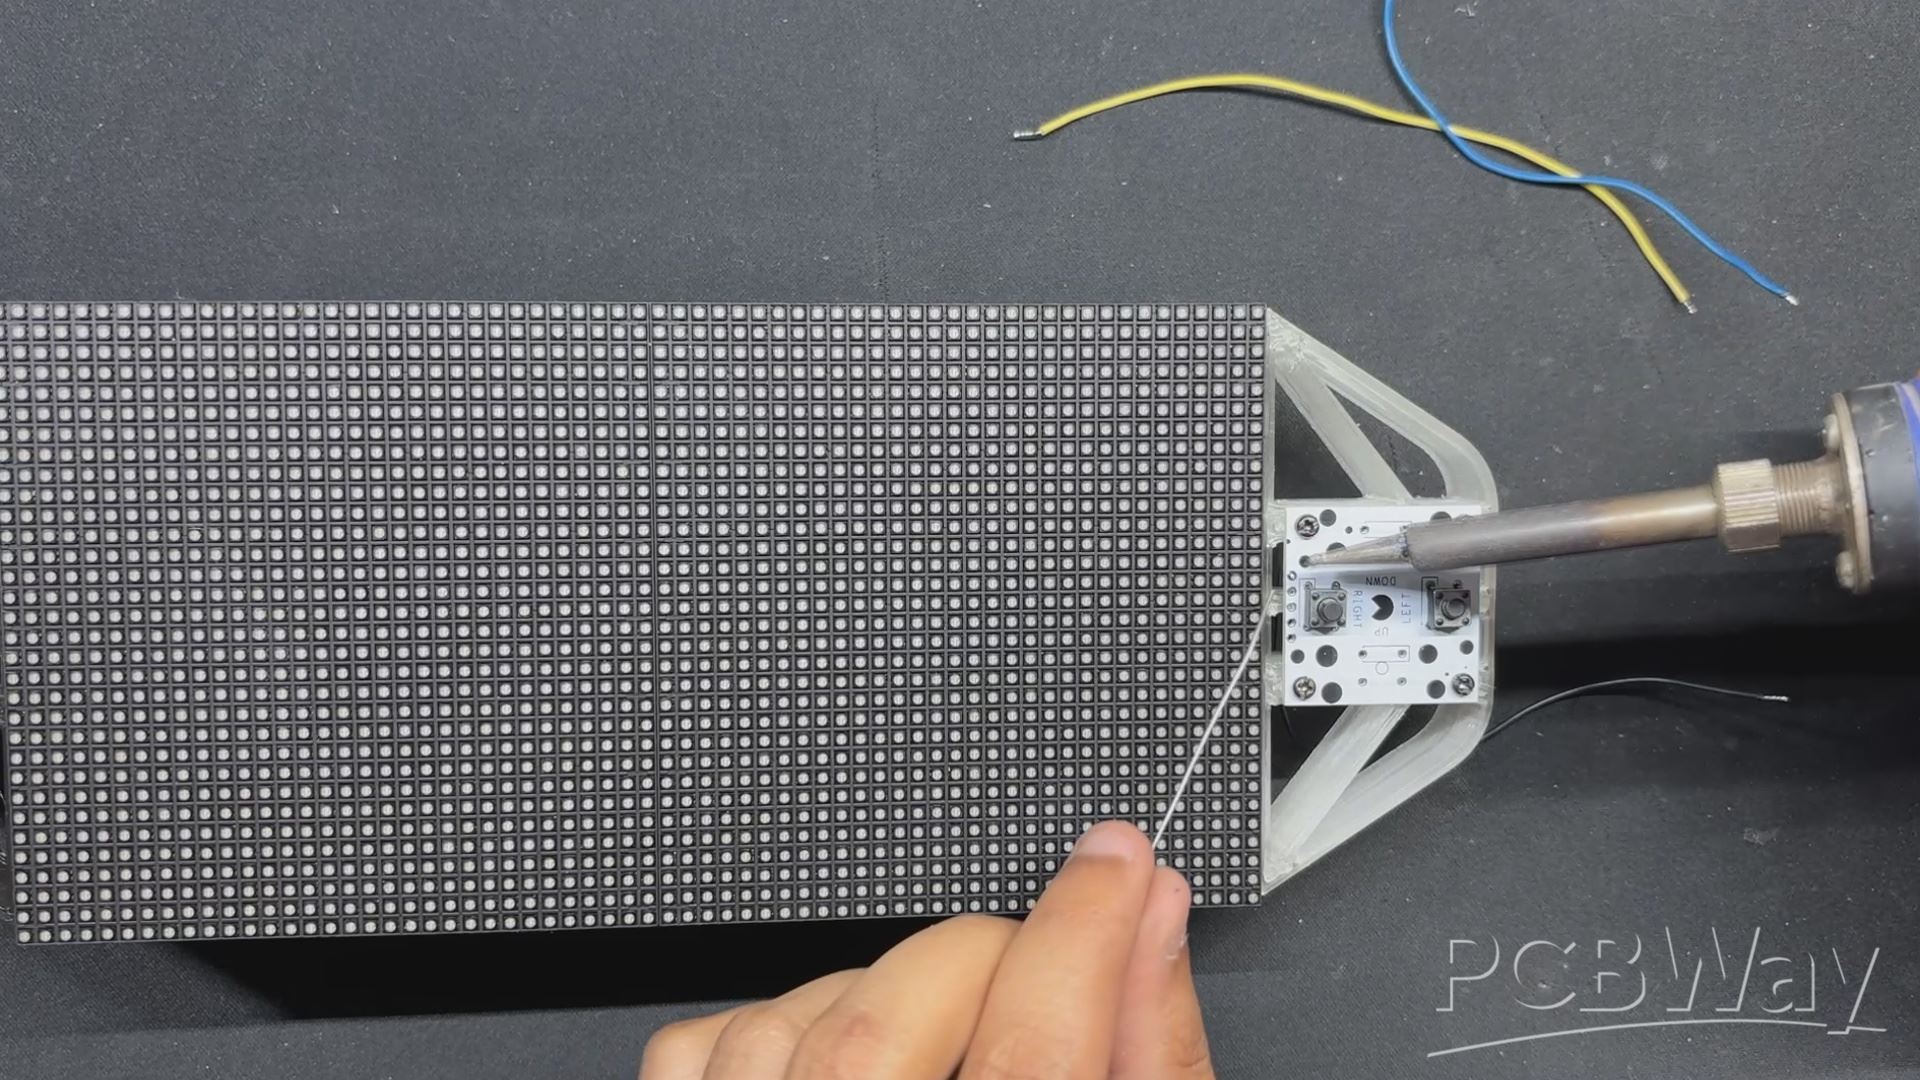
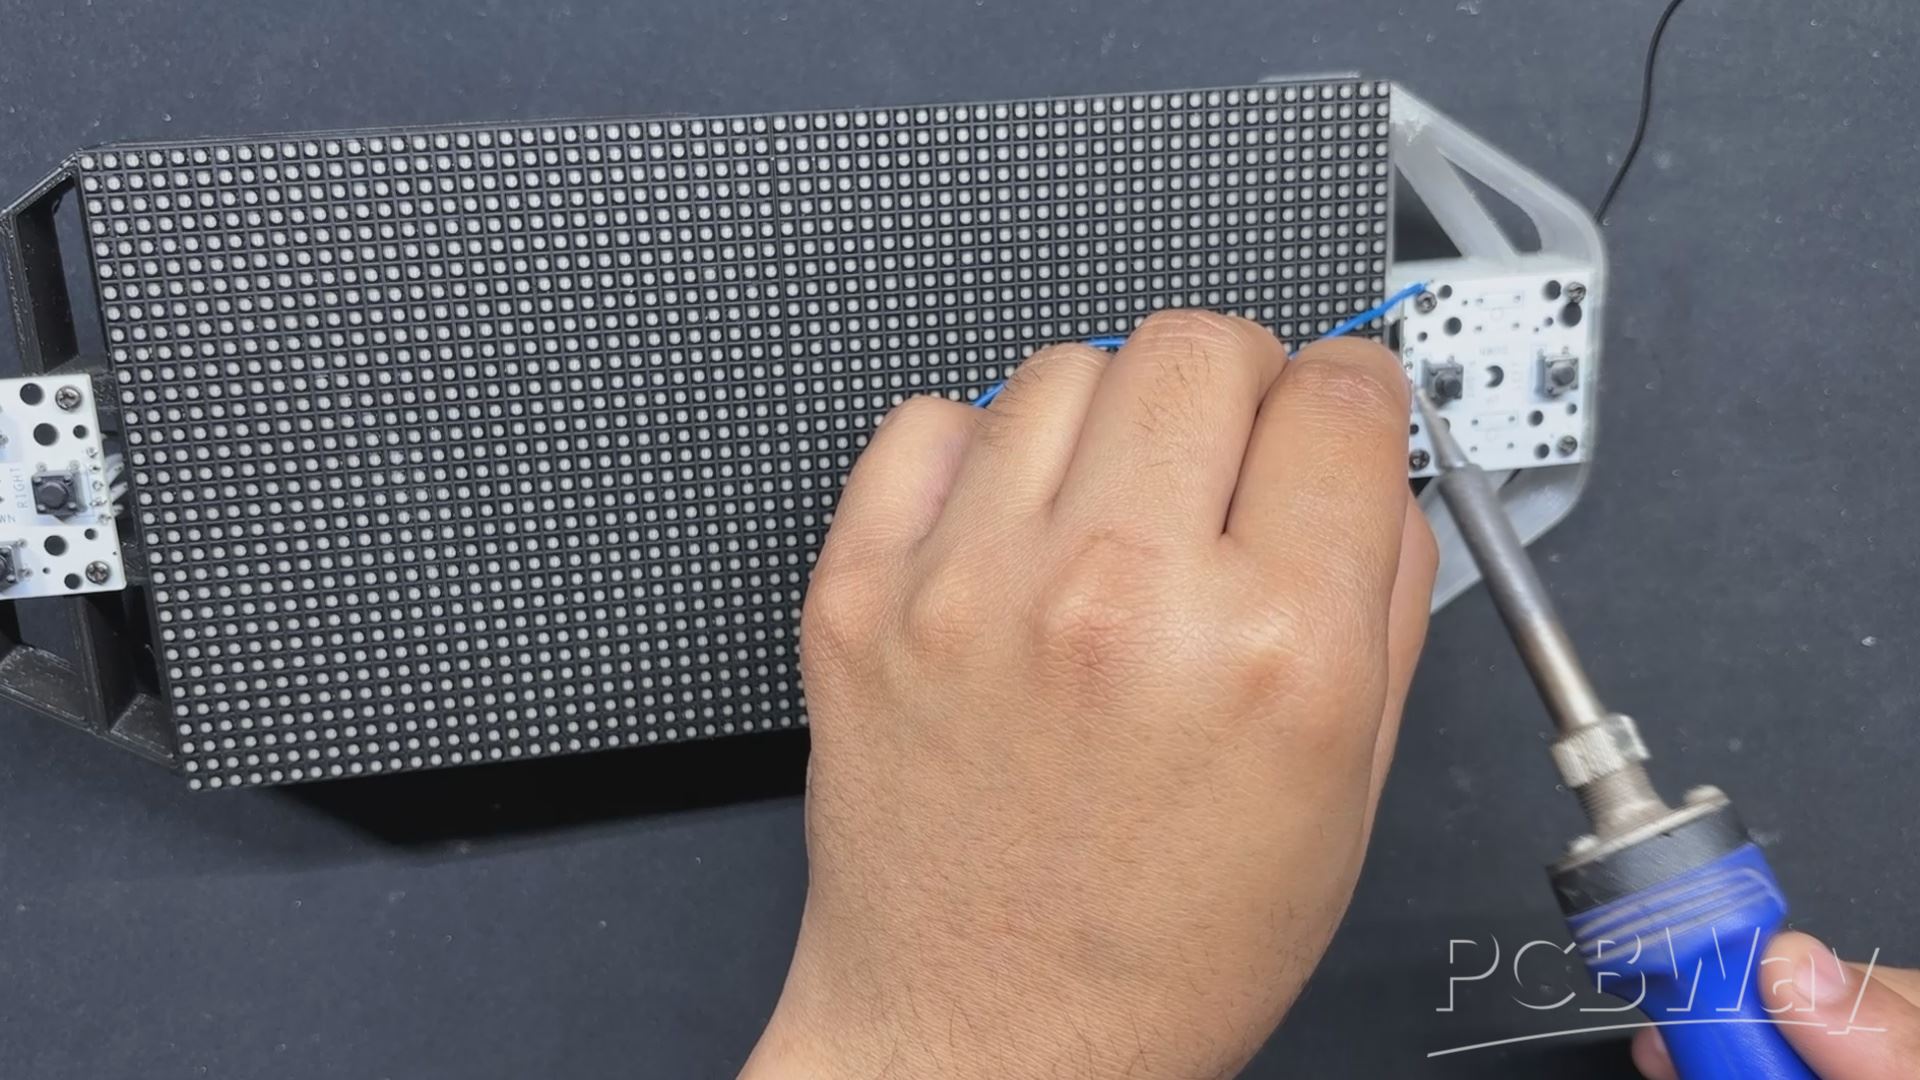
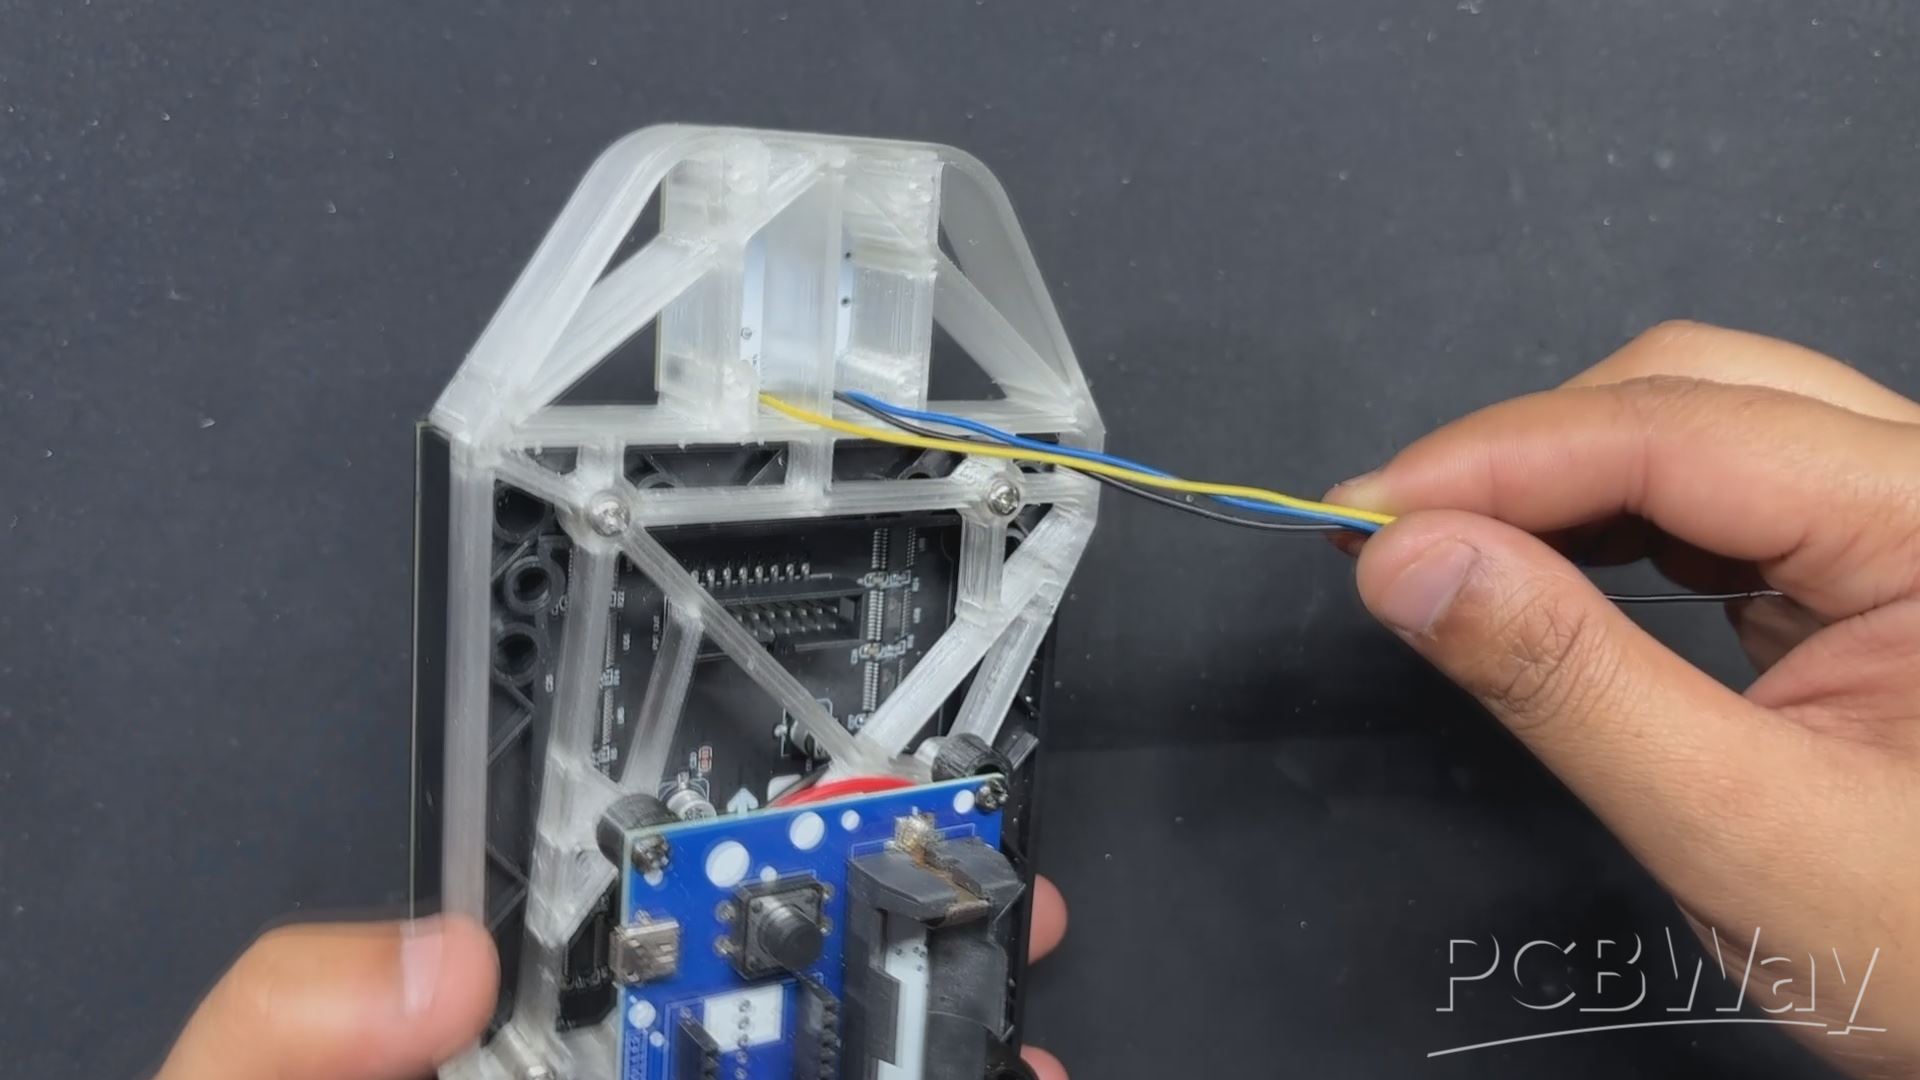
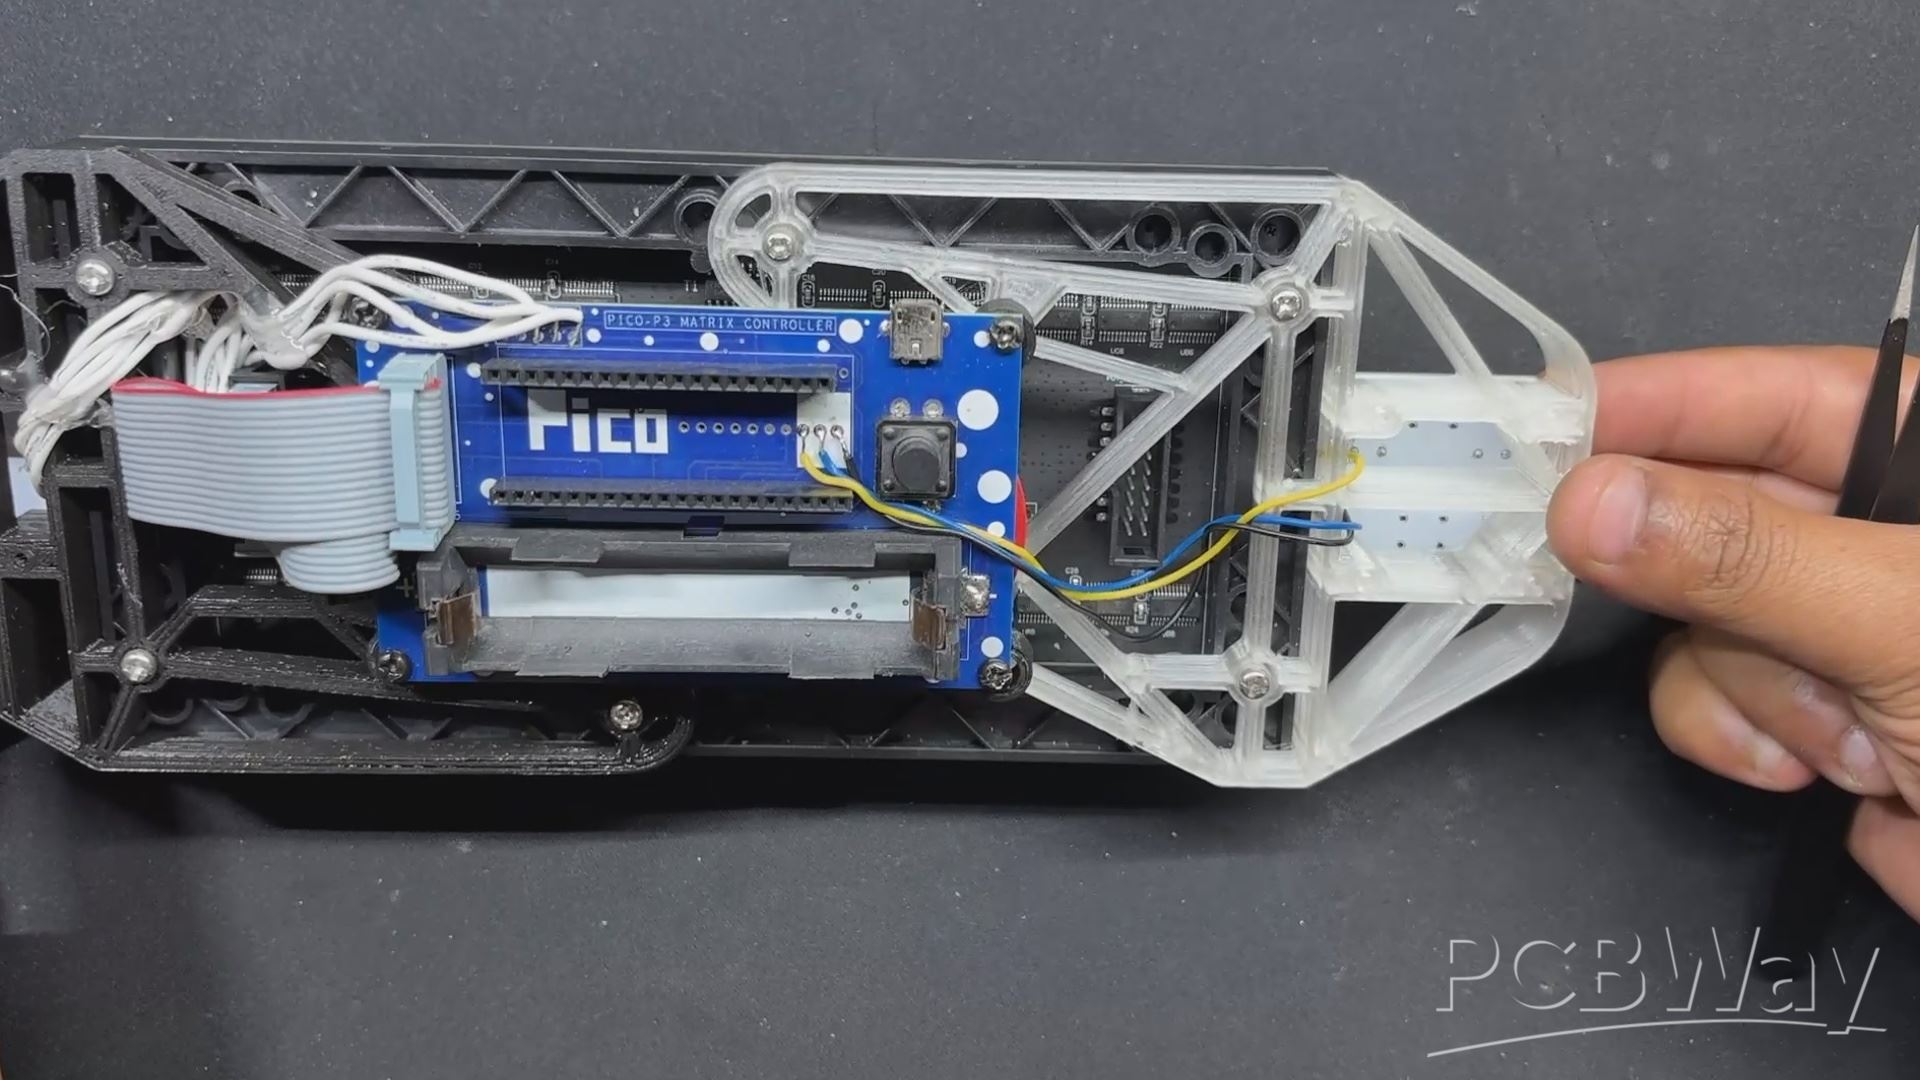
- For the button PCB wiring, we only need to connect both buttons to GPIO 27 and GPIO 28, with their common Ground connected to GND of PICO 2.
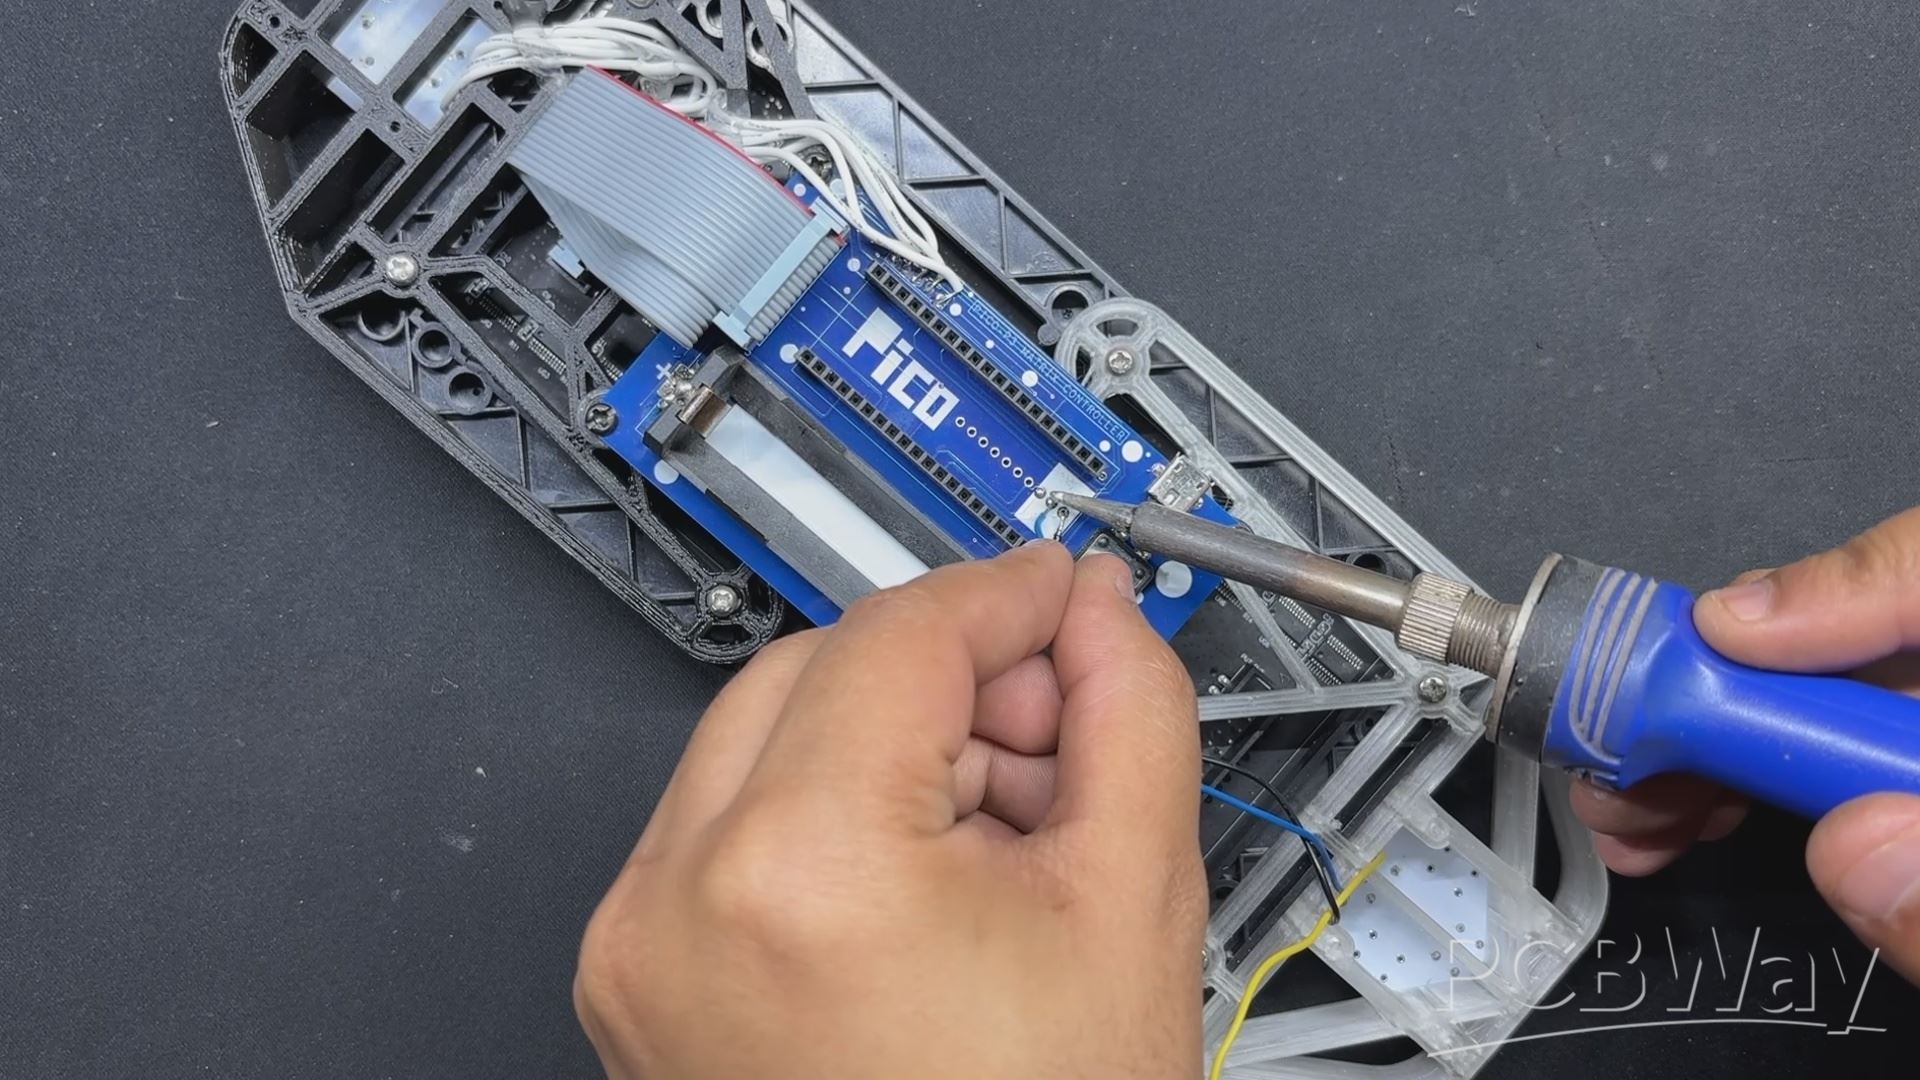
- For connections, we used long jumper wires connected to the button board's pads and then to the back side of the PICO DRIVER board.
- After the wires have been linked, we can enter the main code into our PICO and test the console.
RESULT

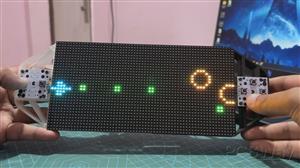
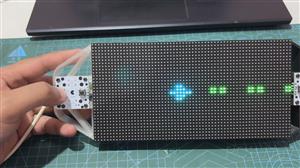
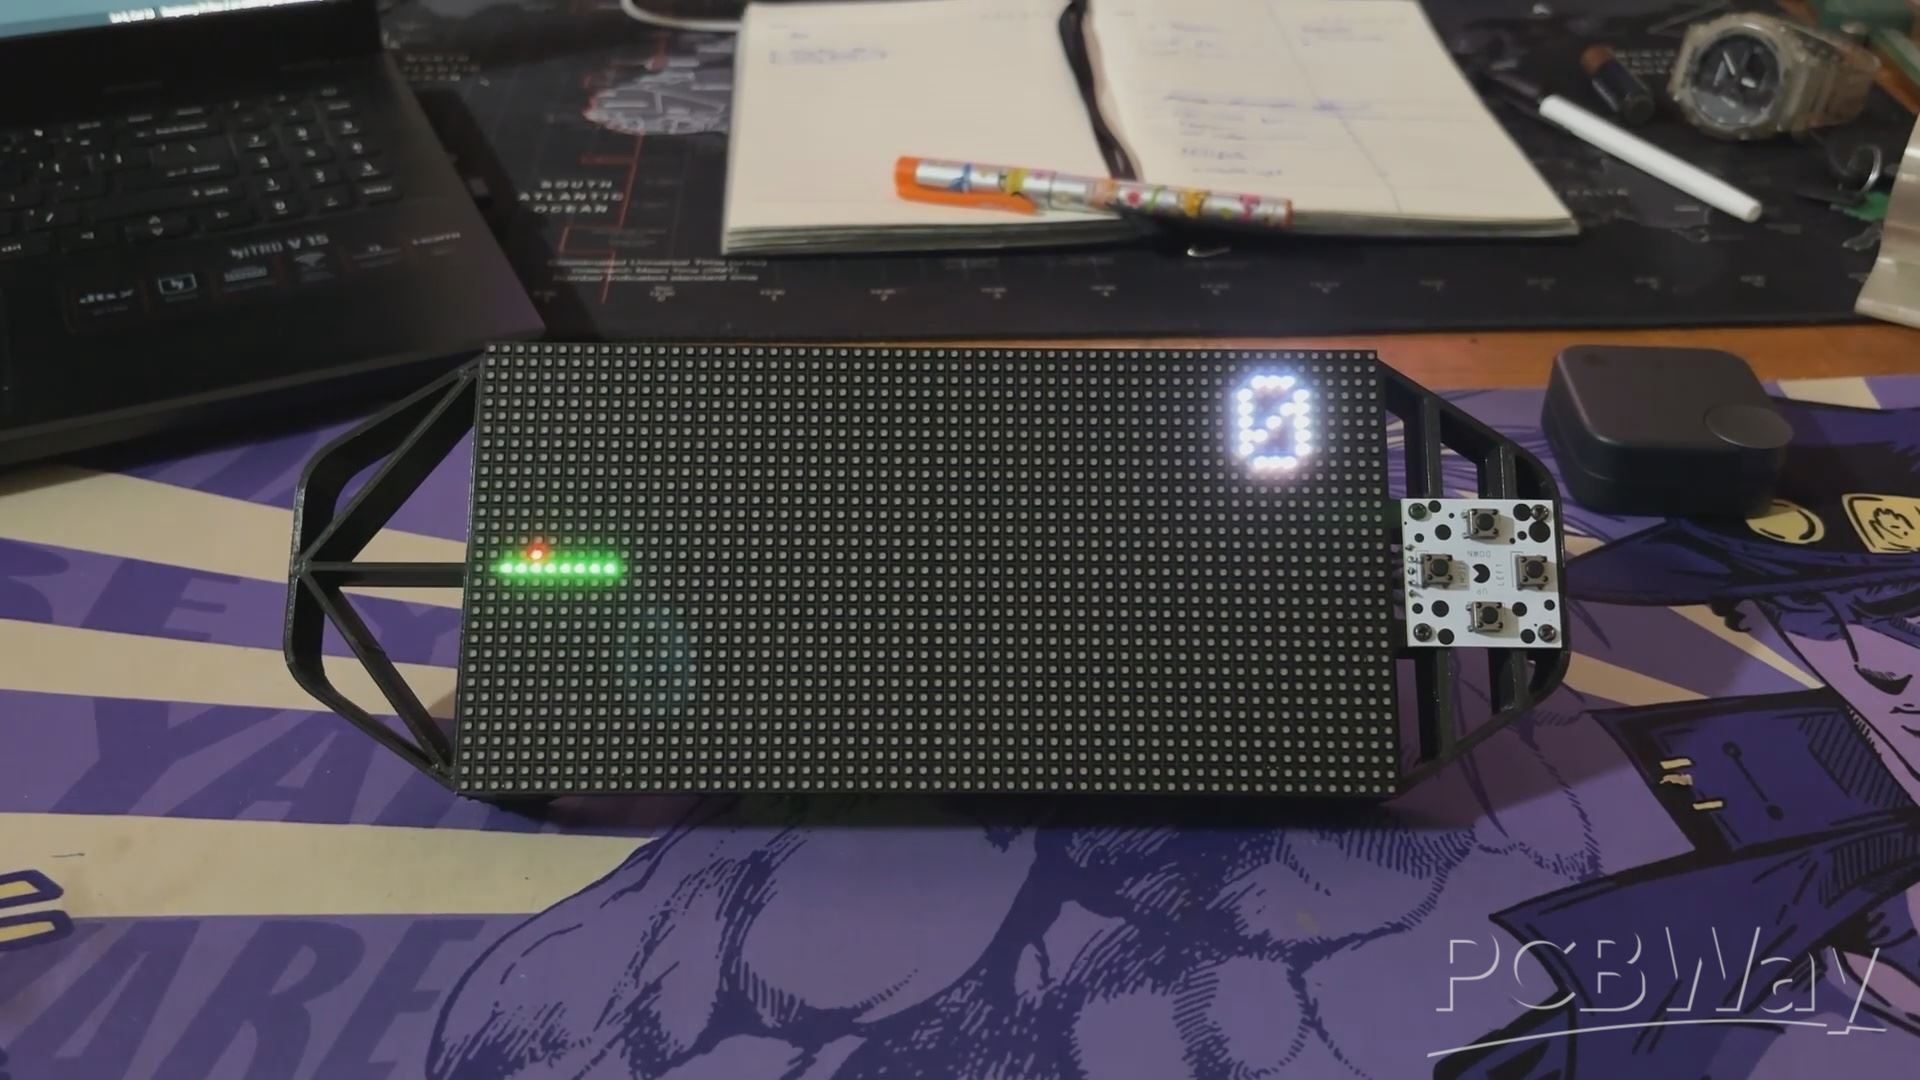
Here's the end result of this simple build: a working same invaders game that we built from scratch running on our CUSTOM GAME CONSOLE, which was also built from the ground up. The entire system is a DIY game console setup that can currently play two games: Snake and this new PICO BLASTER.
We can maneuver our spacecraft up, down, left, and right using the Direction Buttons, and we can fire bullets or blasts using the Weapon Buttons.
This game is a fun one and is totally playable. The screen refresh rate is also smooth and PICO 2 is handling this task quite well. If our spacecraft hits any projectile, we are greeted with a game over screen that shows a whole yellow circle showing that the circles WON. this splash screen stays for 5 seconds, and then the whole game resets.
This game is currently very basic and made up of simple geometrical shapes. We may further change this code by adding sprites to the game file, which are created using a pixel art generator and then turned into .H files. We can add more adversaries and objects to our game to improve its overall functionality.
Reach out to me if you require any extra assistance.
This game code, as well as the build instructions for this project or the snake game console, are accessible in this article, and it was previously published, so feel free to tweak the code and create your own game console.
In addition, we appreciate PCBWAY's support of this project. Visit them for a variety of PCB-related services, such as stencil and PCB assembly services, as well as 3D printing services
Thanks for reaching this far, and I will be back with a new project pretty soon.
Peace.
#include <Adafruit_Protomatter.h>
#include <SPI.h>
#include <stdint.h>
#include <math.h>
// Matrix configuration
#define WIDTH 64
#define HEIGHT 32
uint8_t rgbPins[] = {2, 3, 4, 5, 8, 9};
uint8_t addrPins[] = {10, 16, 18, 20};
#define CLK 11
#define LAT 12
#define OE 13
Adafruit_Protomatter matrix(WIDTH, HEIGHT, 1, rgbPins, 4, addrPins, CLK, LAT, OE, false);
// Button pins
#define BUTTON_UP 7
#define BUTTON_DOWN 6
#define BUTTON_LEFT 15
#define BUTTON_RIGHT 14
#define BUTTON_FIRE 27
#define BUTTON_MISSILE 28 // GPIO28 for missile
// Game state variable
bool gameOver = false;
unsigned long gameOverStartTime = 0;
const unsigned long gameOverDuration = 5000; // 5 seconds
// Ship parameters
#define SHIP_WIDTH 7
#define SHIP_HEIGHT 5
int shipX = 0;
int shipY = HEIGHT / 2 - SHIP_HEIGHT / 2;
// Projectile variables
#define PROJECTILE_WIDTH 2
#define PROJECTILE_HEIGHT 2
#define MAX_PROJECTILES 5
int projX[MAX_PROJECTILES];
int projY[MAX_PROJECTILES];
bool projectileActive[MAX_PROJECTILES];
const uint16_t projectileColor = matrix.color565(0, 255, 0);
int nextProjectile = 0;
// Rock variables
#define MAX_ROCKS 5
#define ROCK_SMALL_SIZE 3
#define ROCK_MEDIUM_SIZE 5
#define ROCK_LARGE_SIZE 7
int rocks[MAX_ROCKS][3]; // [x, y, size]
unsigned long lastRockSpawn = 0;
const unsigned long rockSpawnInterval = 500;
const uint16_t rockColor = matrix.color565(255, 100, 0);
const int rockSpeed = 1;
int rockHitCount[MAX_ROCKS];
bool blastActive = false; // Add blast active flag
int blastX, blastY;       // Blast coordinates
unsigned long blastStartTime;
const unsigned long blastDuration = 100; //ms
// Missile variables
#define MISSILE_WIDTH 4
#define MISSILE_HEIGHT 4
int missileX = -1;
int missileY = -1;
bool missileActive = false;
const uint16_t missileColor = matrix.color565(255, 0, 0);
unsigned long lastMissileTime = 0;
const unsigned long missileCooldown = 10000;
// Spaceship sprite data (arrow pointing right)
static const uint8_t shipSprite[SHIP_HEIGHT] = {
0b0010000,
0b0011000,
0b1111111,
0b0011000,
0b0010000
};
const uint16_t shipColor = matrix.color565(0, 255, 255);
// Variables for fire rate control
unsigned long lastFireTime = 0;
const unsigned long fireRate = 200;
// Function to draw a circle
void drawCircle(int x0, int y0, int r, uint16_t color) {
int f = 1 - r;
int ddF_x = 1;
int ddF_y = -2 * r;
int x = 0;
int y = r;
matrix.drawPixel(x0, y0 + r, color);
matrix.drawPixel(x0, y0 - r, color);
matrix.drawPixel(x0 + r, y0, color);
matrix.drawPixel(x0 - r, y0, color);
while (x < y) {
if (f >= 0) {
y--;
ddF_y += 2;
f += ddF_y;
}
x++;
ddF_x += 2;
f += ddF_x;
matrix.drawPixel(x0 + x, y0 + y, color);
matrix.drawPixel(x0 - x, y0 + y, color);
matrix.drawPixel(x0 + x, y0 - y, color);
matrix.drawPixel(x0 - x, y0 - y, color);
matrix.drawPixel(x0 + y, y0 + x, color);
matrix.drawPixel(x0 - y, y0 + x, color);
matrix.drawPixel(x0 + y, y0 - x, color);
matrix.drawPixel(x0 - y, y0 - x, color);
}
}
// Function to draw the blast animation
void drawBlast() {
if (blastActive) {
matrix.drawPixel(blastX, blastY, matrix.color565(255, 255, 255));
matrix.drawPixel(blastX + 1, blastY, matrix.color565(255, 200, 0));
matrix.drawPixel(blastX - 1, blastY, matrix.color565(255, 200, 0));
matrix.drawPixel(blastX, blastY + 1, matrix.color565(255, 200, 0));
matrix.drawPixel(blastX, blastY - 1, matrix.color565(255, 200, 0));
if (millis() - blastStartTime > blastDuration) {
blastActive = false; // Clear the blast after duration
}
}
}
// Function to draw text (using Adafruit_GFX style)
void drawText(int x, int y, const char *text, uint16_t color) {
matrix.setTextColor(color);
matrix.setCursor(x, y);
matrix.print(text);
}
// Function to draw the game over screen
void drawGameOver() {
matrix.fillScreen(0); // Clear the entire screen buffer
// Draw a big circle for the face
int centerX = WIDTH / 2;
int centerY = HEIGHT / 2;
int radius = 10;
uint16_t circleColor = matrix.color565(255, 255, 0); // Yellow
drawCircle(centerX, centerY, radius, circleColor);
// Draw the sad eyes as crosses
uint16_t eyeColor = matrix.color565(0, 0, 0); // Black
matrix.drawPixel(centerX - 5, centerY - 5, eyeColor);
matrix.drawPixel(centerX - 4, centerY - 4, eyeColor);
matrix.drawPixel(centerX - 5, centerY - 4, eyeColor);
matrix.drawPixel(centerX - 4, centerY - 5, eyeColor);
matrix.drawPixel(centerX + 4, centerY - 5, eyeColor);
matrix.drawPixel(centerX + 5, centerY - 4, eyeColor);
matrix.drawPixel(centerX + 4, centerY - 4, eyeColor);
matrix.drawPixel(centerX + 5, centerY - 5, eyeColor);
// Draw the sad mouth
for (int x = centerX - 4; x <= centerX + 4; x++) {
matrix.drawPixel(x, centerY + 3, eyeColor);
}
matrix.show();
}
// Setup function
void setup() {
matrix.begin();
matrix.fillScreen(0);
Serial.begin(9600);
pinMode(BUTTON_UP, INPUT_PULLUP);
pinMode(BUTTON_DOWN, INPUT_PULLUP);
pinMode(BUTTON_LEFT, INPUT_PULLUP);
pinMode(BUTTON_RIGHT, INPUT_PULLUP);
pinMode(BUTTON_FIRE, INPUT_PULLUP);
pinMode(BUTTON_MISSILE, INPUT_PULLUP);
// Initialize rocks
for (int i = 0; i < MAX_ROCKS; i++) {
rocks[i][0] = -ROCK_LARGE_SIZE * 2; // Initialize off-screen
rocks[i][1] = 0;
rocks[i][2] = ROCK_LARGE_SIZE; // Start with largest size
rockHitCount[i] = 0;
}
// Initialize projectiles
for (int i = 0; i < MAX_PROJECTILES; i++) {
projX[i] = -PROJECTILE_WIDTH;
projY[i] = -PROJECTILE_HEIGHT;
projectileActive[i] = false;
}
missileX = -MISSILE_WIDTH;
missileY = -MISSILE_HEIGHT;
missileActive = false;
gameOver = false;
gameOverStartTime = 0; // Initialize
Serial.println("Starting up...");
}
// Function to draw the spaceship
void drawShip() {
if (!gameOver) { // Only draw if game is not over
for (int y = 0; y < SHIP_HEIGHT; y++) {
for (int x = 0; x < SHIP_WIDTH; x++) {
if (bitRead(shipSprite[y], 6 - x)) {
matrix.drawPixel(shipX + x, shipY + y, shipColor);
}
}
}
}
}
// Function to draw the projectiles
void drawProjectiles() {
for (int i = 0; i < MAX_PROJECTILES; i++) {
if (projectileActive[i]) {
matrix.fillRect(projX[i], projY[i], PROJECTILE_WIDTH, PROJECTILE_HEIGHT, projectileColor);
}
}
}
// Function to draw the missile
void drawMissile() {
if (missileActive) {
matrix.fillRect(missileX, missileY, MISSILE_WIDTH, MISSILE_HEIGHT, missileColor);
}
}
// Function to reset the game state
void resetGame() {
gameOver = false;
gameOverStartTime = 0;
shipX = 0;
shipY = HEIGHT / 2 - SHIP_HEIGHT / 2;
for (int i = 0; i < MAX_PROJECTILES; i++) {
projX[i] = -PROJECTILE_WIDTH;
projY[i] = -PROJECTILE_HEIGHT;
projectileActive[i] = false;
}
for (int i = 0; i < MAX_ROCKS; i++) {
rocks[i][0] = -ROCK_LARGE_SIZE * 2; // Reset all rocks offscreen
rocks[i][1] = 0;
rocks[i][2] = ROCK_LARGE_SIZE;
rockHitCount[i] = 0;
}
missileX = -MISSILE_WIDTH;
missileY = -MISSILE_HEIGHT;
missileActive = false;
lastRockSpawn = 0;
lastFireTime = 0;
lastMissileTime = 0;
blastActive = false;
}
// Main loop
void loop() {
if (gameOver) {
drawGameOver();
if (millis() - gameOverStartTime >= gameOverDuration) {
resetGame();
}
return; // Stop updating the game
}
matrix.fillScreen(0);
// Movement handling
if (!digitalRead(BUTTON_UP)) {
shipY = max(shipY - 1, 0);
}
if (!digitalRead(BUTTON_DOWN)) {
shipY = min(shipY + 1, HEIGHT - SHIP_HEIGHT); // Corrected variable name here
}
if (!digitalRead(BUTTON_LEFT)) {
shipX = max(shipX - 1, 0);
}
if (!digitalRead(BUTTON_RIGHT)) {
shipX = min(shipX + 1, WIDTH - SHIP_WIDTH);
}
// Firing projectiles
if (!digitalRead(BUTTON_FIRE) && (millis() - lastFireTime >= fireRate)) {
int projectileIndex = -1;
for (int i = 0; i < MAX_PROJECTILES; i++) {
if (!projectileActive[i]) {
projectileIndex = i;
break;
}
}
if (projectileIndex != -1) {
projX[projectileIndex] = shipX + SHIP_WIDTH;
projY[projectileIndex] = shipY + SHIP_HEIGHT / 2 - PROJECTILE_HEIGHT / 2;
projectileActive[projectileIndex] = true;
lastFireTime = millis();
Serial.println("Fire!");
}
}
// Fire Missile
if (!digitalRead(BUTTON_MISSILE) && (millis() - lastMissileTime >= missileCooldown) && !missileActive) {
missileX = shipX + SHIP_WIDTH;
missileY = shipY + SHIP_HEIGHT / 2 - MISSILE_HEIGHT / 2;
missileActive = true;
lastMissileTime = millis();
Serial.println("Missile Fire!");
}
// Projectile movement
for (int i = 0; i < MAX_PROJECTILES; i++) {
if (projectileActive[i]) {
projX[i] += 3;
if (projX[i] >= WIDTH) {
projectileActive[i] = false;
projX[i] = -PROJECTILE_WIDTH;
projY[i] = -PROJECTILE_HEIGHT;
}
}
}
// Missile movement
if (missileActive) {
missileX += 2;
if (missileX >= WIDTH) {
missileActive = false;
missileX = -MISSILE_WIDTH;
missileY = -MISSILE_HEIGHT;
}
}
// Rock spawning
if (millis() - lastRockSpawn > rockSpawnInterval) {
int availableRockSlot = -1;
for (int i = 0; i < MAX_ROCKS; i++) {
if (rocks[i][0] <= -ROCK_LARGE_SIZE * 2) { // Check if rock is off-screen
availableRockSlot = i;
break;
}
}
if (availableRockSlot != -1) {
rocks[availableRockSlot][0] = WIDTH;
rocks[availableRockSlot][1] = random(HEIGHT - ROCK_LARGE_SIZE * 2 + 1) + ROCK_LARGE_SIZE;
rocks[availableRockSlot][2] = random(3) == 0 ? ROCK_SMALL_SIZE : (random(2) == 0 ? ROCK_MEDIUM_SIZE : ROCK_LARGE_SIZE); // Random size
lastRockSpawn = millis();
}
}
// Rock handling and collision
for (int i = 0; i < MAX_ROCKS; i++) {
if (rocks[i][0] >= 0) {
rocks[i][0] -= rockSpeed;
int rockSize = rocks[i][2];
uint16_t drawColor = rockColor;
if (rockSize == ROCK_SMALL_SIZE) {
drawColor = matrix.color565(255, 140, 0); // Darker Orange #FF8C00
} else if (rockSize == ROCK_MEDIUM_SIZE) {
drawColor = matrix.color565(255,255,0); // Yellow
} else {
drawColor = matrix.color565(255, 0, 0); // Red
}
drawCircle(rocks[i][0], rocks[i][1], rockSize, drawColor);
// Game over check
if (shipX < rocks[i][0] + rockSize &&
shipX + SHIP_WIDTH > rocks[i][0] - rockSize &&
shipY < rocks[i][1] + rockSize &&
shipY + SHIP_HEIGHT > rocks[i][1] - rockSize) {
gameOver = true;
gameOverStartTime = millis(); // Record start time
Serial.println("Game Over - Ship hit by rock!");
break; // Exit the loop
}
// Check collision with projectiles
for (int j = 0; j < MAX_PROJECTILES; j++) {
if (projectileActive[j] &&
projX[j] < rocks[i][0] + rockSize &&
projX[j] + PROJECTILE_WIDTH > rocks[i][0] - rockSize &&
projY[j] < rocks[i][1] + rockSize &&
projY[j] + PROJECTILE_HEIGHT > rocks[i][1] - rockSize) {
rockHitCount[i]++;
projectileActive[j] = false;
projX[j] = -PROJECTILE_WIDTH;
projY[j] = -PROJECTILE_HEIGHT;
Serial.println("Hit Rock!");
if ((rocks[i][2] == ROCK_SMALL_SIZE && rockHitCount[i] >= 1) ||
(rocks[i][2] == ROCK_MEDIUM_SIZE && rockHitCount[i] >= 2) ||
(rocks[i][2] == ROCK_LARGE_SIZE && rockHitCount[i] >= 3)) { // 3 hits for large
rocks[i][0] = -ROCK_LARGE_SIZE * 2;
rockHitCount[i] = 0;
blastX = rocks[i][0]; // Store blast coordinates
blastY = rocks[i][1];
blastActive = true;    // Trigger blast
blastStartTime = millis();
}
break;
}
}
// Check collision with missile
if (missileActive &&
missileX < rocks[i][0] + rockSize &&
missileX + MISSILE_WIDTH > rocks[i][0] - rockSize &&
missileY < rocks[i][1] + rockSize &&
missileY + MISSILE_HEIGHT > rocks[i][1] - rockSize) {
rocks[i][0] = -ROCK_LARGE_SIZE * 2;
rockHitCount[i] = 0;
missileActive = false;
missileX = -MISSILE_WIDTH;
missileY = -MISSILE_HEIGHT;
Serial.println("Missile Hit Rock!");
blastX = rocks[i][0]; // Store blast coordinates
blastY = rocks[i][1];
blastActive = true;    // Trigger blast
blastStartTime = millis();
}
}
}
drawShip();
drawProjectiles();
drawMissile();
drawBlast(); // Draw blast
matrix.show();
delay(50);
}
PICO Blasters
*PCBWay community is a sharing platform. We are not responsible for any design issues and parameter issues (board thickness, surface finish, etc.) you choose.


Raspberry Pi 5 7 Inch Touch Screen IPS 1024x600 HD LCD HDMI-compatible Display for RPI 4B 3B+ OPI 5 AIDA64 PC Secondary Screen(Without Speaker)
BUY NOW


- Comments(0)
- Likes(0)
More by Arnov Arnov sharma
-
 DIY XBOX Controller
Greetings everyone, and welcome back. Here's something fun and custom.This is my version of an Xbox ...
DIY XBOX Controller
Greetings everyone, and welcome back. Here's something fun and custom.This is my version of an Xbox ...
-
 Pocket SNES
Greetings everyone, and welcome back! Today, I’ve got something fun and tiny to share—the Pocket SNE...
Pocket SNES
Greetings everyone, and welcome back! Today, I’ve got something fun and tiny to share—the Pocket SNE...
-
 Batocera Arcade Box
Greetings everyone and welcome back, Here's something. Fun and nostalgic. Right now, we are using ou...
Batocera Arcade Box
Greetings everyone and welcome back, Here's something. Fun and nostalgic. Right now, we are using ou...
-
 64x32 Matrix Panel Setup with PICO 2
Greetings everyone and welcome back.So here's something fun and useful: a Raspberry Pi Pico 2-powere...
64x32 Matrix Panel Setup with PICO 2
Greetings everyone and welcome back.So here's something fun and useful: a Raspberry Pi Pico 2-powere...
-
 Portable Air Quality Meter
Hello everyone, and welcome back! Today, I have something incredibly useful for you—a Portable Air Q...
Portable Air Quality Meter
Hello everyone, and welcome back! Today, I have something incredibly useful for you—a Portable Air Q...
-
 WALKPi PCB Version
Greetings everyone and welcome back, This is the WalkPi, a homebrew audio player that plays music fr...
WALKPi PCB Version
Greetings everyone and welcome back, This is the WalkPi, a homebrew audio player that plays music fr...
-
 Delete Button XL
Greetings everyone and welcome back, and here's something fun and useful.In essence, the Delete Butt...
Delete Button XL
Greetings everyone and welcome back, and here's something fun and useful.In essence, the Delete Butt...
-
 Arduino Retro Game Controller
Greetings everyone and welcome back. Here's something fun.The Arduino Retro Game Controller was buil...
Arduino Retro Game Controller
Greetings everyone and welcome back. Here's something fun.The Arduino Retro Game Controller was buil...
-
 Super Power Buck Converter
Greetings everyone and welcome back!Here's something powerful, The SUPER POWER BUCK CONVERTER BOARD ...
Super Power Buck Converter
Greetings everyone and welcome back!Here's something powerful, The SUPER POWER BUCK CONVERTER BOARD ...
-
 Pocket Temp Meter
Greetings and welcome back.So here's something portable and useful: the Pocket TEMP Meter project.As...
Pocket Temp Meter
Greetings and welcome back.So here's something portable and useful: the Pocket TEMP Meter project.As...
-
 Pico Powered DC Fan Driver
Hello everyone and welcome back.So here's something cool: a 5V to 12V DC motor driver based around a...
Pico Powered DC Fan Driver
Hello everyone and welcome back.So here's something cool: a 5V to 12V DC motor driver based around a...
-
 Mini Solar Light Project with a Twist
Greetings.This is the Cube Light, a Small and compact cube-shaped emergency solar light that boasts ...
Mini Solar Light Project with a Twist
Greetings.This is the Cube Light, a Small and compact cube-shaped emergency solar light that boasts ...
-
 PALPi V5 Handheld Retro Game Console
Hey, Guys what's up?So this is PALPi which is a Raspberry Pi Zero W Based Handheld Retro Game Consol...
PALPi V5 Handheld Retro Game Console
Hey, Guys what's up?So this is PALPi which is a Raspberry Pi Zero W Based Handheld Retro Game Consol...
-
 DIY Thermometer with TTGO T Display and DS18B20
Greetings.So this is the DIY Thermometer made entirely from scratch using a TTGO T display board and...
DIY Thermometer with TTGO T Display and DS18B20
Greetings.So this is the DIY Thermometer made entirely from scratch using a TTGO T display board and...
-
 Motion Trigger Circuit with and without Microcontroller
GreetingsHere's a tutorial on how to use an HC-SR505 PIR Module with and without a microcontroller t...
Motion Trigger Circuit with and without Microcontroller
GreetingsHere's a tutorial on how to use an HC-SR505 PIR Module with and without a microcontroller t...
-
 Motor Driver Board Atmega328PU and HC01
Hey, what's up folks here's something super cool and useful if you're making a basic Robot Setup, A ...
Motor Driver Board Atmega328PU and HC01
Hey, what's up folks here's something super cool and useful if you're making a basic Robot Setup, A ...
-
 Power Block
Hey Everyone what's up!So this is Power block, a DIY UPS that can be used to power a bunch of 5V Ope...
Power Block
Hey Everyone what's up!So this is Power block, a DIY UPS that can be used to power a bunch of 5V Ope...
-
 Goku PCB Badge V2
Hey everyone what's up!So here's something SUPER cool, A PCB Board themed after Goku from Dragon Bal...
Goku PCB Badge V2
Hey everyone what's up!So here's something SUPER cool, A PCB Board themed after Goku from Dragon Bal...
-
Programmable Mist Maker - XIAO / QT PY Extension
172 0 0 -
RadioHAT - Raspberry Pi radio development platform
182 0 1 -
-
-
-
-
ARPS-2 – Arduino-Compatible Robot Project Shield for Arduino UNO
2767 0 5 -
A Compact Charging Breakout Board For Waveshare ESP32-C3
3275 3 8 -
AI-driven LoRa & LLM-enabled Kiosk & Food Delivery System
3529 2 2


