


|
|
Arduino Nano R3 |
x 1 | |
|
|
Adafruit NeoPixel Ring: WS2812 5050 RGB LED |
x 1 | |
|
|
DFRobot I2C 16x2 Arduino LCD Display Module |
x 1 | |

|
GT-0903ASOBERTON INC.
|
x 1 | |
|
|
Pushbutton Switch, Momentary |
x 2 |

|
Soldering Iron Kit |
|

|
arduino IDEArduino
|
Mini Cyclone Game on WS2812 LED Ring and Arduino Nano
This game is based on the Cyclone arcade game, where the player tries to stop an led scrolling around a circle at a specific spot.
In one of my previous videos(https://youtu.be/1K0vr-hrh0k), I presented you the same game, but on a large ring consisting of 60 Leds, which contained several levels.

This time I use a small ring with 12 Leds and the game does not contain levels but is a continuous game until once the target marker is not hit.

In addition, there is an LCD display that shows highscore and current round.
The code was taken from Joern Weise's GitHub page (https://github.com/M3taKn1ght/Blog-Repo/tree/master/Cyclone), and I made some modifications.
First I shortened the way of testing the LEDs, and then added different sounds for each segment of the game so that it is now much more interesting.
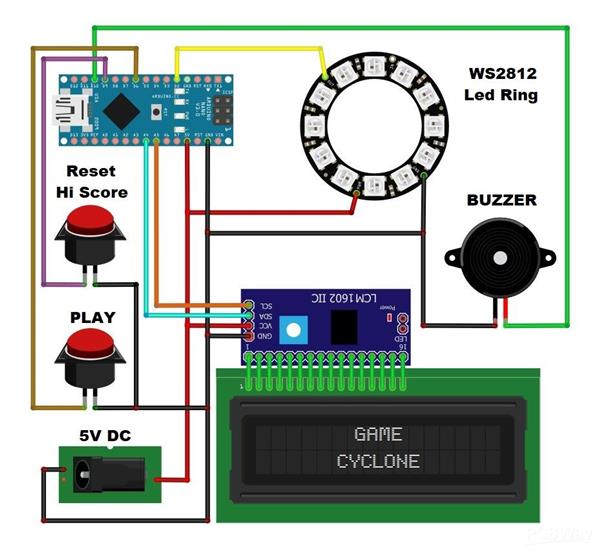
The device is very simple to build and consists of only a few components:
- Arduino nano microcontroller
- 12 Leds ring with WS2812 Led chip
- 16x2 LCD display with I2C communication protocol
- two buttons
- and Buzzer

If you want to make a PCB for this project, or for any other electronic project, PCBway (www.pcbway.com) is a great choice for you. PCBway is one of the most experienced PCB manufacturing company in China in field of PCB prototype and fabrication. They provide completed PCB assembly service with worldwide free shipping , and ISO9001 quality control system. Also, on their site there is an online gerber viewer where you can upload your gerber and drill files to render your board.

As for the gameplay, as I mentioned before, in this case there are no levels with increasing speed, but each successive round starts with a randomized speed, and generally the speeds can be easily changed in the code in the lines:
#define STARTINTERVAL 250 //"Normal" move
#define MAXINTERVAL 500 //Very slow move
#define MININTERVAL 50 //Very fast move

Now let's see how the device works in reality.
When turning on the game, all LEDs light up sequentially accompanied by an appropriate sound effect, and a corresponding message about the test on the LCD display.

Next, by pressing the button the game starts
The goal is to press the button at the moment when the rotating diode is located exactly on the static diodes.
In the first two levels, three diodes are static, and in the next levels only one.
The number of laps completed and the score are shown on the display.

If we fail to hit the red Led, the game ends, and High Score appears on the display.

The number of laps completed and the score are shown on the display.
Otherwise, the high score is recorded in the eprom of the microcontroller so that it is saved even after the reset.

If we want to delete the high score, when turning on, we hold down the HSR button.
And finally, the game is mounted on a PVC board with a thickness of 3 mm and covered with self-adhesive colored wallpaper.
//-----------------------------------------------------
// Game "CYCLONE" for Arduino
// Autor:   Joern Weise
// License: GNU GPl 3.0
// Created: 20. Sep 2020
// Update:  25. Sep 2020
// modified by mircemk 25. Feb 2022
//-----------------------------------------------------
//Include libraries
#include <Adafruit_NeoPixel.h>
#include <Wire.h>
#include <LiquidCrystal_I2C.h>
#include <EEPROM.h>

//Defines
#define NUMPIXELS   12  // Popular NeoPixel ring size or edit the number of LEDs
#define PIN         2   // Data-Pin to ring or strip
#define PINBTN      6   // Pin for Player-button
#define PINSCORERST 9   // Pin to reset score during first run

#define DISABLEWINDOW 3 //Rounds before the LED before and after target is not valid anymore

//Player-Dot speed defines
#define STARTINTERVAL 250 //"Normal" move
#define MAXINTERVAL 500   //Very slow move
#define MININTERVAL 50    //Very fast move

//Create objects
LiquidCrystal_I2C lcd(0x27,16,2);  // set the LCD adress
Adafruit_NeoPixel pixels(NUMPIXELS, PIN, NEO_GRB + NEO_KHZ800); //Init NeoPixel object

bool bFirstRun, bSecureWindow;
int iState = 1;
int iTargetPos, iPlayerPos, iStoredHighscore, iRound, iScore, iInterval;  //Vars for the game
int iLastButtonPressed, iButtonState, iDebounceButton;  //Vars to debounce button
unsigned long iLastPlayerMove, ulLastDebounceTime;      //Timer to debouce button
unsigned long ulDebounceButton = 10;                    //Debounce-time
int i = 0;
void setup() {
  Serial.begin(115200);
  Serial.println("Init serial communication: DONE");

  //Begin init for WS218B-ring or -strip
  pixels.begin(); // INITIALIZE NeoPixel strip object (REQUIRED)
  pixels.clear(); // Set all pixels to "off"
  pixels.setBrightness(20); // Set brightness to 20%
  pixels.show();   // Send the updated pixel colors to the hardware.
  Serial.println("Init WS218B-ring: DONE");

  //Begin init display
  lcd.init();
  lcd.backlight();
  lcd.clear();
  Serial.println("Init LCD display: DONE");

  randomSeed(analogRead(0));  // Make randome more randome
  Serial.println("Make randome more randome: DONE");

  //Read latest highscore from EEPROM
  iStoredHighscore = EEPROM.read(0);
  Serial.println("Last stored highscore: " + String(iStoredHighscore));

  //Init button with internal pullup-resistor
  pinMode(PINBTN,INPUT_PULLUP); //GameBTN
  pinMode(PINSCORERST,INPUT_PULLUP); //Reset-Pin for score

  //Init some basic-vars
  bFirstRun = true; //Enable firstrun
  iLastButtonPressed = digitalRead(PINBTN); //Init iLastButtonPressed
  iButtonState = digitalRead(PINBTN); //Init iButtonstate
}

void loop() {
  int iDebounceButton = DebounceButton(); //Check and debounce button

  if(!bFirstRun)
  {
    if(iState == 1) //Startscreen
    {
      bSecureWindow = true;
      iRound = 1;
      iScore = 0;
      iInterval = STARTINTERVAL;
      lcd.clear();
      lcd.home();
      lcd.print("Highscore: " + String(iStoredHighscore));
      lcd.setCursor(0,1);
      lcd.print("Press button ...");
      iState = 2;
    }
    if(iState == 2) //Get Button pressed
    {
      if(iDebounceButton == LOW)
      {
        if(iRound == 1) //Only show once during game
          Serial.println("-------- New game --------");
        lcd.clear();
        lcd.home();
        lcd.print("Release button");
        lcd.setCursor(0,1);
        lcd.print("to start");
        iState = 3;
      }
    }
    if(iState == 3) //Init next round
    {
      if(iDebounceButton == HIGH)
      {
        lcd.clear();
        lcd.home();
        lcd.print("Round: " + String(iRound));
        Serial.println("Round: " + String(iRound));
        lcd.setCursor(0,1);
        lcd.print("Score: " + String(iScore));
        Serial.println("Score: " + String(iScore));

        iTargetPos = random(0,NUMPIXELS-1);
        Serial.println("New target pos: " + String(iTargetPos));
        iPlayerPos = random(0,NUMPIXELS-1);
        while(iTargetPos == iPlayerPos)
          iPlayerPos = random(0,NUMPIXELS-1);
        Serial.println("Player start pos: " + String(iPlayerPos));
        iState = 4;
      }
    }
    if(iState == 4) //Draw target and playes dot
    {
      DrawNextTarget(iTargetPos, bSecureWindow);  //Draw new target
      DrawPlayer(iPlayerPos);                     //Draw player dot
      iLastPlayerMove = millis();                 //Update timer for moving
      iState = 5;
    }
    if(iState == 5) //Wait pressing button and move player dot
    {
      if(iDebounceButton == LOW)
      {
        iState = 6;
      }
      else
      {
        unsigned long currentMillis = millis();
        if(currentMillis - iLastPlayerMove > iInterval)
        {
          iPlayerPos++;
          if(iPlayerPos >= NUMPIXELS)
            iPlayerPos = 0;
          DrawNextTarget(iTargetPos, bSecureWindow);
          DrawPlayer(iPlayerPos);
          iLastPlayerMove = currentMillis;
        }
      }
    }
    if(iState == 6) //Check if player win
    {
      if(CheckPlayerPos())  //Winner or loser?
      {
        iScore++; //Update score
        tone(10, 3000, 100);
        iRound++; //Update rounds
        iState = 2; //Go back to release button
        if(iRound > DISABLEWINDOW)  //Only target
        {
          bSecureWindow = false;
          iInterval = random(MININTERVAL,MAXINTERVAL);
        }
        else
          iInterval = random(STARTINTERVAL-50,MAXINTERVAL);
        Serial.println("New interval: " + String(iInterval));
      }
      else
        iState = 90;
    }
    if(iState == 90)  //Game ends
    {
      Serial.println("Game ends");
      lcd.clear();
      lcd.home();
      iDebounceButton = HIGH;
      iLastButtonPressed = HIGH;
      iButtonState = HIGH;
      if(iScore > iStoredHighscore) //New highscore?
      {
        lcd.print("New highscore ");
        lcd.setCursor(0,1);
        lcd.print("New score: " + String(iScore));
        Serial.println("New highscore is " + String(iScore));
        EEPROM.write(0,iScore); //Store new highscore to EEPROM
        iStoredHighscore = iScore;
      }
      else  //Loser
      {
        lcd.print("Game Over");
        lcd.setCursor(0,1);
        lcd.print("You lose");
        Serial.println("You lose!");
         tone(10, 150, 1000);
      }
      Serial.println("-------- End game --------");
      delay(2000);
      iState = 1;
    }
  }
  else
    InitFirstRun(); //Init Firstrun to check LCD and WS218B-ring
}

//Function to make first run
void InitFirstRun()
{
  if(digitalRead(PINSCORERST) == LOW) //Overwrite EEPROM with "0"
  {
    Serial.println("Reset highscore");
    for(int iCnt = 0; iCnt < EEPROM.length(); iCnt++)
      EEPROM.write(iCnt,0);
  }
  Serial.println("---- Start init ----");
  lcd.home();
  lcd.print("Game Cyclone");
  Serial.println("Game Cyclone");
  lcd.setCursor(0,1);
  lcd.print("(c)  M3taKn1ght");
  Serial.print("(c)  M3taKn1ght");
  delay(1000);
  lcd.clear();
  lcd.home();
  lcd.print("    mircemk");
  Serial.println("For az-Delivery");
  lcd.setCursor(0,1);
  lcd.print("Testing ring ...");
  Serial.println("Testing ring ...");
  delay(1000);
  pixels.clear();
  //Check every single LED
  for(int i = 0; i<=51; i+=51)
  {
    InitRingTest(i,0,0);
    delay(50);
  }
//  pixels.clear();
//  for(int i = 0; i<=255; i+=51)
 // {
//    InitRingTest(0,i,0);
 //   delay(50);
  //}
//  pixels.clear();
 // for(int i = 0; i<=255; i+=51)
 // {
  //  InitRingTest(0,0,i);
  //  delay(50);
 // }
  pixels.clear();
  pixels.show();


  Serial.println("----  End init  ----");
  bFirstRun = false;
  Serial.println("bFirstRun: " + String(bFirstRun));
  Serial.println("Activate state for game");
}

//Simple function to check LED-Ring one by one
void InitRingTest(int iRed, int iGreen, int iBlue)
{
  Serial.println("R: " + String(iRed) + " G: " + String(iGreen) + " B: " + String(iBlue));
  for(int iPixel = 0; iPixel < NUMPIXELS; iPixel++)
  {
    pixels.setPixelColor(iPixel, pixels.Color(iRed, iGreen, iBlue));
    pixels.show();
        int thisPitch = map (iPixel , 0, 12,  1000, 3000);
       tone(10, thisPitch,120);
    delay(50);
  }
}

//Function to draw target an secure area for player
void DrawNextTarget(int iPos, bool bArea)
{
  pixels.clear();
  pixels.setPixelColor(iPos, pixels.Color(0, 255, 0));
  if(bArea)
  {
    if(iPos - 1 < 0)
      pixels.setPixelColor(NUMPIXELS - 1, pixels.Color(255, 136, 0));
    else
      pixels.setPixelColor(iPos - 1, pixels.Color(255, 136, 0));

    if(iPos + 1 >= NUMPIXELS)
      pixels.setPixelColor(0, pixels.Color(255, 136, 0));
    else
      pixels.setPixelColor(iPos + 1, pixels.Color(255, 136, 0));
  }
}

//Function to draw players LED
void DrawPlayer(int iPos)
{
  if(iPos == iTargetPos)  //target and player-dot is equal
    pixels.setPixelColor(iPos, pixels.Color(0, 0, 255));  //Dot color will blue

  else
    pixels.setPixelColor(iPos, pixels.Color(255, 0, 0));  //Otherwise red
  pixels.show();
  tone(10, 500, 50);
}

//Function to check after pressing button, if user hit the target
bool CheckPlayerPos()
{
  if(iTargetPos == iPlayerPos)  //Player hit target?

   return true;

  else
  {
    if(bSecureWindow) //LED before and after target active?
    {
      int iBeforeTarget = iTargetPos - 1;
      int iAfterTarget = iTargetPos + 1;
      if(iBeforeTarget < 0)
        iBeforeTarget = NUMPIXELS - 1;
      if(iAfterTarget >= NUMPIXELS)
        iAfterTarget = 0;
      if(iBeforeTarget == iPlayerPos || iAfterTarget == iPlayerPos)
        return true;
      else
        return false;

    }
    else
      return false;
  }
}

//Function to debounce button
int DebounceButton()
{
  int iCurrentButtonState = digitalRead(PINBTN);
  if(iCurrentButtonState != iLastButtonPressed)
    ulLastDebounceTime = millis();

  if((millis() - ulLastDebounceTime) > ulDebounceButton)
  {
    if(iCurrentButtonState != iButtonState)
      iButtonState = iCurrentButtonState;
  }
  iLastButtonPressed = iCurrentButtonState;
  return iButtonState;
}
Mini Cyclone Game on WS2812 LED Ring and Arduino Nano









Raspberry Pi 5 7 Inch Touch Screen IPS 1024x600 HD LCD HDMI-compatible Display for RPI 4B 3B+ OPI 5 AIDA64 PC Secondary Screen(Without Speaker)
BUY NOW


- Comments(0)
- Likes(0)
More by Mirko Pavleski
-
 Arduino 3D Printed self Balancing Cube
Self-balancing devices are electronic devices that use sensors and motors to keep themselves balanc...
Arduino 3D Printed self Balancing Cube
Self-balancing devices are electronic devices that use sensors and motors to keep themselves balanc...
-
 Building a Mini Fostex Horn Speaker with a 2-Inch Full-Range Driver
A back-loaded horn speaker is a loudspeaker design that channels the rear sound wave of a driver th...
Building a Mini Fostex Horn Speaker with a 2-Inch Full-Range Driver
A back-loaded horn speaker is a loudspeaker design that channels the rear sound wave of a driver th...
-
 ESP32 Moon Lamp That Shows the Real Moon Phase on Crowpanel Round Dispaly
Recently on the Hackaday portal I came across a very interesting project called Moon Display by aut...
ESP32 Moon Lamp That Shows the Real Moon Phase on Crowpanel Round Dispaly
Recently on the Hackaday portal I came across a very interesting project called Moon Display by aut...
-
 40-Year-Old DIY Power Amplifiers – Do They Still Work - 500W MOSFET & Transistor Amps
This time I want to describe my two DIY super powerful audio amplifiers that I made about 40 years ...
40-Year-Old DIY Power Amplifiers – Do They Still Work - 500W MOSFET & Transistor Amps
This time I want to describe my two DIY super powerful audio amplifiers that I made about 40 years ...
-
 Wi-Fi HaLow Explained! Long-Range Camera Test up to 300m (ESP32 + ThinkNode G4 from ELECROW)
I recently needed to install a security camera at a relatively large distance from my home, more pre...
Wi-Fi HaLow Explained! Long-Range Camera Test up to 300m (ESP32 + ThinkNode G4 from ELECROW)
I recently needed to install a security camera at a relatively large distance from my home, more pre...
-
 Simple Object Recognition with the UNIHIKER K10 – No TensorFlow, No Internet, No Cloud AI
Object recognition has become one of the most popular applications of artificial intelligence and em...
Simple Object Recognition with the UNIHIKER K10 – No TensorFlow, No Internet, No Cloud AI
Object recognition has become one of the most popular applications of artificial intelligence and em...
-
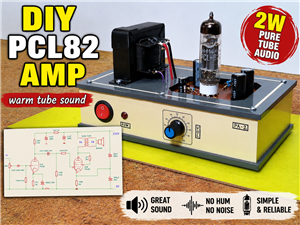 DIY PCL82 Tube Amplifier, Single-Ended Amp with Amazing Sound
The idea for this project came from a local electronics magazine called EMITER, issue 12/13 from 20...
DIY PCL82 Tube Amplifier, Single-Ended Amp with Amazing Sound
The idea for this project came from a local electronics magazine called EMITER, issue 12/13 from 20...
-
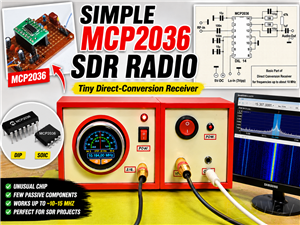 Simple MCP2036 SDR Radio - The Most Unusual Software Defined Radio
SDR (Software Defined Radio) is a radio communication system where many of the key electronic compo...
Simple MCP2036 SDR Radio - The Most Unusual Software Defined Radio
SDR (Software Defined Radio) is a radio communication system where many of the key electronic compo...
-
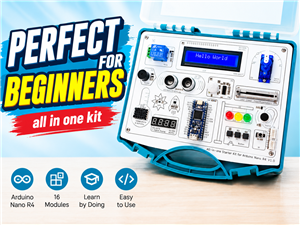 Elecrow All-in-One Arduino Starter Kit Review - 20 Projects & 16 Modules
This time I will describe a simple and practical way to enter the world of microcontrollers, specif...
Elecrow All-in-One Arduino Starter Kit Review - 20 Projects & 16 Modules
This time I will describe a simple and practical way to enter the world of microcontrollers, specif...
-
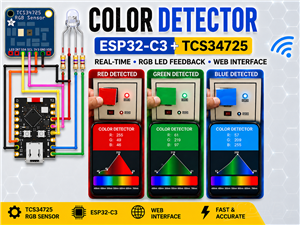 ESP32-C3 Color Detector with TCS34725, Real-Time RGB Detection & Web Interface
Color detection is a fundamental task in many embedded systems – from industrial sorting machines t...
ESP32-C3 Color Detector with TCS34725, Real-Time RGB Detection & Web Interface
Color detection is a fundamental task in many embedded systems – from industrial sorting machines t...
-
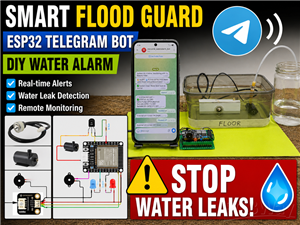 DIY ESP32 Telegram Flood Protection System - Smart Home Automation
Recently I had an unpleasant experience in my home, specifically my ground floor was flooded as a r...
DIY ESP32 Telegram Flood Protection System - Smart Home Automation
Recently I had an unpleasant experience in my home, specifically my ground floor was flooded as a r...
-
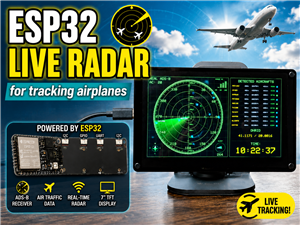 Real-Time Air Traffic Radar using ESP32 + ADS-B Data
ADS-B, which stands for Automatic Dependent Surveillance-Broadcast, is the modern standard for trac...
Real-Time Air Traffic Radar using ESP32 + ADS-B Data
ADS-B, which stands for Automatic Dependent Surveillance-Broadcast, is the modern standard for trac...
-
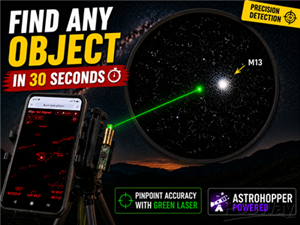 DIY Green Laser Night Sky Object Finder - Find Stars & Galaxies Instantly with great accuracy
As an amateur astronomer, especially at the beginning, the most difficult part of observing the nig...
DIY Green Laser Night Sky Object Finder - Find Stars & Galaxies Instantly with great accuracy
As an amateur astronomer, especially at the beginning, the most difficult part of observing the nig...
-
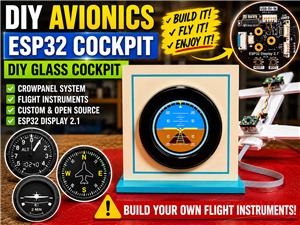 DIY Avionics Simulator with ESP32 - Artificial Horizon, Compass & Altimeter
The inspiration for this project comes from classical aircraft cockpit instruments used for navigat...
DIY Avionics Simulator with ESP32 - Artificial Horizon, Compass & Altimeter
The inspiration for this project comes from classical aircraft cockpit instruments used for navigat...
-
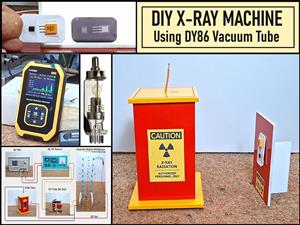 DIY Miniature X-Ray Machine using a TV Vacuum Tube DY86
An X-ray machine (or radiograph) is a quick, painless medical test that produces images of the struc...
DIY Miniature X-Ray Machine using a TV Vacuum Tube DY86
An X-ray machine (or radiograph) is a quick, painless medical test that produces images of the struc...
-
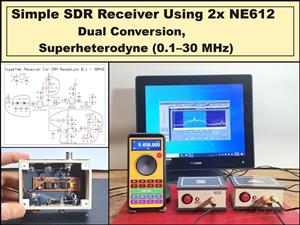 Simple SDR Receiver Using 2x NE612 - Dual Conversion, Superheterodyne (0.1–30 MHz)
SDR (Software Defined Radio) is a radio system in which most of the functions of a classic radio (f...
Simple SDR Receiver Using 2x NE612 - Dual Conversion, Superheterodyne (0.1–30 MHz)
SDR (Software Defined Radio) is a radio system in which most of the functions of a classic radio (f...
-
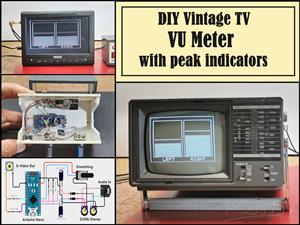 DIY Vintage TV VU Meter with peak indicators
Some time ago in one of my projects I presented you a way to turn a black and white old mini TV int...
DIY Vintage TV VU Meter with peak indicators
Some time ago in one of my projects I presented you a way to turn a black and white old mini TV int...
-
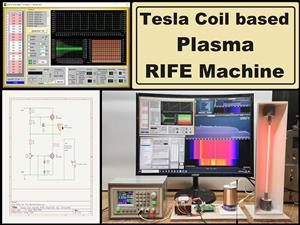 DIY Tesla Coil based Plasma Rife Machine
In several of my previous videos, I presented you with different ways to make a Rife Machine, from ...
DIY Tesla Coil based Plasma Rife Machine
In several of my previous videos, I presented you with different ways to make a Rife Machine, from ...
-
Programmable Mist Maker - XIAO / QT PY Extension
2119 2 2 -
RadioHAT - Raspberry Pi radio development platform
1801 0 4 -
-
-
-
ARPS-2 – Arduino-Compatible Robot Project Shield for Arduino UNO
4013 0 6 -
A Compact Charging Breakout Board For Waveshare ESP32-C3
4750 3 8 -
AI-driven LoRa & LLM-enabled Kiosk & Food Delivery System
5564 2 2 -





















