


|
arduino IDEArduino
|
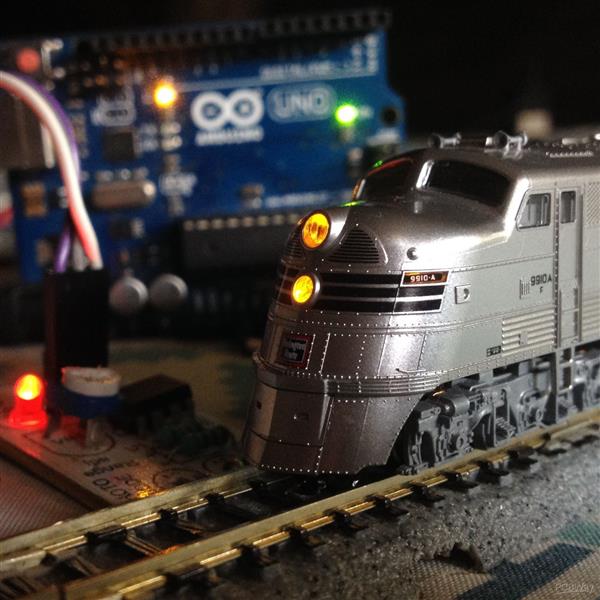
Keyboard Controlled Model Train(PS/2 Interface)
Using Arduino microcontrollers, there are a lot of ways of controlling model railway layouts. A keyboard has the great advantage of having a lot of keys to add a lot of functions. Here let's see how can we start with a simple layout with locomotive and turnout control.
So, without further ado, let's get started!
Step 1: Watch the Video
Step 2: Get All the Stuff

For this project you will need:
- An Arduino microcontroller board.
- An Adafruit motor driver shield V2.
- A female PS/2 connector(Get the one shown in the picture, it will make work easier.)
- 4 male to male jumper wires(For connecting the female PS/2 connector to the Arduino board.)
- 4 male to male jumper wires(2 for each turnout.)
- 2 male-to-male jumper wires(For connecting the track power.)
- 12-volt DC power source with a current capacity of at least 1A(1000 mA).
- A PS/2 keyboard(USB one will not work!)
- A suitable USB cable for programming the Arduino board.
Step 3: Program the Arduino Board and Plug on the Shield

Get the library for the PS/2 keyboard from here.
To install the library for the Adafruit motor shield, go to Sketch>Include library>Manage libraries and search for Adafruit motor shield V2 library, install it and you're good to go.
Step 4: Identify the Pin Connections of the PS/2 Connector and Connect It to the Arduino Board


Using a multimeter set to continuity test and using the given picture as a reference, mark the pinouts of the PS/2 connector/extension cable wires and make the following wiring connections between the PS/2 connector and the Arduino board:
- Connect the 'CLOCK' wire to pin D2.
- Connect the 'DATA' wire to pin D3.
- Connect the 'GND' wire to pin 'GND'.
- Connect the '+5-volt/VCC' wire to the +5-volt pin.
Step 5: Connect Wires to the Motor Output Terminals

Step 6: Set Up a Test Layout

Step 7: Connect the Motor Output Wires to the Turnouts and Track Power

Connect the M1 output to track power and connect the M3 and M4 outputs to any of the two turnouts each.
Double-check all the wiring connections and make sure no wiring connections are loose.
Step 8: Connect the Keyboard to the PS/2 Connector


Step 9: Place the Locomotive and Some Rolling Stock on the Tracks

Step 10: Connect to Power and Turn It On

Step 11: Sit Back With The Keyboard and Operate Your Layout
Step 12: Go Further!
There are a lot of buttons left on the keyboard. Go ahead and try adding more turnouts and functions to your layout. Whatever you do, don't forget to keep trying new stuff!
Keyboard Controlled Model Train(PS/2 Interface)


Raspberry Pi 5 7 Inch Touch Screen IPS 1024x600 HD LCD HDMI-compatible Display for RPI 4B 3B+ OPI 5 AIDA64 PC Secondary Screen(Without Speaker)
BUY NOW

- Comments(0)
- Likes(0)
 More by KushagraK7
-
 Raspberry Pi Pico RC Vehicle
SuppliesA Raspberry Pi Pico(Almost any microcontroller can be used here, but the Pico offers great f...
Raspberry Pi Pico RC Vehicle
SuppliesA Raspberry Pi Pico(Almost any microcontroller can be used here, but the Pico offers great f...
-
 Stepper Motor Controlled Stepper Motor Without Microcontroller!
Step 1: Watch the VideoWatch the video to get a full understanding of the project and learn how to t...
Stepper Motor Controlled Stepper Motor Without Microcontroller!
Step 1: Watch the VideoWatch the video to get a full understanding of the project and learn how to t...
-
 Automated Model Railroad Layout Running Two Trains
I made an Automated Model Train Layout with Passing Siding a while back. Upon request from a fellow ...
Automated Model Railroad Layout Running Two Trains
I made an Automated Model Train Layout with Passing Siding a while back. Upon request from a fellow ...
-
 Program the Raspberry Pi Pico With the Arduino IDE
The Raspberry Pi Pico is a recently launched product in the family of microcontrollers and its load ...
Program the Raspberry Pi Pico With the Arduino IDE
The Raspberry Pi Pico is a recently launched product in the family of microcontrollers and its load ...
-
 Reuse an Old Laptop's Touchpad to Control a Computer!
PS/2 laptop touchpads are among the coolest user interface devices to use with a microcontroller. Th...
Reuse an Old Laptop's Touchpad to Control a Computer!
PS/2 laptop touchpads are among the coolest user interface devices to use with a microcontroller. Th...
-
 Automated Model Railroad Layout With Reverse Loops
In one of my previous projects, I showed how to make a Simple Automated Point to Point Model Railroa...
Automated Model Railroad Layout With Reverse Loops
In one of my previous projects, I showed how to make a Simple Automated Point to Point Model Railroa...
-
 Use a Stepper Motor As a Rotary Encoder
Rotary encoders are great for use in microcontroller projects as an input device but their performan...
Use a Stepper Motor As a Rotary Encoder
Rotary encoders are great for use in microcontroller projects as an input device but their performan...
-
 Keyboard Controlled Model Train(PS/2 Interface)
Using Arduino microcontrollers, there are a lot of ways of controlling model railway layouts. A keyb...
Keyboard Controlled Model Train(PS/2 Interface)
Using Arduino microcontrollers, there are a lot of ways of controlling model railway layouts. A keyb...
-
 Stepper Motor Speed and Direction Control Without a Microcontroller
In one of my previous projects, I showed you how to control a stepper motor's speed using a 555 time...
Stepper Motor Speed and Direction Control Without a Microcontroller
In one of my previous projects, I showed you how to control a stepper motor's speed using a 555 time...
-
 Smartphone Controlled 4X4 Robot With ESP8266
SuppliesFor this project, you will need:An ESP8266 microcontroller(Node MCU)A dual H-bridge motor dr...
Smartphone Controlled 4X4 Robot With ESP8266
SuppliesFor this project, you will need:An ESP8266 microcontroller(Node MCU)A dual H-bridge motor dr...
-
 Touchpad Controlled Digital Servo Motor
Here is a quick and simple project where we control a digital servo motor with the slide of our fing...
Touchpad Controlled Digital Servo Motor
Here is a quick and simple project where we control a digital servo motor with the slide of our fing...
-
 Smartphone Controlled Model Railroad With an ESP8266
IntroA while back, I made a project where a stepper motor's position is controlled using a smartphon...
Smartphone Controlled Model Railroad With an ESP8266
IntroA while back, I made a project where a stepper motor's position is controlled using a smartphon...
-
 Simple USB Volume Controller with Arduino
This project uses a rotary encoder connected to an Arduino Leonardo to control the audio volume of a...
Simple USB Volume Controller with Arduino
This project uses a rotary encoder connected to an Arduino Leonardo to control the audio volume of a...
-
 Motor Speed and Direction Control with a Web-Server using an ESP01
Supplies:For this project, you will need:An ESP01 microcontroller(You can use any ESP8266-based micr...
Motor Speed and Direction Control with a Web-Server using an ESP01
Supplies:For this project, you will need:An ESP01 microcontroller(You can use any ESP8266-based micr...
-
 Wi-Fi Controlled Stepper Motor With an ESP Microcontroller
Step 1: Get All the Required StuffFor this project, you will need:An ESP8266 microcontrollerA Steppe...
Wi-Fi Controlled Stepper Motor With an ESP Microcontroller
Step 1: Get All the Required StuffFor this project, you will need:An ESP8266 microcontrollerA Steppe...
-
 Simple Automated Model Railroad Loop With Yard Siding
Video:Supplies: For this project, you will require:An Arduino microcontroller board compatible with ...
Simple Automated Model Railroad Loop With Yard Siding
Video:Supplies: For this project, you will require:An Arduino microcontroller board compatible with ...
-
 Laptop Touchpad Controlled Model Railroad
Supplies:For this project, you will require:An Arduino microcontroller compatible with Adafruit Moto...
Laptop Touchpad Controlled Model Railroad
Supplies:For this project, you will require:An Arduino microcontroller compatible with Adafruit Moto...
-
 Control a Stepper Motor with a Slide of Your Finger
Supplies:An Arduino microcontroller boardA PS/2 touchpad from a laptop(Try to get one with a Synapti...
Control a Stepper Motor with a Slide of Your Finger
Supplies:An Arduino microcontroller boardA PS/2 touchpad from a laptop(Try to get one with a Synapti...
-
Programmable Mist Maker - XIAO / QT PY Extension
1080 2 1 -
RadioHAT - Raspberry Pi radio development platform
896 0 2 -
-
-
-
-
ARPS-2 – Arduino-Compatible Robot Project Shield for Arduino UNO
3338 0 6 -
A Compact Charging Breakout Board For Waveshare ESP32-C3
3949 3 8 -
AI-driven LoRa & LLM-enabled Kiosk & Food Delivery System
4340 2 2


