


|
|
Hobby servo motor |
x 1 | |
|
|
L298N motor driver module |
x 1 | |
|
|
12-volt DC power supply |
x 1 | |
|
|
Male-to-male jumper wires |
x 4 | |
|
|
Female-to-female jumper wires |
x 2 |
Hack a Servo Motor to Make a Model Train Controller!
Supplies

Here is what you will need:
- A standard servo motor(Plastic gear one is recommended since the mechanics of the servo motor will be unused.)
- A screwdriver
- A diagonal cutter
- Some M-M jumper wires
- A power feeder track(Use a suitable gauge of track that you have, I use N-gauge tracks)
- Some female-to-female jumper wires
Step 1: Take Apart the Servo Motor

Step 2: Disconnect the Motor Wires


Step 3: Take Out the Servo Driver


Remove the top gear housing and the output gear to expose the potentiometer. Push it down to free it from the servo motor's body and take the driver board out along with the potentiometer.
Step 4: Add Female Connectors to the Output Wires of the Driver Board


Doing so will make it easier to connect the servo driver's output to the L298N motor driver's input pins.
Step 5: Connect Jumper Cables to the L298N Motor Driver

Take a pair of jumper cables with female connectors on one side and bare wires on the other and connect the bare wires to the 5 volts and GND of the motor driver board. Using a pair of male-to-male jumper cables, connect the 12-volt input of the motor driver board(also marked as VIN or VMOT) and the GND to be later connected to a 12-volt power supply. Then, take another pair of male-to-male jumper wires and connect them to any of the two motor outputs. Click on the image for help.
Step 6: Connect the Servo Driver Board

Connect the output wires of the servo drive to the input pins of the motor driver corresponding to the motor output the power feeder track will be connected to. For example, if outputs 3 and 4 are being used(see image), connect the servo driver's output to the input pins marked 3 and 4.
Step 7: Connect the Servo Tester to the Servo Driver Board

Step 8: Connect the Servo Driver's Power Input to the 5 Volt Output of the Motor Driver

Step 9: Make the Test Layout

The test layout is just a loop of a track made using N-gauge Kato Unitrack.
Step 10: Connect the Power Feeder Track to the Motor Driver

Step 11: Connect the Motor Driver's Input Power to a 12-volt DC Power Supply

Here, I have used a computer's power supply to power the whole setup but you can also use a 12-volt power adapter.
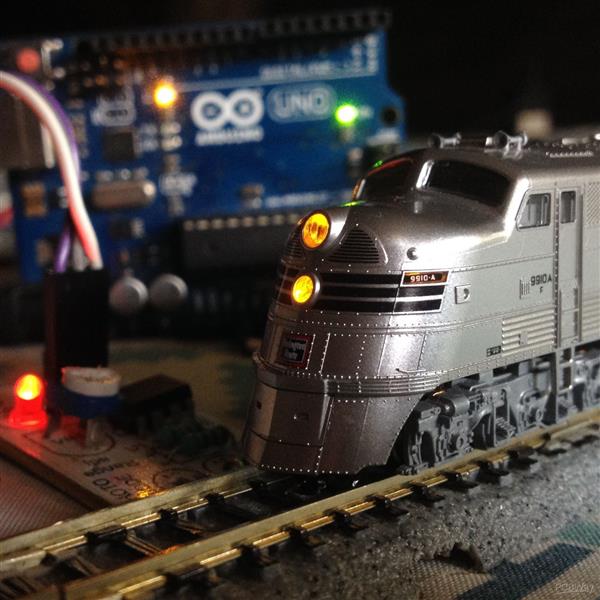
Step 12: Get Your Train and Position It on the Tracks

Step 13: Power Up the Setup

Step 14: Calibrate the Driver

After powering on the setup, press the button on the servo tester once. The middle LED should light up and the servo tester will command the servo driver to move the motor at 90 degrees angle(As it would normally do in a regular servo motor).

Adjust the potentiometer on the servo driver until the locomotive stops moving.
Step 15: It's Done!
Step 16: What's Next?!
Since this model train driver uses a servo motor's driver board, it can easily be controlled using any microcontroller and can also be used with Wireless RC controllers to control the trains and even turnouts. Excited? Stay tuned for future projects related to this and all the best for your build!
Hack a Servo Motor to Make a Model Train Controller!


Raspberry Pi 5 7 Inch Touch Screen IPS 1024x600 HD LCD HDMI-compatible Display for RPI 4B 3B+ OPI 5 AIDA64 PC Secondary Screen(Without Speaker)
BUY NOW

- Comments(0)
- Likes(2)
 More by KushagraK7
-
 Raspberry Pi Pico RC Vehicle
SuppliesA Raspberry Pi Pico(Almost any microcontroller can be used here, but the Pico offers great f...
Raspberry Pi Pico RC Vehicle
SuppliesA Raspberry Pi Pico(Almost any microcontroller can be used here, but the Pico offers great f...
-
 Stepper Motor Controlled Stepper Motor Without Microcontroller!
Step 1: Watch the VideoWatch the video to get a full understanding of the project and learn how to t...
Stepper Motor Controlled Stepper Motor Without Microcontroller!
Step 1: Watch the VideoWatch the video to get a full understanding of the project and learn how to t...
-
 Automated Model Railroad Layout Running Two Trains
I made an Automated Model Train Layout with Passing Siding a while back. Upon request from a fellow ...
Automated Model Railroad Layout Running Two Trains
I made an Automated Model Train Layout with Passing Siding a while back. Upon request from a fellow ...
-
 Program the Raspberry Pi Pico With the Arduino IDE
The Raspberry Pi Pico is a recently launched product in the family of microcontrollers and its load ...
Program the Raspberry Pi Pico With the Arduino IDE
The Raspberry Pi Pico is a recently launched product in the family of microcontrollers and its load ...
-
 Reuse an Old Laptop's Touchpad to Control a Computer!
PS/2 laptop touchpads are among the coolest user interface devices to use with a microcontroller. Th...
Reuse an Old Laptop's Touchpad to Control a Computer!
PS/2 laptop touchpads are among the coolest user interface devices to use with a microcontroller. Th...
-
 Automated Model Railroad Layout With Reverse Loops
In one of my previous projects, I showed how to make a Simple Automated Point to Point Model Railroa...
Automated Model Railroad Layout With Reverse Loops
In one of my previous projects, I showed how to make a Simple Automated Point to Point Model Railroa...
-
 Use a Stepper Motor As a Rotary Encoder
Rotary encoders are great for use in microcontroller projects as an input device but their performan...
Use a Stepper Motor As a Rotary Encoder
Rotary encoders are great for use in microcontroller projects as an input device but their performan...
-
 Keyboard Controlled Model Train(PS/2 Interface)
Using Arduino microcontrollers, there are a lot of ways of controlling model railway layouts. A keyb...
Keyboard Controlled Model Train(PS/2 Interface)
Using Arduino microcontrollers, there are a lot of ways of controlling model railway layouts. A keyb...
-
 Stepper Motor Speed and Direction Control Without a Microcontroller
In one of my previous projects, I showed you how to control a stepper motor's speed using a 555 time...
Stepper Motor Speed and Direction Control Without a Microcontroller
In one of my previous projects, I showed you how to control a stepper motor's speed using a 555 time...
-
 Smartphone Controlled 4X4 Robot With ESP8266
SuppliesFor this project, you will need:An ESP8266 microcontroller(Node MCU)A dual H-bridge motor dr...
Smartphone Controlled 4X4 Robot With ESP8266
SuppliesFor this project, you will need:An ESP8266 microcontroller(Node MCU)A dual H-bridge motor dr...
-
 Touchpad Controlled Digital Servo Motor
Here is a quick and simple project where we control a digital servo motor with the slide of our fing...
Touchpad Controlled Digital Servo Motor
Here is a quick and simple project where we control a digital servo motor with the slide of our fing...
-
 Smartphone Controlled Model Railroad With an ESP8266
IntroA while back, I made a project where a stepper motor's position is controlled using a smartphon...
Smartphone Controlled Model Railroad With an ESP8266
IntroA while back, I made a project where a stepper motor's position is controlled using a smartphon...
-
 Simple USB Volume Controller with Arduino
This project uses a rotary encoder connected to an Arduino Leonardo to control the audio volume of a...
Simple USB Volume Controller with Arduino
This project uses a rotary encoder connected to an Arduino Leonardo to control the audio volume of a...
-
 Motor Speed and Direction Control with a Web-Server using an ESP01
Supplies:For this project, you will need:An ESP01 microcontroller(You can use any ESP8266-based micr...
Motor Speed and Direction Control with a Web-Server using an ESP01
Supplies:For this project, you will need:An ESP01 microcontroller(You can use any ESP8266-based micr...
-
 Wi-Fi Controlled Stepper Motor With an ESP Microcontroller
Step 1: Get All the Required StuffFor this project, you will need:An ESP8266 microcontrollerA Steppe...
Wi-Fi Controlled Stepper Motor With an ESP Microcontroller
Step 1: Get All the Required StuffFor this project, you will need:An ESP8266 microcontrollerA Steppe...
-
 Simple Automated Model Railroad Loop With Yard Siding
Video:Supplies: For this project, you will require:An Arduino microcontroller board compatible with ...
Simple Automated Model Railroad Loop With Yard Siding
Video:Supplies: For this project, you will require:An Arduino microcontroller board compatible with ...
-
 Laptop Touchpad Controlled Model Railroad
Supplies:For this project, you will require:An Arduino microcontroller compatible with Adafruit Moto...
Laptop Touchpad Controlled Model Railroad
Supplies:For this project, you will require:An Arduino microcontroller compatible with Adafruit Moto...
-
 Control a Stepper Motor with a Slide of Your Finger
Supplies:An Arduino microcontroller boardA PS/2 touchpad from a laptop(Try to get one with a Synapti...
Control a Stepper Motor with a Slide of Your Finger
Supplies:An Arduino microcontroller boardA PS/2 touchpad from a laptop(Try to get one with a Synapti...
-
Programmable Mist Maker - XIAO / QT PY Extension
1089 2 1 -
RadioHAT - Raspberry Pi radio development platform
910 0 2 -
-
-
-
-
ARPS-2 – Arduino-Compatible Robot Project Shield for Arduino UNO
3344 0 6 -
A Compact Charging Breakout Board For Waveshare ESP32-C3
3959 3 8 -
AI-driven LoRa & LLM-enabled Kiosk & Food Delivery System
4344 2 2


