


Delta Nas Project
Greetings everyone and welcome back.
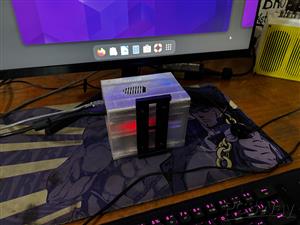
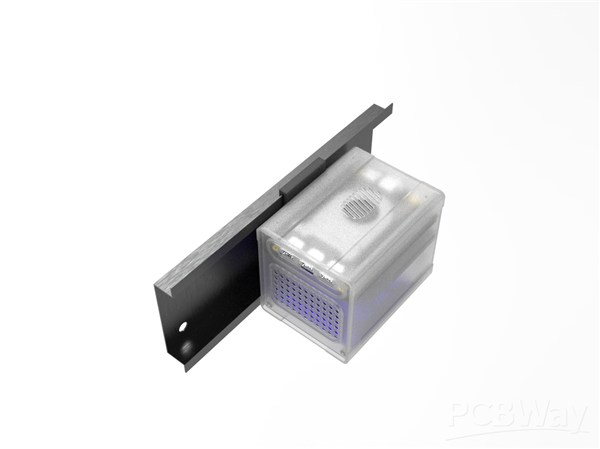
Introducing Delta NAS, a compact and customizable network storage solution built around the powerful LattePanda 3 Delta.
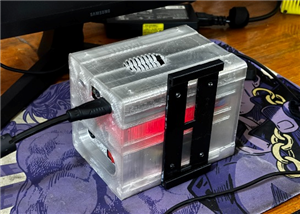
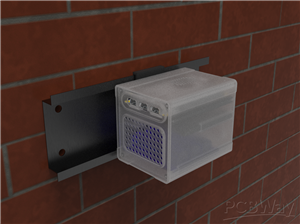
Equipped with a 1TB SATA SSD, this sleek setup is housed in a fully custom-designed 3D-printed enclosure. Delta NAS mounts seamlessly onto a wall via a specially crafted tray mechanism that integrates with a standard TV mount, allowing easy sliding and secure placement.
What sets this build apart is its internal battery pack PCB, providing uninterrupted power during outages, effectively functioning as a built-in UPS.
This Article is about the whole build process of this NAS PROJECT, so let's get started with the build.
Materials Required
These were the materials required in this project:
- Custom PCBs (provided by PCBWAY)
- LATTE PANDA 3 DELTA
- SATA SSD
- M.2 to SATA ADAPTOR (from Seeed Studio)
- Lithium Ion cells
- 18650 Cell Holder SMD
- SMD LED
- 10K Resistor
- M7 Diode
- DC Barrel Jack
- Rocker Switch - Tactile Button type
- 3D Printed parts
NAS DESIGN
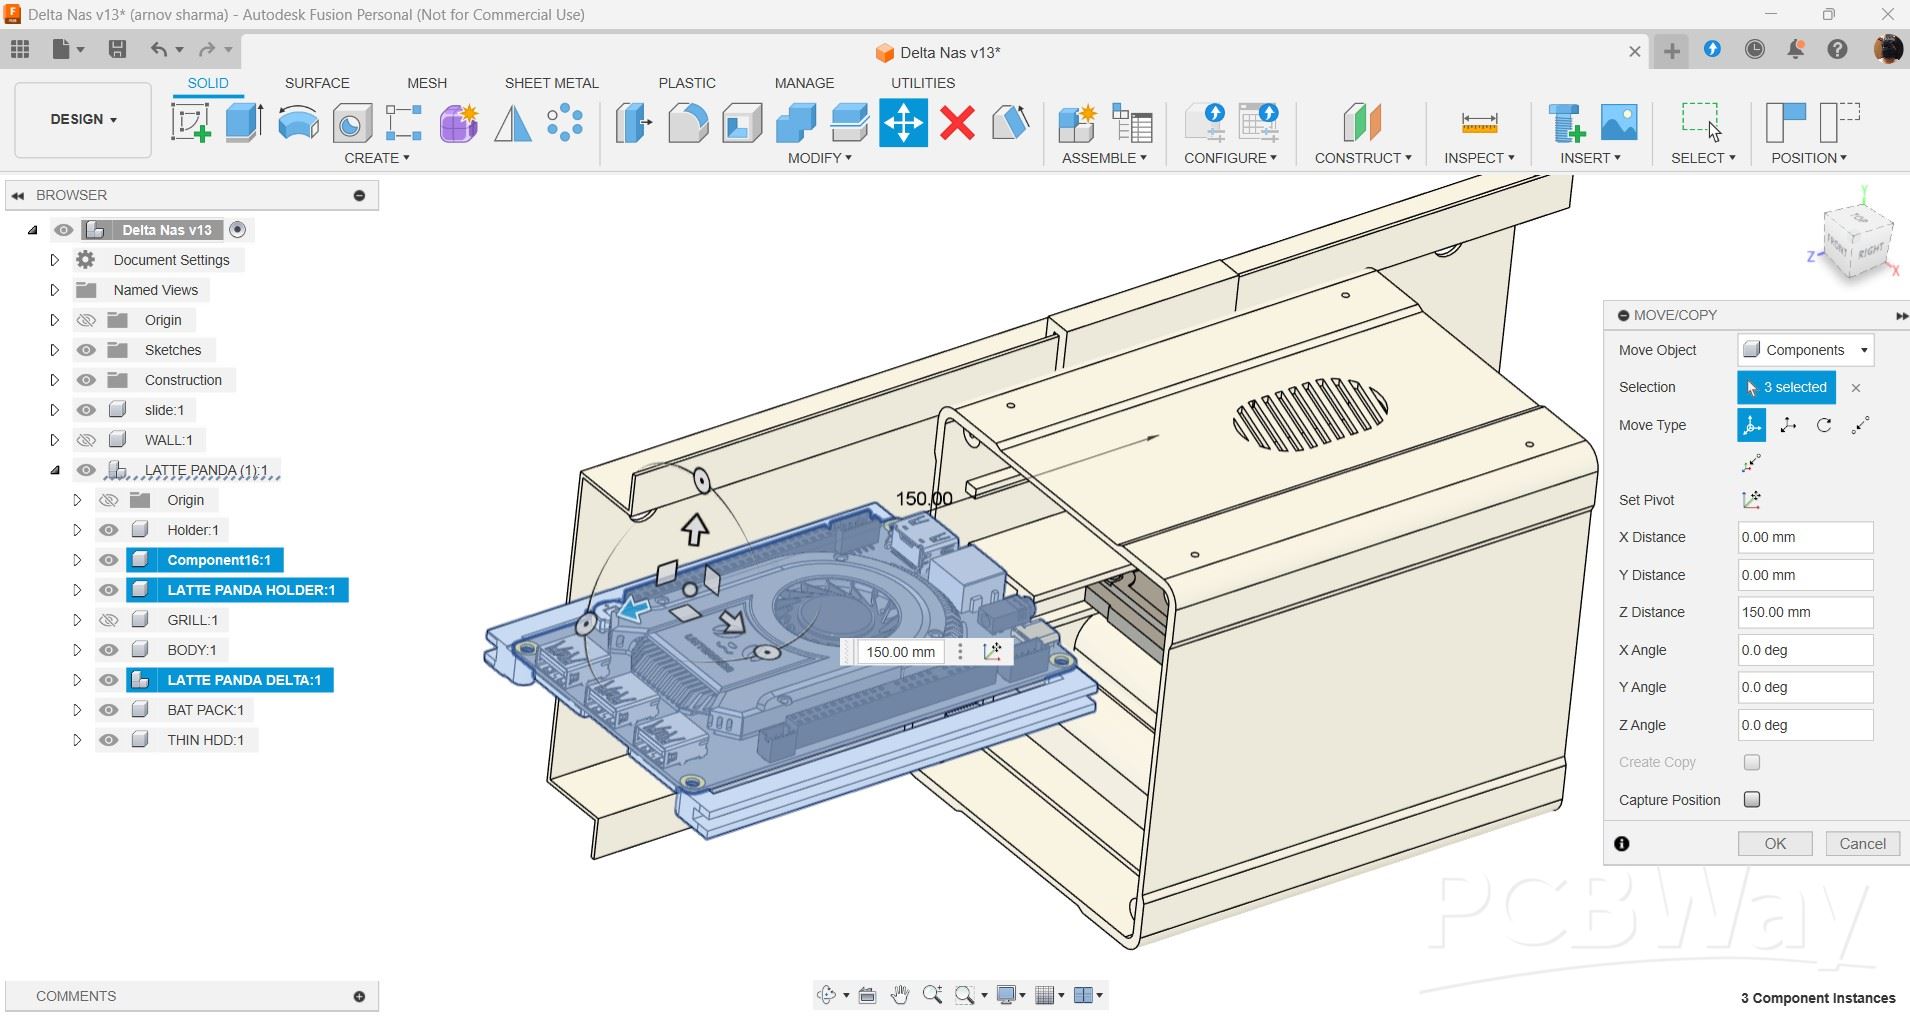
This project's design is straightforward; we took the Latte Panda 3 Delta 3D model to make a housing for the Latte Panda, Sata SSD, and a custom PCB on which we mounted the SMD Li-ion cell holders.
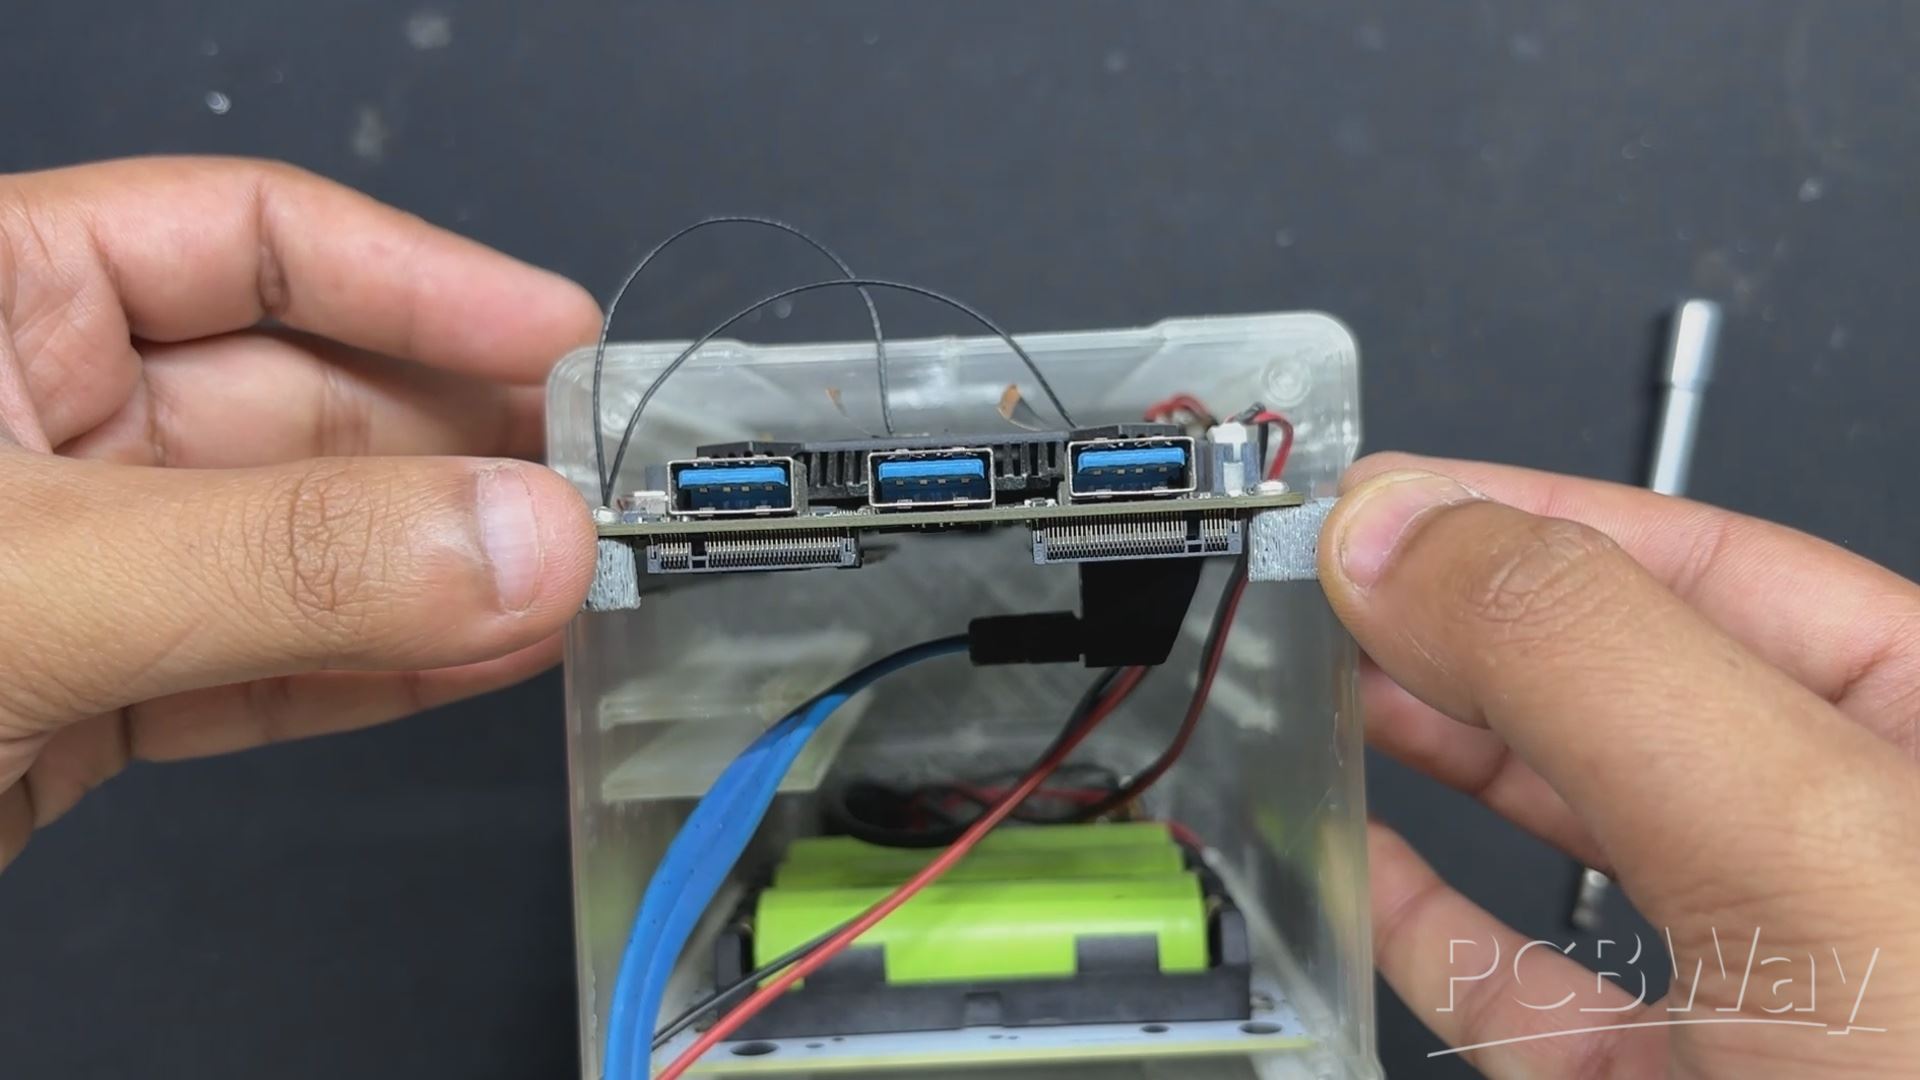
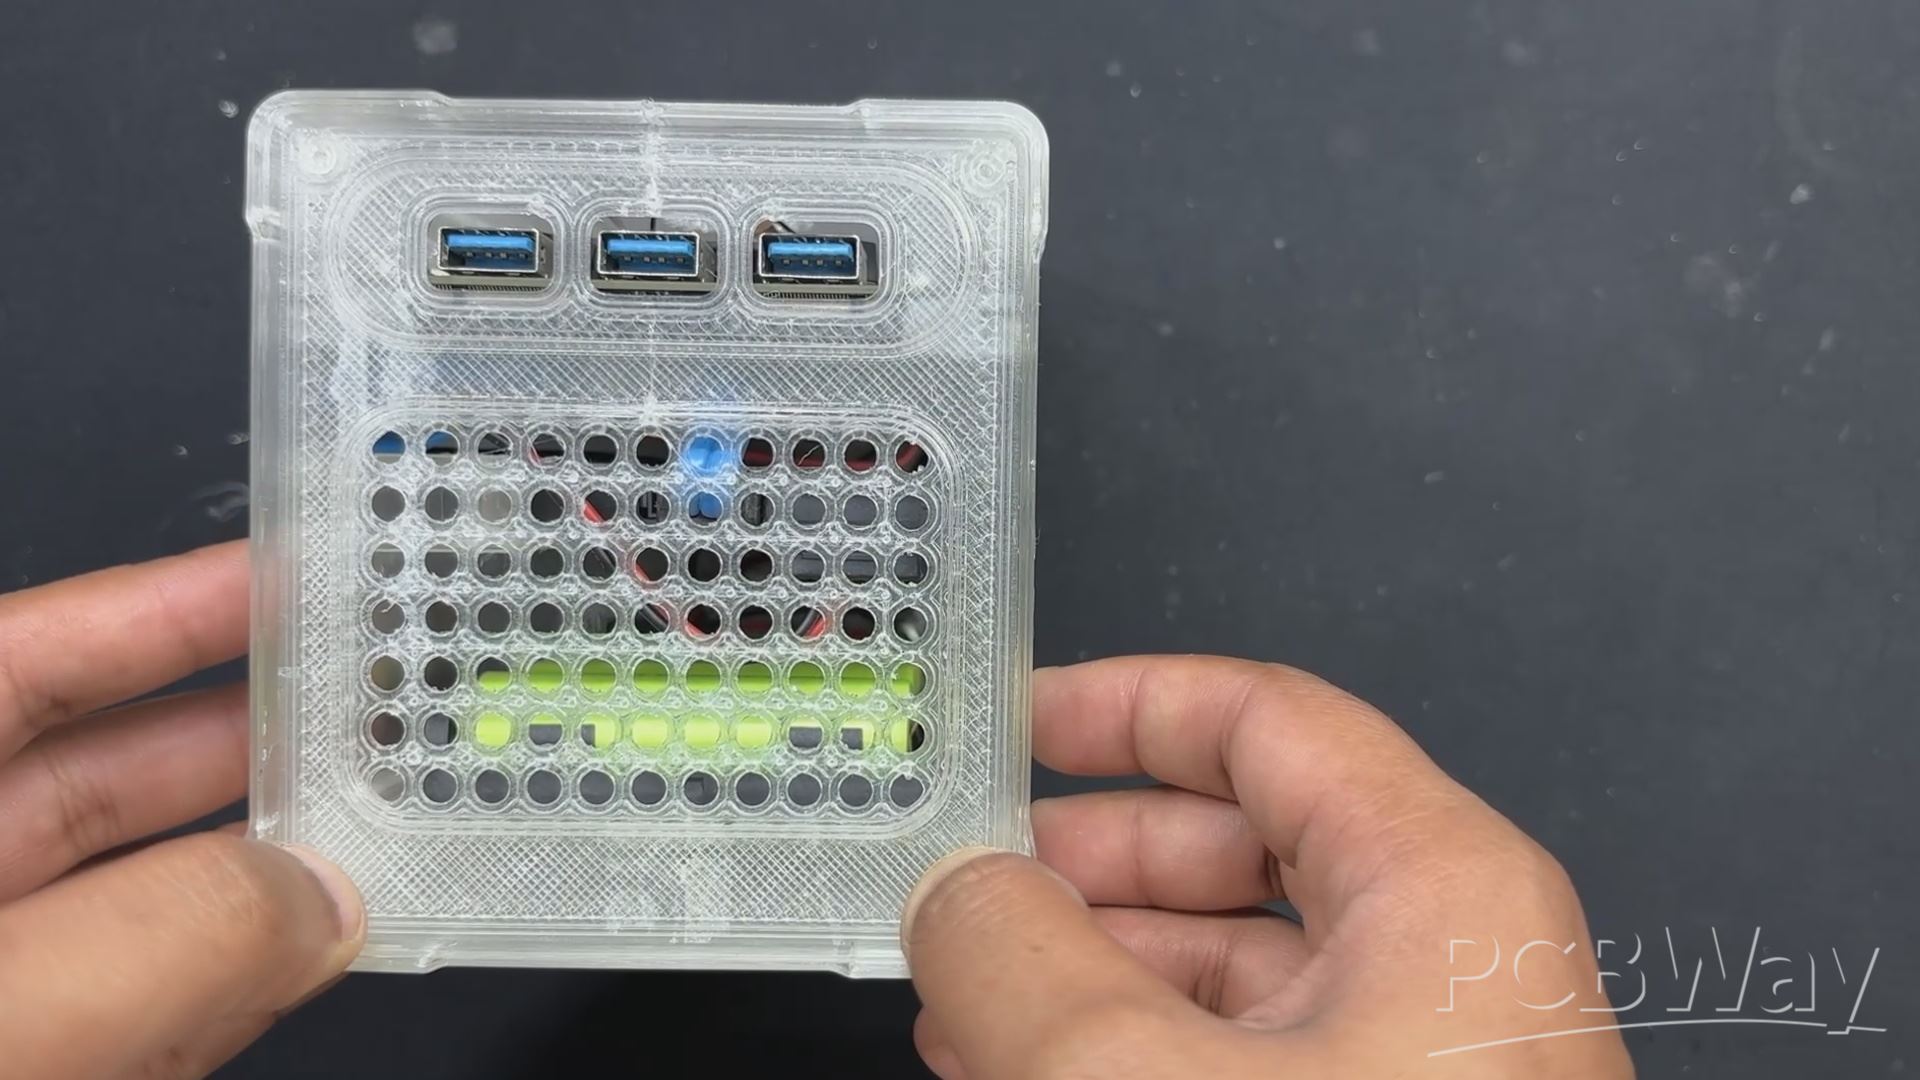
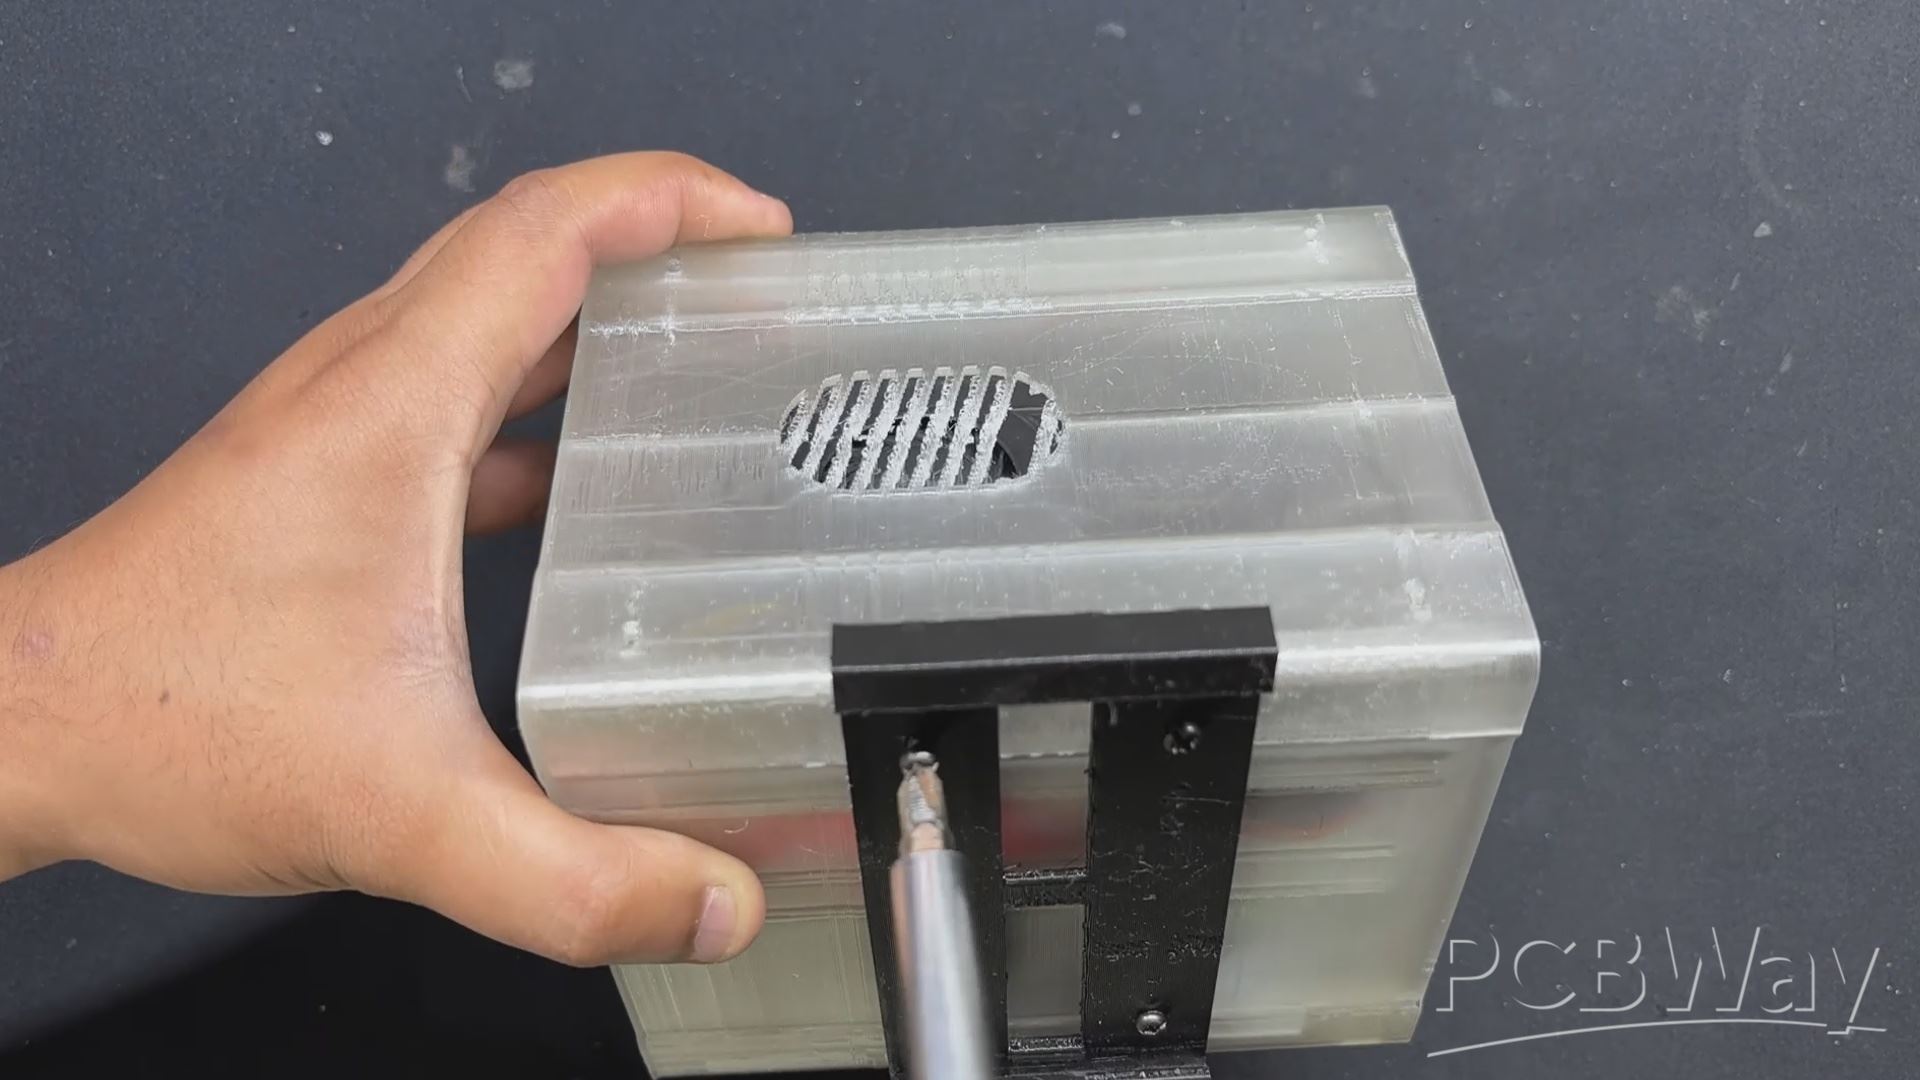
Here, we created a cuboid-shaped enclosure with an opening on the left side of the design. We added a lid to the left side of the enclosure that has four mounting holes, grills for airflow, and an opening for the Latte Panda's USB ports. We have included openings for the Type C, HDMI, and Ethernet ports on the right side of the design.
Along with a hole for a DC barrel jack that will be used for charging input, we have also included a slot for placement of a rocker switch that will be used to turn the Latte Panda on and off.
Sliding rails have been added inside, which serve as parts for adding and sliding all of our components into place. Although adding the SSD and power board is simple, the LattePanda needed a particular set of attachments to put the board into position.
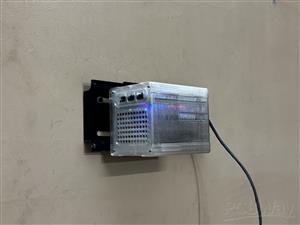
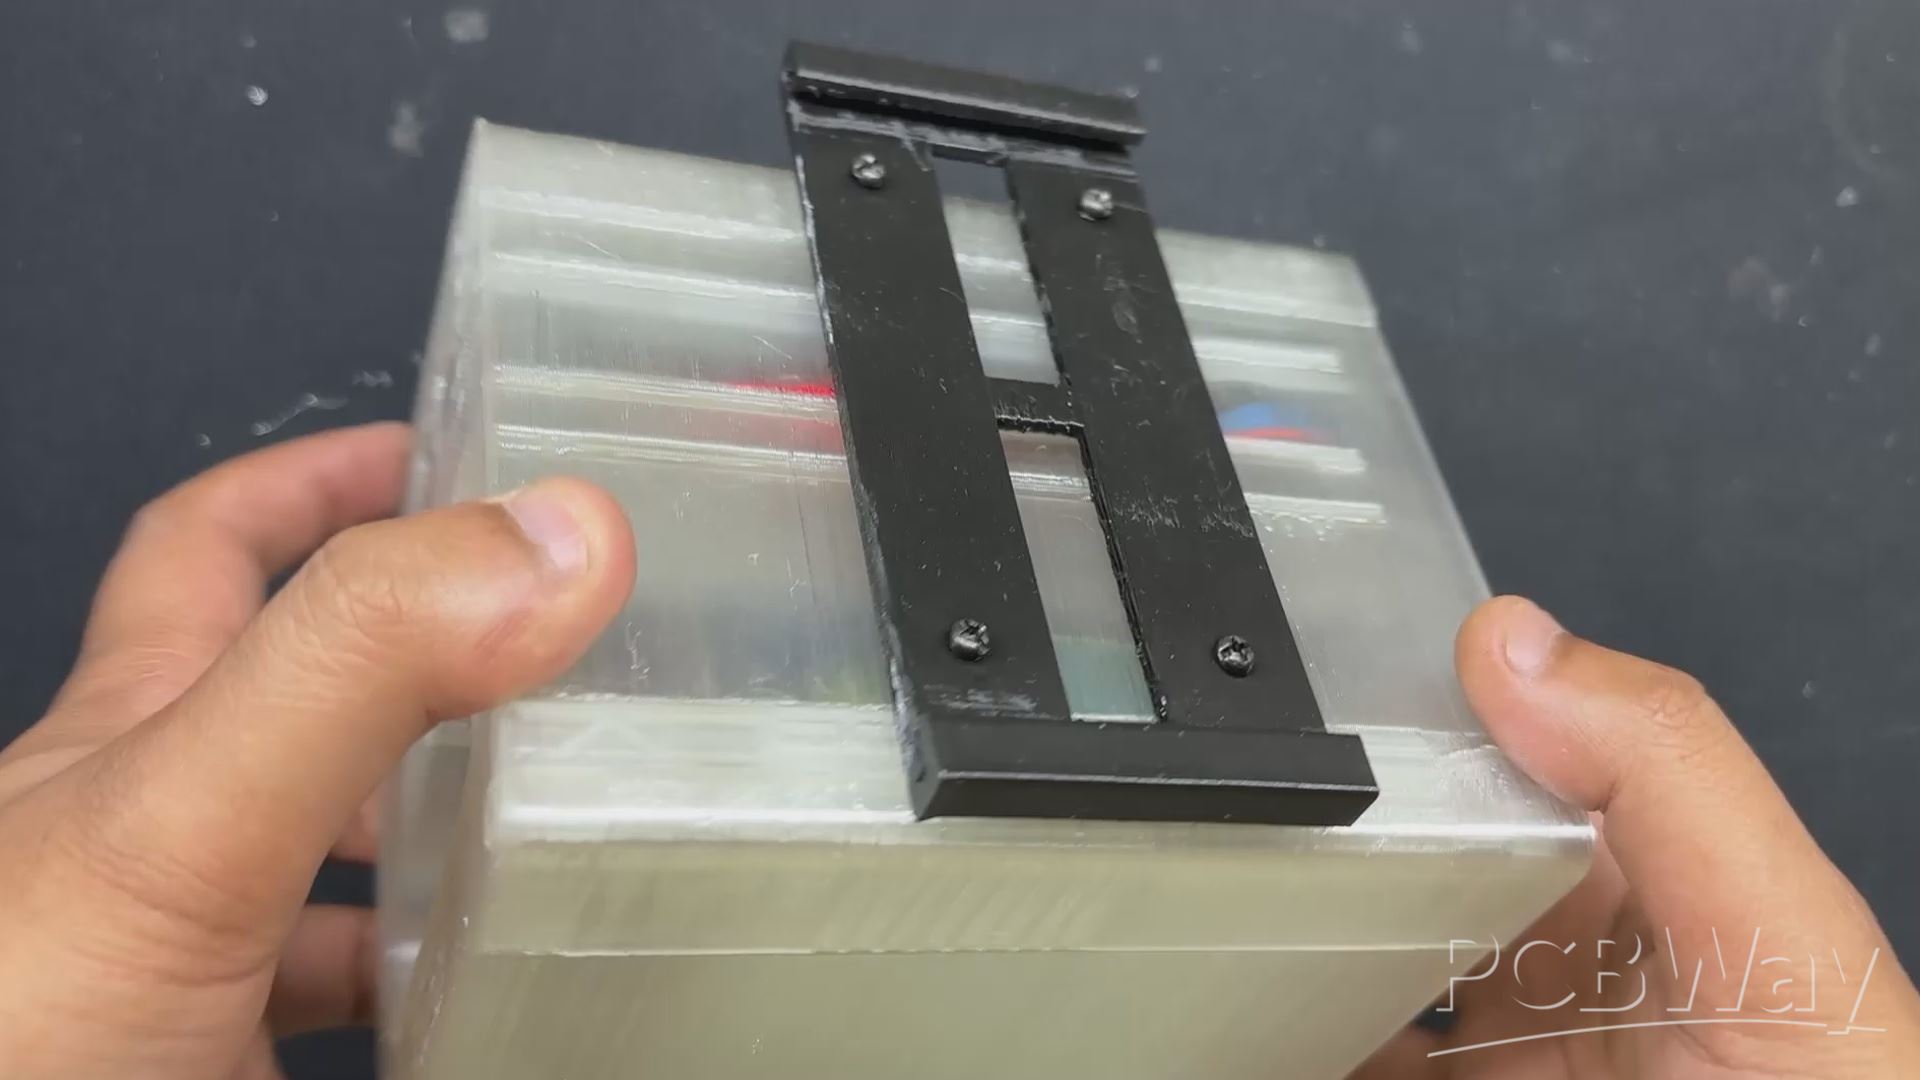
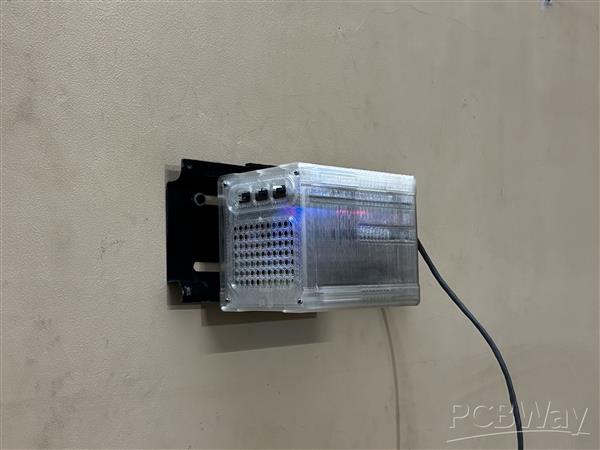
We are repurposing an old LCD TV stand for wall mounting the entire NAS design. Because of the stand's unique design, which resembles a sliding rail, we created a part that slides into the rail to mount the NAS on the wall.
Black PLA was used to print the Latte Panda slide attachment and the sliding rail mount part, while transparent PLA was used to print the main body and lid part.
LATTE PANDA 3 DELTA
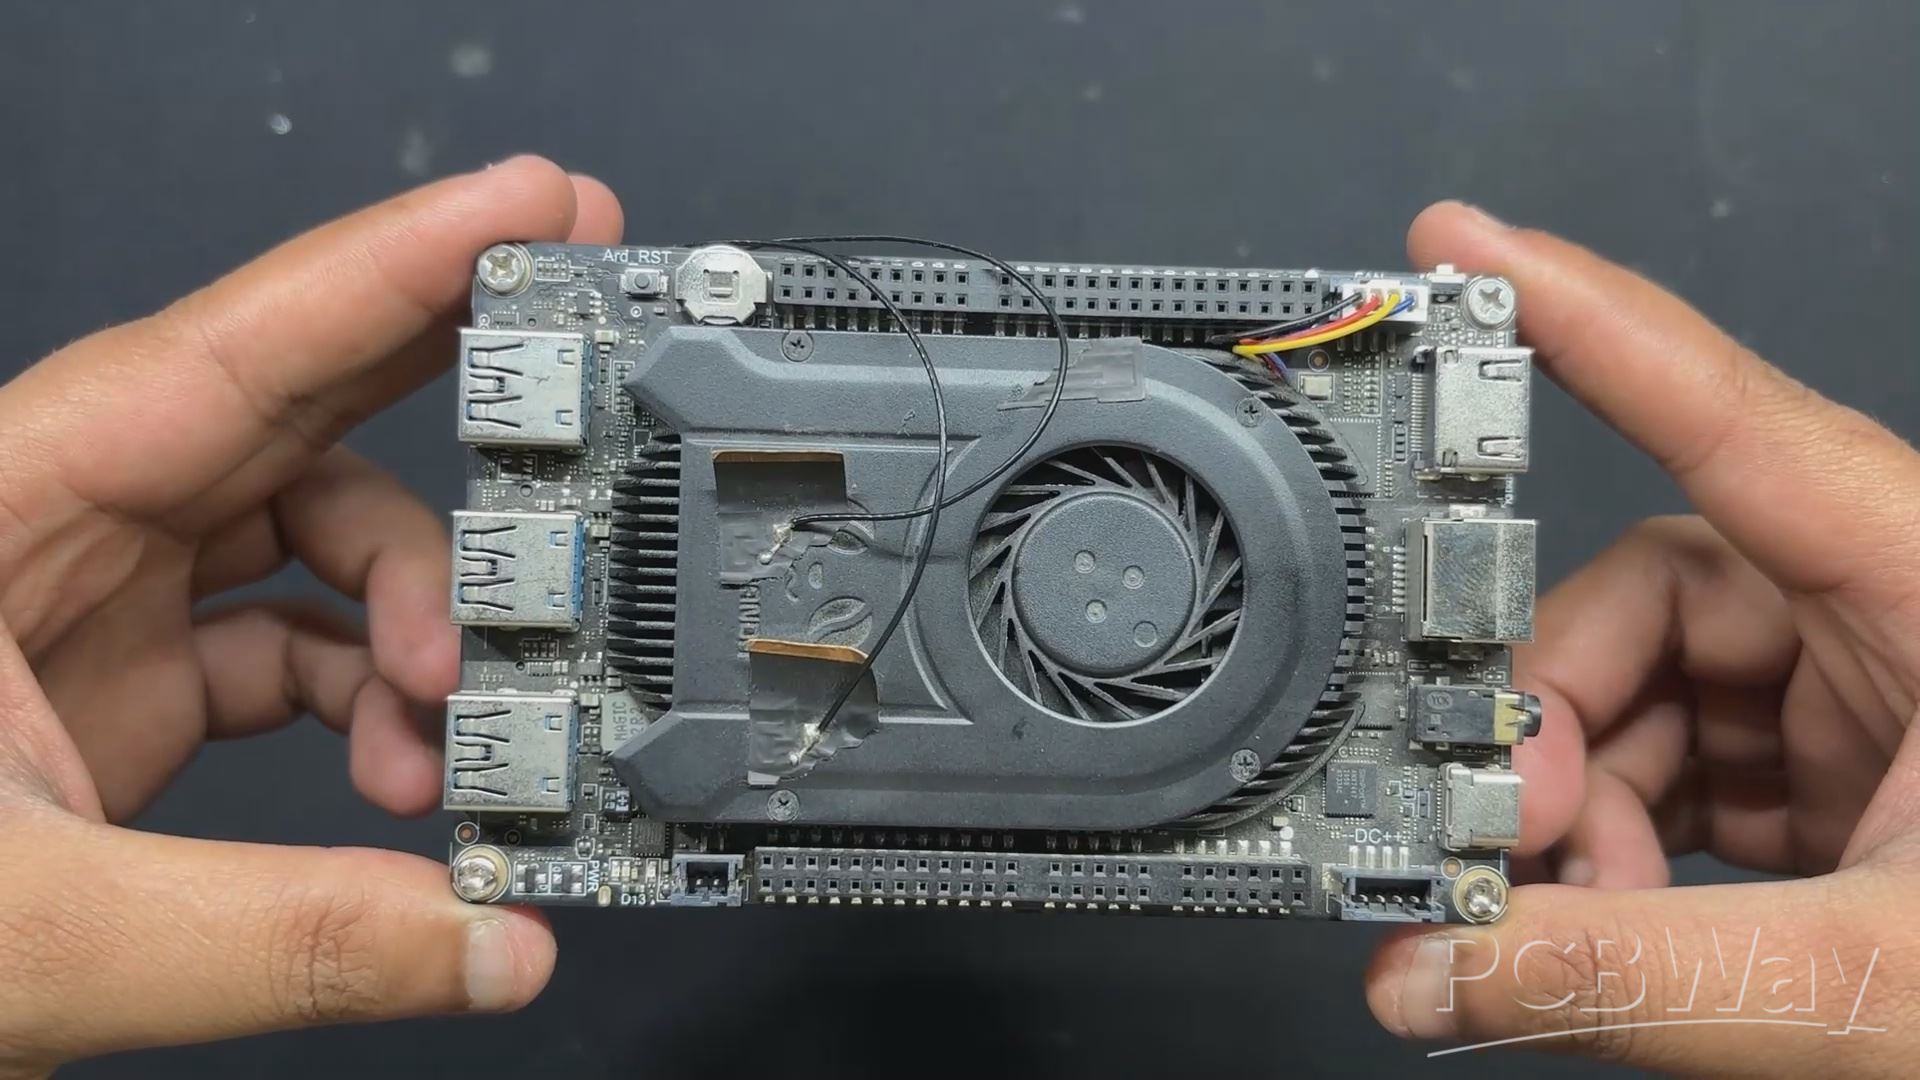
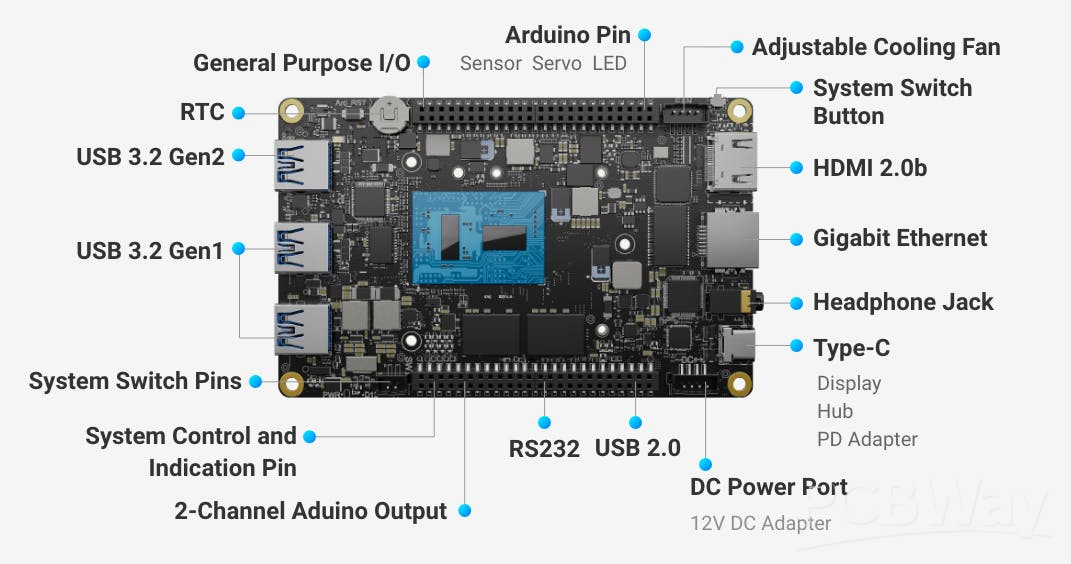
For the main control unit of our NAS setup, we’re using the LattePanda 3 Delta—a compact x86 single-board computer that packs desktop-level performance into a palm-sized form factor. Designed by DFRobot, it’s powered by an Intel 11th Gen Celeron N5105 processor and equipped with 8GB of LPDDR4 RAM running at 2933MHz. With its Gigabit LAN port and dual M.2 slots, it's built for speed, connectivity, and flexibility—perfect for projects that demand both serious computing power and precise hardware control.
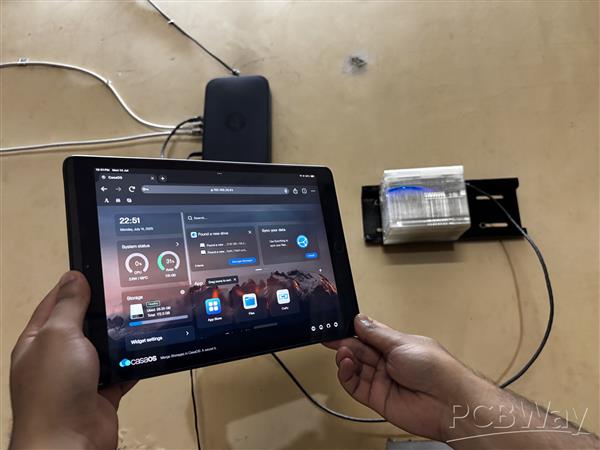
In our case, the LattePanda 3 Delta is running Debian as its main operating system, paired with CASA OS to transform it into a full-fledged NAS.
This setup is a great match—the x86 architecture and ample 8GB RAM give it plenty of headroom to manage storage, serve files, and handle web-based administration with ease. And the fact that it’s all running on a tiny SBC just makes the build that much more satisfying.
PCB DESIGN

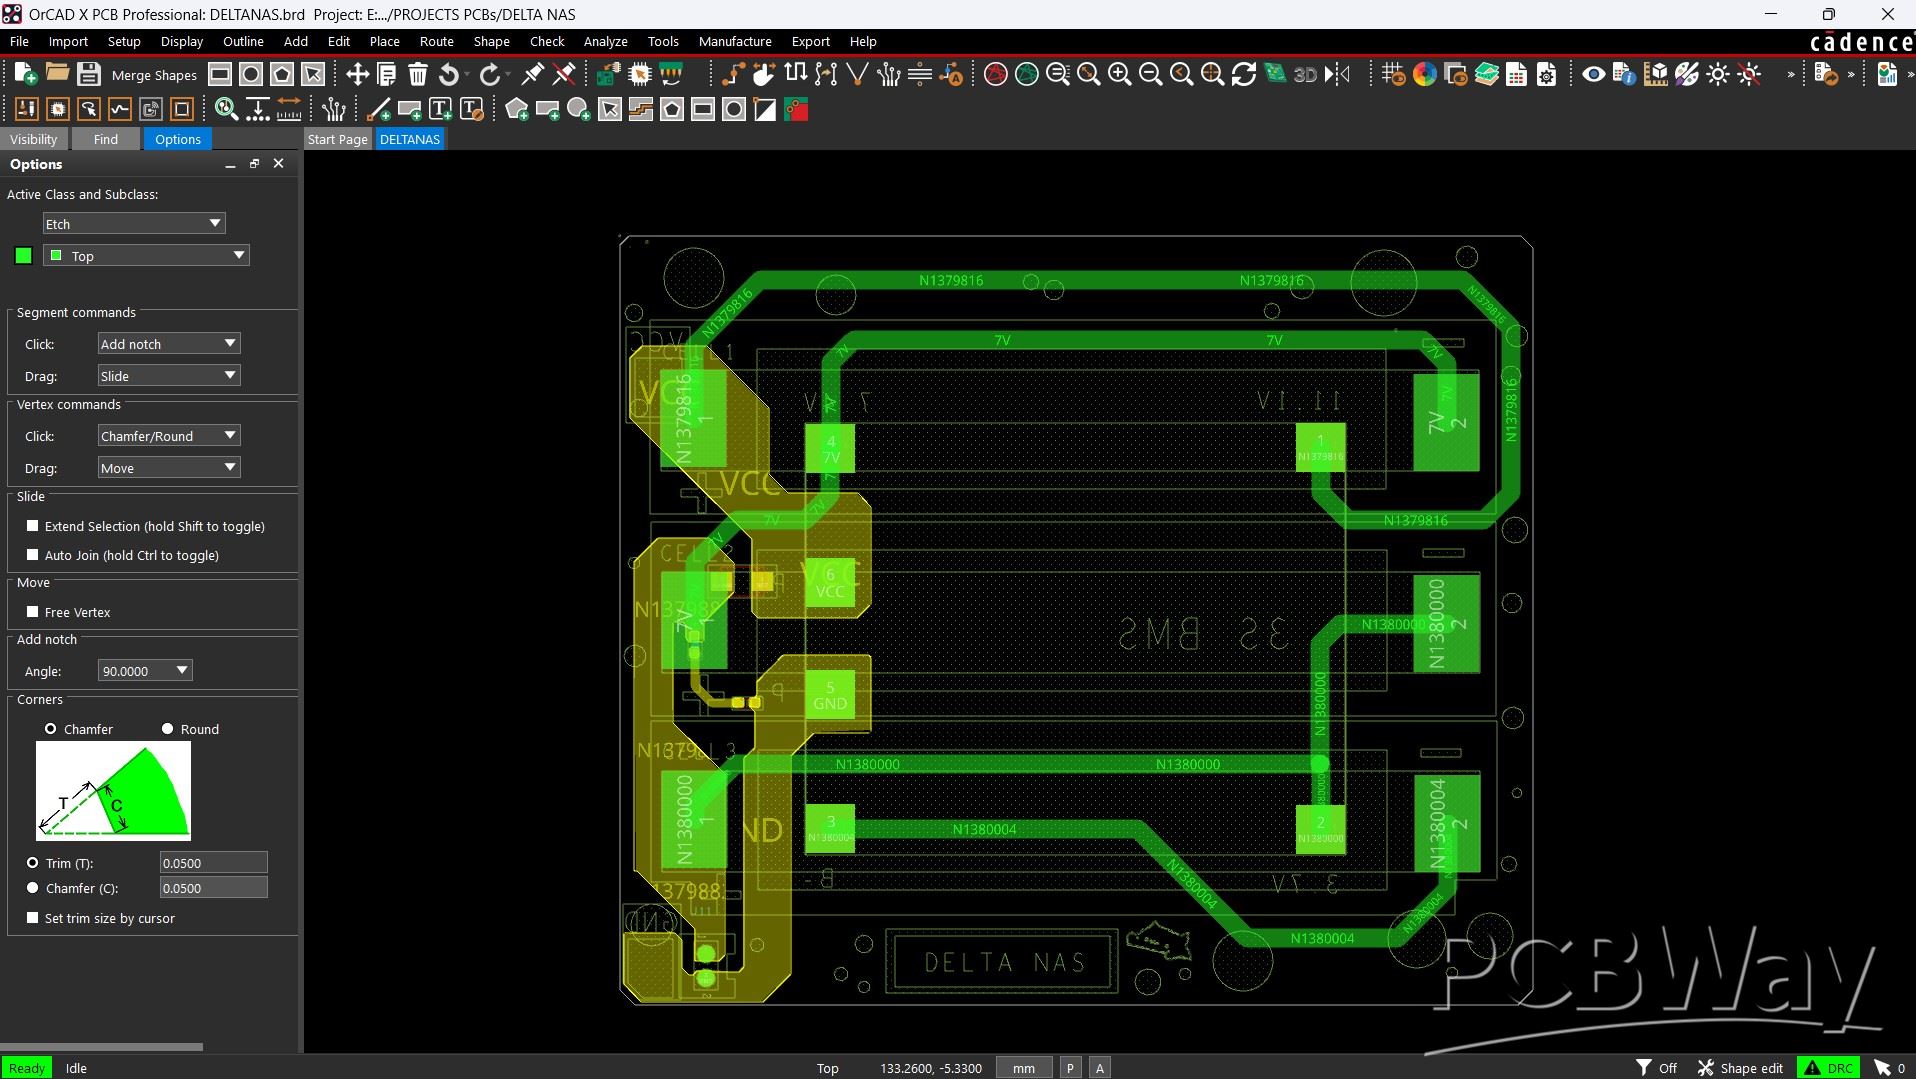
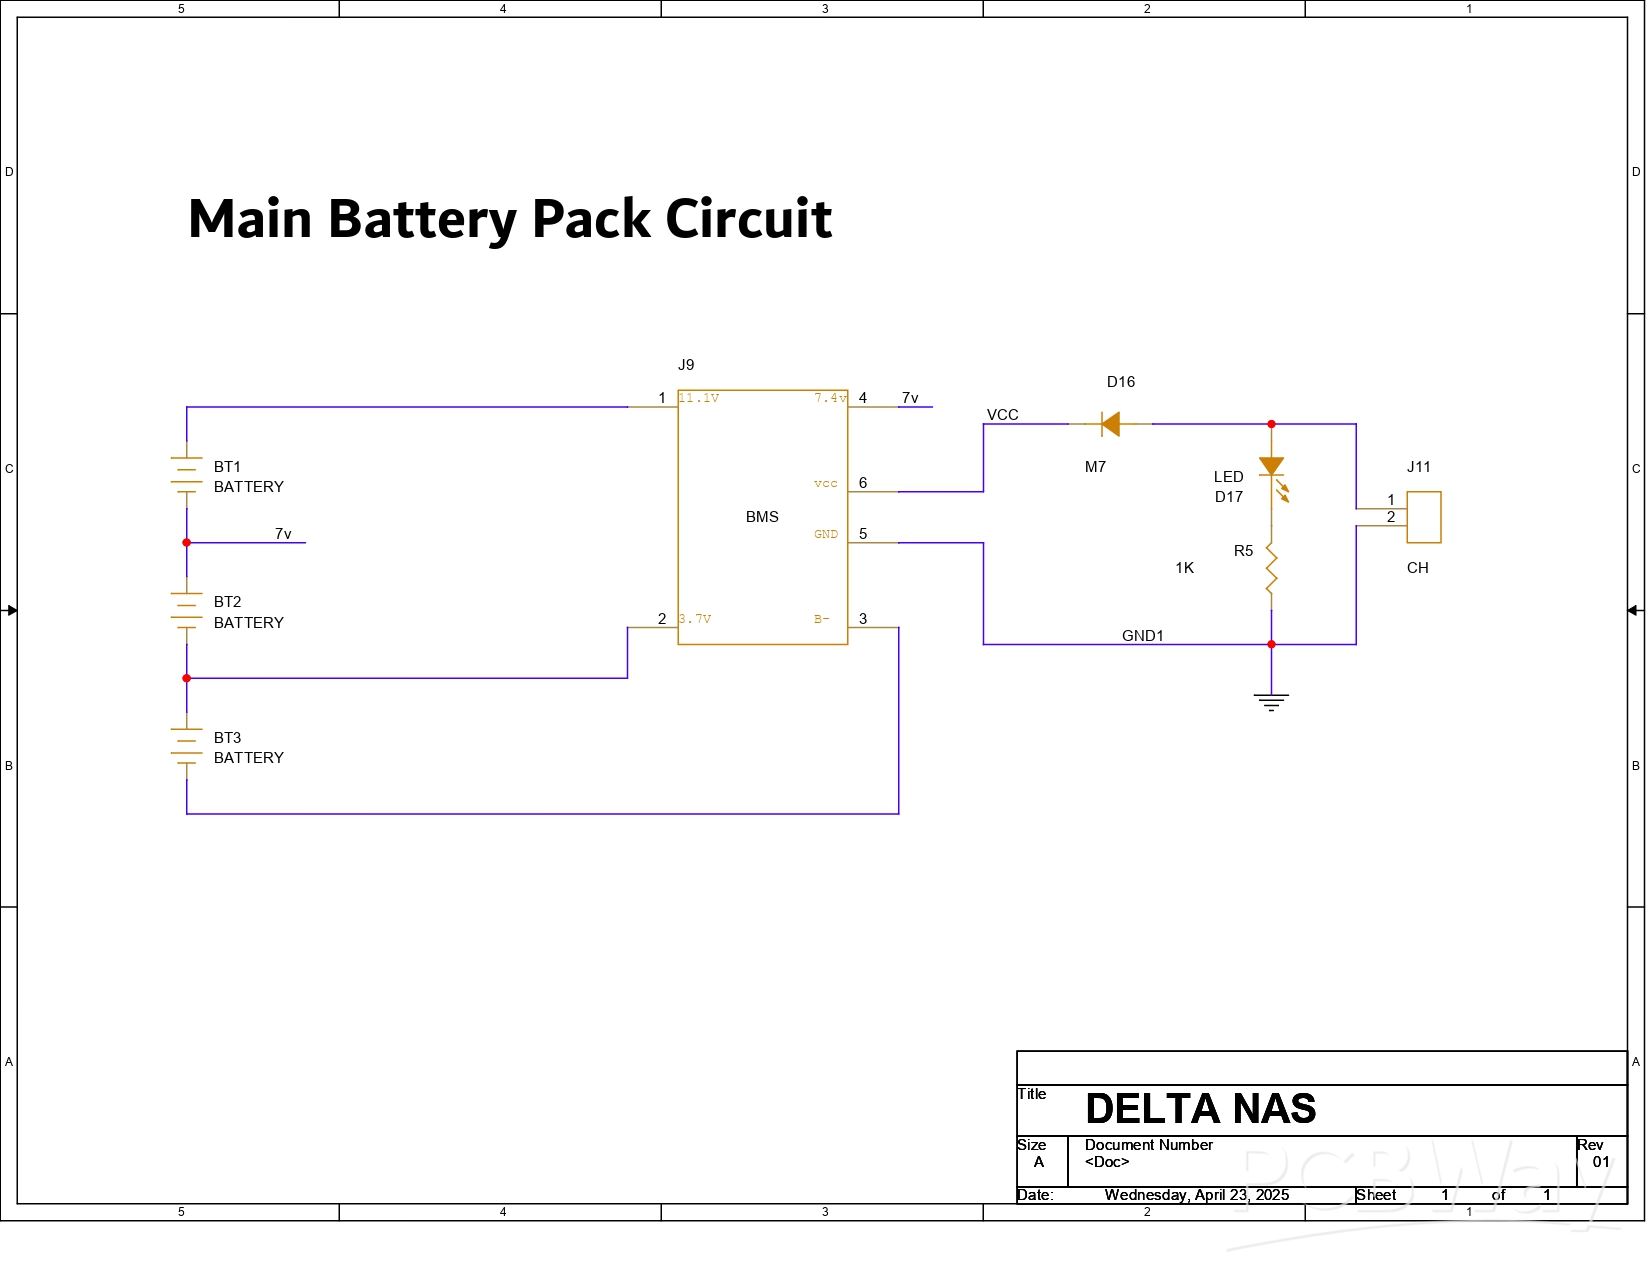
To power the Lattepanda, we designed a 12V battery board consisting of three lithium cells mounted on a circuit board and linked with a BMS.
Here, the SMD 18650 cell holder was mounted on one side of the PCB, and the BMS was positioned on the other side. We also included an M7 diode to charge the cells, a 10K resistor, and a 0603 indicator LED, which illuminates when the battery pack receives 12V power by connecting the charger.
The High Cut feature of BMS allows it to cut off the external power supplied to each cell when the cells have reached full charge. This enables us to create a basic UPS for our Lattepanda 3 Delta using this battery pack in combination with a 12V charger.
PCBWAY SERVICE

For this project, we opted for a white soldermask PCB with black silkscreen.
PCBs were received within a week, and the PCB quality was outstanding. Here, we added a few design elements on the board's silkscreen layer to increase the aesthetic appeal of the project. PCBWAY made the custom layer properly, which shows their great PCB manufacturing capabilities.
Over the past ten years, PCBWay has distinguished themselves by providing outstanding PCB manufacturing and assembly services, becoming a trusted partner for countless engineers and designers worldwide.
You guys can check out PCBWAY if you want great PCB service at an affordable rate.
PCB ASSEMBLY
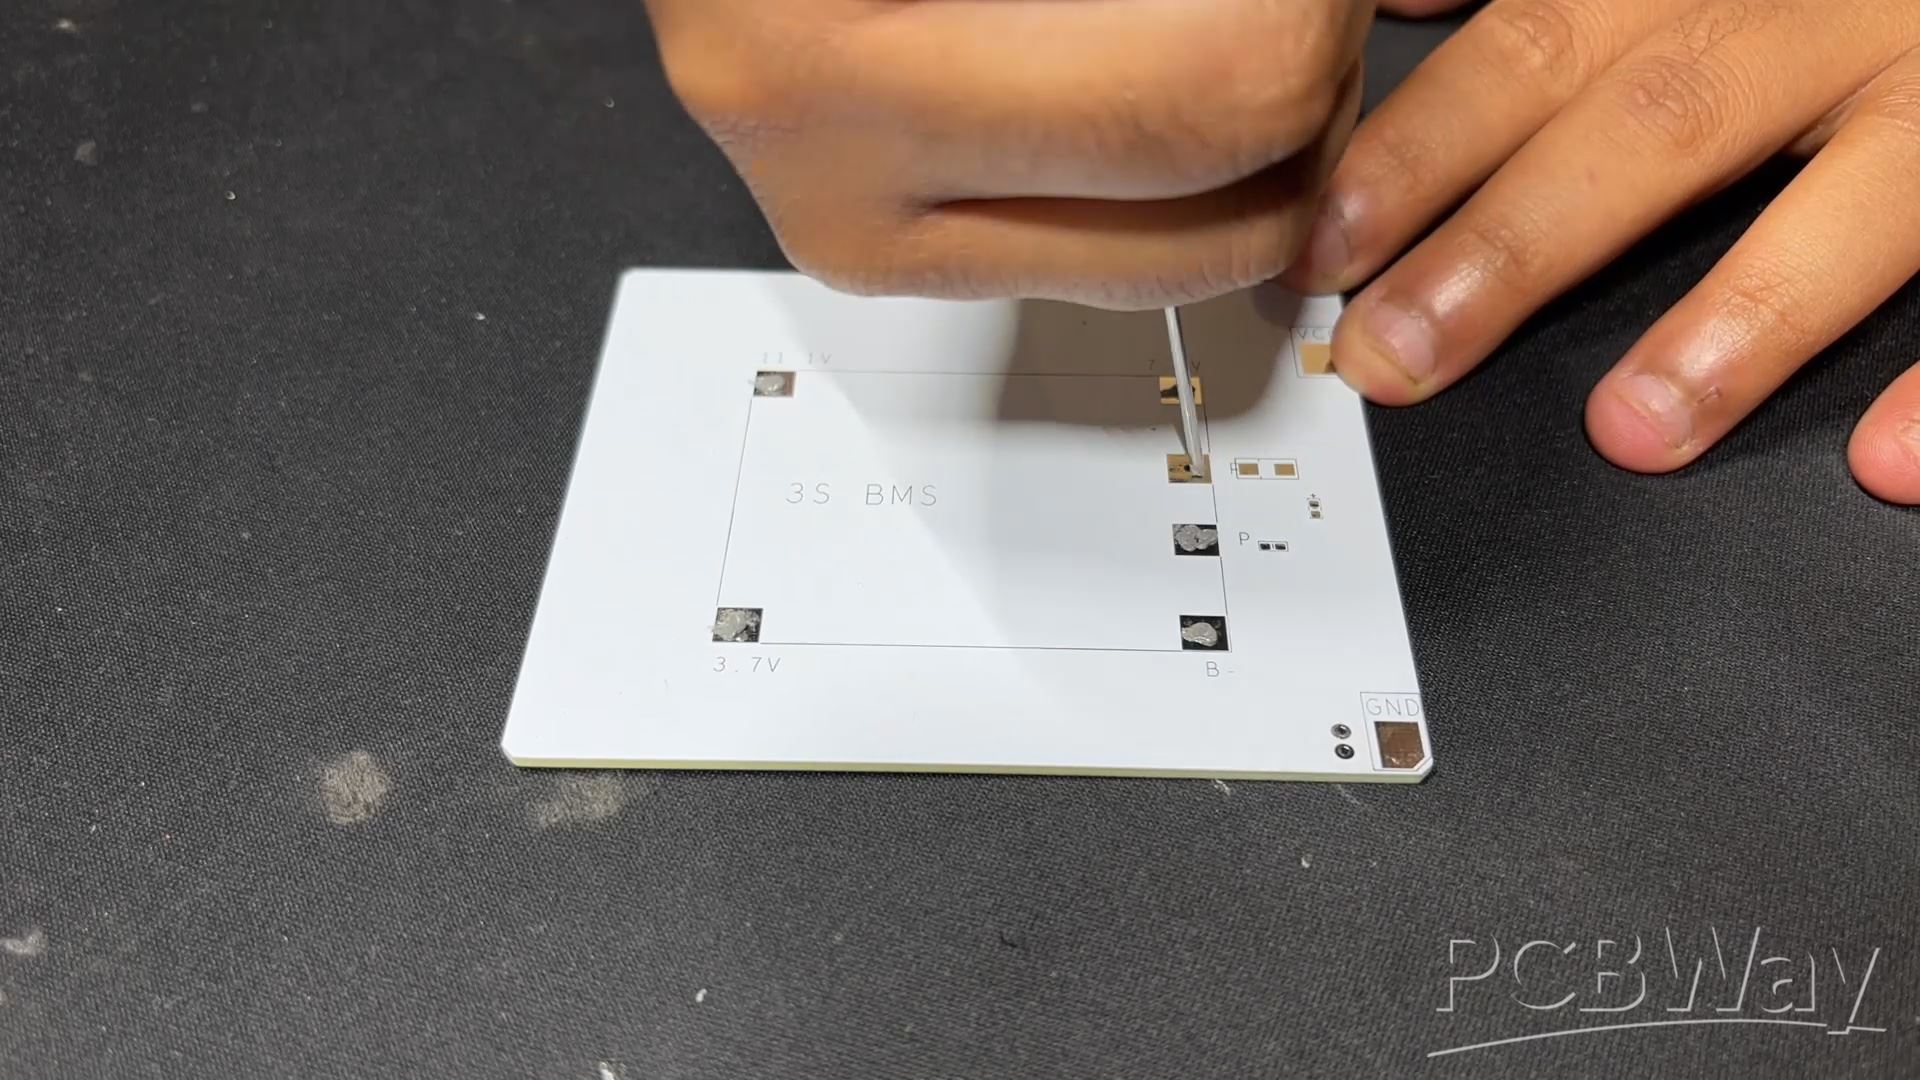


- Using a solder paste dispensing needle, solder paste is applied to each component pad to start the PCB assembly process. 63/37 Sn-Pb solder paste is what we're using here.
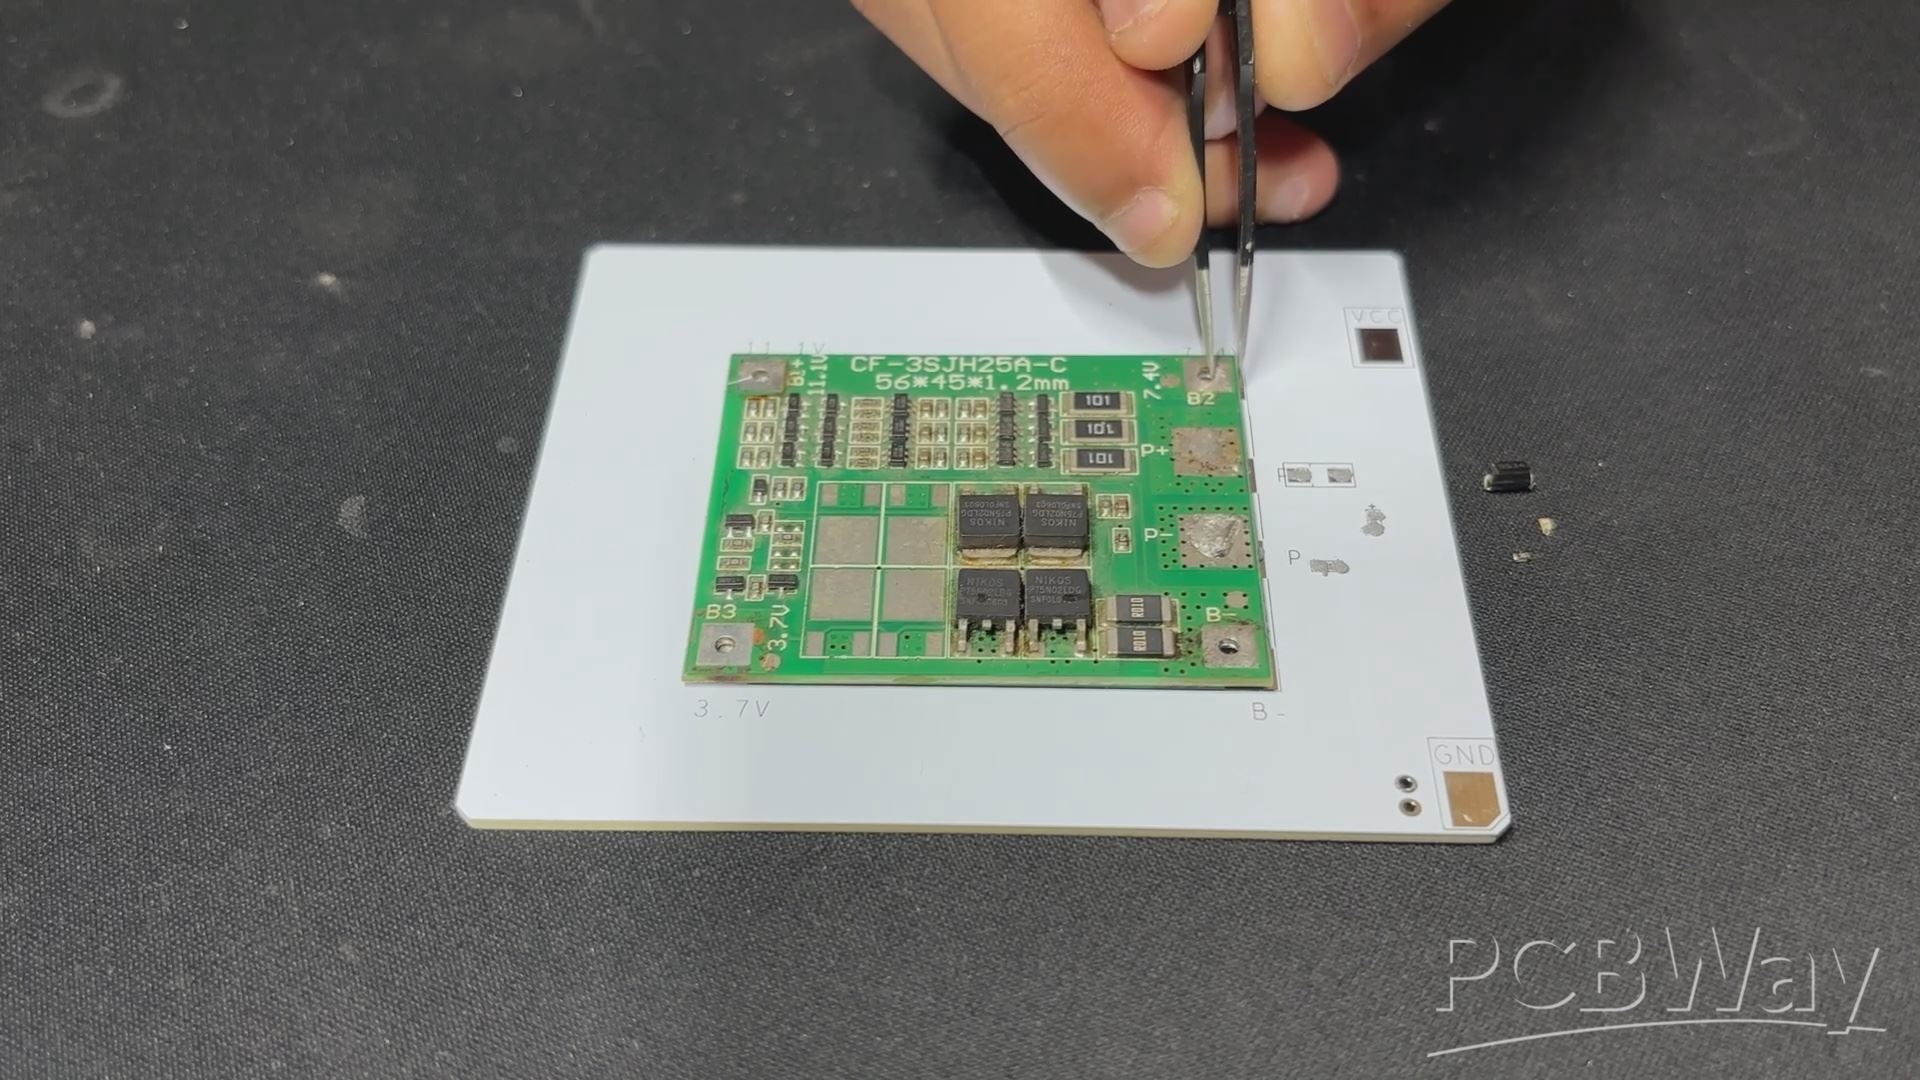
- After that, we pick every SMD component and place it, starting with the BMS and moving on to the diode, resistor, and LED.
- We set the PCB on our Reflow Hotplate, which melts the solder paste by heating it from below. Solder paste melts as the temperature rises, allowing all parts to be secured in place.
- We use a soldering iron to attach the SMD 18650 Cell holder to the circuit from the bottom side.
POWER SOURCE AND TESTING


We are using 18650 3.7V 2000mAh Li-ion cells as the project's power source. Three 3.7V cells are connected in series in our configuration, giving us a maximum of 12.6V, which will power our Lattepanda 3 Delta.
In order to check that the battery board is functioning, we place the cells in the correct polarity. We then use a multimeter to measure the output pin, which gives us 11.7V, confirming that the pack is functioning but that the batteries require a little more charging.
NVME to SATA ADAPTER
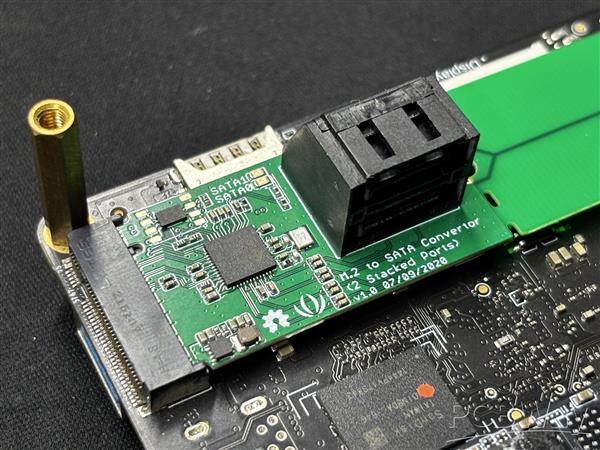
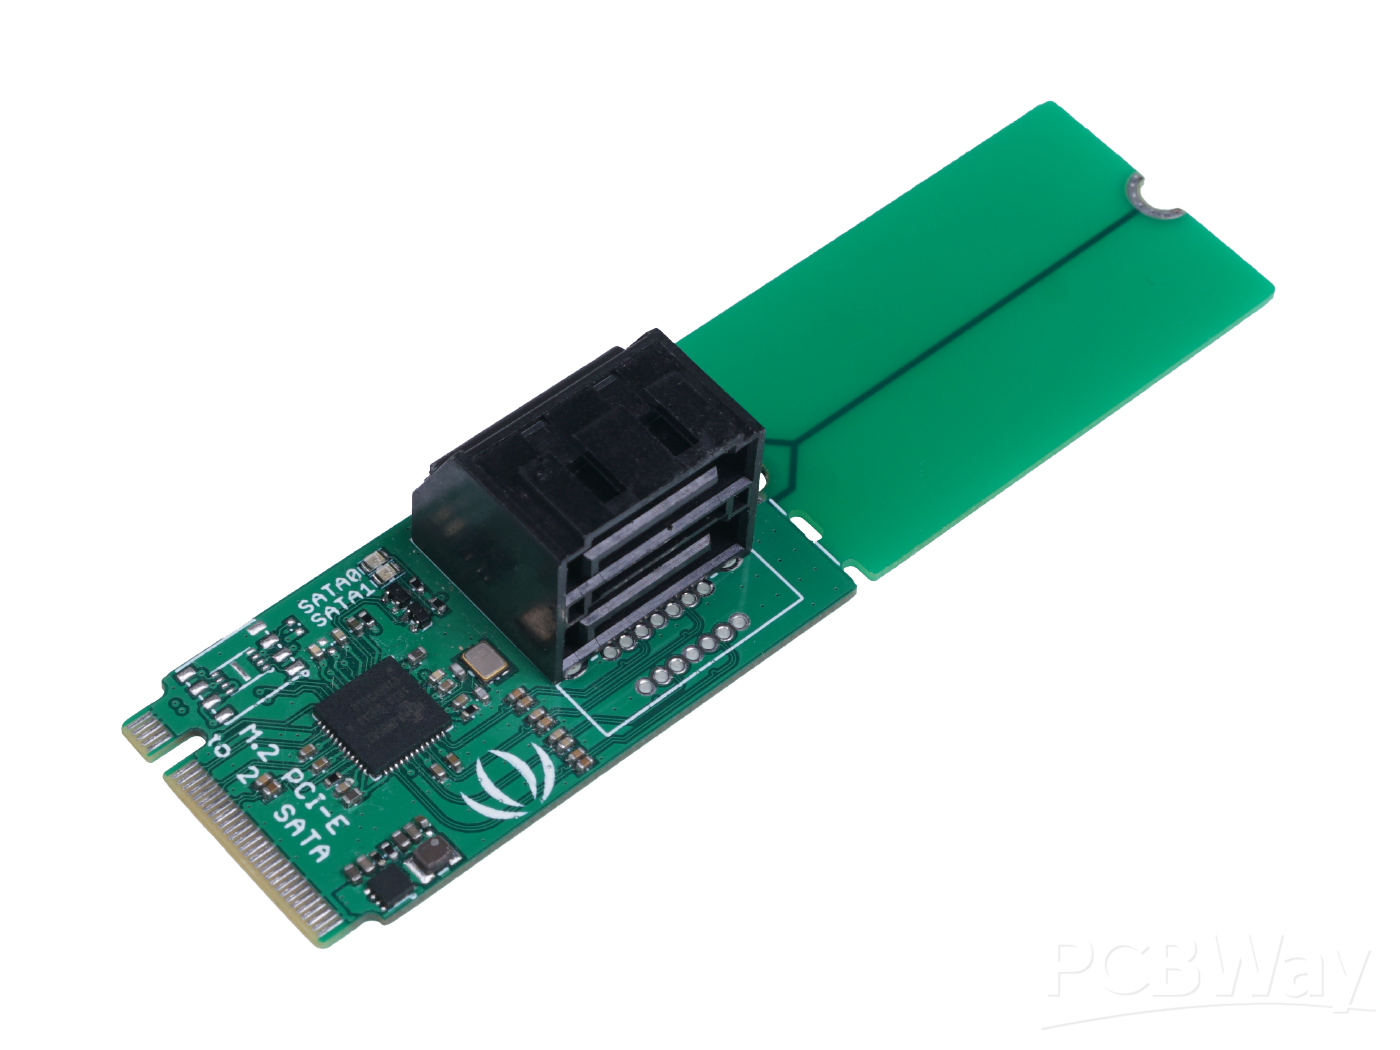
In this project, we are using a Sata SSD; however, the LattePanda 3 Delta does not have a Sata port; instead, it has two M.2 key slots, one of which we have utilized to install an M.2 SSD. With the addition of a special M.2 to Dual Sata Adaptor, we can now use the M.2 Port to connect two Sata SSDs to our Latte Panda.
We are using this M.2 Key adaptor from seeed studio-
https://www.seeedstudio.com/M-2-to-SATA-Converter-2-Stacked-Ports-p-4727.html
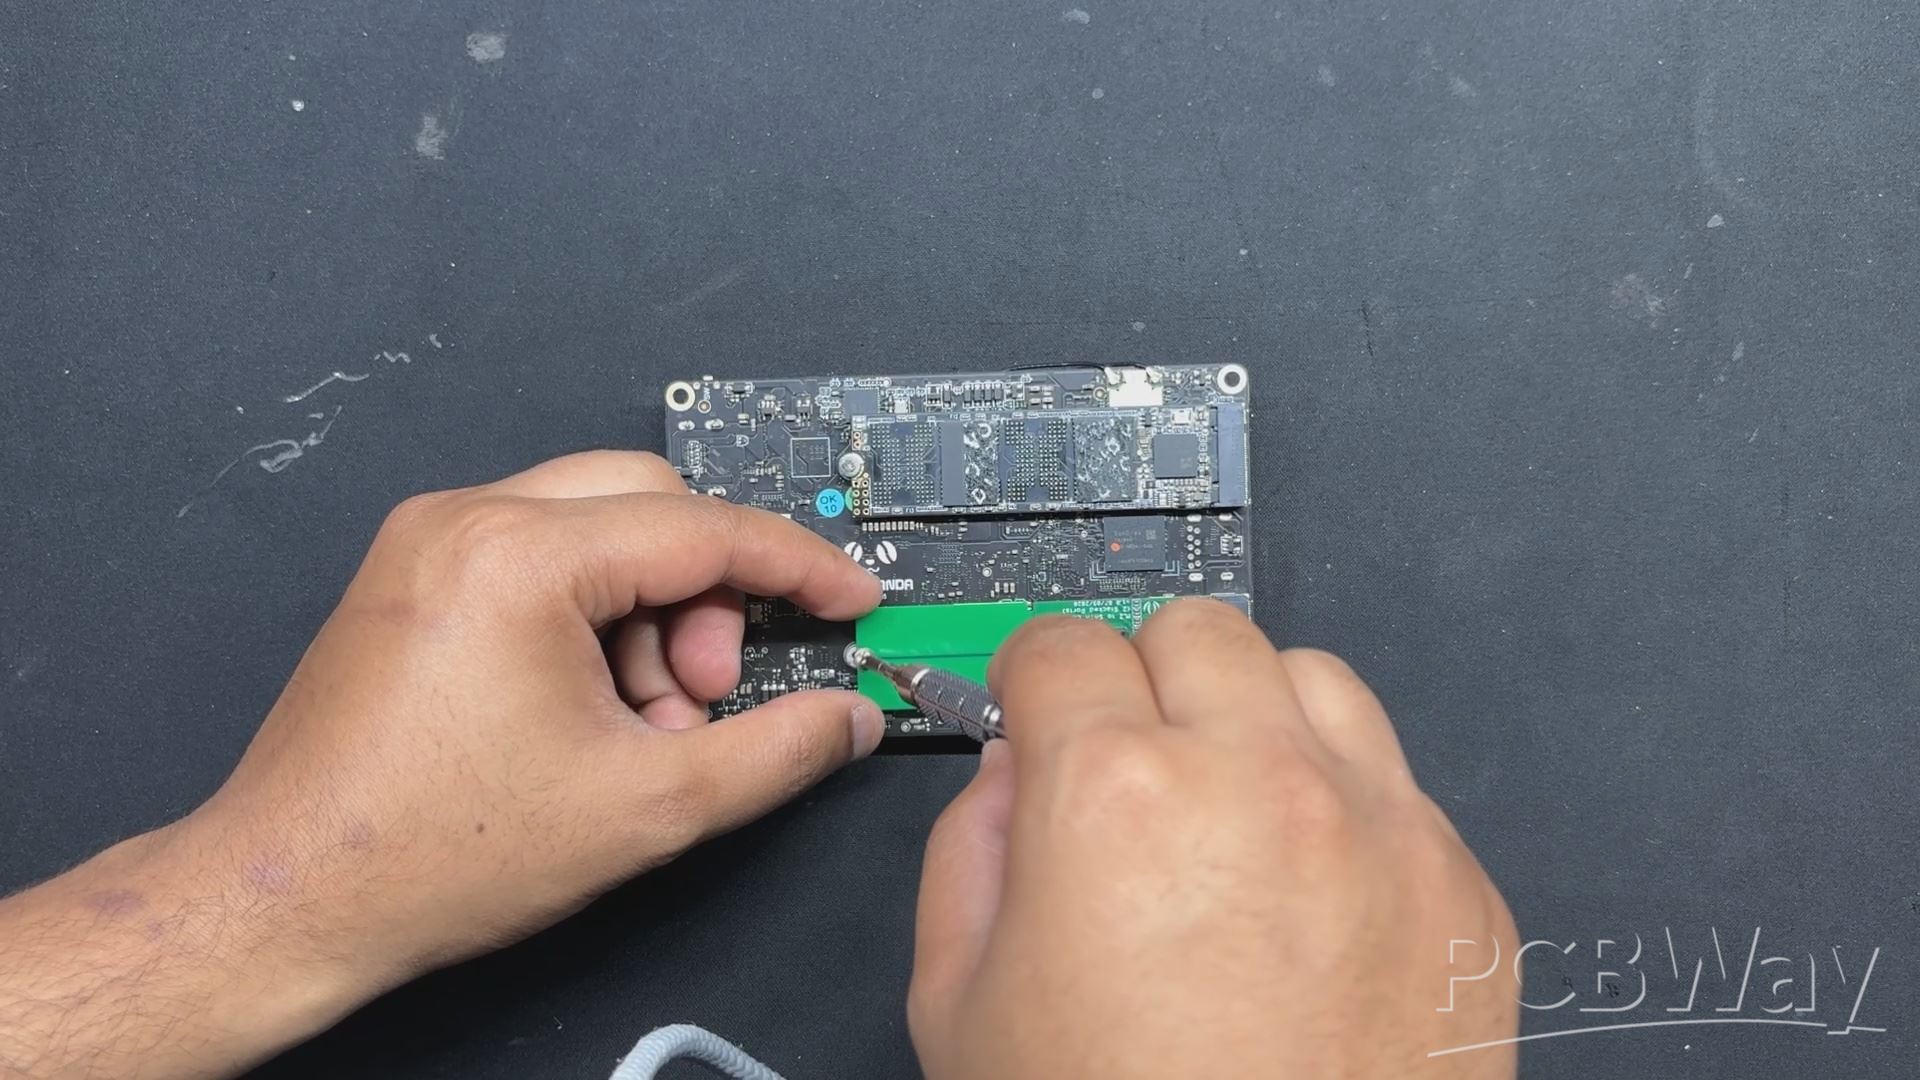
- It was really easy to add this adapter to our Lattepanda; all we had to do was plug the M.2 adapter into the Lattepanda's M.2 M key and fasten it in place with the included M2 bolt.
- We had to provide sata SSD with 5V from an external source because this is only for the SATA connection and does not power the SSD.
LATTE PANDA FRAME ASSEMBLY
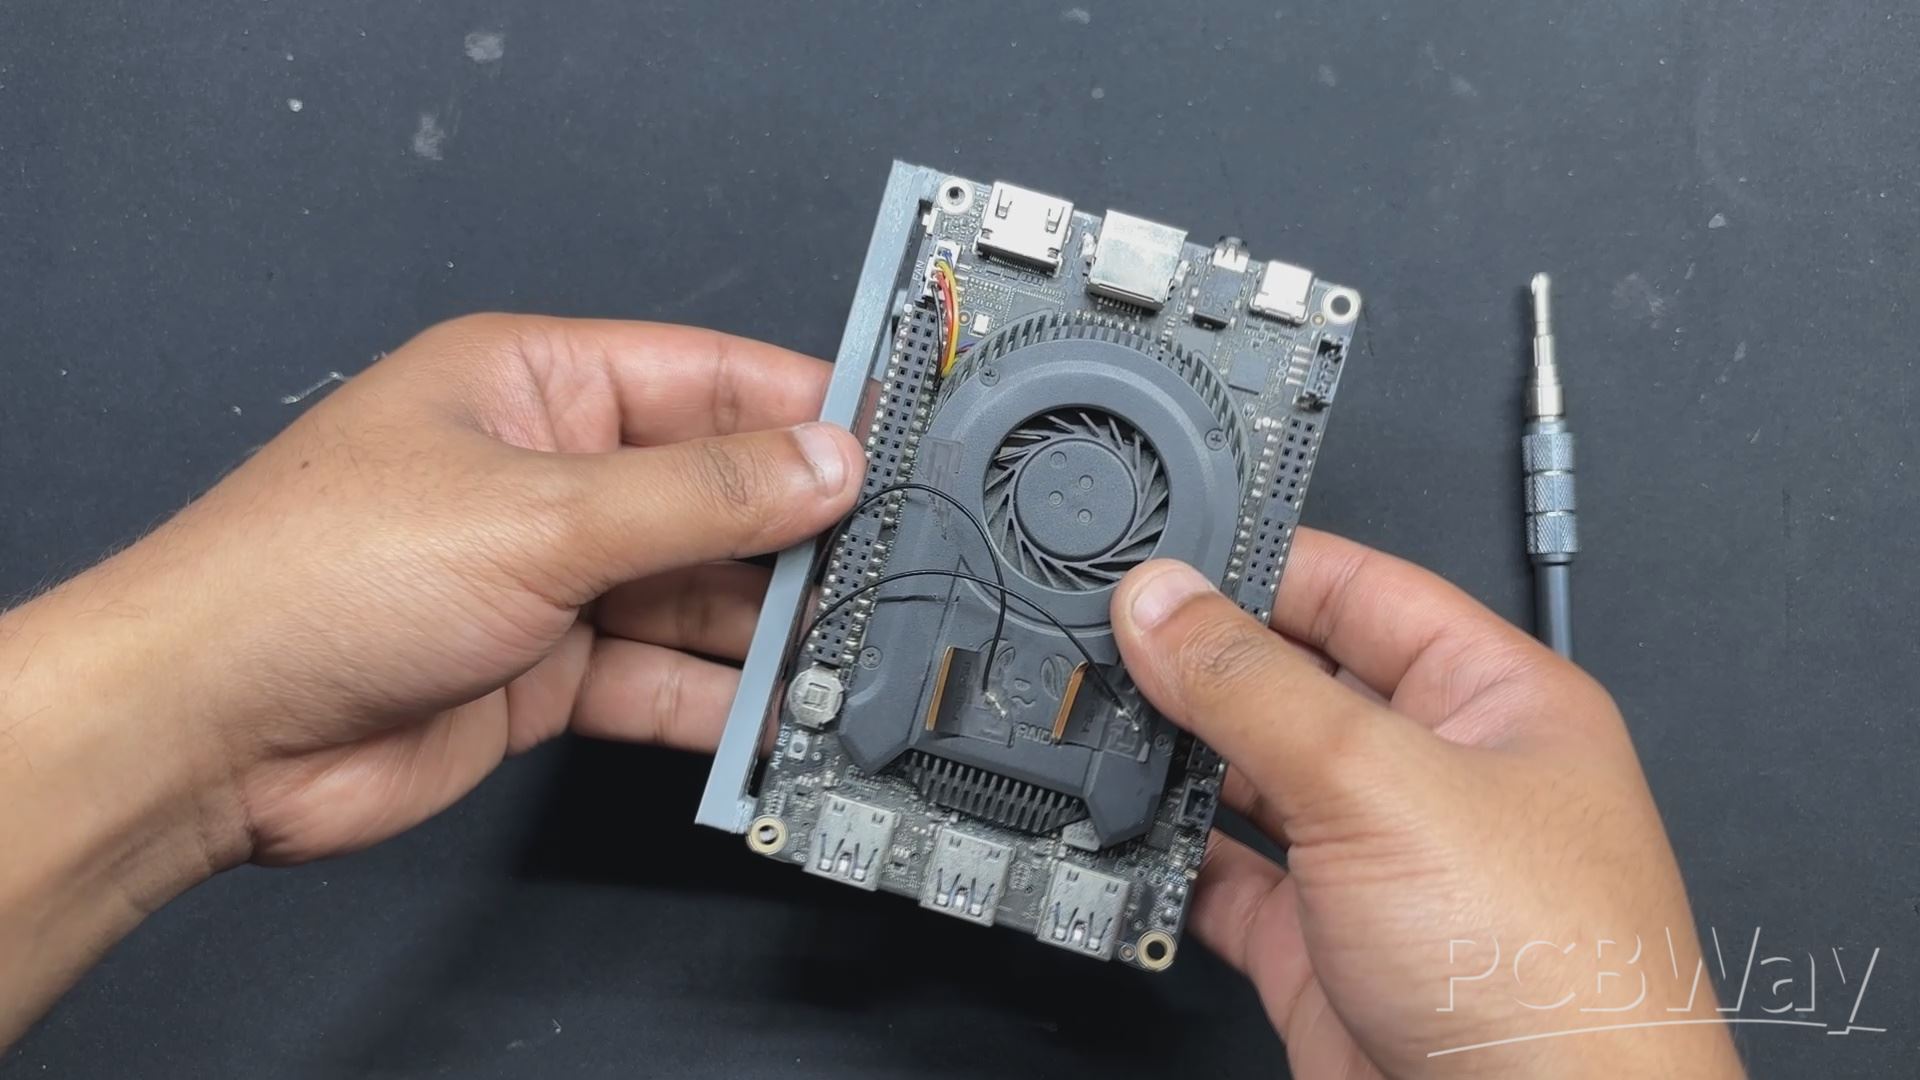

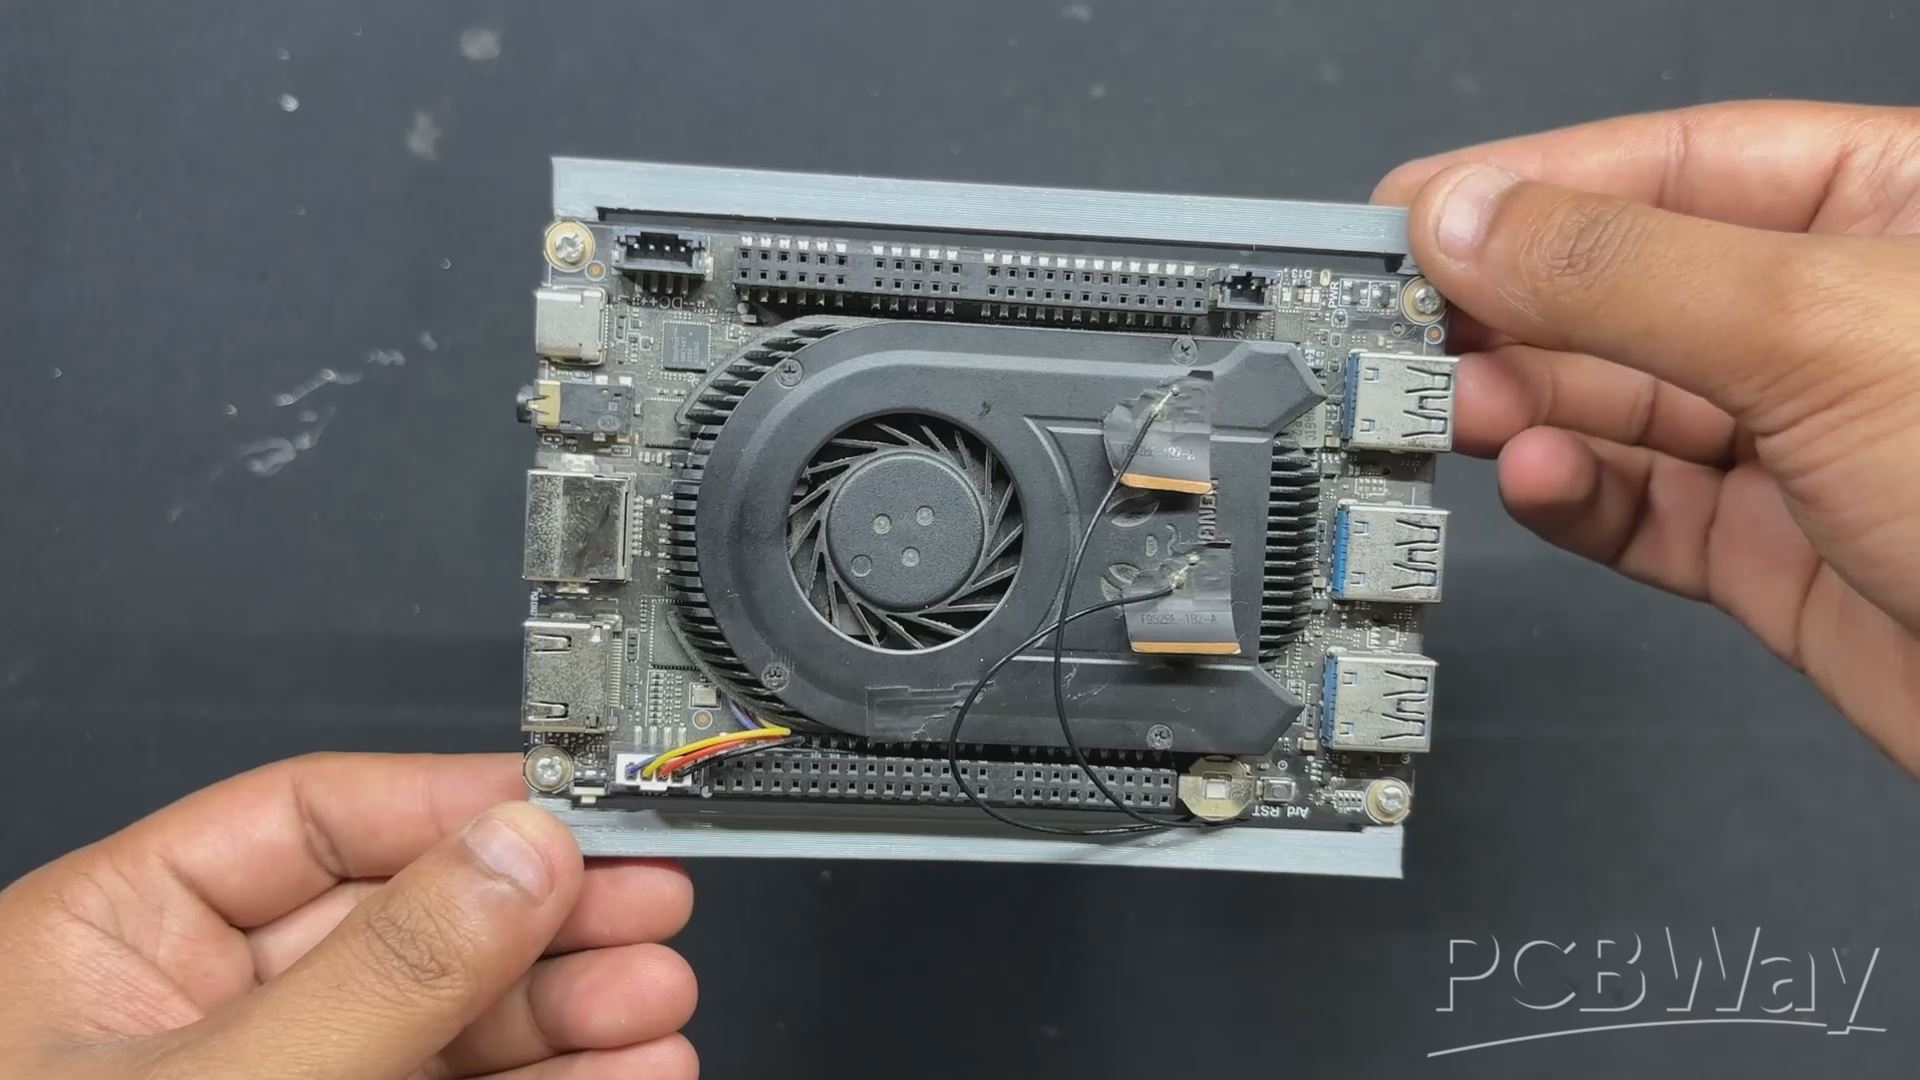
- To begin the Latepanda frame assembly, we first position both frame parts over the Lattepanda's mounting holes.
- Next, we used two M2 screws for each frame part to secure the frame with the LattePanda.
FINAL ASSEMBLY PROCESS
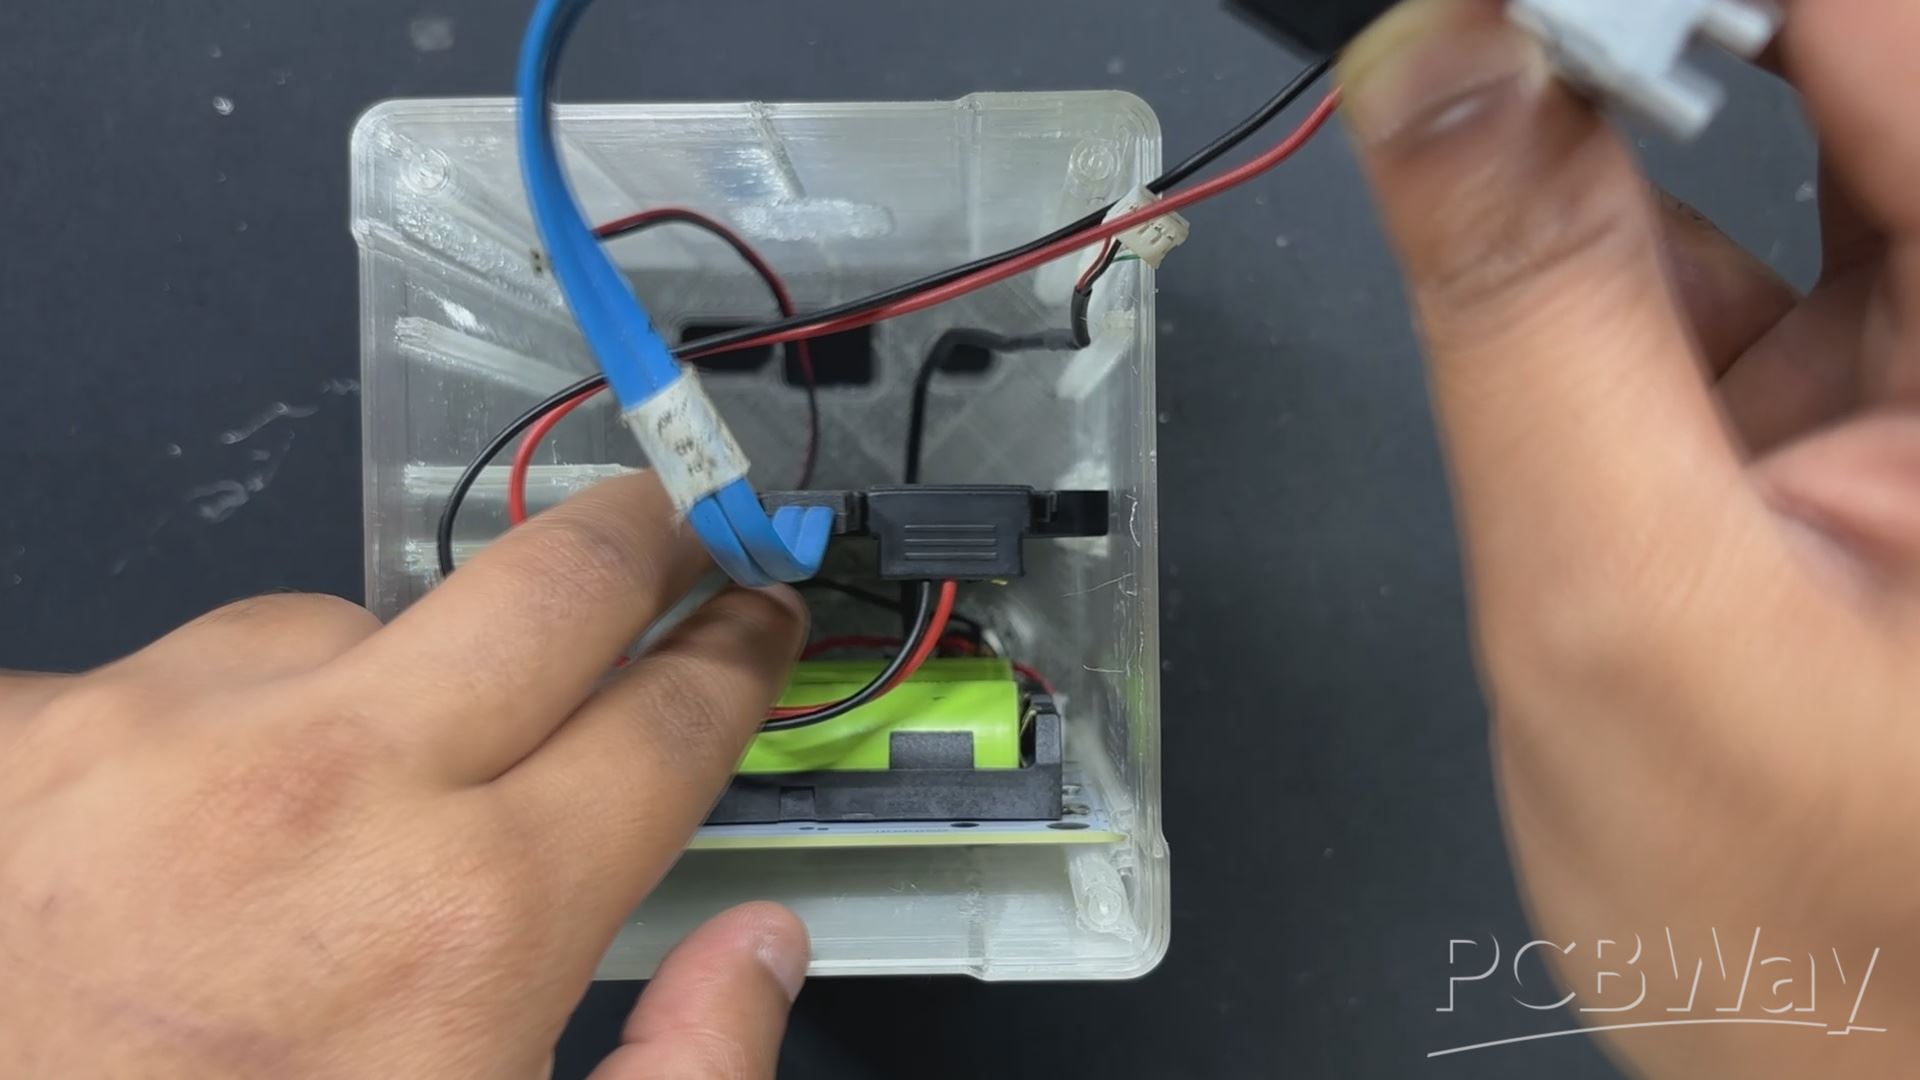
- We attach the push button connector to the JST connector for the switch on Lattepanda.
- Next, we utilized a CON4 connector with pins attached to the VCC and GND of the Battery Board. This CON4 is plugged into the lattepanda's power connector, which supplies power to the lattepanda.
- Lattepanda is then positioned over its mounting spot and slid down into position.
- To place Lattepanda, we had to remove the Sata SSD from its original placement. After putting in the Lattepanda, we reinserted the SSD and attached the Sata Port connector and Sata Power connector to its ports.
- After assembling everything, we placed the Lid section on the left side and secured it with four M2 screws to the Delta Nas body.
- On the back, we inserted the Slide Rail Part and mounted it to the NAS Body with four M2 screws.
- The Delta Nas assembly is now complete.
NAS OPERATING OS- CASA OS


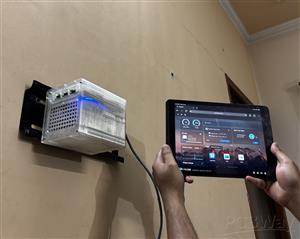
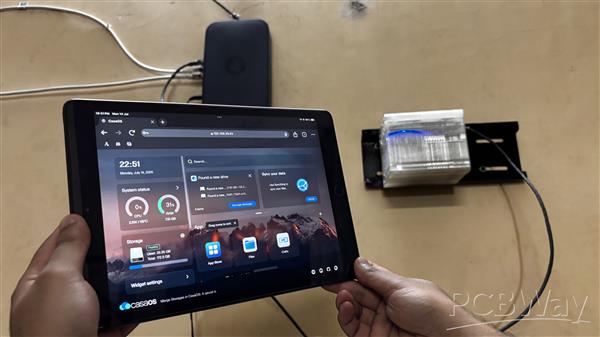
To power Delta NAS, I chose Debian 12 as the base operating system, layered with CasaOS, a lightweight and intuitive platform designed for personal cloud and home server environments. CasaOS simplifies NAS management by offering a clean web-based interface and one-click installation for popular Docker apps like Plex, Jellyfin, and Nextcloud.
It’s open-source, easy to set up, and ideal for users who want powerful functionality without the complexity of traditional NAS systems. With support for shared folders, remote access, and elegant file management, CasaOS turns any Linux-based device into a versatile and user-friendly storage hub.
SETTING UP CASA OS
Installing CASA OS is a super straightforward process.
To begin, we run the following command to update the system and ensure that our operating system is up to current.
sudo apt update && sudo apt upgrade -y
Next, we install dependencies such as curl and other required tools if they are not already present.
sudo apt install curl wget -y
Next, we begin the Installation Script: CasaOS has a simple one-liner script for installation.
curl -fsSL https://get.casaos.io | sudo bash
After installing CasaOS, we are able to access it using a web browser using the IP address provided by the installer.
- We open a web browser on any device connected to the same network as our Debian server, using the IP address provided by the installation.
- We follow the instructions displayed on the screen to finish the initial setup and create our CasaOS account.
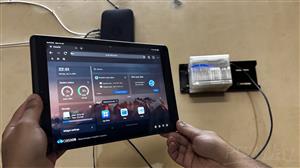
- CasaOS has been installed on our NAS system; we can now use the App Store to explore and install a range of self-hosted applications with a single click, manage your files with simplicity using the File browser, and monitor our system resources with the built-in widgets.
RESULT
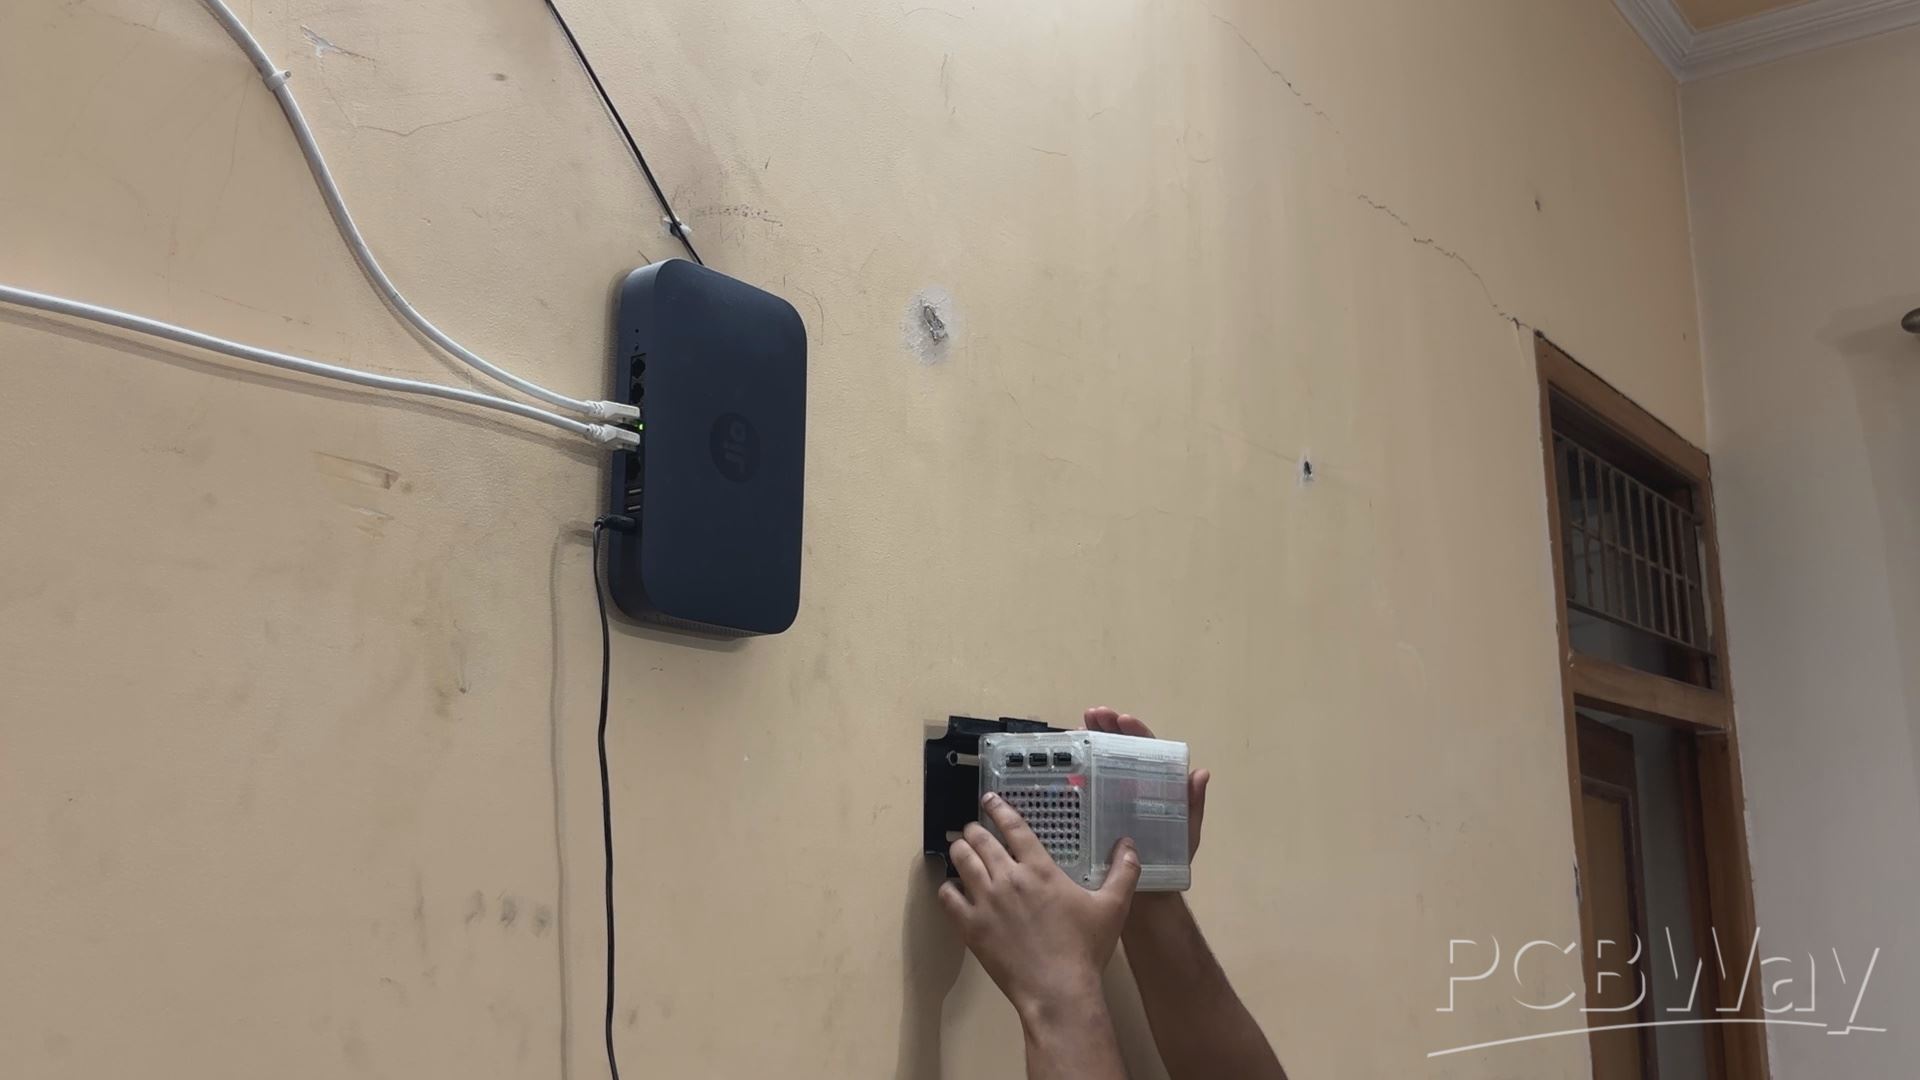
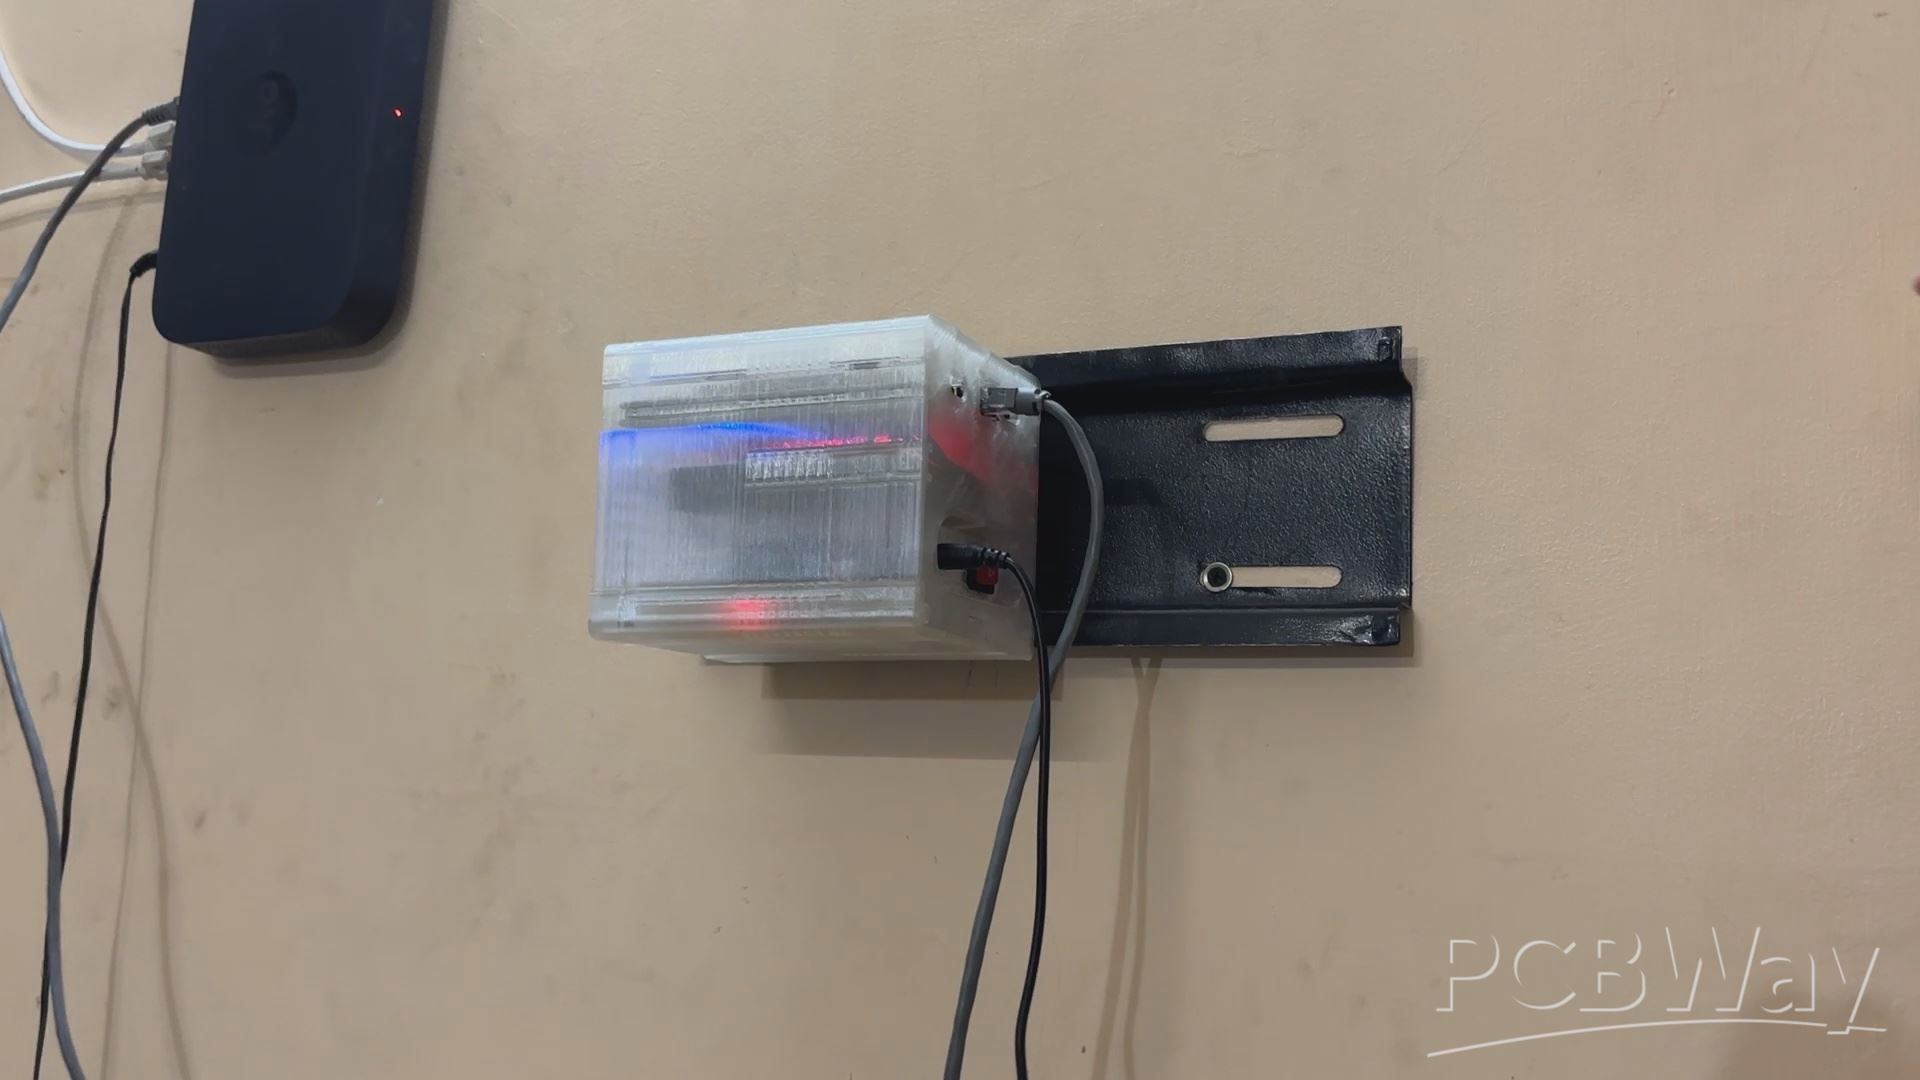
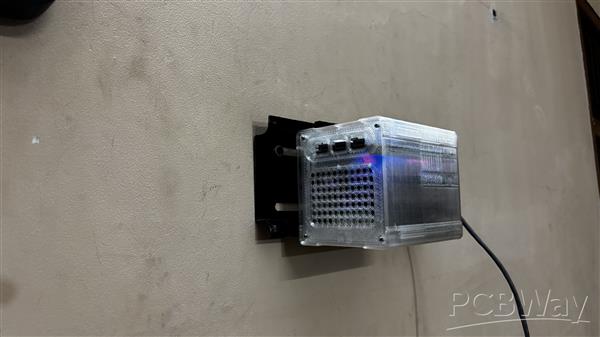
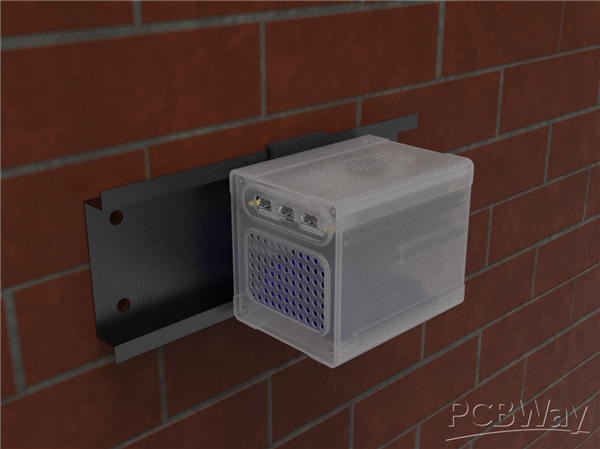
We slide the NAS onto the Stand, and it fits nicely thanks to the sliding tray part we built.
Next, we connected the ethernet port to the I/O Opening on the right side of the NAS, followed by the 12V Charger, which will charge the battery while also powering the system in parallel. When the power goes out, our system will run from the 12V battery pack, which is connected in parallel, acting as a UPS that will always keep our NAS running.
CONCLUSION
Using our NAS, we were able to access saved data on our Sata SSD, which included family photos, videos, some crucial work documents, and even some old Retro Game Rom files that I had collected over the years.
The idea behind setting up this NAS was to create a common storage system that anyone in my family could access and view or save their stuff. 1TB of Sata SSD isn't particularly fast or large, but this was just a demo project; in future revisions, I plan to make a few changes to this NAS setup, such as adding more storage and even trying out other NAS OS instead of the webservice that I used in this project.
Please let me know if you require any additional assistance; all the documents, files, and code are included in the article.
In addition, we appreciate PCBWAY's support of this project. Visit them for a variety of PCB-related services, such as stencil and PCB assembly services, as well as 3D printing services
Thanks for reaching this far, and I will be back with a new project pretty soon.
Peace.
Delta Nas Project
Project images are for reference only. Actual production is based on the manufacturing files on the project page.
Please review the designer's notes (e.g., PCB thickness) and select the appropriate options.
PCBWay is not responsible
for issues caused by unsuitable parameter selections.
For more important ordering information, please refer to
Read More


Raspberry Pi 5 7 Inch Touch Screen IPS 1024x600 HD LCD HDMI-compatible Display for RPI 4B 3B+ OPI 5 AIDA64 PC Secondary Screen(Without Speaker)
BUY NOW


- Comments(0)
- Likes(1)
More by Arnov Arnov sharma
-
 DIY XBOX Controller
Greetings everyone, and welcome back. Here's something fun and custom.This is my version of an Xbox ...
DIY XBOX Controller
Greetings everyone, and welcome back. Here's something fun and custom.This is my version of an Xbox ...
-
 Pocket SNES
Greetings everyone, and welcome back! Today, I’ve got something fun and tiny to share—the Pocket SNE...
Pocket SNES
Greetings everyone, and welcome back! Today, I’ve got something fun and tiny to share—the Pocket SNE...
-
 Batocera Arcade Box
Greetings everyone and welcome back, Here's something. Fun and nostalgic. Right now, we are using ou...
Batocera Arcade Box
Greetings everyone and welcome back, Here's something. Fun and nostalgic. Right now, we are using ou...
-
 64x32 Matrix Panel Setup with PICO 2
Greetings everyone and welcome back.So here's something fun and useful: a Raspberry Pi Pico 2-powere...
64x32 Matrix Panel Setup with PICO 2
Greetings everyone and welcome back.So here's something fun and useful: a Raspberry Pi Pico 2-powere...
-
 Portable Air Quality Meter
Hello everyone, and welcome back! Today, I have something incredibly useful for you—a Portable Air Q...
Portable Air Quality Meter
Hello everyone, and welcome back! Today, I have something incredibly useful for you—a Portable Air Q...
-
 WALKPi PCB Version
Greetings everyone and welcome back, This is the WalkPi, a homebrew audio player that plays music fr...
WALKPi PCB Version
Greetings everyone and welcome back, This is the WalkPi, a homebrew audio player that plays music fr...
-
 Delete Button XL
Greetings everyone and welcome back, and here's something fun and useful.In essence, the Delete Butt...
Delete Button XL
Greetings everyone and welcome back, and here's something fun and useful.In essence, the Delete Butt...
-
 Arduino Retro Game Controller
Greetings everyone and welcome back. Here's something fun.The Arduino Retro Game Controller was buil...
Arduino Retro Game Controller
Greetings everyone and welcome back. Here's something fun.The Arduino Retro Game Controller was buil...
-
 Super Power Buck Converter
Greetings everyone and welcome back!Here's something powerful, The SUPER POWER BUCK CONVERTER BOARD ...
Super Power Buck Converter
Greetings everyone and welcome back!Here's something powerful, The SUPER POWER BUCK CONVERTER BOARD ...
-
 Pocket Temp Meter
Greetings and welcome back.So here's something portable and useful: the Pocket TEMP Meter project.As...
Pocket Temp Meter
Greetings and welcome back.So here's something portable and useful: the Pocket TEMP Meter project.As...
-
 Pico Powered DC Fan Driver
Hello everyone and welcome back.So here's something cool: a 5V to 12V DC motor driver based around a...
Pico Powered DC Fan Driver
Hello everyone and welcome back.So here's something cool: a 5V to 12V DC motor driver based around a...
-
 Mini Solar Light Project with a Twist
Greetings.This is the Cube Light, a Small and compact cube-shaped emergency solar light that boasts ...
Mini Solar Light Project with a Twist
Greetings.This is the Cube Light, a Small and compact cube-shaped emergency solar light that boasts ...
-
 PALPi V5 Handheld Retro Game Console
Hey, Guys what's up?So this is PALPi which is a Raspberry Pi Zero W Based Handheld Retro Game Consol...
PALPi V5 Handheld Retro Game Console
Hey, Guys what's up?So this is PALPi which is a Raspberry Pi Zero W Based Handheld Retro Game Consol...
-
 DIY Thermometer with TTGO T Display and DS18B20
Greetings.So this is the DIY Thermometer made entirely from scratch using a TTGO T display board and...
DIY Thermometer with TTGO T Display and DS18B20
Greetings.So this is the DIY Thermometer made entirely from scratch using a TTGO T display board and...
-
 Motion Trigger Circuit with and without Microcontroller
GreetingsHere's a tutorial on how to use an HC-SR505 PIR Module with and without a microcontroller t...
Motion Trigger Circuit with and without Microcontroller
GreetingsHere's a tutorial on how to use an HC-SR505 PIR Module with and without a microcontroller t...
-
 Motor Driver Board Atmega328PU and HC01
Hey, what's up folks here's something super cool and useful if you're making a basic Robot Setup, A ...
Motor Driver Board Atmega328PU and HC01
Hey, what's up folks here's something super cool and useful if you're making a basic Robot Setup, A ...
-
 Power Block
Hey Everyone what's up!So this is Power block, a DIY UPS that can be used to power a bunch of 5V Ope...
Power Block
Hey Everyone what's up!So this is Power block, a DIY UPS that can be used to power a bunch of 5V Ope...
-
 Goku PCB Badge V2
Hey everyone what's up!So here's something SUPER cool, A PCB Board themed after Goku from Dragon Bal...
Goku PCB Badge V2
Hey everyone what's up!So here's something SUPER cool, A PCB Board themed after Goku from Dragon Bal...
-
Programmable Mist Maker - XIAO / QT PY Extension
1061 2 1 -
RadioHAT - Raspberry Pi radio development platform
860 0 2 -
-
-
-
-
ARPS-2 – Arduino-Compatible Robot Project Shield for Arduino UNO
3322 0 6 -
A Compact Charging Breakout Board For Waveshare ESP32-C3
3930 3 8 -
AI-driven LoRa & LLM-enabled Kiosk & Food Delivery System
4315 2 2


