


|
|
Arduino Nano R3 |
x 1 | |
|
|
Buzzer |
x 1 | |
|
|
button |
x 2 | |
|
|
8x8 Led Matrix with WS2812B Leds |
x 1 |

|
Soldering Iron Kit |
|

|
arduino IDEArduino
|
Arduino Breakout game on 8X8 Led Matrix with WS2812B Leds
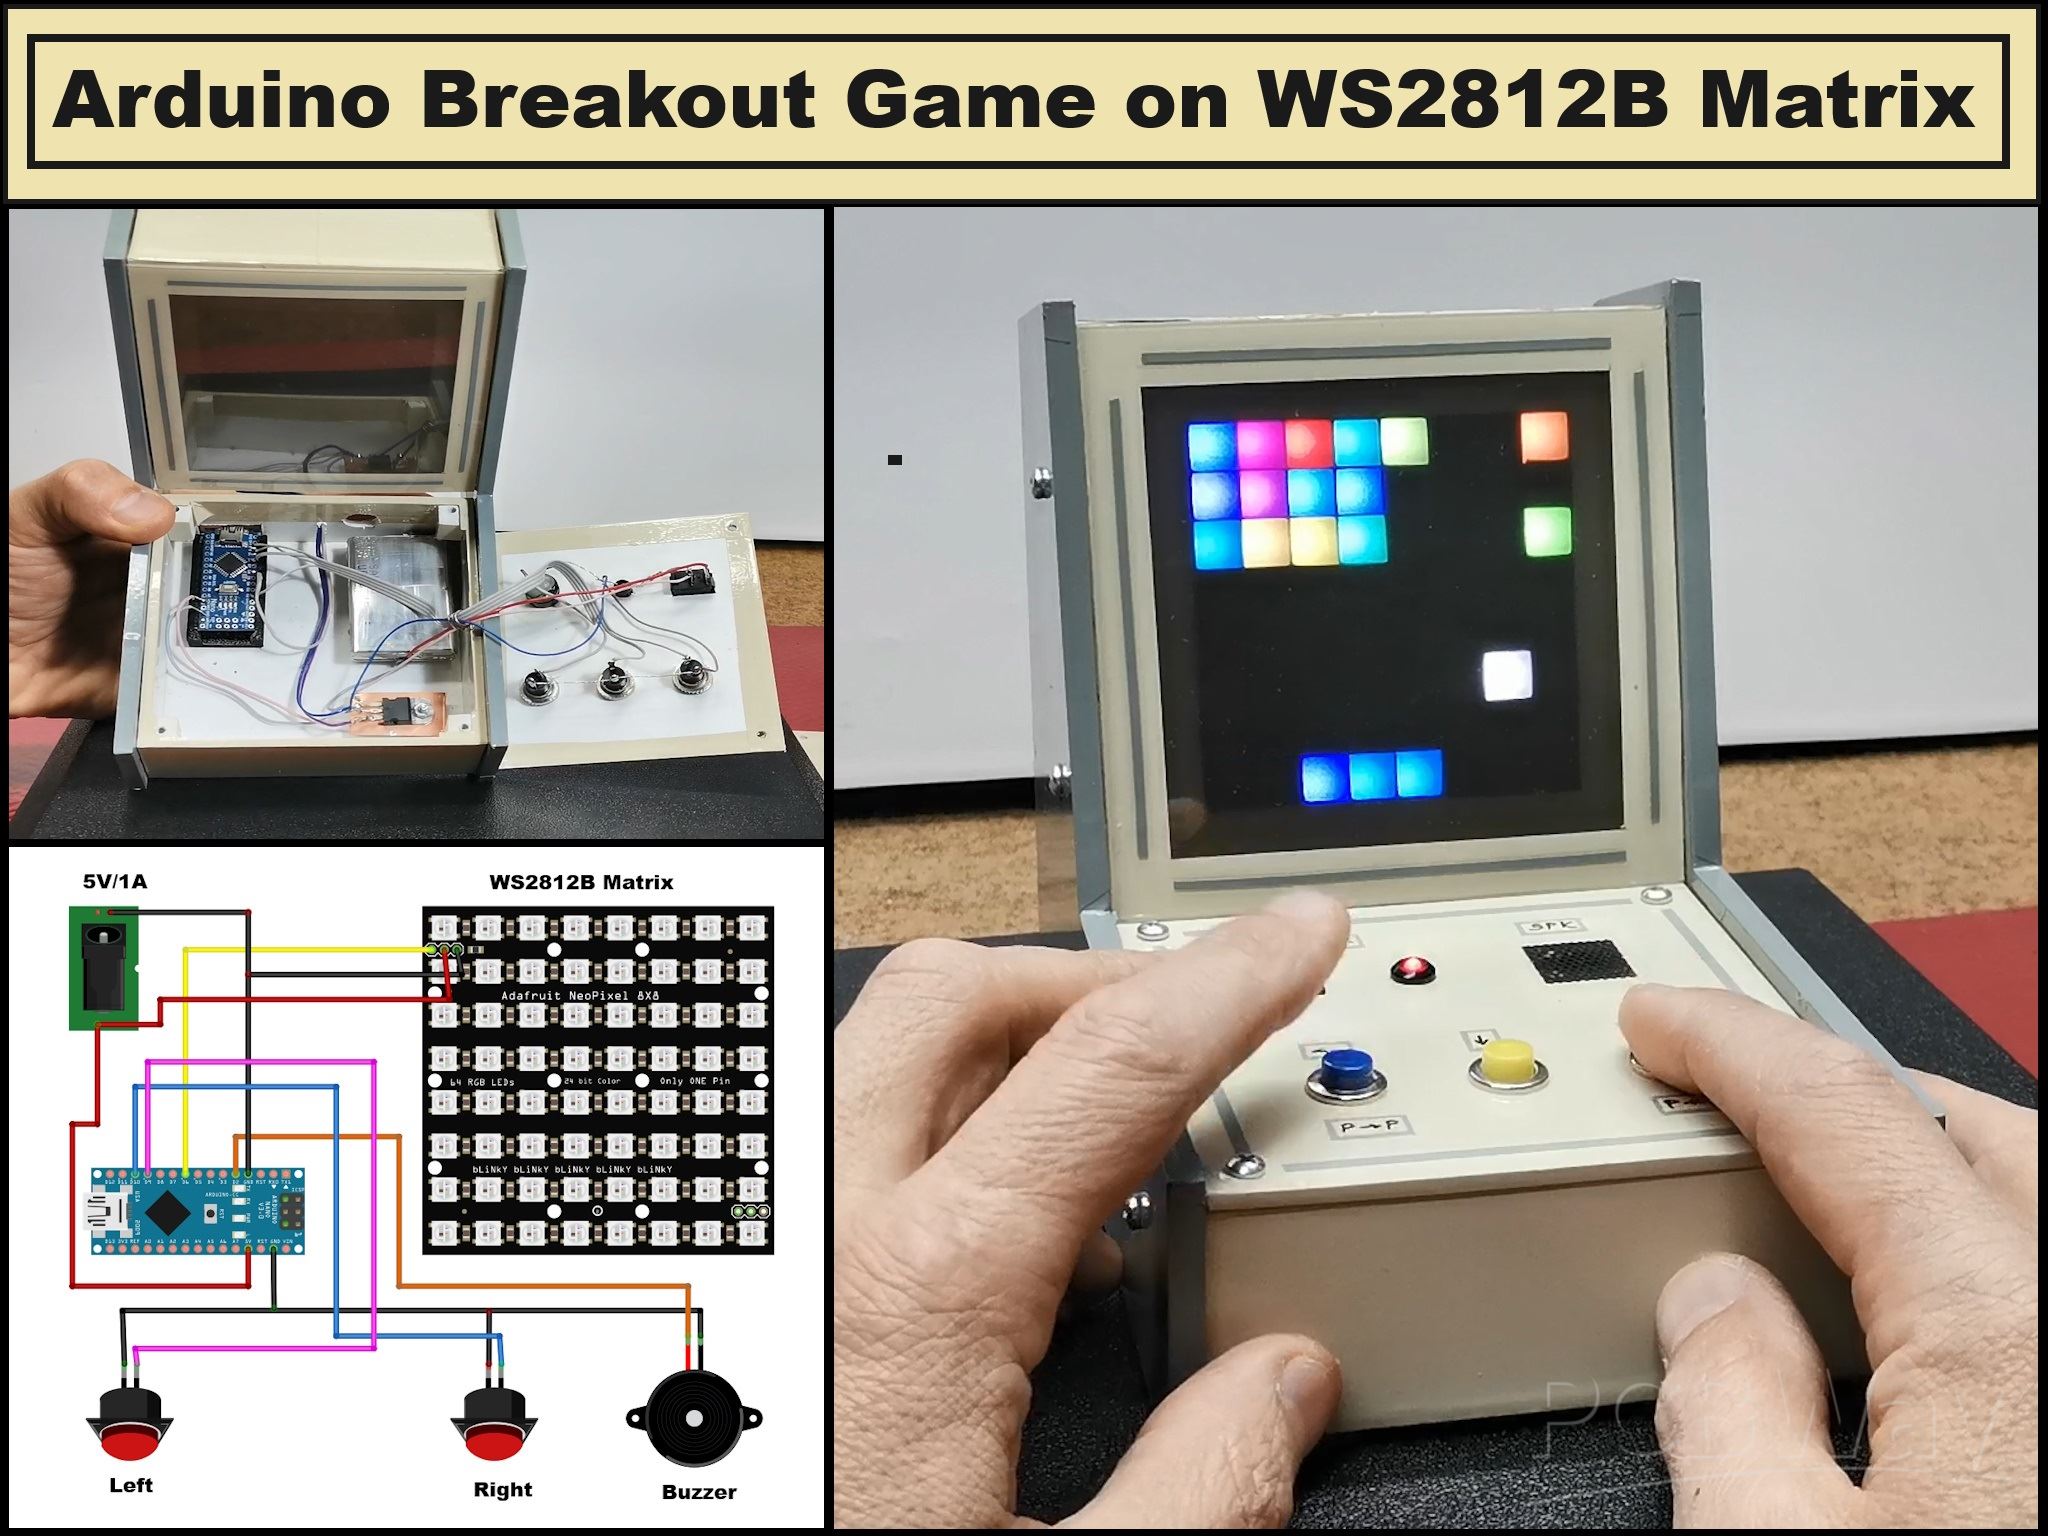
Recently in one of my projects I presented you a simple way to make a Tetris game on an 8x8 LED display. This time I will use the same hardware and case, and I will try to explain to you an equally simple way to make another legendary arcade game - Breakout.
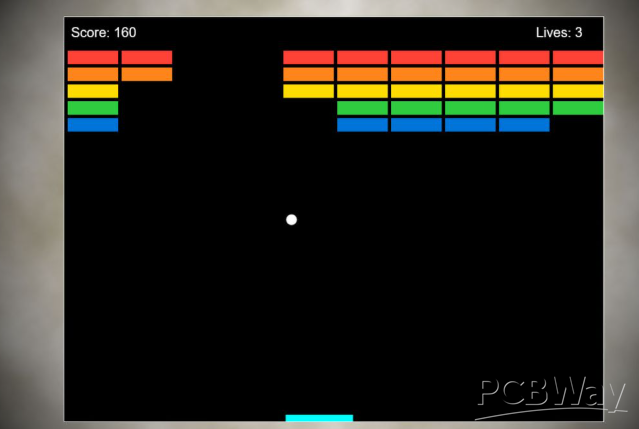
Breakout is an arcade video game developed and published by Atari, and released on 1976. The player controls a paddle at the bottom of the screen. The objective is to use the paddle to bounce a ball into a wall of bricks at the top of the screen. Hitting a brick causes it to disappear, and the player earns points. The game has been ported to numerous platforms over the years, ensuring its continued popularity
The version I present to you this time is probably the simplest possible and is played on a display with a resolution of only 64 pixels. However, it has almost all the options of the original, and even has three levels.
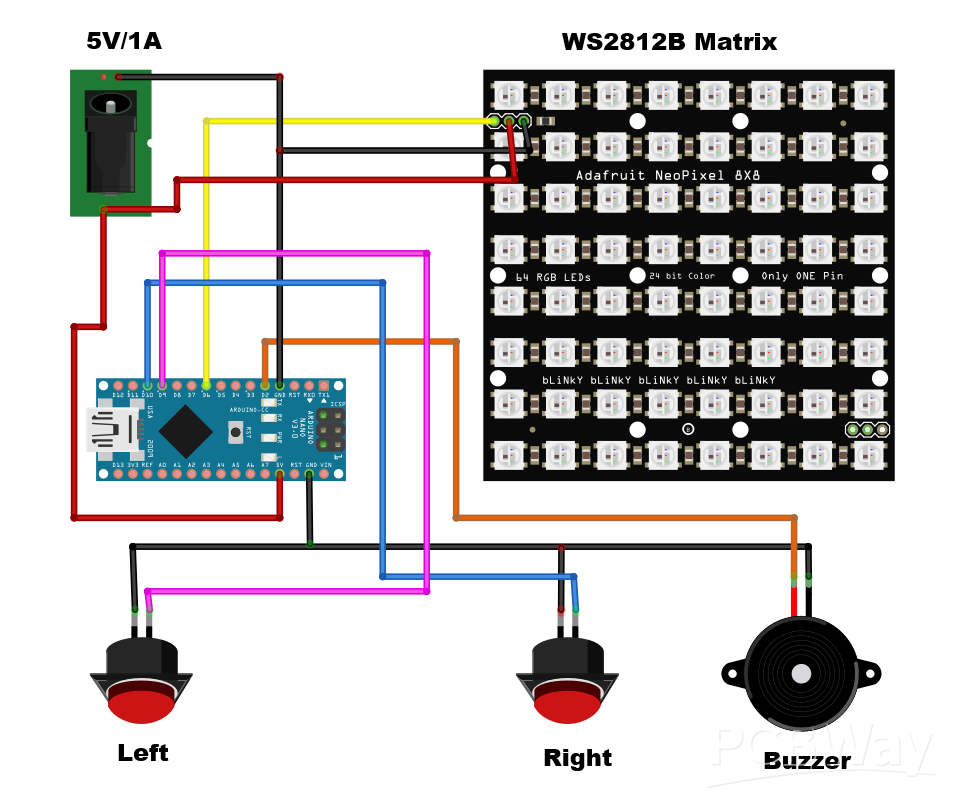
As before, the construction is extremely simple and the device consists of a minimum number of components:
- Arduino Nano microcontroller board
- Buzzer
- this time I use two Buttons
- optionally battery with voltage regulator
- and 8x8 Led Matrix with WS2812B Leds
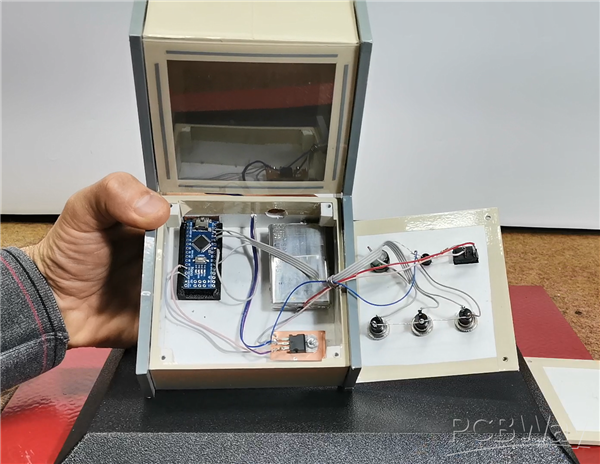
I should mention that if the device is powered by an external 5VDC source, it should be capable of delivering a current of at least 1Ampere. All components used are standard except the LED matrix which can be found on the market in several versions. They all differ in the way and order of connecting the LEDs in them (zigzag horizontally, then vertically, snake connection, etc.). It is obvious that we cannot make hardware changes, so for this purpose I created a part of the code where any version of these matrices can be selected.
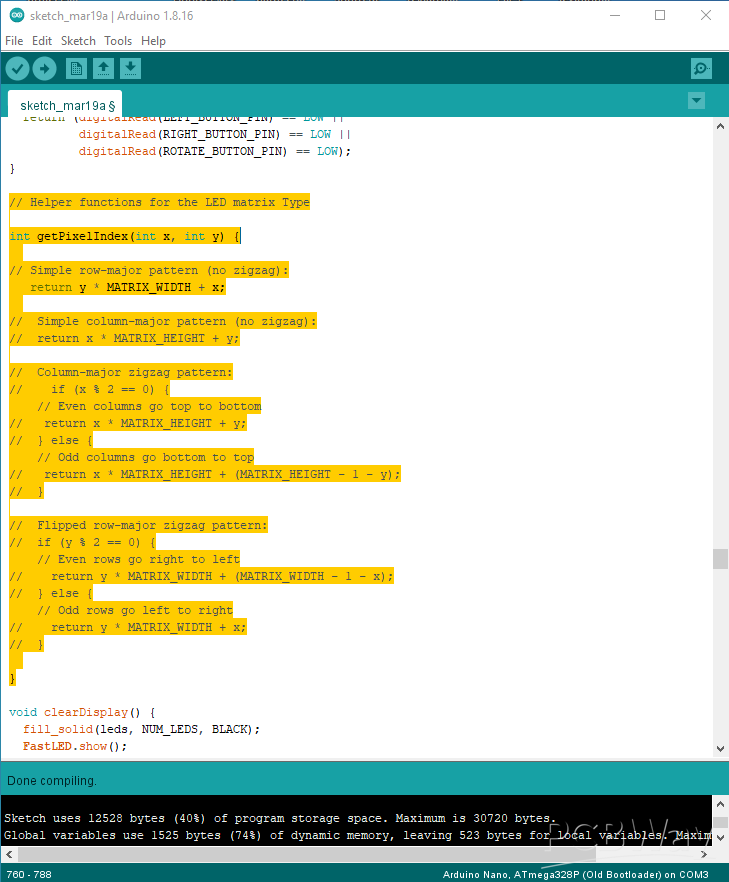
We need to select one by one of these 4 connection methods until we get the correct image on the matrix display. As for the rest of the code, although seemingly simple, there were problems with frequent repetition of an identical path of the ball, making it impossible to destroy some of the bricks, which is a consequence of the extremely small display. However, after a long experiment, I solved this part with some randomization of the ball, so the game became even more interesting. And like last time, you can see that the code is designed in such a way that all the game parameters can be changed very easily, so we can quickly adapt the game to our own needs.
This year, PCBWay celebrates its 11th anniversary of continuous progress and is organizing several activities. On that occasion you can get exclusive coupons, or you can Start Your PCB Order for Just $5, and get Up to 50% off for 3D Printing & CNC Machining. You also get a special discount on selected items and share your projects with the Community and get the sponsorship amount up to 20 US dollars per project. PCBWay not only counts years but also builds a legacy of quality, reliability and partnership. Together let's shape the innovations of tomorrow!
Now let's follow the way the game works. Immediately after turning on the game, a MINI BREAKOUT scrolling text appears on the display. Immediately after that, the game begins. The first level is the easiest, so in this level the paddle is the largest and is 3 pixels wide.
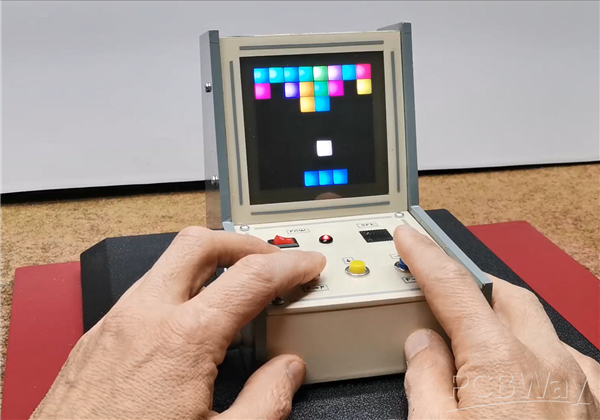
When we hit any brick with the ball, it disappears and we get one point for that. The entire game is accompanied by appropriate sounds. If we hit all the bricks, the game moves to the second level where the width of the paddle is now two pixels.
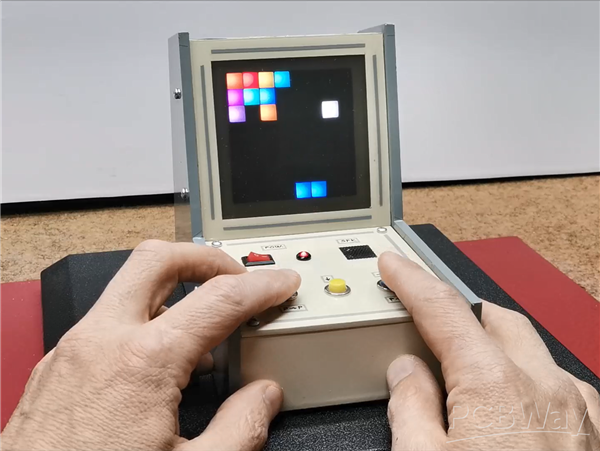
Similarly, in the third level the width of the paddle is only one pixel and now it is the most difficult to follow the ball.
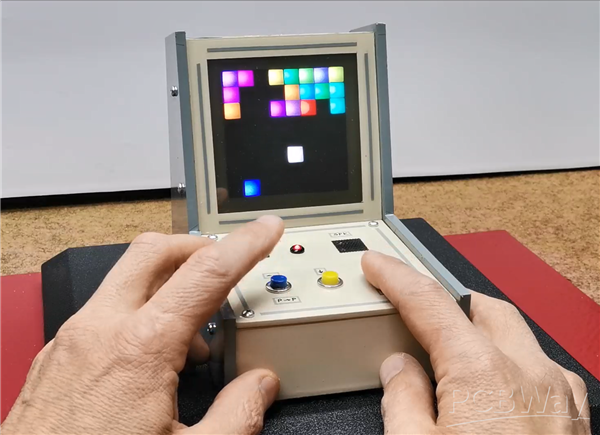
After completing the game, the score appears in the form of scrolling text, and at the end a smiley figure appears. Now by pressing any of the buttons a new game is started.
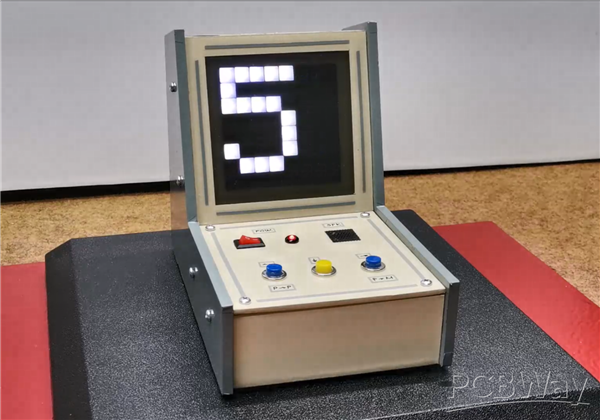
And finally a short conclusion: This extremely simple project is actually the minimum possible version of the Breakout Arcade game made on a 64 pixel display, but still with all the standard options and sound effects. As I mentioned previously, the case is from one of my previous projects and is made of 5mm thick PVC material and has the shape of a classic arcade game console where this game was most often played many years ago. It is covered with self-adhesive wallpaper.
/*Arduino BREAKOUT Game on 8x8 Matrix WS2812b
by mircemk, June 2025
*/

#include <FastLED.h>

#define LED_PIN        6
#define NUM_LEDS      64
#define MATRIX_WIDTH   8
#define MATRIX_HEIGHT  8
#define LEFT_BUTTON_PIN  9
#define RIGHT_BUTTON_PIN 10
#define BUZZER_PIN     2

// Game constants
#define MIN_X_SPEED 0.2
#define MAX_X_SPEED 0.35
#define MIN_Y_SPEED 0.25
#define MAX_Y_SPEED 0.4
#define SPEED_DECAY 0.98

// Sound settings
#define TONE_HIT    1200
#define TONE_PADDLE 800
#define TONE_WALL   1000
#define TONE_GAMEOVER 400
#define TONE_DURATION 15
#define TONE_COOLDOWN 50

CRGB leds[NUM_LEDS];

// Game elements
int paddlePos = 3;
int paddleWidth = 3;
float ballX = 4;
float ballY = 6;
float ballSpeedX = 0.2;
float ballSpeedY = -0.25;
bool bricks[3][8];
CRGB brickColors[3][8];
int score = 0;
int level = 1;
bool gameOver = false;
bool levelCompleted = false;
bool newGame = false;
bool displayScoreDone = false;

// Timing control
unsigned long lastFrameTime = 0;
unsigned long lastSoundTime = 0;
const unsigned long FRAME_TIME = 50;

const byte SMILEY[8] = {
  B00111100,
  B01000010,
  B10100101,
  B10000001,
  B10100101,
  B10011001,
  B01000010,
  B00111100
};

// Font definition for letters and numbers (5x7 font)
const byte font[37][5] = {
  {0x7C, 0x22, 0x22, 0x22, 0x7C}, // A
  {0x7E, 0x4A, 0x4A, 0x4A, 0x34}, // B
  {0x3C, 0x42, 0x42, 0x42, 0x24}, // C
  {0x7E, 0x42, 0x42, 0x42, 0x3C}, // D
  {0x7E, 0x4A, 0x4A, 0x4A, 0x42}, // E
  {0x7E, 0x0A, 0x0A, 0x0A, 0x02}, // F
  {0x3C, 0x42, 0x52, 0x52, 0x34}, // G
  {0x7E, 0x08, 0x08, 0x08, 0x7E}, // H
  {0x00, 0x42, 0x7E, 0x42, 0x00}, // I
  {0x20, 0x40, 0x42, 0x3E, 0x02}, // J
  {0x7E, 0x08, 0x14, 0x22, 0x42}, // K
  {0x7E, 0x40, 0x40, 0x40, 0x40}, // L
  {0x7E, 0x04, 0x18, 0x04, 0x7E}, // M
  {0x7E, 0x04, 0x08, 0x10, 0x7E}, // N
  {0x3C, 0x42, 0x42, 0x42, 0x3C}, // O
  {0x7E, 0x12, 0x12, 0x12, 0x0C}, // P
  {0x3C, 0x42, 0x52, 0x22, 0x5C}, // Q
  {0x7E, 0x12, 0x32, 0x52, 0x0C}, // R
  {0x24, 0x4A, 0x4A, 0x4A, 0x30}, // S
  {0x02, 0x02, 0x7E, 0x02, 0x02}, // T
  {0x3E, 0x40, 0x40, 0x40, 0x3E}, // U
  {0x1E, 0x20, 0x40, 0x20, 0x1E}, // V
  {0x3E, 0x40, 0x30, 0x40, 0x3E}, // W
  {0x66, 0x18, 0x18, 0x18, 0x66}, // X
  {0x06, 0x08, 0x70, 0x08, 0x06}, // Y
  {0x62, 0x52, 0x4A, 0x46, 0x42}, // Z
  {0x3E, 0x51, 0x49, 0x45, 0x3E}, // 0
  {0x00, 0x42, 0x7F, 0x40, 0x00}, // 1
  {0x72, 0x49, 0x49, 0x49, 0x46}, // 2
  {0x21, 0x41, 0x45, 0x4B, 0x31}, // 3
  {0x18, 0x14, 0x12, 0x7F, 0x10}, // 4
  {0x27, 0x45, 0x45, 0x45, 0x39}, // 5
  {0x3E, 0x49, 0x49, 0x49, 0x32}, // 6
  {0x01, 0x71, 0x09, 0x05, 0x03}, // 7
  {0x36, 0x49, 0x49, 0x49, 0x36}, // 8
  {0x26, 0x49, 0x49, 0x49, 0x3E}, // 9
  {0x00, 0x00, 0x00, 0x00, 0x00}  // Space
};

// Function to get the index of a character in the font array
int getCharIndex(char c) {
  if (c >= 'A' && c <= 'Z') {
    return c - 'A';
  } else if (c >= '0' && c <= '9') {
    return c - '0' + 26;
  } else {
    return 36; // Space
  }
}

// Function to scroll text on the LED matrix
void scrollText(const char* text, int delayTime) {
  int length = strlen(text);
  for (int offset = 0; offset < length * 6 + MATRIX_WIDTH; offset++) {
    fill_solid(leds, NUM_LEDS, CRGB::Black);
    for (int i = 0; i < length; i++) {
      int charIndex = getCharIndex(text[i]);
      for (int col = 0; col < 5; col++) {
        if (i * 6 + col - offset >= 0 && i * 6 + col - offset < MATRIX_WIDTH) {
          byte column = font[charIndex][col];
          for (int row = 0; row < 7; row++) {
            if (column & (1 << row)) {
              leds[getPixelIndex(i * 6 + col - offset, row)] = CRGB::White;
            }
          }
        }
      }
    }
    FastLED.show();
    delay(delayTime);
  }
}

void setup() {
  FastLED.addLeds<WS2812B, LED_PIN, GRB>(leds, NUM_LEDS);
  FastLED.setBrightness(50);

  pinMode(LEFT_BUTTON_PIN, INPUT_PULLUP);
  pinMode(RIGHT_BUTTON_PIN, INPUT_PULLUP);
  pinMode(BUZZER_PIN, OUTPUT);
  delay (1000);
  scrollText(" MINI BREAKOUT", 80);
  initializeGame();
}

void playSound(int frequency, int duration) {
  noTone(BUZZER_PIN); // Ensure the buzzer is off before playing a new sound
  tone(BUZZER_PIN, frequency, duration);
  delay(duration);
  noTone(BUZZER_PIN); // Turn off the buzzer after the duration
}

void initializeGame() {
  FastLED.setBrightness(50); // Ensure consistent brightness
  for (int row = 0; row < 3; row++) {
    for (int col = 0; col < 8; col++) {
      bricks[row][col] = true;
      brickColors[row][col] = CHSV(random(0, 255), 255, 255);  // Random color
    }
  }

  paddlePos = 3;
  ballX = 4.0;
  ballY = 6.0;
  ballSpeedX = 0.2;
  ballSpeedY = -0.25;
  score = 0;
  level = 1;
  paddleWidth = 3;
  gameOver = false;
  levelCompleted = false;
  newGame = false;
  displayScoreDone = false;
  lastFrameTime = millis();
  lastSoundTime = 0;
}

void initializeLevel() {
  for (int row = 0; row < 3; row++) {
    for (int col = 0; col < 8; col++) {
      bricks[row][col] = true;
      brickColors[row][col] = CHSV(random(0, 255), 255, 255);  // Random color
    }
  }

  paddlePos = 3;
  ballX = 4.0;
  ballY = 6.0;
  ballSpeedX = 0.2;
  ballSpeedY = -0.25;
  levelCompleted = false;
  lastFrameTime = millis();
}

void loop() {
  unsigned long currentTime = millis();

  if (!gameOver && !newGame) {
    if (currentTime - lastFrameTime >= FRAME_TIME) {
      handleInput();
      updateGame();
      lastFrameTime = currentTime;
    }
    drawGame();
    FastLED.show();
  } else if (gameOver && !displayScoreDone) {
    char scoreText[20];
    sprintf(scoreText, "SCORE: %d", score);
    scrollText(scoreText, 100);
    displayScoreDone = true;
    displaySmiley();
  } else if (gameOver && displayScoreDone) {
    if (digitalRead(LEFT_BUTTON_PIN) == LOW || digitalRead(RIGHT_BUTTON_PIN) == LOW) {
      delay(300);
      initializeGame();
      newGame = false; // Reset newGame for the next game cycle
      displayScoreDone = false;
    }
  }
}

void handleInput() {
  if (digitalRead(LEFT_BUTTON_PIN) == LOW && paddlePos > 0) {
    paddlePos--;
  }
  if (digitalRead(RIGHT_BUTTON_PIN) == LOW && paddlePos < MATRIX_WIDTH - paddleWidth) {
    paddlePos++;
  }
}

void updateGame() {
  ballX += ballSpeedX;
  ballY += ballSpeedY;

  // Brick collisions
  bool allBricksDestroyed = true;
  for (int row = 0; row < 3; row++) {
    for (int col = 0; col < 8; col++) {
      if (bricks[row][col]) {
        allBricksDestroyed = false;
        if (ballY >= row - 0.1 && ballY < row + 1.1 &&
            ballX >= col - 0.1 && ballX < col + 1.1) {
          bricks[row][col] = false;

          float dx = ballX - (col + 0.5);
          float dy = ballY - (row + 0.5);

          if (abs(dx) > abs(dy)) {
            ballSpeedX = -ballSpeedX;
          } else {
            ballSpeedY = -ballSpeedY;
          }

          ballSpeedX += (random(-15, 16) / 100.0);

          ballSpeedX = constrain(ballSpeedX, -MAX_X_SPEED, MAX_X_SPEED);
          ballSpeedY = constrain(ballSpeedY, -MAX_Y_SPEED, MAX_Y_SPEED);

          score += 1;
          playSound(TONE_HIT, TONE_DURATION);
          break;
        }
      }
    }
  }

  // Check for level completion
  if (allBricksDestroyed) {
    levelCompleted = true;
    level++;
    if (level > 3) {
      gameOver = true;
      playSound(TONE_GAMEOVER, TONE_DURATION * 5);
    } else {
      if (level == 2) {
        paddleWidth = 2;
      } else if (level == 3) {
        paddleWidth = 1;
      }
      initializeLevel();
    }
  }

  // Wall collisions
  if (ballX <= 0 || ballX >= MATRIX_WIDTH - 1) {
    ballSpeedX = -ballSpeedX;
    ballX = (ballX <= 0) ? 0.1 : (MATRIX_WIDTH - 1.1);

    if (abs(ballSpeedY) < MIN_Y_SPEED) {
      ballSpeedY += (ballSpeedY > 0 ? MIN_Y_SPEED : -MIN_Y_SPEED) * 0.5;
    }

    playSound(TONE_WALL, TONE_DURATION);
  }

  if (ballY <= 0) {
    ballSpeedY = abs(ballSpeedY);
    ballY = 0.1;
    playSound(TONE_WALL, TONE_DURATION);
  }

  // Paddle collision
  if (ballY >= MATRIX_HEIGHT - 2 && ballY < MATRIX_HEIGHT - 1) {
    if (ballX >= paddlePos && ballX < paddlePos + paddleWidth) {
      ballY = MATRIX_HEIGHT - 2;

      float hitPos = (ballX - paddlePos) / paddleWidth;
      float angle = (hitPos - 0.5) * PI * 0.7;

      float speed = sqrt(ballSpeedX * ballSpeedX + ballSpeedY * ballSpeedY);
      ballSpeedX = sin(angle) * speed;
      ballSpeedY = -abs(cos(angle) * speed);

      if (abs(ballSpeedY) < MIN_Y_SPEED) {
        ballSpeedY = -MIN_Y_SPEED;
      }

      playSound(TONE_PADDLE, TONE_DURATION);
    }
  }

  // Check if the ball collapses next to paddle on the left or right side
  if (ballY >= MATRIX_HEIGHT - 1 && (ballX < paddlePos || ballX >= paddlePos + paddleWidth)) {
    gameOver = true;
    playSound(TONE_GAMEOVER, TONE_DURATION * 5);
  }

  ballSpeedX *= SPEED_DECAY;
  ballSpeedY *= SPEED_DECAY;

  if (abs(ballSpeedX) < MIN_X_SPEED) {
    ballSpeedX = (ballSpeedX < 0) ? -MIN_X_SPEED : MIN_X_SPEED;
  }
  if (abs(ballSpeedY) < MIN_Y_SPEED) {
    ballSpeedY = (ballSpeedY < 0) ? -MIN_Y_SPEED : MIN_Y_SPEED;
  }

  ballSpeedX = constrain(ballSpeedX, -MAX_X_SPEED, MAX_X_SPEED);
  ballSpeedY = constrain(ballSpeedY, -MAX_Y_SPEED, MAX_Y_SPEED);

  if (ballY >= MATRIX_HEIGHT) {
    gameOver = true;
    playSound(TONE_GAMEOVER, TONE_DURATION * 5);
  }
}

void drawGame() {
  fill_solid(leds, NUM_LEDS, CRGB::Black);

  // Draw bricks
  for (int row = 0; row < 3; row++) {
    for (int col = 0; col < 8; col++) {
      if (bricks[row][col]) {
        leds[getPixelIndex(col, row)] = brickColors[row][col];
      }
    }
  }

  // Draw paddle
  for (int i = 0; i < paddleWidth; i++) {
    leds[getPixelIndex(paddlePos + i, MATRIX_HEIGHT - 1)] = CRGB::Blue;
  }

  // Draw ball
  leds[getPixelIndex(int(ballX), int(ballY))] = CRGB::White;
}

void displaySmiley() {
  fill_solid(leds, NUM_LEDS, CRGB::Black);
  for (int row = 0; row < 8; row++) {
    for (int col = 0; col < 8; col++) {
      if (SMILEY[row] & (1 << (7 - col))) {
        leds[getPixelIndex(col, row)] = CRGB::Yellow;
      }
    }
  }
  FastLED.show();
}

int getPixelIndex(int x, int y) {
  return y * MATRIX_WIDTH + x;
}
Arduino Breakout game on 8X8 Led Matrix with WS2812B Leds









Raspberry Pi 5 7 Inch Touch Screen IPS 1024x600 HD LCD HDMI-compatible Display for RPI 4B 3B+ OPI 5 AIDA64 PC Secondary Screen(Without Speaker)
BUY NOW


- Comments(0)
- Likes(2)
More by Mirko Pavleski
-
 Arduino 3D Printed self Balancing Cube
Self-balancing devices are electronic devices that use sensors and motors to keep themselves balanc...
Arduino 3D Printed self Balancing Cube
Self-balancing devices are electronic devices that use sensors and motors to keep themselves balanc...
-
 Building a Mini Fostex Horn Speaker with a 2-Inch Full-Range Driver
A back-loaded horn speaker is a loudspeaker design that channels the rear sound wave of a driver th...
Building a Mini Fostex Horn Speaker with a 2-Inch Full-Range Driver
A back-loaded horn speaker is a loudspeaker design that channels the rear sound wave of a driver th...
-
 ESP32 Moon Lamp That Shows the Real Moon Phase on Crowpanel Round Dispaly
Recently on the Hackaday portal I came across a very interesting project called Moon Display by aut...
ESP32 Moon Lamp That Shows the Real Moon Phase on Crowpanel Round Dispaly
Recently on the Hackaday portal I came across a very interesting project called Moon Display by aut...
-
 40-Year-Old DIY Power Amplifiers – Do They Still Work - 500W MOSFET & Transistor Amps
This time I want to describe my two DIY super powerful audio amplifiers that I made about 40 years ...
40-Year-Old DIY Power Amplifiers – Do They Still Work - 500W MOSFET & Transistor Amps
This time I want to describe my two DIY super powerful audio amplifiers that I made about 40 years ...
-
 Wi-Fi HaLow Explained! Long-Range Camera Test up to 300m (ESP32 + ThinkNode G4 from ELECROW)
I recently needed to install a security camera at a relatively large distance from my home, more pre...
Wi-Fi HaLow Explained! Long-Range Camera Test up to 300m (ESP32 + ThinkNode G4 from ELECROW)
I recently needed to install a security camera at a relatively large distance from my home, more pre...
-
 Simple Object Recognition with the UNIHIKER K10 – No TensorFlow, No Internet, No Cloud AI
Object recognition has become one of the most popular applications of artificial intelligence and em...
Simple Object Recognition with the UNIHIKER K10 – No TensorFlow, No Internet, No Cloud AI
Object recognition has become one of the most popular applications of artificial intelligence and em...
-
 DIY PCL82 Tube Amplifier, Single-Ended Amp with Amazing Sound
The idea for this project came from a local electronics magazine called EMITER, issue 12/13 from 20...
DIY PCL82 Tube Amplifier, Single-Ended Amp with Amazing Sound
The idea for this project came from a local electronics magazine called EMITER, issue 12/13 from 20...
-
 Simple MCP2036 SDR Radio - The Most Unusual Software Defined Radio
SDR (Software Defined Radio) is a radio communication system where many of the key electronic compo...
Simple MCP2036 SDR Radio - The Most Unusual Software Defined Radio
SDR (Software Defined Radio) is a radio communication system where many of the key electronic compo...
-
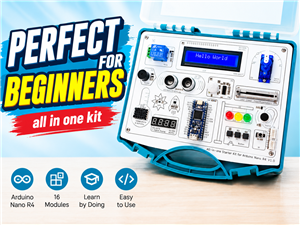 Elecrow All-in-One Arduino Starter Kit Review - 20 Projects & 16 Modules
This time I will describe a simple and practical way to enter the world of microcontrollers, specif...
Elecrow All-in-One Arduino Starter Kit Review - 20 Projects & 16 Modules
This time I will describe a simple and practical way to enter the world of microcontrollers, specif...
-
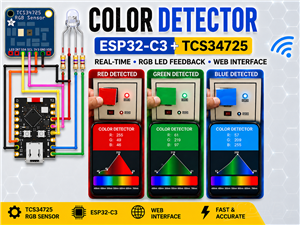 ESP32-C3 Color Detector with TCS34725, Real-Time RGB Detection & Web Interface
Color detection is a fundamental task in many embedded systems – from industrial sorting machines t...
ESP32-C3 Color Detector with TCS34725, Real-Time RGB Detection & Web Interface
Color detection is a fundamental task in many embedded systems – from industrial sorting machines t...
-
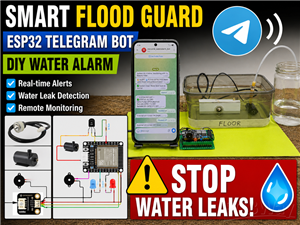 DIY ESP32 Telegram Flood Protection System - Smart Home Automation
Recently I had an unpleasant experience in my home, specifically my ground floor was flooded as a r...
DIY ESP32 Telegram Flood Protection System - Smart Home Automation
Recently I had an unpleasant experience in my home, specifically my ground floor was flooded as a r...
-
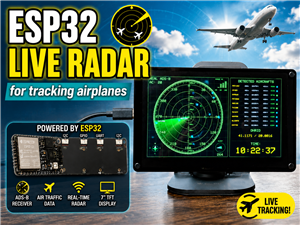 Real-Time Air Traffic Radar using ESP32 + ADS-B Data
ADS-B, which stands for Automatic Dependent Surveillance-Broadcast, is the modern standard for trac...
Real-Time Air Traffic Radar using ESP32 + ADS-B Data
ADS-B, which stands for Automatic Dependent Surveillance-Broadcast, is the modern standard for trac...
-
 DIY Green Laser Night Sky Object Finder - Find Stars & Galaxies Instantly with great accuracy
As an amateur astronomer, especially at the beginning, the most difficult part of observing the nig...
DIY Green Laser Night Sky Object Finder - Find Stars & Galaxies Instantly with great accuracy
As an amateur astronomer, especially at the beginning, the most difficult part of observing the nig...
-
 DIY Avionics Simulator with ESP32 - Artificial Horizon, Compass & Altimeter
The inspiration for this project comes from classical aircraft cockpit instruments used for navigat...
DIY Avionics Simulator with ESP32 - Artificial Horizon, Compass & Altimeter
The inspiration for this project comes from classical aircraft cockpit instruments used for navigat...
-
 DIY Miniature X-Ray Machine using a TV Vacuum Tube DY86
An X-ray machine (or radiograph) is a quick, painless medical test that produces images of the struc...
DIY Miniature X-Ray Machine using a TV Vacuum Tube DY86
An X-ray machine (or radiograph) is a quick, painless medical test that produces images of the struc...
-
 Simple SDR Receiver Using 2x NE612 - Dual Conversion, Superheterodyne (0.1–30 MHz)
SDR (Software Defined Radio) is a radio system in which most of the functions of a classic radio (f...
Simple SDR Receiver Using 2x NE612 - Dual Conversion, Superheterodyne (0.1–30 MHz)
SDR (Software Defined Radio) is a radio system in which most of the functions of a classic radio (f...
-
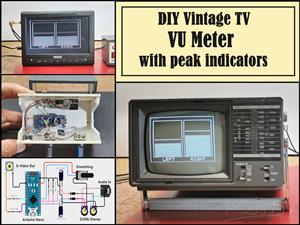 DIY Vintage TV VU Meter with peak indicators
Some time ago in one of my projects I presented you a way to turn a black and white old mini TV int...
DIY Vintage TV VU Meter with peak indicators
Some time ago in one of my projects I presented you a way to turn a black and white old mini TV int...
-
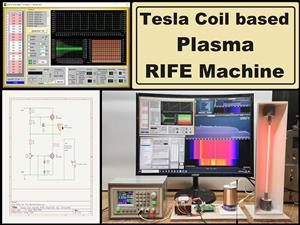 DIY Tesla Coil based Plasma Rife Machine
In several of my previous videos, I presented you with different ways to make a Rife Machine, from ...
DIY Tesla Coil based Plasma Rife Machine
In several of my previous videos, I presented you with different ways to make a Rife Machine, from ...
-
Programmable Mist Maker - XIAO / QT PY Extension
2119 2 2 -
RadioHAT - Raspberry Pi radio development platform
1801 0 4 -
-
-
-
ARPS-2 – Arduino-Compatible Robot Project Shield for Arduino UNO
4013 0 6 -
A Compact Charging Breakout Board For Waveshare ESP32-C3
4750 3 8 -
AI-driven LoRa & LLM-enabled Kiosk & Food Delivery System
5564 2 2 -





















