


Another Macro Pad!
Yup! I made another one, this time with lights! Cherry MX (and equivalent) mechanical keyboard switches have a provision for a RGB LED and I decided to toss in some addressable ones in order to double the fun! The greatest part of this particular macro pad is that you can use any microcontroller you would like, instead of being stuck to a pro micro like my previous macro pad, AND you get to mix and match switches - go nuts!
R1, R2, R4, R5, R6, R7 are 5k (I used 4.7k)
R8, R9, R10 are 1k
R3 is 10k
R11 is 500R
Here are the parts you will need:
Outemu (or any Cherry MX equivalent) key switches:
Canada: https://amzn.to/3b9jW1X
USA and World: https://amzn.to/3osKzCk
Aliexpress: https://s.click.aliexpress.com/e/_DeaidSL
Keycaps which can accept a label:
Canada: https://amzn.to/3aXVlxj
USA and World: https://amzn.to/3cGN7Kp
Aliexpress: https://s.click.aliexpress.com/e/_DEVJ6D5
Hotswap sockets:
Canada: https://amzn.to/3u9FBwP
USA and World: https://amzn.to/3VA95zM
Aliexpress: https://s.click.aliexpress.com/e/_DDbBiXD
SK6812 Mini-E LEDs (reverse mount):
Aliexpress: https://s.click.aliexpress.com/e/_DEMO87h
100n 0805 capacitors:
Canada: https://amzn.to/3Vy0Vb4
USA and World: https://amzn.to/3VEwXm0
Aliexpress: https://s.click.aliexpress.com/e/_DcZIY9H
M3x6mm screws:
Canada: https://amzn.to/3VAMBPd
USA and World: https://amzn.to/3UjOCOz
Aliexpress: https://s.click.aliexpress.com/e/_DlkKWPh
Some more useful things:
3x4 Keypad:
Aliexpress: https://www.aliexpress.com/item/32530917534.html
"Cherry" style switch sampler:
Aliexpress: https://s.click.aliexpress.com/e/_DmvWdnd
Keyswitch remover:
Canada: https://amzn.to/3GWIZTr
USA and World: https://amzn.to/3uhUbCt
Aliexpress: https://s.click.aliexpress.com/e/_Dli9cxD
and some useful links:
V1 Macro Pad:
https://youtu.be/3iy2FWI8sWU
Listen to the Simple Electronics Podcast while you solder:
https://www.simpleelectronics.ca/podcast
Thanks for watching!
Check out my website: https://www.simpleelectronics.ca
If you feel like supporting the channel, please consider supporting on Patreon:
https://www.patreon.com/SimpleElectronics
or get some cool merch!
https://teespring.com/stores/electronics-r-us
or buy anything from USA Amazon using my affiliate link:
https://amzn.to/3Iki6q7
or buy anything from Canadian Amazon using my affiliate link:
https://amzn.to/3FNxPfI
or buy anything on Banggood's site using my affiliate link:
https://www.banggood.com/custlink/mGvGJL5Qm1
or buy anything using my Aliexpress affiliate link:
https://s.click.aliexpress.com/e/_9u07X6
and if you feel so inclined, here is my Amazon wish list!
https://www.amazon.ca/hz/wishlist/ls/2BMH2EFGY31V1?ref_=wl_share
I have other channels!:
SE-Made-A-Stream:
https://www.youtube.com/channel/UC4Ak1IVkuT5M66PayLOe19Q
Dan Fixes Cars:
https://www.youtube.com/channel/UC8gQZ_5-DOb0oQVm66oTl6A
SE Con Dairy:
https://www.youtube.com/channel/UCL1jXgPQjCI0gWFLltq2bzg
Live Gaming:
https://www.twitch.tv/SimpleElectronicsYT
Disclaimer: Some links included in this description are affiliate links. If you purchase a product or service with the links that I provide I may receive a small commission. There is no additional charge to you!
//Written by Dan from the Simple Electronics YouTube channel: www.youtube.com/@simpleelectronics

// Beginning of Adafruit stuff I am using just for the Neopixels

#include <Adafruit_NeoPixel.h>
#define PIN        6 // On Trinket or Gemma, suggest changing this to 1
#define NUMPIXELS 16 // Popular NeoPixel ring size
Adafruit_NeoPixel pixels(NUMPIXELS, PIN, NEO_GRB + NEO_KHZ800);
#define DELAYVAL 250 // Time (in milliseconds) to pause between pixels

int red = 0;
int green = 0;
int blue = 0;

// End of Adafruit stuff for Neopixels

// Beginning of the LCD I2C stuff I use just for the display

#include <Wire.h>
#include <LiquidCrystal_I2C.h>
LiquidCrystal_I2C lcd(0x3F, 16, 2);

// End of LCD I2C stuff just for the display

// Define your analog pin here - you can use any analog input
int analogPin = A0;

// Define a variable to store the value read from the analogPin in
int analogVal = 0;

// Define a variable to determine which button was actually pressed
int pressedButton = 0;

// Use the test loop to determine analog values of your buttons and put the range here below:
const int btn1Min = 1022;
const int btn1Max = 1024;

const int btn2Min = 1012;
const int btn2Max = 1014;

const int btn3Min = 1002;
const int btn3Max = 1005;

const int btn4Min = 992;
const int btn4Max = 995;

const int btn5Min = 694;
const int btn5Max = 698;

const int btn6Min = 688;
const int btn6Max = 693;

const int btn7Min = 684;
const int btn7Max = 687;

const int btn8Min = 680;
const int btn8Max = 683;

const int btn9Min = 526;
const int btn9Max = 528;

const int btn10Min = 523;
const int btn10Max = 525;

const int btn11Min = 520;
const int btn11Max = 522;

const int btn12Min = 518;
const int btn12Max = 519;

const int btn13Min = 422;
const int btn13Max = 425;

const int btn14Min = 350;
const int btn14Max = 354;

const int btn15Min = 300;
const int btn15Max = 305;

const int btn16Min = 260;
const int btn16Max = 266;

void setup ()
{
  pixels.begin(); // INITIALIZE NeoPixel strip object (REQUIRED)
  pixels.clear(); // Set all pixel colors to 'off'

  lcd.init();
  lcd.backlight();
  lcd.clear();

  // Setup serial to use the serial monitor
  Serial.begin (9600);

}

void loop ()
{
      // Test loop - uncomment this one to get the analog values of your buttons to calibrate your array
      /*
      val = analogRead (analogPin);
      Serial.println (String(val));
      */
      //read the analog value of the button matrix to the analogVal variable
      analogVal = analogRead (analogPin);

      //we need to run that read value through our function to get the actual pressed button (1-16) and 99 for nothing pressed
      pressedButton = getButton(analogVal);

      //print in our serial monitor which button has been pressed - uncomment for troubleshooting
      //Serial.println (String(pressedButton));
      //Serial.println (String(analogVal));

      //put in whatever you want your button(s) to do here:
      if (pressedButton == 1){
        //do what button 1 needs to do here
          lcd.clear();
          lcd.setCursor(0,0);
          lcd.print("The button is: ");
          lcd.setCursor(13,1);
          lcd.print("1");
          delay(DELAYVAL);
      }
      else if (pressedButton == 2){
        //do what button 2 needs to do here
          lcd.clear();
          lcd.setCursor(0,0);
          lcd.print("The button is: ");
          lcd.setCursor(13,1);
          lcd.print("2");
          delay(DELAYVAL);
      }
      else if (pressedButton == 3){
        //do what button 3 needs to do here
          lcd.clear();
          lcd.setCursor(0,0);
          lcd.print("The button is: ");
          lcd.setCursor(13,1);
          lcd.print("3");
          delay(DELAYVAL);
      }
      else if (pressedButton == 4){
        //do what button 4 needs to do here
          lcd.clear();
          lcd.setCursor(0,0);
          lcd.print("The button is: ");
          lcd.setCursor(13,1);
          lcd.print("4");
          delay(DELAYVAL);
      }
      else if (pressedButton == 5){
        //do what button 5 needs to do here
          lcd.clear();
          lcd.setCursor(0,0);
          lcd.print("The button is: ");
          lcd.setCursor(13,1);
          lcd.print("5");
          delay(DELAYVAL);
      }
      else if (pressedButton == 6){
        //do what button 6 needs to do here
          lcd.clear();
          lcd.setCursor(0,0);
          lcd.print("The button is: ");
          lcd.setCursor(13,1);
          lcd.print("6");
          delay(DELAYVAL);
      }
      else if (pressedButton == 7){
        //do what button 7 needs to do here
          lcd.clear();
          lcd.setCursor(0,0);
          lcd.print("The button is: ");
          lcd.setCursor(13,1);
          lcd.print("7");
          delay(DELAYVAL);
      }
      else if (pressedButton == 8){
        //do what button 8 needs to do here
          lcd.clear();
          lcd.setCursor(0,0);
          lcd.print("The button is: ");
          lcd.setCursor(13,1);
          lcd.print("8");
          delay(DELAYVAL);
      }
      else if (pressedButton == 9){
        //do what button 9 needs to do here
          lcd.clear();
          lcd.setCursor(0,0);
          lcd.print("The button is: ");
          lcd.setCursor(13,1);
          lcd.print("9");
          delay(DELAYVAL);
      }
      else if (pressedButton == 10){
        //do what button 10 needs to do here
          lcd.clear();
          lcd.setCursor(0,0);
          lcd.print("The button is: ");
          lcd.setCursor(13,1);
          lcd.print("10");
          delay(DELAYVAL);
      }
      else if (pressedButton == 11){
        //do what button 11 needs to do here
          lcd.clear();
          lcd.setCursor(0,0);
          lcd.print("The button is: ");
          lcd.setCursor(13,1);
          lcd.print("11");
          delay(DELAYVAL);
      }
      else if (pressedButton == 12){
        //do what button 12 needs to do here
          lcd.clear();
          lcd.setCursor(0,0);
          lcd.print("The button is: ");
          lcd.setCursor(13,1);
          lcd.print("12");
          delay(DELAYVAL);
      }
      else if (pressedButton == 13){
        //do what button 13 needs to do here
          lcd.clear();
          lcd.setCursor(0,0);
          lcd.print("The button is: ");
          lcd.setCursor(13,1);
          lcd.print("13");
          delay(DELAYVAL);
      }
      else if (pressedButton == 14){
        //do what button 14 needs to do here
          lcd.clear();
          lcd.setCursor(0,0);
          lcd.print("The button is: ");
          lcd.setCursor(13,1);
          lcd.print("14");
          delay(DELAYVAL);
      }
      else if (pressedButton == 15){
        //do what button 15 needs to do here
          lcd.clear();
          lcd.setCursor(0,0);
          lcd.print("The button is: ");
          lcd.setCursor(13,1);
          lcd.print("15");
          delay(DELAYVAL);
      }
      else if (pressedButton == 16){
        //do what button 16 needs to do here
        //Serial.println("The loop got this far!");
        lcd.clear();
        lcd.setCursor(0,0);
        lcd.print("The button is: ");
        lcd.setCursor(13,1);
        lcd.print("16");

        red = random(75);
        green = random(75);
        blue = random(75);
        //More Neopixel stuff
        for(int i=0; i<NUMPIXELS; i++)
        {
          pixels.setPixelColor(i, pixels.Color(red, green, blue));
        }
        pixels.show();   // Send the updated pixel colors to the hardware.
        delay(DELAYVAL);
        //End of Neopixel stuff
      }
}

int getButton (int val)
{
  if (val <= btn1Max && val >= btn1Min) return 1;
  else if (val <= btn2Max && val >= btn2Min) return 2;
  else if (val <= btn3Max && val >= btn3Min) return 3;
  else if (val <= btn4Max && val >= btn4Min) return 4;
  else if (val <= btn5Max && val >= btn5Min) return 5;
  else if (val <= btn6Max && val >= btn6Min) return 6;
  else if (val <= btn7Max && val >= btn7Min) return 7;
  else if (val <= btn8Max && val >= btn8Min) return 8;
  else if (val <= btn9Max && val >= btn9Min) return 9;
  else if (val <= btn10Max && val >= btn10Min) return 10;
  else if (val <= btn11Max && val >= btn11Min) return 11;
  else if (val <= btn12Max && val >= btn12Min) return 12;
  else if (val <= btn13Max && val >= btn13Min) return 13;
  else if (val <= btn14Max && val >= btn14Min) return 14;
  else if (val <= btn15Max && val >= btn15Min) return 15;
  else if (val <= btn16Max && val >= btn16Min) return 16;
  else return 99;
}
Another Macro Pad!
*PCBWay community is a sharing platform. We are not responsible for any design issues and parameter issues (board thickness, surface finish, etc.) you choose.


Raspberry Pi 5 7 Inch Touch Screen IPS 1024x600 HD LCD HDMI-compatible Display for RPI 4B 3B+ OPI 5 AIDA64 PC Secondary Screen(Without Speaker)
BUY NOW


- Comments(0)
- Likes(8)
- 1 USER VOTES
- YOUR VOTE 0.00 0.00
-
10design
-
10usability
-
10creativity
-
10content
More by Simple Electronics
-
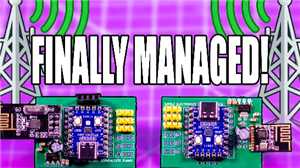 RP2040 and NRF24L01 Transmitter and Receiver
After years of losing to the NRF24L01, I finally won. I designed an RP2040-Zero PCB that uses bitban...
RP2040 and NRF24L01 Transmitter and Receiver
After years of losing to the NRF24L01, I finally won. I designed an RP2040-Zero PCB that uses bitban...
-
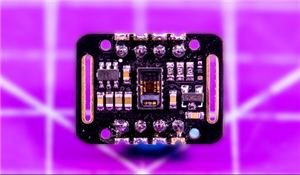 MAX30102 Heart Rate Sensor
A combiner board to put together a RP2040-Zero, a SSD1306 OLED and a MAX30102 sensor board - enjoy!h...
MAX30102 Heart Rate Sensor
A combiner board to put together a RP2040-Zero, a SSD1306 OLED and a MAX30102 sensor board - enjoy!h...
-
 Semi-Universal Temperature Board
I made an excuse for you to use your DHT-11, DHT-22, BMP280 and 12B20 and have a nice tool to keep o...
Semi-Universal Temperature Board
I made an excuse for you to use your DHT-11, DHT-22, BMP280 and 12B20 and have a nice tool to keep o...
-
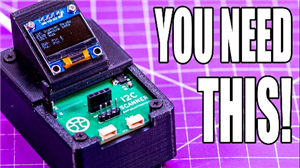 RP2040 i2c Scanner
https://youtu.be/NPpPVw-4qi8For the most information, the CODE and more, check out the website artic...
RP2040 i2c Scanner
https://youtu.be/NPpPVw-4qi8For the most information, the CODE and more, check out the website artic...
-
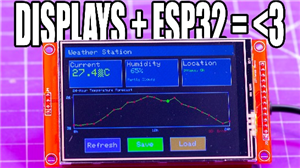 ESP32 DEVKIT V1 + TFT Touch Combiner
In this project, I showcase a custom PCB that combines an ESP32-DevKit-V1 (30 pin) with a 3.5" TFT L...
ESP32 DEVKIT V1 + TFT Touch Combiner
In this project, I showcase a custom PCB that combines an ESP32-DevKit-V1 (30 pin) with a 3.5" TFT L...
-
 Tiny Microcontroller Tester
A simple board to test out GPIO of your microcontrollers, using two rows of 0603 LEDs (one row for H...
Tiny Microcontroller Tester
A simple board to test out GPIO of your microcontrollers, using two rows of 0603 LEDs (one row for H...
-
 30-pin DIP to SIL
I created this for the WeAct Studio RP2350B board (the huge one with 48 GPIO) but works for all sort...
30-pin DIP to SIL
I created this for the WeAct Studio RP2350B board (the huge one with 48 GPIO) but works for all sort...
-
 Servo Tester
If you have servos at home and are looking for an excuse to dust them off or even if you just need t...
Servo Tester
If you have servos at home and are looking for an excuse to dust them off or even if you just need t...
-
 RP2040-Zero adapter (mega)
https://youtu.be/8vQdalhTISYYou will likely want the "mini" unless you are a psycho like me - since ...
RP2040-Zero adapter (mega)
https://youtu.be/8vQdalhTISYYou will likely want the "mini" unless you are a psycho like me - since ...
-
 RP2040-Zero adapter (mini)
https://youtu.be/8vQdalhTISYYou will likely want the "mini" unless you are a psycho like me - since ...
RP2040-Zero adapter (mini)
https://youtu.be/8vQdalhTISYYou will likely want the "mini" unless you are a psycho like me - since ...
-
 ESP32-Relay-Control
ESP32 PCB with a DC-DC converter and 8 outputs and 6 inputs.Please note that switch 7 and 8 are acci...
ESP32-Relay-Control
ESP32 PCB with a DC-DC converter and 8 outputs and 6 inputs.Please note that switch 7 and 8 are acci...
-
 0-60V Analog Load
Build your own analog load to load up power supplies, drain batteries, limit current, all sorts of t...
0-60V Analog Load
Build your own analog load to load up power supplies, drain batteries, limit current, all sorts of t...
-
 0-30V Analog Load
Build your own analog load to load up power supplies, drain batteries, limit current, all sorts of t...
0-30V Analog Load
Build your own analog load to load up power supplies, drain batteries, limit current, all sorts of t...
-
 0-15V Analog Load
Build your own analog load to load up power supplies, drain batteries, limit current, all sorts of t...
0-15V Analog Load
Build your own analog load to load up power supplies, drain batteries, limit current, all sorts of t...
-
 Relay Board
I was unsatisfied with the generic relay PCBs on the market - so I made my own!You will also need th...
Relay Board
I was unsatisfied with the generic relay PCBs on the market - so I made my own!You will also need th...
-
 A 12-Device USB Charging Station
I have a lot of devices that need relatively low current charging and I don't really have that many ...
A 12-Device USB Charging Station
I have a lot of devices that need relatively low current charging and I don't really have that many ...
-
 Holiday Wreath
This Holiday Season, PCBWay sponsored me to make a holiday decoration! The inspiration for this one ...
Holiday Wreath
This Holiday Season, PCBWay sponsored me to make a holiday decoration! The inspiration for this one ...
-
 Another Macro Pad!
Yup! I made another one, this time with lights! Cherry MX (and equivalent) mechanical keyboard switc...
Another Macro Pad!
Yup! I made another one, this time with lights! Cherry MX (and equivalent) mechanical keyboard switc...
-
Programmable Mist Maker - XIAO / QT PY Extension
171 0 0 -
RadioHAT - Raspberry Pi radio development platform
180 0 1 -
-
-
-
-
ARPS-2 – Arduino-Compatible Robot Project Shield for Arduino UNO
2766 0 5 -
A Compact Charging Breakout Board For Waveshare ESP32-C3
3273 3 8 -
AI-driven LoRa & LLM-enabled Kiosk & Food Delivery System
3528 2 2


