PCBWay Community
Search title or content
Search
PCBWay
PCB Instant Quote
CNC | 3D Printing
Login
Sign Up
More Notifications
No notifications.
My Profile
My projects
My Likes
My Deals
My Goods for Bazaar
Settings
Sign Out
Projects
Categories
DIY Electronics
Arduino
Hardware
Audio
Computers & USB
Breakout Board Projects
Home Automation
LED Displays & Matrices
IoT
Robotics
View all categories
By Source Files
Onju Voice - AI assistant replacement to Google Nest Mini by @justLV
DIY 1kW Open Source MPPT Solar Charge Controller
LogicAnalyzer V6.0
Tad Boy Color
kv4p HT v1.7b
QuinLED-Dig-Uno
SummerCart64 - a fully open source N64 flashcart
Bike Fingerprint - PCB
Arduino RC engine sound & light controller with inertia simulation for ESP32
Solar Powered WiFi Weather Station V2.0
SIDKick pico 0.2 (SID 6581/8580-replacement for C64/C128)
Frog Boy Color
View all source files projects
Featured Projects
Onju Voice - AI assistant replacement to Google Nest Mini by @justLV
DIY 1kW Open Source MPPT Solar Charge Controller
LogicAnalyzer V6.0
Featured
Source Files
Video
View all projects
Questions
Sponsorships
Feedback
Blog
Store
PCB Design
Contest
- 8th Project Design Contest
- 7th Project Design Contest
- KiCad Design Contest
- 6th Project Design Contest
- 5th PCB Design Contest
- 4th PCB Design Contest
- Raspberry Pi Pico Contest
- PCB Design Tutorial
- 3rd PCB Design Contest
- I CAN SOLDER Kit Contest
- 2nd PCB Design Contest
- 1st PCB Design Contest
Add questions
Create a project
Please verify your email address so that you can enjoy our more comprehensive services.
Wearables
Weather
All categories
DIY Electronics
Arduino
Hardware
Audio
Computers & USB
Breakout Board Projects
Home Automation
LED Displays & Matrices
IoT
Robotics
3D Printing
Blinkenlights
Calculator
Camera
Clocks
CNC
Educational
Automotive
Electronic Games
ESP32
Fabrication Tools
Flight
Guitar
Keyboards
Misc
Music
Nixie Tube
Oscilloscope
Particle
Power Supply
Programmable Logic Projects
Raspberry Pi
Radio
Retro Stuffs
Space & Satellite
Sensors
Software
Synthesizer
Ultrasonic
Virtual Reality
Wearables
Weather
Project by top creative fields
All categories
3D Printing
Arduino
Audio
Automotive
Blinkenlights
Breakout Board Projects
Calculator
Camera
Clocks
CNC
Computers & USB
DIY Electronics
Educational
Electronic Games
ESP32
Fabrication Tools
Flight
Guitar
Hardware
Home Automation
IoT
Keyboards
LED Displays & Matrices
Misc
Music
Nixie Tube
Oscilloscope
Particle
Power Supply
Programmable Logic Projects
Radio
Raspberry Pi
Retro Stuffs
Robotics
Sensors
Software
Space & Satellite
Synthesizer
Ultrasonic
Virtual Reality
Wearables
Weather
View all categories
Share & Discover
All tags
Audio
Arduino
3D printing
Board
LED
Calculator
Create a project
Sort by : Trending
Trending
Score
Likes
Views
Discuss
Newest
Featured
Source Files
3D Design
Video
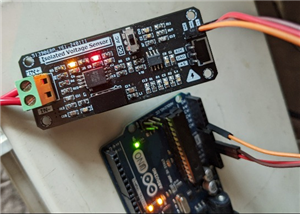
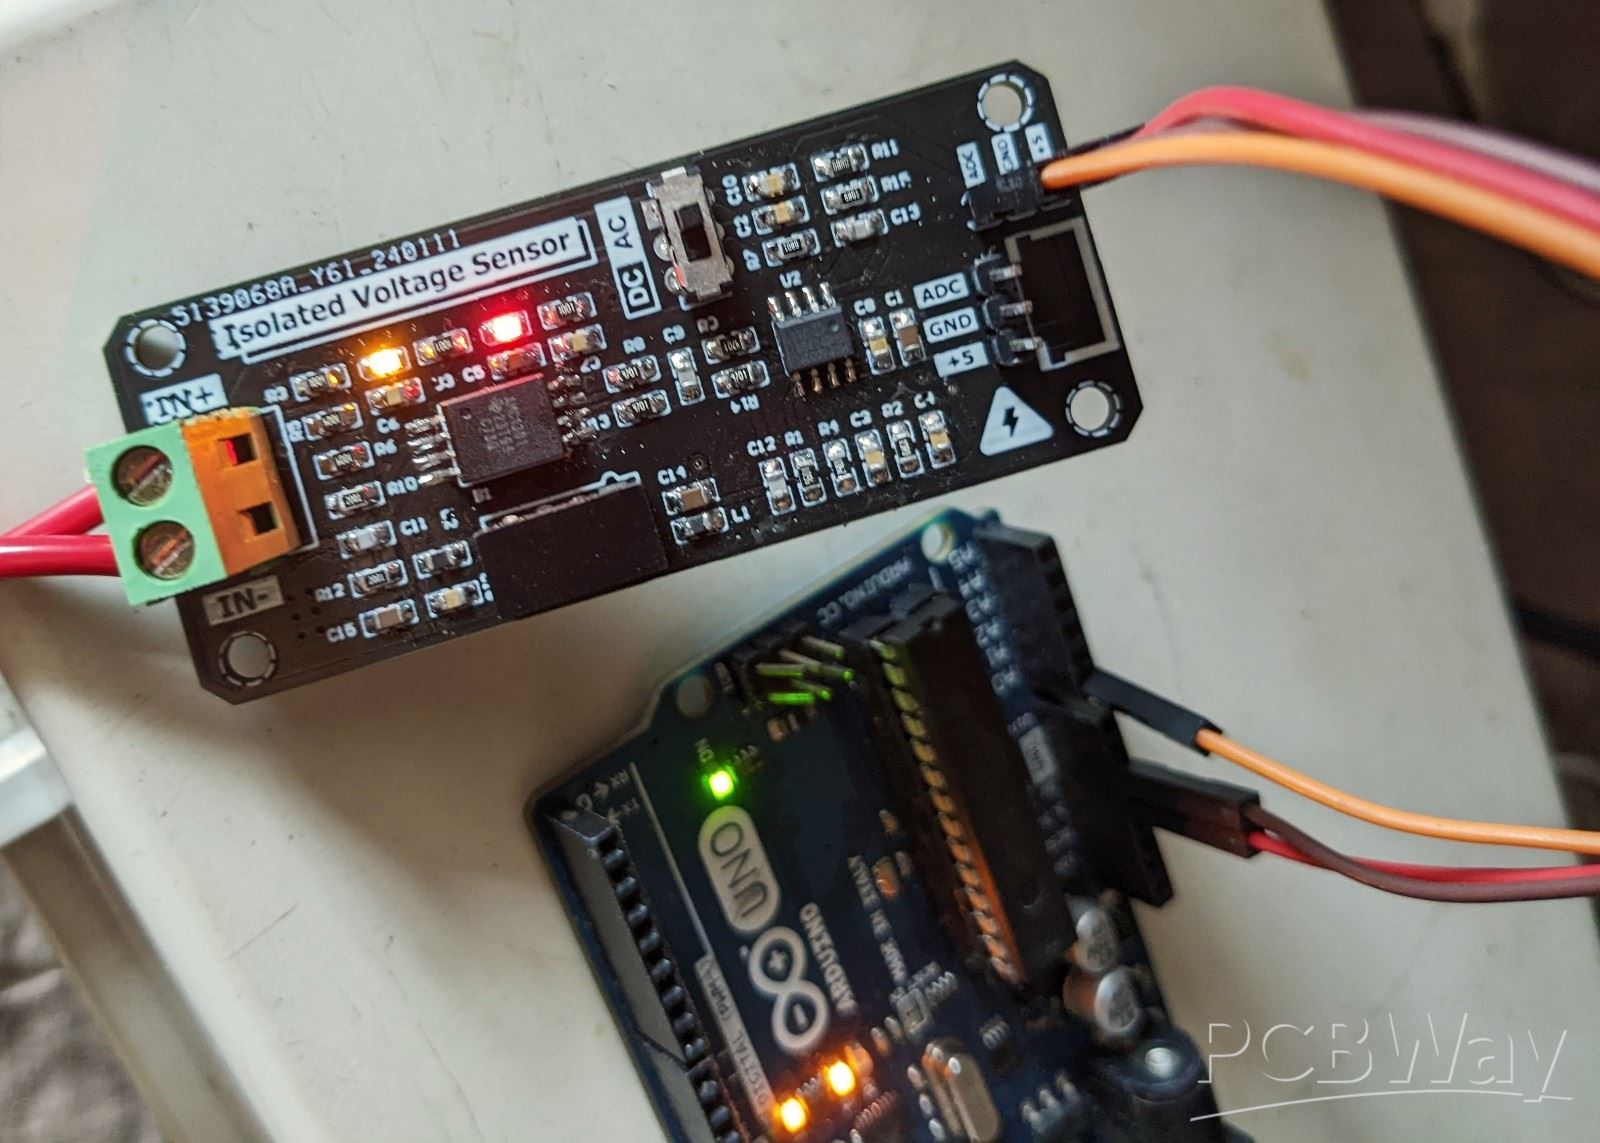
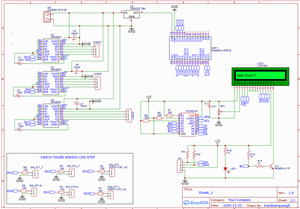
High Voltage to Isolated ADC Signal Conversion Module1. Principle: Interfacing a Differential-Output (Isolated) Amplifier to a Single-Ended Input ADCThis project follows the principle introduced in th...
High Voltage AC/DC to Isolated ADC Signal Conversion Module
1118
0
3
Heo Nie
Heo Nie
VIETNAM
0
0
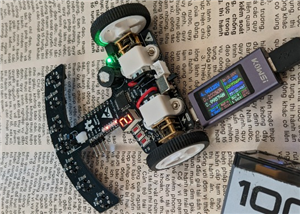
SharksBot V4 is a compact, self-driving line-following robot, capable of precise navigation using infrared sensors. It is specifically designed for educational and research purposes in PCB hardware de...
Line Fllow Car Bot - SharkBot V4
546
0
0
Trình Công
Trình Công
VIETNAM
0
0
VIDEOSUMMARYThe emergence of a large number of household appliances that use electricity leads to the great challenges of managing electricity efficiently. Effective power management will help save en...
Design and execute sensor network application for monitoring the electric power.
2387
0
1
qtruongsmt
qtruongsmt
VIETNAM
0
0
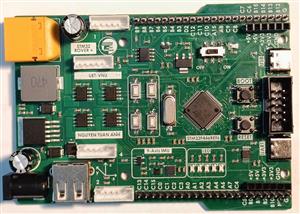
Good day everyone,This is a special development board based on the STM32F446RET6 microcontroller. The board can be used as a standard STM32 development board by connecting external sensors and actuato...
Multi-Purpose STM32 Microcontroller Development Board for Education
1064
0
2
Nguyen TAnh
Nguyen TAnh
VIETNAM
1
0
In August 2021, I got an idea to make a robot be able to draw pictures on a wall. After many days researching, designing, and programming, I finally finished a robot that could draw any pattern on a w...
Fumik: Open-source, wall drawing robot
2688
4
4
baank83
baank83
VIETNAM
3
0
ATMEGA8 line sensor using ADC.This is control broad with 8 led.
ATmega8 ADC Line Sensor 8LED
1611
0
0
Võ Văn Thành
Võ Văn Thành
VIETNAM
1
0
I have built this control driver based on the prototype schematic, and it has been tested in real operation with 100% functionality and no minor errors.The component names are already printed on the t...
Driver Yiroshi mini classAB amplifier
2379
1
1
WTE VN
WTE VN
VIETNAM
6
0
Dangerous Protoboard: xQFP. Prototype board for working with xQFP chips and SMD parts. Great for getting started with a new microcontroller. It has footprints for:32-80pin xQFP packages, eac...
Prototype board for working with xQFP chips and SMD parts
2797
0
2
Tuan?PHAM
Tuan?PHAM
VIETNAM
5
0
This project is a custom-designed PCB controller for CNC machines, focusing on reliability, precision, and ease of integration. The goal is to create a compact and cost-effective solution that can con...
CNC PCB Machine Controller Board
415
4
2
Quang Doan
Quang Doan
VIETNAM
0
0
AirSENSE-Mobile is an open-source portable air quality monitoring system designed to measure and visualize environmental conditions in real time. The project focuses on collecting air quality data usi...
AirSENSE-Mobile – ESP32-Based Portable Air Quality Monitoring System
298
0
2
Chi Tuyen Le
Chi Tuyen Le
VIETNAM
0
0
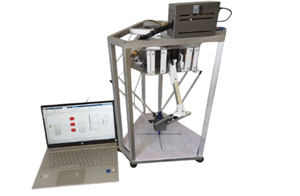
1. IntroduceThe project is fully titled "Research and Development of a Delta Robot Model Combining PID Controller to Optimize Accuracy and Speed During Operation" . Specifically, PID aims to opti...
Design of a Delta Robot Model combined with a PID Controller
150
0
1
Khoi Ngo
Khoi Ngo
VIETNAM
0
0
This is a motherboard using Raspberry pi RP2040 microcontroller with tmc2208 driverThe functions of this motherboard include:- Reverse polarity protection.- Expansion port for BLtouch.- Can control up...
Motherboard for 3d printer using rp2040 microcontroller
449
3
0
Mr Q
Mr Q
VIETNAM
1
0
Le mahjong est un jeu de société emblématique qui traverse les siècles sans perdre de sa popularité. Né en Chine, il s’est répandu dans le monde entier, séduisant les amateurs de réflexion et de strat...
jeu-mahjong.fr : Découvrez le mahjong, un jeu d’esprit entre tradition et stratégie
114
0
0
Jeu Mahjong
Jeu Mahjong
VIETNAM
0
0
IntrodutionThese are many open source and commercial about wifi sdcard out there. But it is too expensive, around $100, i dont try it yet, but i think it have much advantage like size, performance... ...
Sdcard wireless
581
0
0
tung bui
tung bui
VIETNAM
0
0
A.IntrodutionYou already hearing and using smart fan, so you knew what it is. This project will guide you to create one, as I said, cheap, smart and high quality, you have never seen before, yeah, per...
DIY home smart fan, cheap and high quality
1004
0
0
tung bui
tung bui
VIETNAM
0
0
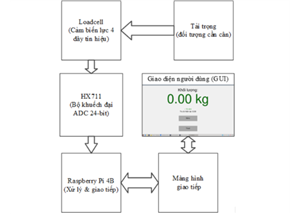
exit_button.pack(pady=50) update_id = root.after(100, update_weight) root.mainloop()finally: cleanup_gpio()
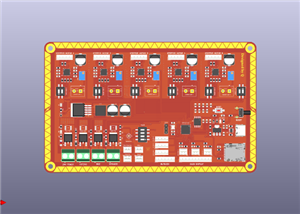
XÂY DỰNG VÀ ĐÁNH GIÁ ĐỘ ỔN ĐỊNH CỦA HỆ THỐNG CÂN TRONG MÔI TRƯỜNG NHIỆT ĐỘ
348
1
0
Engineer
Engineer
VIETNAM
0
0
1
2
3
4