Summary: If you've already seen the Addon Battery YD-ESP32-S3 board I made to give autonomy to the YD ESP32 S3 development boards, you might be wondering: what could its application be?
If you've already seen the Addon Battery YD-ESP32-S3 board I made to give autonomy to the YD ESP32 S3 development boards, you might be wondering: what could its application be?
Well, the simple answer is, anything that needs autonomy, for example in my case I am using it to measure soil moisture using the FC-28 moisture sensor.

My objective is to be able to measure the humidity in various locations in the gardens where I live and transmit it using LoRa to a base station that will send this data to the Internet. This is the initial premise; however, this can be extrapolated to more sensors, such as temperature sensors, pH sensors, CO2 sensors, and anything else that needs to be analyzed in a given area.
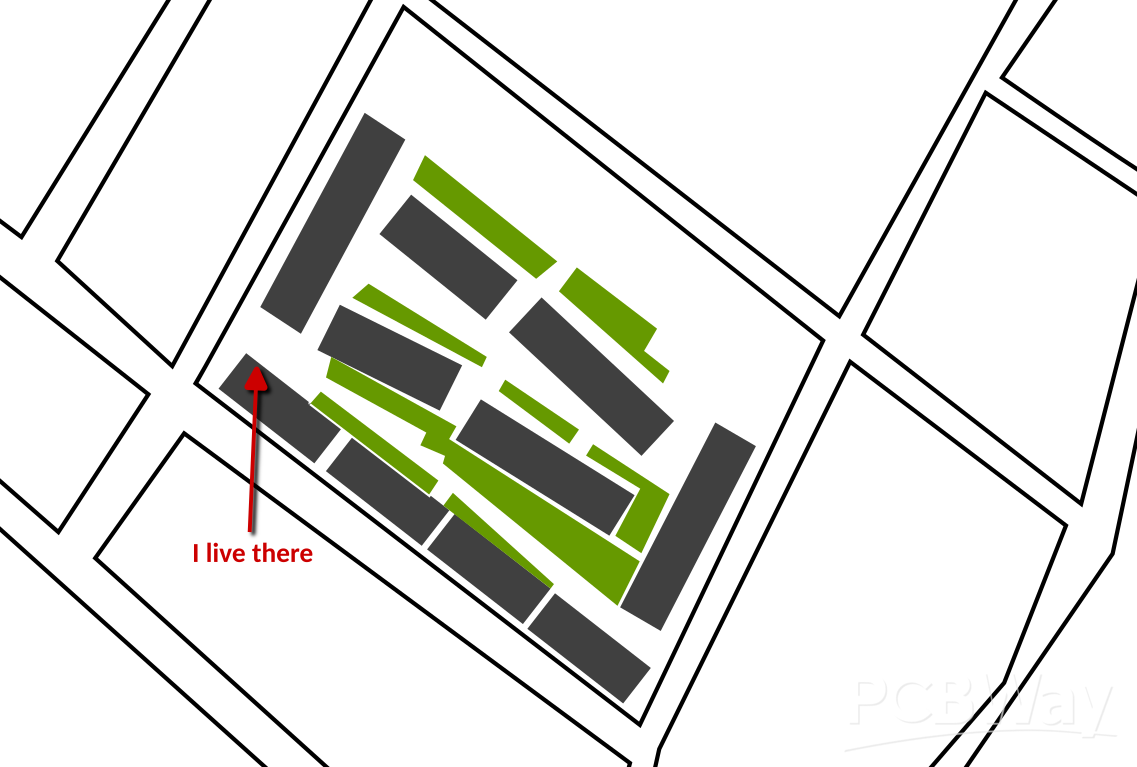
The areas painted green are the gardens; the closest garden to my house is 20 meters away and the furthest is more than 100 meters away, and I also don't have line of sight, which is why I decided to use LORA.
The hardware I'm using is simply the YD-ESP32-S3 Battery Addon with a battery, an ESP32-S3, and a RYLR993_Lite module.
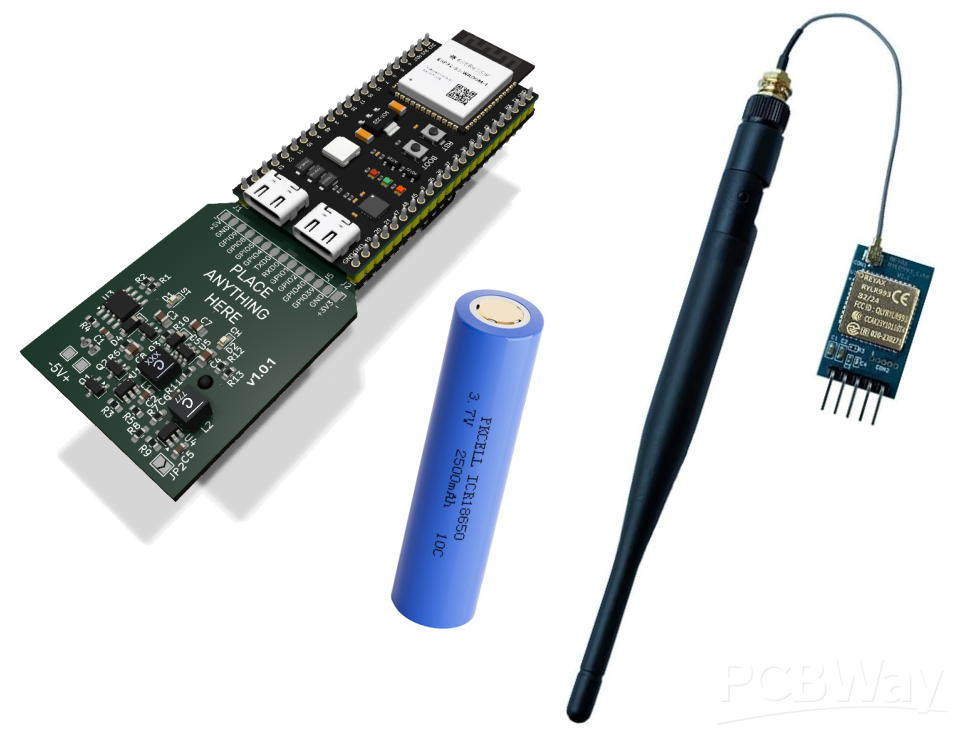
I had previously tested the RYLR998 module, which surprised me with its low power consumption. However, the problem with this module was its antenna limitations. My goal is to create a long-range device for installation in the garden, so I needed a module that allowed for an external antenna.
The RYLR993 Lite module was the solution, as it offers the same advantages as the previous module, is compatible with LoRa WAN, and also uses an external antenna that can be removed from the circuit to prevent contact with water or moisture.
These modules come in two formats: the individual RYLR993 module and the RYLR993 Lite. Each has a different purpose. The Lite is useful for quick proof-of-concept testing, as you connect a serial-USB cable and can start using it in a couple of minutes with AT commands. On the other hand, the RYLR993 module must be integrated onto the PCB. Since the autonomy board was designed to give autonomy to an ESP32-S3, a specific application integrating any LORA module was not considered.
To attach the LORA module to the autonomy board, it was necessary to remove all components from the underside of the RYLR993_Lite PCB, as this would provide a flat surface for attaching with double-sided tape.
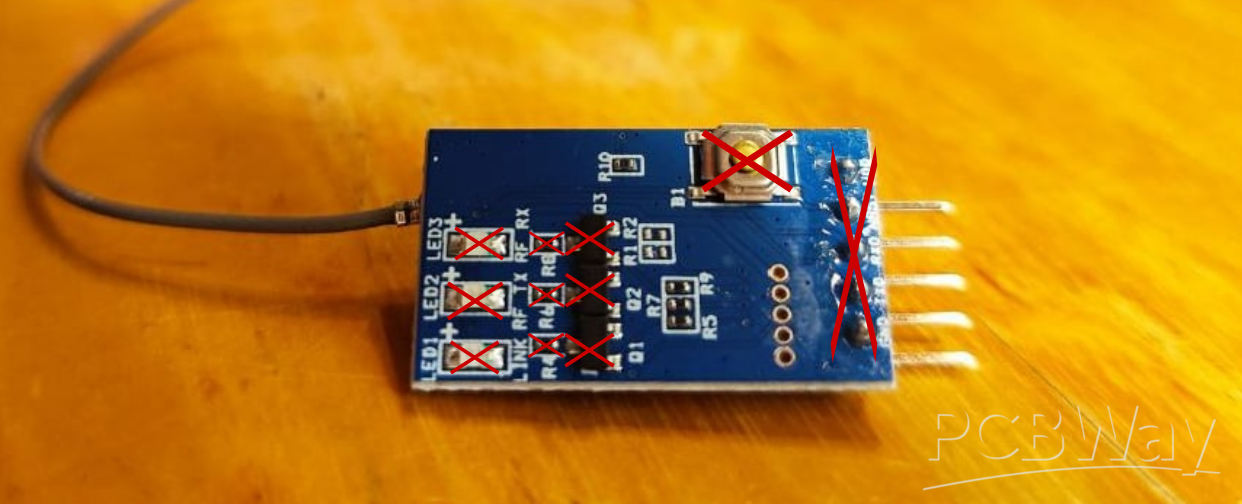
These components are used to power the LEDs and reset the module, but they are not necessary for our intended application.
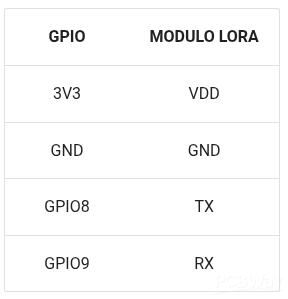
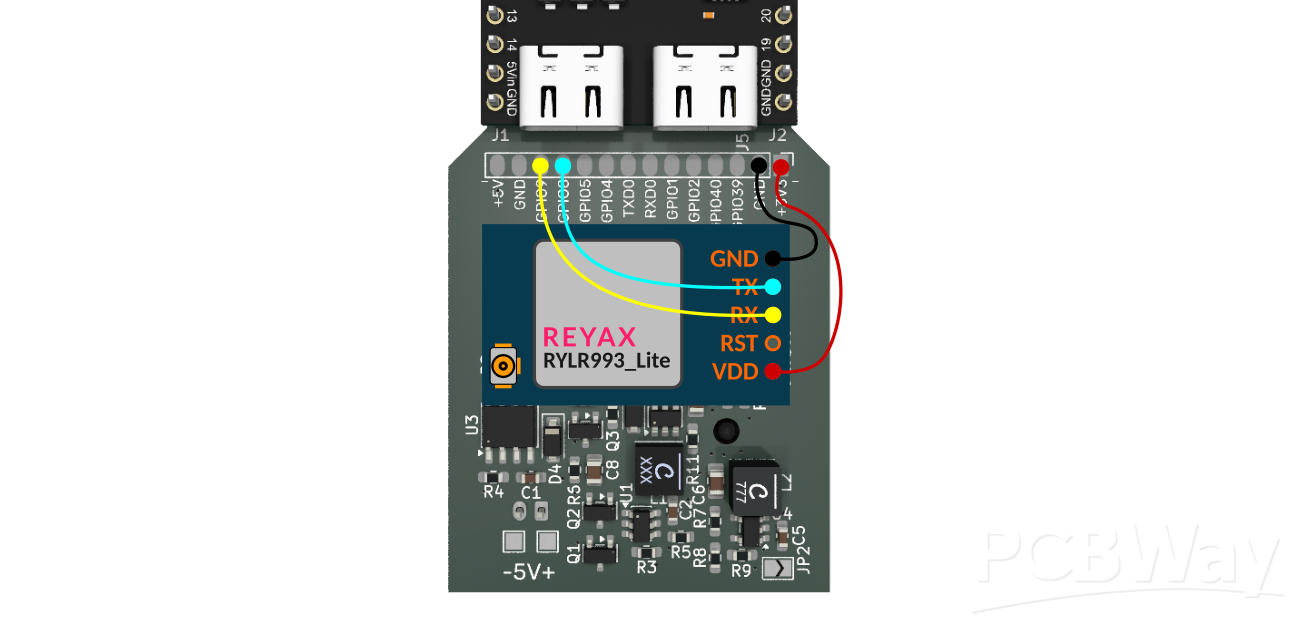
Now, connect the LoRa module to the battery board as shown in the following pins.
It would look something like this; the only drawback is that it covers the charging and status indicator LEDs!
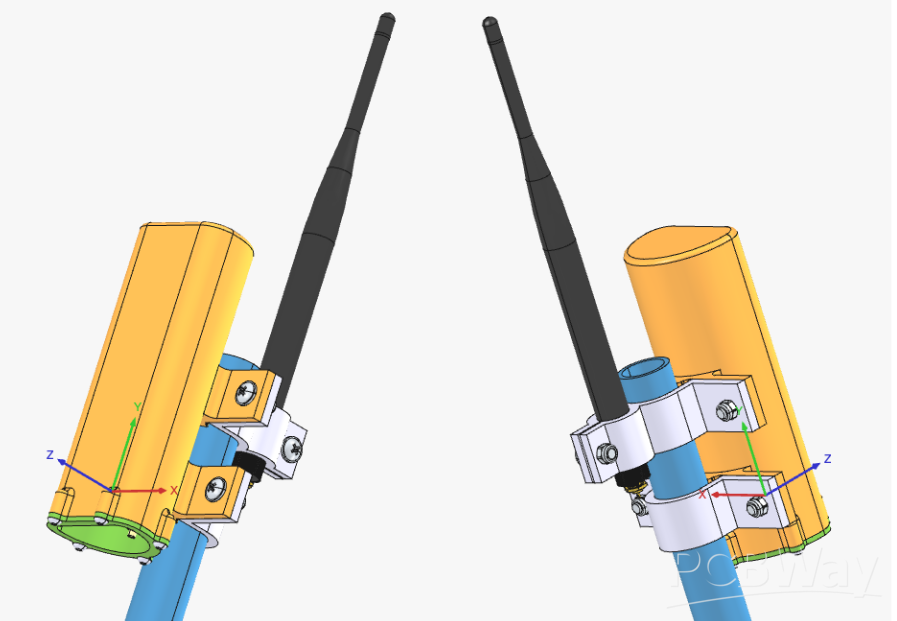
I designed the housing in FreeCAD, and it has a cylindrical shape with a lid at the bottom to prevent splashes. It also has clamps that can be adjusted to different sizes; in my case, a 1/2" PVC pipe. Additionally, one of the supports has an adapter to connect the 915 MHz antenna.
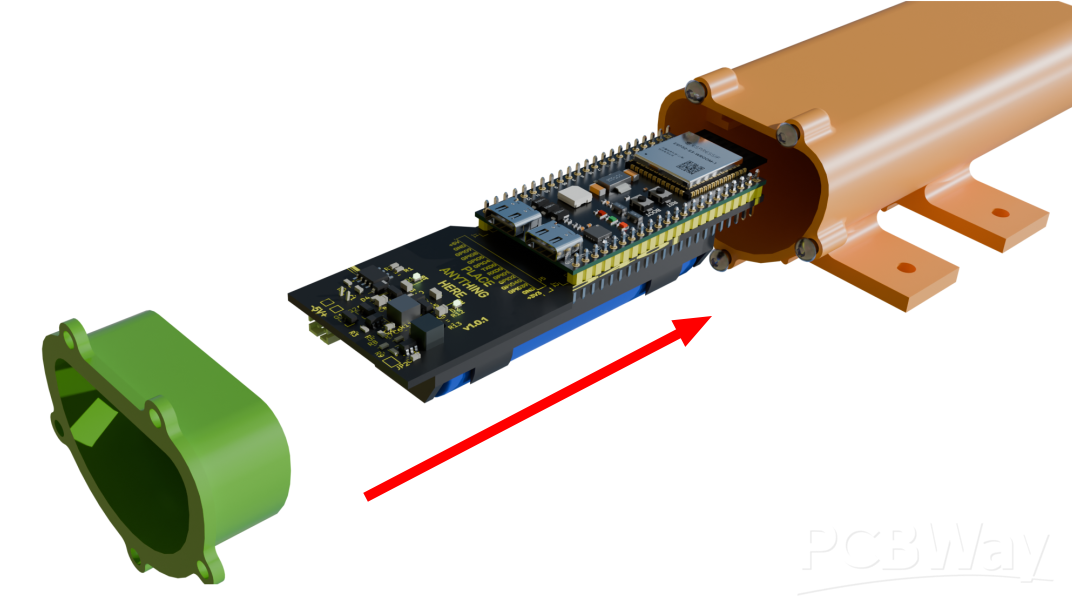
The PCB is inserted as a sort of rail into the casing, as seen in the following image.
Okay, from here on it's just programming and data analysis, so for now I'll leave it at this point and promise to complete it later with the program and test results.
The manufacturing files are on PCBWay, both for the enclosure and the PCB.
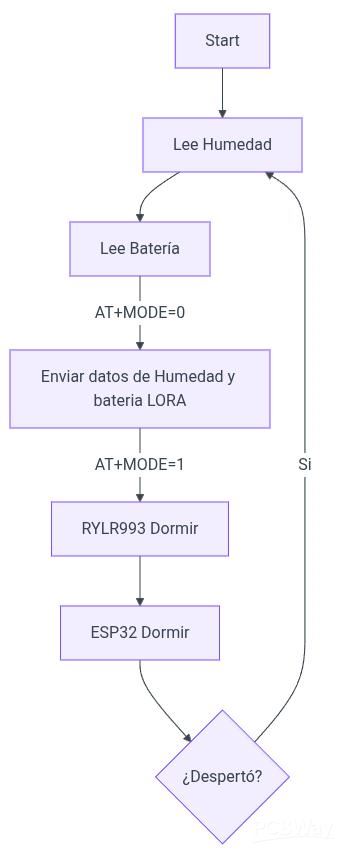
Since this device must have very low power consumption, a logic system must be implemented to maximize battery energy usage.
The stages I propose are as follows: