


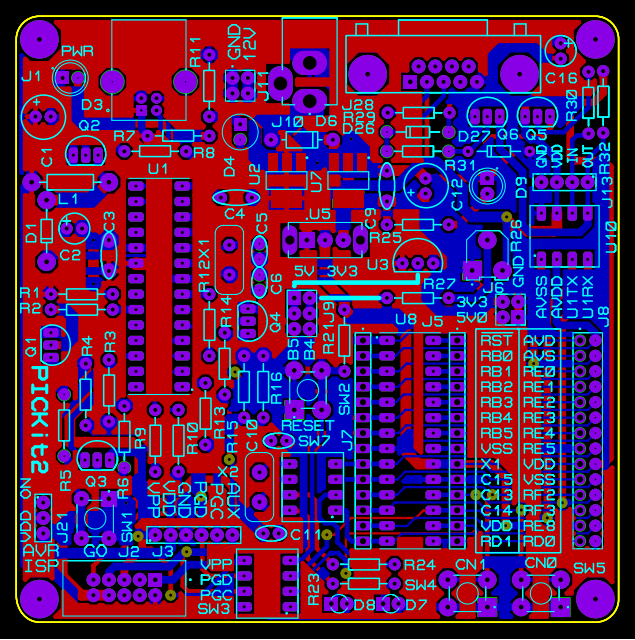
Small dsPIC30F2010 and dsPIC30F1010 Prototype Board
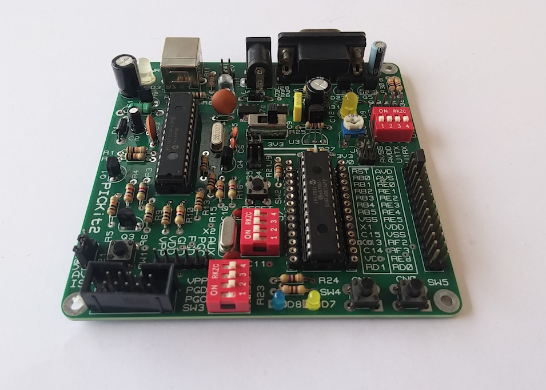
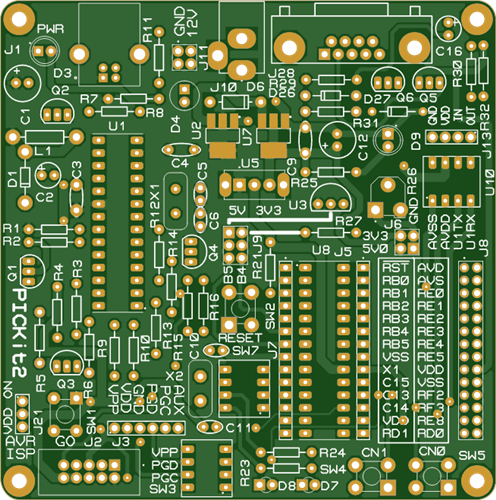
I designed a small experiment board for dsPIC30F2010 for my own micro-controller firmware testing. It could help saving time and avoid device burning due to wrong wiring circuit.
These DIP micro-controllers can easily prototype on a breadboard. However we can create a simple prototype board for these chip from scratch. I designed a prototype board for these chips with a PICKit2 programmer to make it self and easier to prototype.
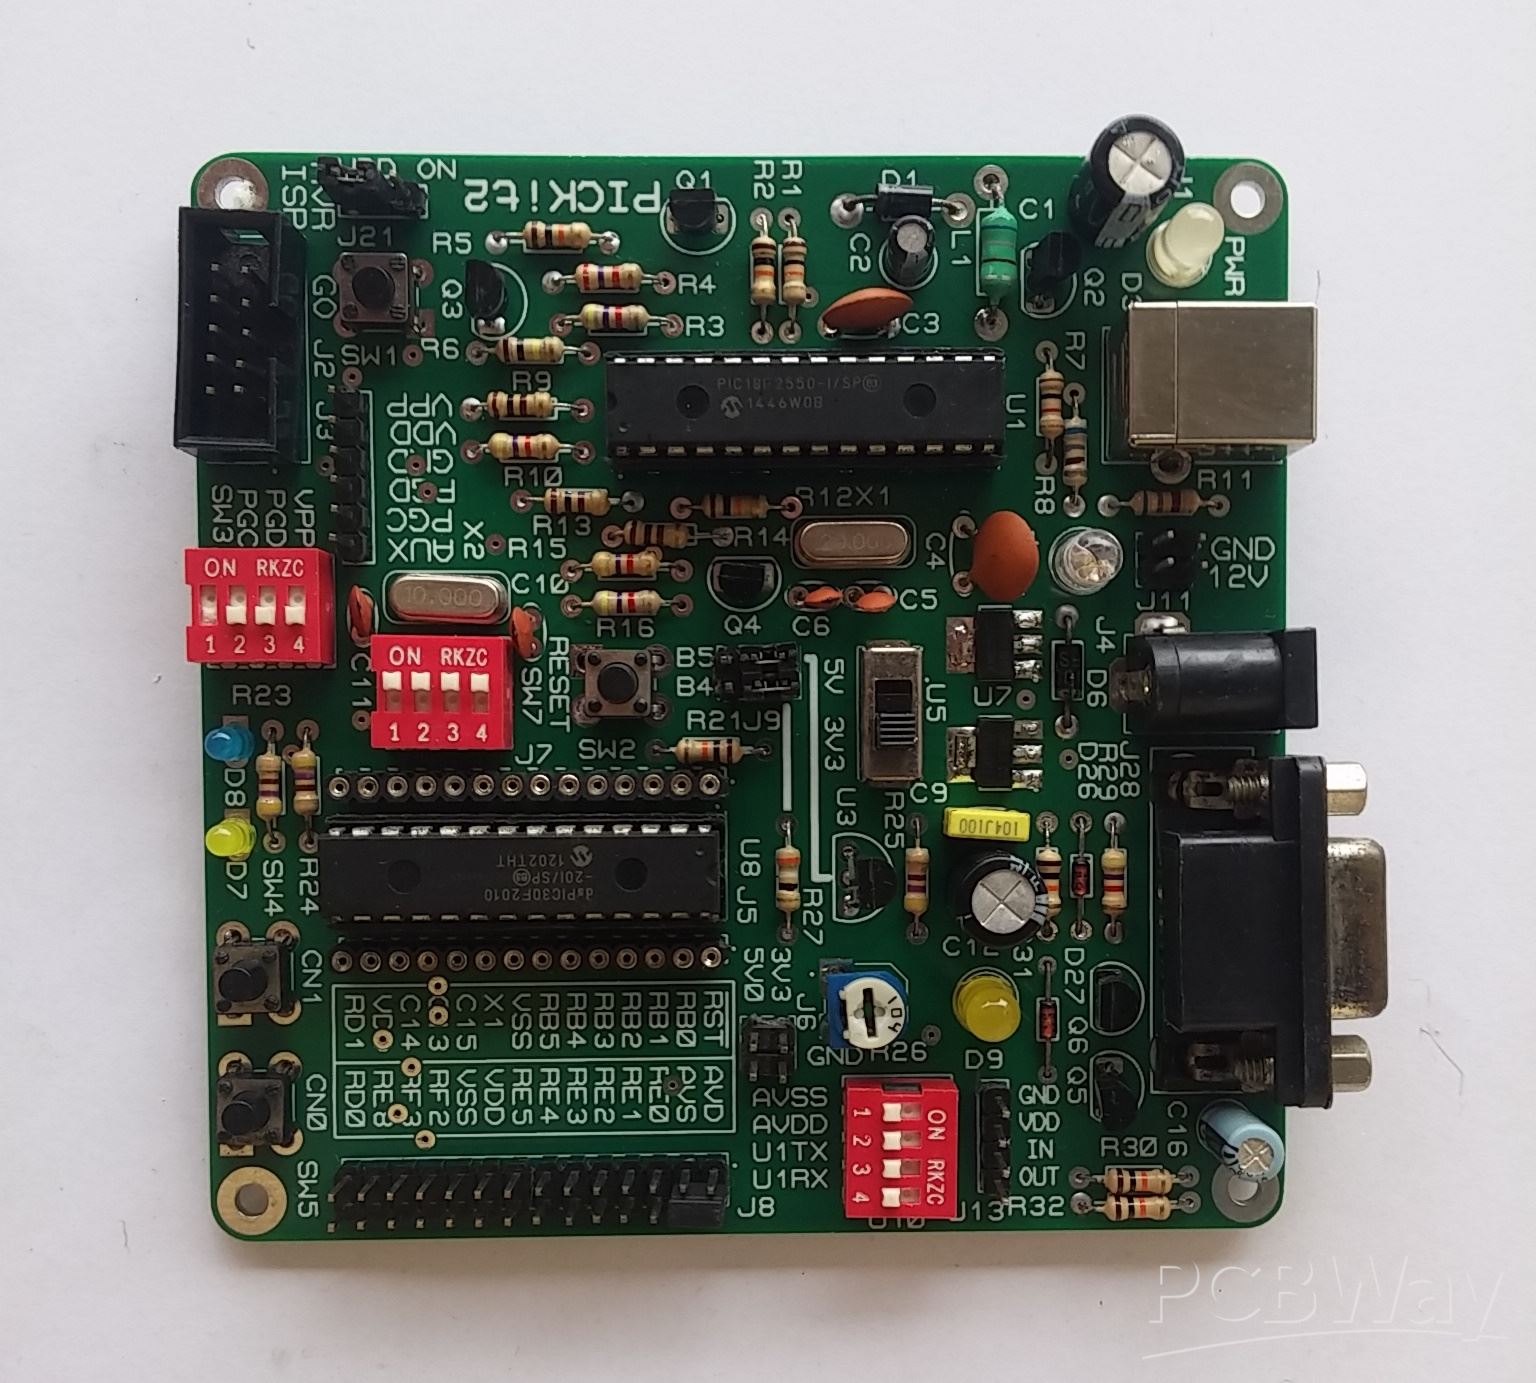
I putted some major modules on this board:
- PICKit2 programmer
- dsPIC30F2010 and dsPIC30F1010 IC socket
- RS-232 to TTL converter
- ADC inputs
- Switches inputs,
- LEDs outputs
- Male header for external connection
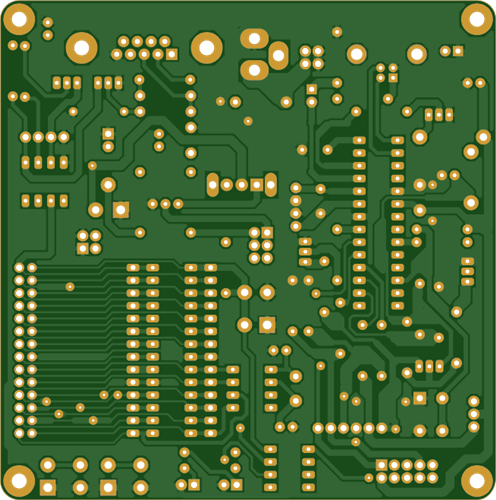
This PCB is approximately 10cmx10cm in size. I use two layers of copper because it is convenience. Furthermore this size of PCB is very low cost to fabricate using any popular PCB manufacturer such as PCBWay .
This micro-controller could be programmed using MPLabX XC16 C or Assembly, CCS PICC, MikroC etc.
I tested this PCBA with some programming language I know.
- Complete Project Link
https://aki-technical.blogspot.com/2025/07/a-diy-dspic30f2010-and-dspic30f1010.html
- CCS PICC Example Code #1
https://aki-technical.blogspot.com/2025/09/dspic30f2010-prototype-board-ccs-picc.html
- CCS PICC Example Code #2
https://aki-technical.blogspot.com/2025/09/dspic30f2010-and-dht-11-environmental.html
- CCS PICC Example Code #3
https://aki-technical.blogspot.com/2025/09/dspic30f2010-and-ds18b20-temperature.html
Small dsPIC30F2010 and dsPIC30F1010 Prototype Board
*PCBWay community is a sharing platform. We are not responsible for any design issues and parameter issues (board thickness, surface finish, etc.) you choose.


Raspberry Pi 5 7 Inch Touch Screen IPS 1024x600 HD LCD HDMI-compatible Display for RPI 4B 3B+ OPI 5 AIDA64 PC Secondary Screen(Without Speaker)
BUY NOW


- Comments(1)
- Likes(0)
More by DIY Electronics
-
 Small dsPIC30F2010 and dsPIC30F1010 Prototype Board
I designed a small experiment board for dsPIC30F2010 for my own micro-controller firmware testing. I...
Small dsPIC30F2010 and dsPIC30F1010 Prototype Board
I designed a small experiment board for dsPIC30F2010 for my own micro-controller firmware testing. I...
-
 PIC16F876A RTC with seven segments display
I use PIC16F876A, DS1307, and 0.8 inch seven-segment display to make this digital clock. The firmwar...
PIC16F876A RTC with seven segments display
I use PIC16F876A, DS1307, and 0.8 inch seven-segment display to make this digital clock. The firmwar...
-
 PIC16F928A DIY 50MHz Frequency Meter
I use PIC16F628A programmed using CCS PICC to make a simple DIY frequency meter. It can measure up t...
PIC16F928A DIY 50MHz Frequency Meter
I use PIC16F628A programmed using CCS PICC to make a simple DIY frequency meter. It can measure up t...
-
 ICL7107 DIY DVM
I use ICL7107 ADC chip with seven-segment display to design this simple DVM. It doesn't need any pro...
ICL7107 DIY DVM
I use ICL7107 ADC chip with seven-segment display to design this simple DVM. It doesn't need any pro...
-
 ATMega16 AVR Development Board For Students And Hobbyists
OverviewAfter a few years of making the AVR...
ATMega16 AVR Development Board For Students And Hobbyists
ATMega16 AVR Development Board For Students And HobbyistsOverviewAfter a few years of making the AVR...
-
 Making a PCB UV Expose Timer Using PIC16F876A With MPLABX XC8
In this design, I use the following stuffs to make a timer work well for my personal use:A variable ...
Making a PCB UV Expose Timer Using PIC16F876A With MPLABX XC8
In this design, I use the following stuffs to make a timer work well for my personal use:A variable ...
-
 A PCB Of The Stereo Audio Amplifier With TEA2025B
TEA2025B is a analog stereo audio amplifier with an output power up to 3W. It requires a single end ...
A PCB Of The Stereo Audio Amplifier With TEA2025B
TEA2025B is a analog stereo audio amplifier with an output power up to 3W. It requires a single end ...
-
 The PCB of a DIY CPLD experimental board with XC9572 and XC95108
This board requires a external JTAG cable to program the device. The JTAG cable could be a legacy co...
The PCB of a DIY CPLD experimental board with XC9572 and XC95108
This board requires a external JTAG cable to program the device. The JTAG cable could be a legacy co...
-
 Making a small CPLD learning board with XC9536
XC9536 is a minimum CPLD of the XC9500 CPLD series. It come with 36 macro-cells with 800 available g...
Making a small CPLD learning board with XC9536
XC9536 is a minimum CPLD of the XC9500 CPLD series. It come with 36 macro-cells with 800 available g...
-
-
ARPS-2 – Arduino-Compatible Robot Project Shield for Arduino UNO
2529 0 5 -
A Compact Charging Breakout Board For Waveshare ESP32-C3
2981 3 8 -
AI-driven LoRa & LLM-enabled Kiosk & Food Delivery System
3188 2 1 -
-
-
-
ESP32-C3 BLE Keyboard - Battery Powered with USB-C Charging
3254 0 2


