|
Altium DesignerAltium Designer
|
|
|
|
Andonstar Digital Microscopehttps://andonstar.com/
|
|
|
|
SMD Rework StationKada
|
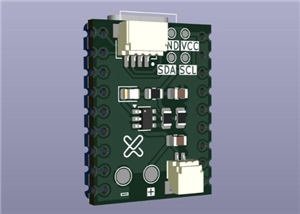
How to make Arduino Pro Micro at Home

Watch Full Video:
https://youtu.be/UU-Tbn8yXEk
Read Article:
https://www.electroniclinic.com/how-to-make-arduino-pro-micro-at-home-altium-designer/
In today’s episode, we are going to make Arduino Pro Micro. My first video in this products designing series was based on the 5V and 3A power supply, which I successfully tested. And I have been using it to power up my Arduino projects, ESP32 based projects, Raspberry Pi Pico, ESP8266 and so on. Even I have been using it to charge my cell phone. So, I am pretty satisfied with this 5V and 3A power supply. I have added a link in the description if you want to learn how to make this 5V and 3A power supply.
Now, the 2nd video in this series is based on the Arduino Pro Micro. This is the one I have designed and I am going to share with you each and every detail; including
1. Its circuit diagram, PCB Design, and how to generate Gerber files.
2. How to place online order on a PCB Manufacturing website "PCBWay".
3. From where to purchase SMD components?
4. How to apply Solder Paste onto the PCB, how to place SMD components, and the soldering using SMD rework station.
5. How to burn Bootloader on Arduino Pro Micro? And
6. Testing.
During the testing phase, first I will start by powering up the Arduino Pro Micro using the Laptop and then I will use my designed 5V and 3A power supply to power up the Arduino Pro Micro. And of course, I will write some basic code to control an LED to practically demonstrate that everything works perfectly. So, without any further delay; let’s get started!!!
Amazon Purchase links:
*****************
Arduino Pro Micro
https://amzn.to/3JsNiXA
Andonstar Digital Microscope
https://amzn.to/3Wypi9P
SMD Rework Station
https://amzn.to/3Fa3yKz
non-magnetic ESD tweezers
https://amzn.to/3Dt02Lf
Other must-have Tools and Components:
Arduino Uno, Nano, Mega, Micro "All types of Arduino Boards":
https://amzn.to/3fk5OTi
Top Arduino Sensors:
https://amzn.to/3vZbnfM
Super Starter kit for Beginners
https://amzn.to/3cq56C5
Top Oscilloscopes
https://amzn.to/3ctF3d8
Variable Supply:
https://amzn.to/2PEAqE7
Digital Multimeter:
https://amzn.to/2QGRPg1
Top Soldering iron kits: "best"
https://amzn.to/39nqDtb
Top Portable drill machines:
https://amzn.to/3suQMh7
Jumper Wires:
https://amzn.to/2NYPEDA
3D printers:
https://amzn.to/3ruG1dt
CNC Machines:
https://amzn.to/3cuZWVv
Electronics Accessories:
https://amzn.to/3sueV7z
Hardware Tools:
https://amzn.to/3m9UhaN
DISCLAIMER: This video and description contain affiliate links, which means that if you click on one of the product links, I will receive a small commission. This helps support the channel and allows me to continue to make videos like this. Thank you for your support!
****************
How to make Arduino Pro Micro at Home
*PCBWay community is a sharing platform. We are not responsible for any design issues and parameter issues (board thickness, surface finish, etc.) you choose.

Raspberry Pi 5 7 Inch Touch Screen IPS 1024x600 HD LCD HDMI-compatible Display for RPI 4B 3B+ OPI 5 AIDA64 PC Secondary Screen(Without Speaker)
BUY NOW- Comments(0)
- Likes(2)
-
 laine thomas
Aug 30,2024
-
 Shahzada Fahad
Mar 15,2023
- 0 USER VOTES
- YOUR VOTE 0.00 0.00
- 1
- 2
- 3
- 4
- 5
- 6
- 7
- 8
- 9
- 10
- 1
- 2
- 3
- 4
- 5
- 6
- 7
- 8
- 9
- 10
- 1
- 2
- 3
- 4
- 5
- 6
- 7
- 8
- 9
- 10
- 1
- 2
- 3
- 4
- 5
- 6
- 7
- 8
- 9
- 10
 More by Shahzada Fahad
-
 How to make Arduino Pro Micro at Home
Watch Full Video:https://youtu.be/UU-Tbn8yXEkRead Article:https://www.electroniclinic.com/how-to-mak...
-
 Arduino developement board
You can use this Development board for developing Arduino Nano based projects.
-
 Arduino Nano and A4988 Stepper Motor Controller
In this tutorial, you will learn how to use the most popular A4988 Stepper Motor Driver with Arduino...
-
 Relay H-Bridge Module for Arduino
High ampere Relay H-bridge Module for DC motors. This Relay H-bridge module can be easily interfaced...
-
 One Channel Relay Module for Arduino
This is a one-channel relay module based on the 12vdc SPDT type relay. This relay module can be used...
-
 NRF24L01 and Arduino Nano based Wireless Industrial Temperature Monitoring System
Using the NRF24L01 transceiver modules you can monitor and control different processes. You can eith...
-
 Talking RFID Bike Control system
In this tutorial, you will learn how to make a talking RFID bike control system using Arduino Nano, ...
-
 ESP32 Camera Development Board Top Circuit Board
Esp32 Camera Development board for all of your image processing based projects with sensors monitori...
-
 ESP32 Camera Development Board Bottom Circuit board
ESP32 Camera Development board bottom circuit. Read complete article on https://www.electroniclinic....
-
 Social Distancing Project against Covid-19 Coronavirus based on Arduino Nano, Ultrasonic Sensor, and LED Module
I this tutorial, you will learn how to make a Social Distancing Project based on the Arduino Nano an...
-
 Women Safety Device with GSM and GPS location tracking, Smart Purse
Any Purse can be converted into to a smart purse with the women safety device provided with a wirele...
-
 Diy World Clock, Wall Clock, iot World Clock
DIY World Clock Video Tutorial:https://youtu.be/w0bavL0FH5IDIY Wrold Clock Article Download Circuit ...
-
 ESP32 Power Supply
This Power supply board can also be used as the development board. As you can see I have added the m...
-
 Password Door Lock Security System using Arduino and Keypad
in this tutorial, you will learn how to make the most efficient Password protected door lock securit...
-
 Reyax rylr890/rylr896 LoRa based Sensor monitoring using Arduino
This is my second tutorial on the Reyax rylr890/rylr896 15km 915Mhz Transceiver module. In this epis...
-
 Arduino Power Supply Module
While working on any electronics based project you always need a power supply to power up your senso...
-
 Nodemcu ESP8266 Power Supply
Thanks for such high Quality PCBs. You can watch the Project making video by visiting my YouTube cha...
-
 Password security system and time controlled machine
Watch Video Tutorials in which these PCBs are used.Time controlled Machine:https://youtu.be/cdm6ndMw...
-
A Compact Charging Breakout Board For Waveshare ESP32-C3
477 3 4 -
AI-driven LoRa & LLM-enabled Kiosk & Food Delivery System
488 2 0 -
-
-
-
ESP32-C3 BLE Keyboard - Battery Powered with USB-C Charging
683 0 1 -
-
mammoth-3D SLM Voron Toolhead – Manual Drill & Tap Edition
672 0 1 -
-
AEL-2011 Power Supply Module
1343 0 2 -
AEL-2011 50W Power Amplifier
1224 0 2


