Compared with traditional manufacturing, 3D printing design optimization enables an integrated workflow from design to production, offering substantial economic and social benefits.
At the prototyping stage, 3D printing is mainly used for rapid and low-cost sample fabrication, helping engineers test appearance, structure, and functionality — dramatically shortening R&D cycles. In the production stage, it is particularly suitable for small-batch, customized parts (such as medical implants and aerospace components) and lightweight 3D printed structures with complex geometries.
However, in practical applications, 3D printing cost reduction depends heavily on early design decisions. Even a minor modification can significantly affect printing time, material consumption, and post-processing effort.
This article presents 10 practical 3D printing design tips and best practices from structural, material, and process perspectives — showing you how to reduce 3D printing costs through effective, cost-aware design strategies.
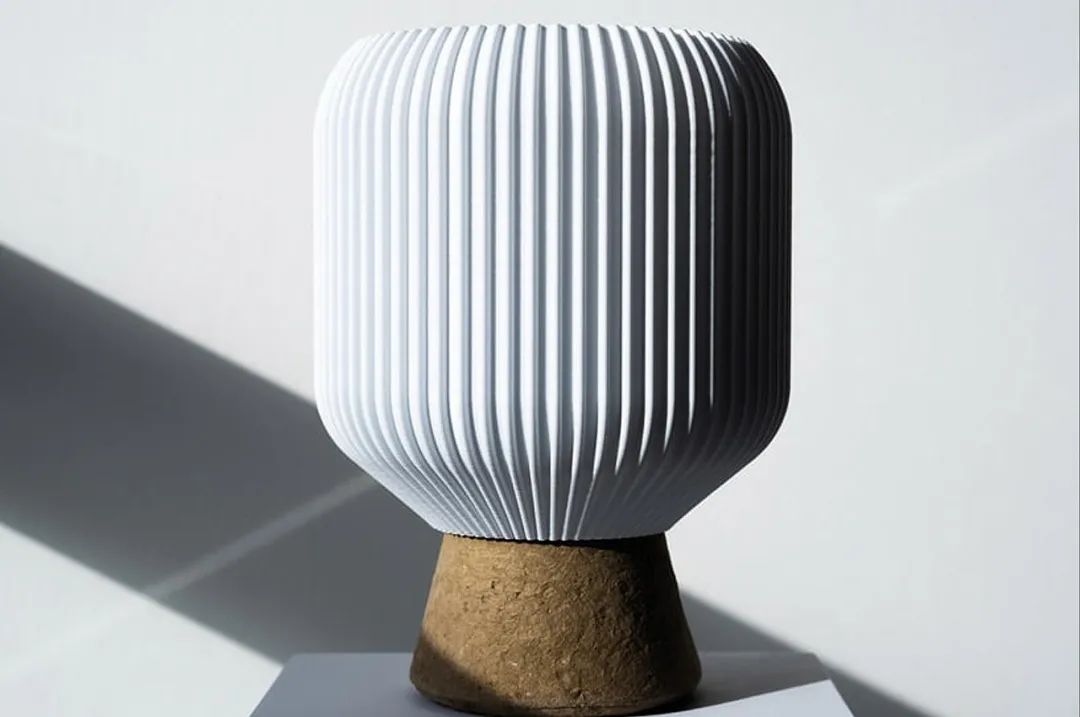
When working on cost-effective 3D printing design, practice minimalism. Delete micro text or details smaller than your printer’s resolution — they won’t print clearly and can extend print time. Replace complex decorations with simple geometries or smooth surfaces to minimize material usage in 3D printing and reduce slicing time.
If internal geometry changes do not affect strength, make the model hollow. Solid prints waste time and filament, increasing total cost.

Adjust the layer height in the slicer to balance precision and efficiency. In most FDM 3D printing setups, increasing layer height reduces total layers, resulting in improved 3D printing efficiency with minimal impact on surface quality.
Orient parts to limit overhangs and generate supports only where essential. Support material not only increases cost but also adds time to removal and finishing.
Use bridging structures or self-supporting geometries (like arches or straight bridges) to reduce support structures in 3D printing, lowering both material waste and post-processing labor.
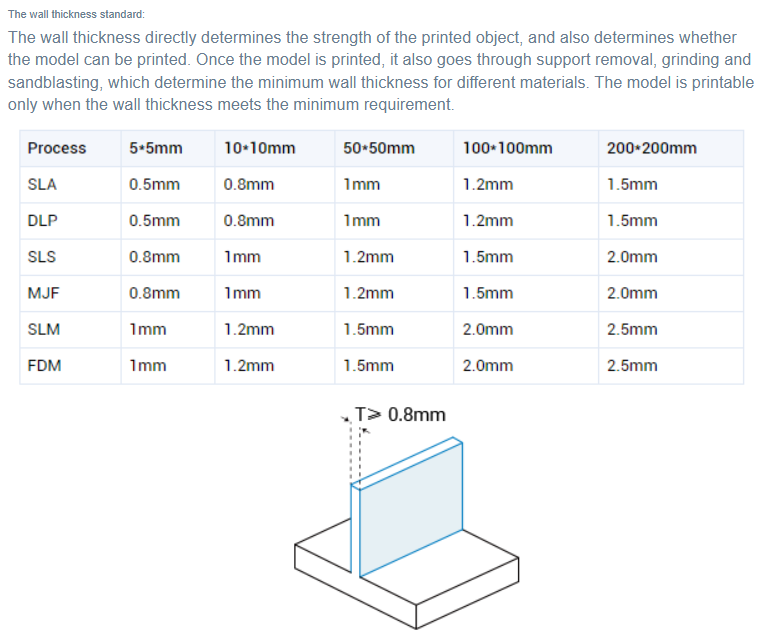
Keep wall thickness consistent throughout the model. If local reinforcement is needed, use ribs or fillets rather than thickening the entire model. Uneven wall thickness causes uneven cooling, leading to warping, cracking, or surface dents. A practical approach is to slightly increase wall thickness (2–3 perimeters) and top/bottom thickness (4–6 layers) while using a lower infill percentage—this achieves good strength with less material.
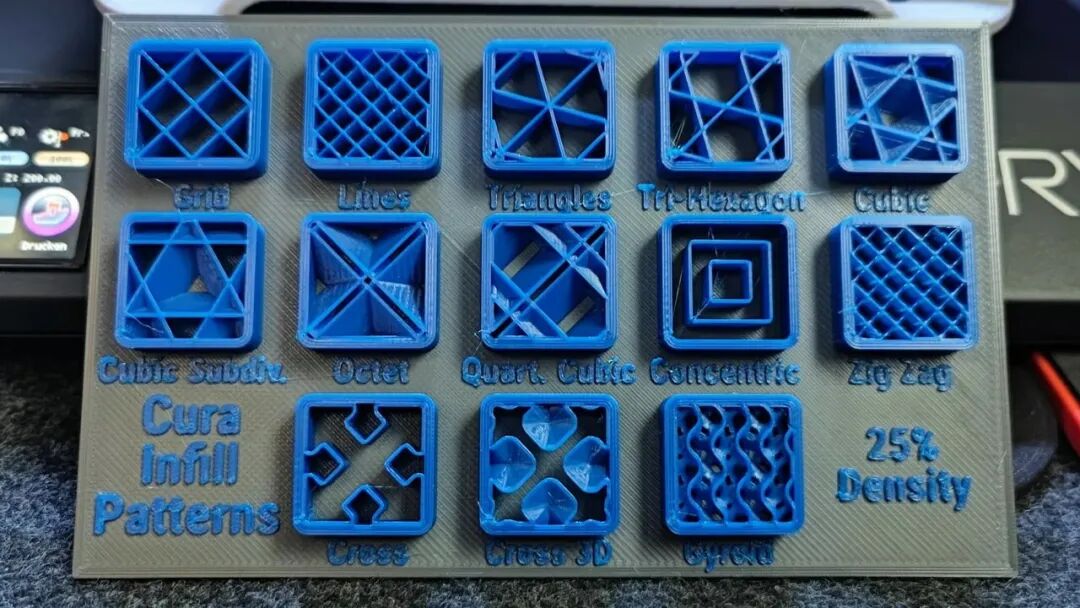
Each pattern has unique performance characteristics:
Grid – The most balanced choice for general applications, offering good strength, print speed, and reliability.
Honeycomb – Excellent strength-to-weight ratio, ideal for structural or load-bearing parts, though it prints slightly slower.
Lines – Best for display models or large prototypes where strength is not required; fastest printing pattern.
Gyroid or Gradient – For large, lightweight, or hollow models where infill density is concentrated only where support is needed, minimizing time and material.
0%–15% (Low density): For visual models and prototypes, providing basic internal support.
15%–25% (Standard density): The “sweet spot” for most functional parts, toys, and consumer products.
50%–100% (High density): For heavy-duty parts or testing prototypes; however, beyond 25%, strength gain becomes marginal while time and cost rise sharply.
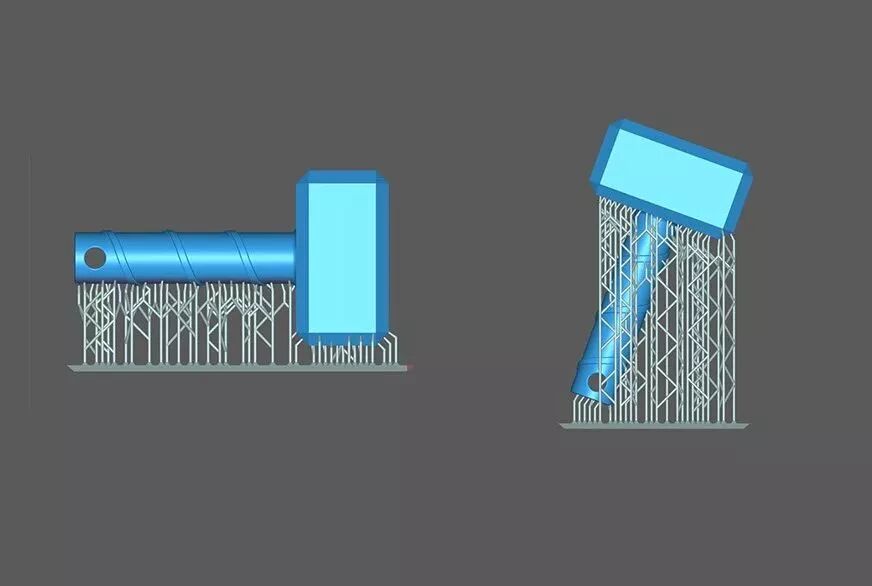
a. Analyze the model’s load direction and align layer lines parallel to the main force to improve strength (since interlayer bonding is weaker).
b. Place visible surfaces facing upward for a smoother finish; avoid support contact on critical appearance areas.
c. Minimize model height along the Z-axis and use the largest flat surface as the base to reduce layer count and printing time while improving bed adhesion.
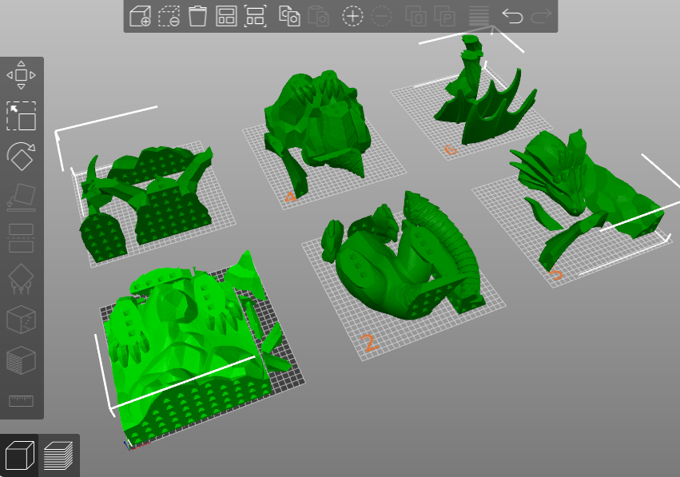
Divide large or complex models into smaller modules for 3D printing design for manufacturability—such as separating a figure into head, body, and limbs.
Each part can then be oriented and printed optimally, improving success rate and reducing support.
This modular approach is especially effective in prototype cost reduction projects.
Material choice greatly influences 3D printing cost and performance:
Resin (SLA/DLP/LCD): Extremely high precision and smooth surfaces but brittle and UV-sensitive; ideal for figurines, jewelry molds, dental models, and display parts requiring fine detail.
Nylon (PA): High strength, flexibility, and wear resistance but moisture-sensitive and difficult to print; suitable for gears, hinges, clips, and drone frames.
PLA: Easy to print and rigid but brittle and low heat resistance; ideal for concept models, educational projects, and low-load prototypes.
PETG: Balanced strength and toughness with good weather and chemical resistance; suitable for outdoor housings and functional parts.
ABS: Strong and heat-resistant but prone to warping and emits odor during printing; suitable for automotive parts, LEGO-like blocks, and durable housings.
You can read this article to learn more. Proper material selection for 3D printing ensures you pay only for the performance you need — a cornerstone of cost-effective 3D printing design.
These methods cure liquid resin with light, making thin walls fragile. Keep minimum wall thickness ≥1 mm. Walls thinner than 0.2 mm may not print correctly or may break during cleaning and post-curing. Add temporary supports for overhanging structures.
Since FDM relies on molten filament deposition, maintain at least 1 mm spacing between narrow features to allow proper cooling and prevent deformation — a small but crucial 3D printing design best practice for process efficiency.
Avoid unnecessary high resolution for non-critical areas
Not every section requires maximum precision. Use lower layer heights (0.1–0.15 mm) for key appearance surfaces and higher layer heights (0.2–0.28 mm) for internal or hidden areas. This simple adjustment can dramatically reduce 3D printing costs without sacrificing quality.
Plan for surface quality during modeling—minimize support contact areas and smooth joining surfaces to reduce sanding, painting, and assembly work later.
Incorporate decorative textures such as leather, mesh, or matte finishes to disguise layer lines. This approach enhances appearance while saving manual labor and finishing costs.
Design decisions directly determine the core cost of 3D printing. A poor design can exponentially increase total cost by extending print time, consuming more material, complicating post-processing, and raising the failure rate.
Conversely, a well-optimized design—through simplified geometry, minimized supports, and process-specific adaptation—can achieve the ideal balance between cost, quality, and efficiency, unlocking the true value of additive manufacturing.


