Failed prints and difficult support removal are among the most common sources of waste in 3D printing. They increase cost, reduce surface quality, and consume unnecessary time and material. Fortunately, many of these print failures can be avoided in the 3D printing design stage.
This article shares practical 3D model optimization techniques to avoid print failure, reduce support material, and improve overall printing success rate — so you get strong, reliable, and high-quality printed parts.
Fixing issues after slicing is never as effective as preventing them through proper additive manufacturing design rules. ot every model can be saved once printing starts — but smart design can stop those issues from ever happening.
Excessive Overhangs
When unsupported areas exceed a material’s bridging capability (typically >45° or horizontal spans >5–10 mm), layers sag, curl, or collapse, leading to failed 3D prints.
Insufficient Bed Adhesion
Parts with very small footprints or high center of gravity detach easily due to shrinkage forces and nozzle movement. Once detachment begins, the print is usually lost.
Thin Walls or Slender Features
Narrow pillars or thin walls are prone to bending under nozzle forces or later use. Stress concentrates at layer boundaries, increasing the risk of breakage.
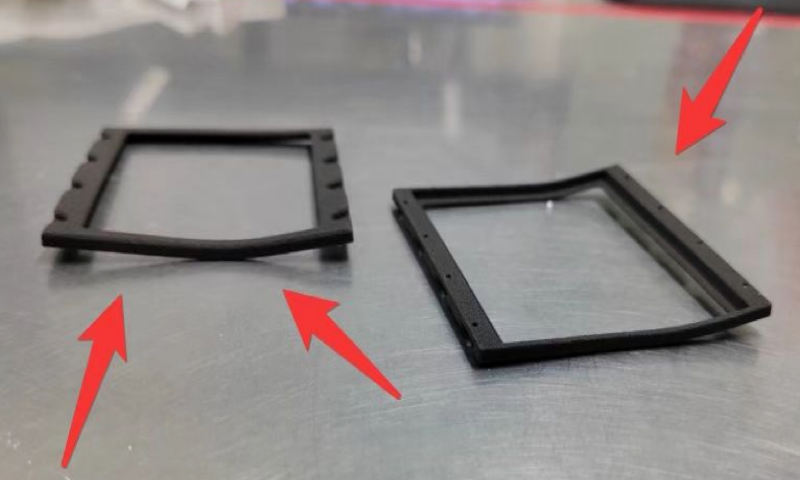
Thermal Deformation: Warping & Layer Separation
Uneven cooling causes shrinkage. With materials like ABS or Nylon, the upper layers may contract faster than lower layers, producing upward curling. Accumulated internal stress may suddenly crack the part or separate layers.
Wall Thickness Mismatch with Fill Structure
Reducing reliance on supports is key to minimize supports and reduce filament waste in 3D printing.
Follow the 45° Rule
Most FDM printers struggle to print unsupported angles beyond 45°. Keeping overhangs within this limit improves printing reliability.
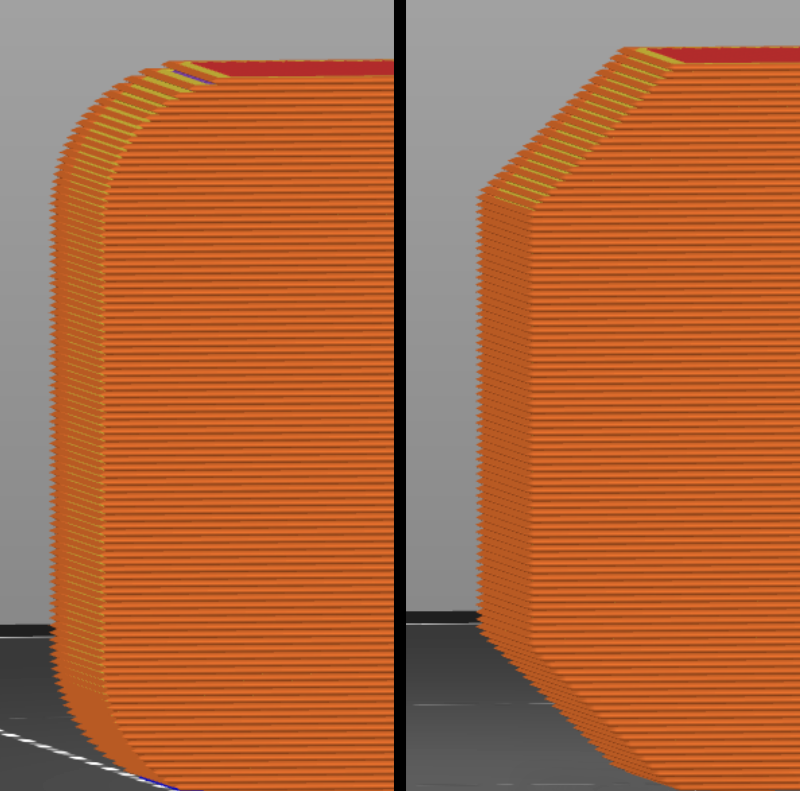
Use Bridges Instead of Large Overhangs
Bridges span between two supported points. Convert large sloped overhangs into stepped segments to make them self-supporting.
Add Fillets or Chamfers at the Root
Where vertical features extend outward (tabs, brackets, lugs), add rounded or angled transitions to relieve stress and improve printability.
Design for Self-Support
Ensure each layer has underlying material. This reduces the need for support structures and prevents print failure caused by unsupported geometry.
Splitting complex parts can improve 3D printing success, speed up printing, and reduce wasted material.
Isolate Problem Areas
Separate portions with deep cavities, steep overhangs, or internal features that require heavy supports.
Hide Seams for Better Surface Quality
Align split lines along natural transitions or shadowed areas to keep assembly seams invisible. Each segment can then be oriented for optimal support reduction.
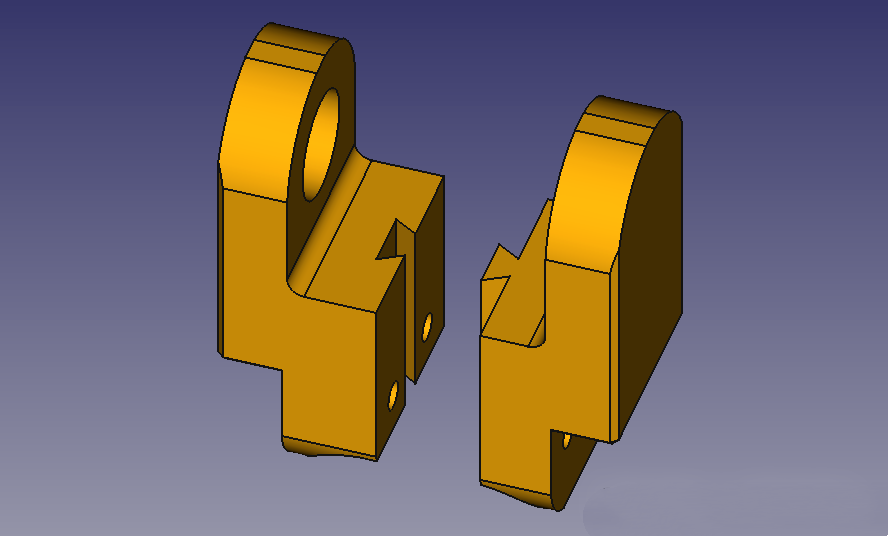
Add Alignment Features
Use snap-fits, keys, dowel holes, or alignment tabs to ensure precise positioning. Good joint design enhances structural strength and assembly reliability.
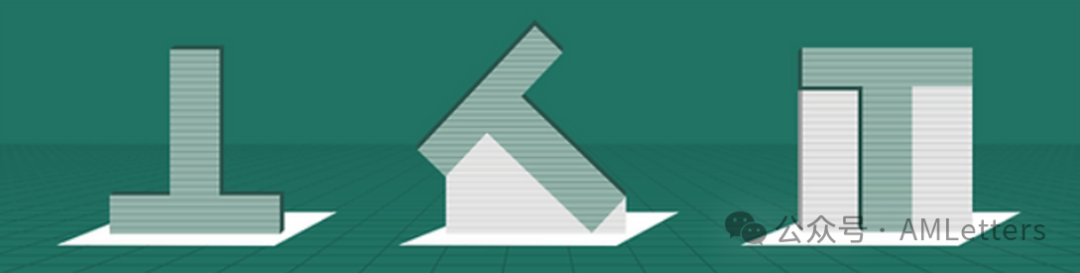
Add Larger Bases or Rounded Bottom Edges
Increasing contact area improves adhesion and prevents warping. Rounded transitions also relieve internal stress.
Avoid Tall, Slender Features Standing Alone
Small footprints are unstable when the nozzle exerts sideways force. Use ribs, tapered forms, or wider bases to stabilize the print.
Optimize Center of Gravity and Load Paths
Orient parts so primary stresses act parallel to layer direction. This enhances part strength and prevents tipping during printing.
Avoid Weak Thin Walls and Sharp Points
Needle-like or unsupported tiny features often break during printing or post-processing. Reinforce roots with fillets if needed.
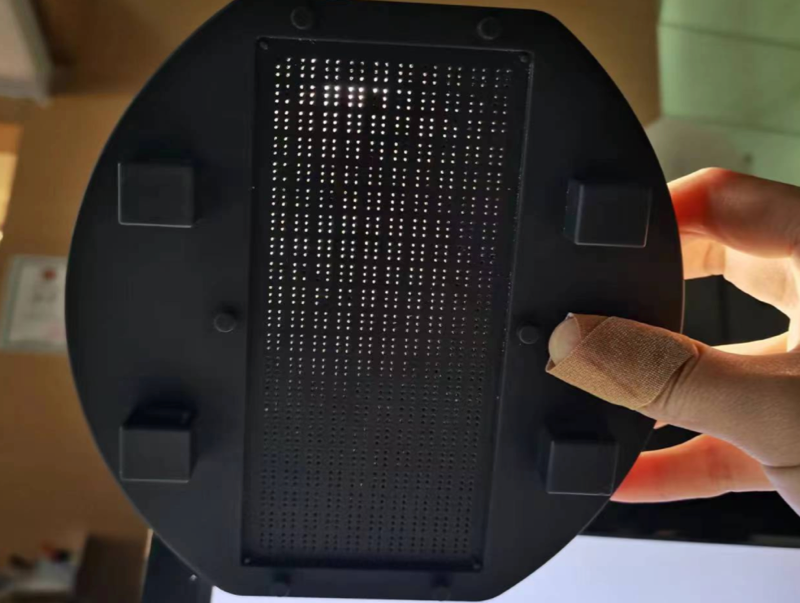
Strengthen Key Stress Zones
Add ribs on the back of plates or enclosures to prevent deformation and cracking. Smooth transitions reduce stress accumulation.
Account for Clearance in Holes & Slots
Due to dimensional deviations in most FDM printers, leave proper tolerance to ensure successful assembly without sanding or drilling.
Improving support strategy reduces support material, enhances surface finish, and lowers cleanup time.
Use Chamfers/Bridges to Reduce Supports
Modify geometry to remove unsupported features entirely. Converting vertical edges into shallow slopes is the most effective way to minimize supports.
Avoid Support in Hard-to-Reach Areas
Supports should attach to non-visible or non-functional surfaces. Internal cavities or deep slots can trap supports and make removal impossible — redesign those regions instead.
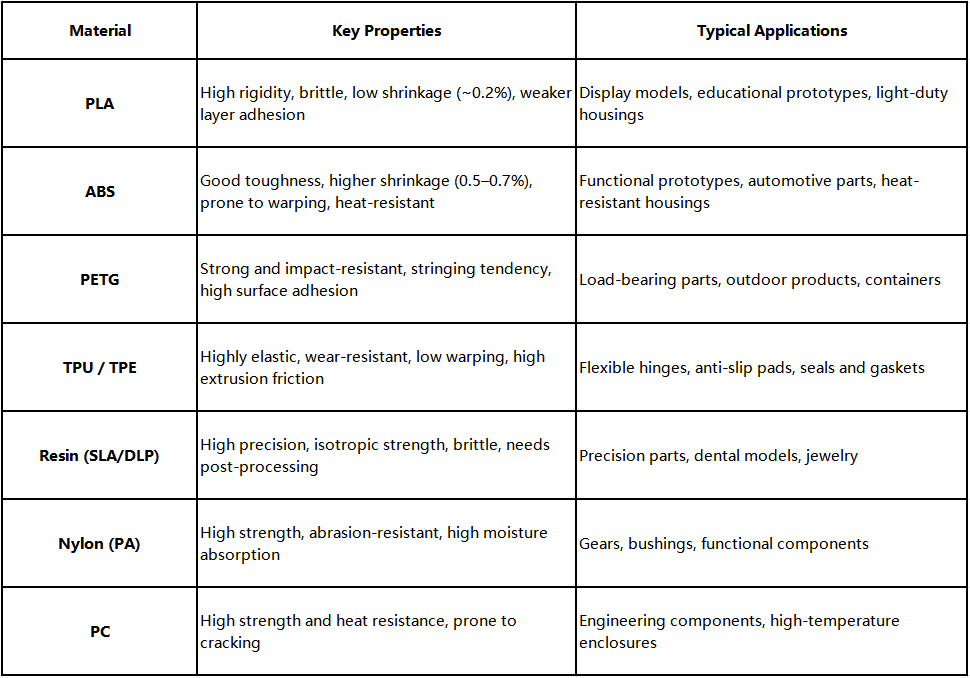
Before finalizing geometry, clarify functional requirements and environment conditions, then select a material that matches those needs. From there, apply design strategies that respect each material’s characteristics to ensure 3D printing success.
The essence of 3D printing design is a deep collaboration with the capabilities and limitations of each process. By understanding critical constraints, designers can proactively shape models that are reliable and efficient to print. Use 3D printing design strategies to prevent print failures and produce high-quality parts.
If you want to learn how to reduce 3D printing costs, read this article: 10 Ways to Reduce 3D Printing Costs Through Smarter Design Optimization
You can use our online quoting service to get 3D printed items.


