


Object lifter with servo and Arduino Nano
Does your waist or back hurt when you bend down? So this invention, it's for you and it can help you!!! Today we will see how to build a clamp to lift objects, which are on the floor or perhaps at a certain height. Just by pressing a couple of buttons, in the command circuit, you can operate a 360-degree MG995 servo motor, which will open or close a clamp that will allow you to raise different objects without any difficulty. In the event that it is rubbish or some dirty object, it will not allow us to put our hands in contact thus avoiding contamination. The brain of the circuit will be an Arduino nano, and the printed circuit is included completely free of charge.
materials
An Arduino nano

The Arduino Nano is a small board, complete and compatible with the test board based on the ATmega328 (Arduino Nano 3.x). It has about the same functionality as the Arduino Duemilanove, but in a different package. It only lacks a DC power connector and works with a Mini-B USB cable instead of a standard one.
microcontrollerATmega328architectureAVROperating voltage5 VFlash memory32 KB of which 2 KB uses the bootloaderSram2 KBClock speed16 MHzAnalog pins IN8Eeprom1 KBDC current by I/O pins40 mA (I/O pins)Input voltage7-12 VDigital I/O Pins22 (6 of which are PWM)PWM output6Energy consumption19 mAPCB size18 x 45 mmweight7g
Pin diagram

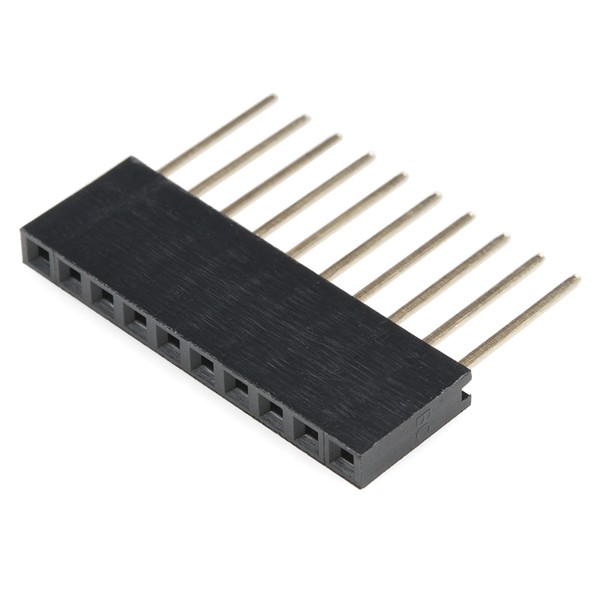
A socket for the Arduino nano

Male pins

A 1Kohm resistor

A LED diode

A pcb

Download gerber file –> Pinza_levanta_objetos
A 360-degree MG995 servo motor (with accessories)

The mg995 – 360o, is a continuous rotation servo (360o) is a variant of the normal servos, in which the signal we send to the servo controls the rotationspeed, rather than the angular position as happens in conventional servos.
This continuous rotation servo is an easy way to get a motor with speed control, without having to add additional devices such as controllers or encoders as in the case of DC motors or step by step, since the control is integrated into the servo itself.
specs
- Gear material: Metal
- Turning Range: 360
- Operating voltage: 3 V to 7.2 V
- Unloaded operating speed : 0.17 seconds / 60 degrees (4.8V); 0.13 seconds / 60 degrees (6.0V)
- Torque: 15 kg / cm
- Working temperature: -30oC to 60oC
- Cable length: 310 mm
- Weight: 55g
- Dimensions: 40.7 mm x 19.7 mm x 42.9 mm
Includes:
- 1 Servomotor Tower Pro Mg995 continuous rotation.
- 3 Screws for assembly.
- 3 Coples (horns).
Female pins
3-wire telephone cable

Aluminium profile 12 x 12 (to build the clamp)

Screws and nuts


Electronic diagram

source code
//Código para servo MG995 de 360 grados
#include <Servo.h>//Librería para el control del servo
//Variables
int BT1 = 2;
int BT2 = 3;
int BT1_ESTADO;
int BT2_ESTADO;
Servo myservo;  // Creanos un objeto servo para el control del servo
void setup() {
  pinMode(BT1, INPUT_PULLUP);// Botón en el pin 2
  pinMode(BT2, INPUT_PULLUP);// Botón en el pin 3
  myservo.attach(4);  // Usaremos el pin número 4 para el control del servo
}
void loop() {
  //Leemos el estado de los puldasores
  BT1_ESTADO = digitalRead(BT1);
  BT2_ESTADO = digitalRead(BT2);
  //Si se precionó el pulsador del pin 2 se cumple esta condición
  if(BT1_ESTADO == LOW){
   myservo.write(180);//Cerramos la pinza
    delay(100);
    }
  //Si se precionó el pulsador del pin 3 se cumple esta condición
   if(BT2_ESTADO == LOW){
   myservo.write(0); //Abrimos la pinza
    delay(400);
    myservo.write(90);//Detenemos la marcha del servo
    }
}
More proyects in https://www.youtube.com/user/carlosvolt?sub_confirmation=1
Object lifter with servo and Arduino Nano
*PCBWay community is a sharing platform. We are not responsible for any design issues and parameter issues (board thickness, surface finish, etc.) you choose.


Raspberry Pi 5 7 Inch Touch Screen IPS 1024x600 HD LCD HDMI-compatible Display for RPI 4B 3B+ OPI 5 AIDA64 PC Secondary Screen(Without Speaker)
BUY NOW


- Comments(0)
- Likes(0)
More by CarlosVolt Tutoriales
-
 Infrared stepper motor control with speed control
More info and updates https://rogerbit.com/wprb/2024/09/motor-paso-a-paso-x-infrarrojo/In this proje...
Infrared stepper motor control with speed control
More info and updates https://rogerbit.com/wprb/2024/09/motor-paso-a-paso-x-infrarrojo/In this proje...
-
 Uploading BME280 Sensor Data to ThingSpeak Using ESP32
In this tutorial, we will show you how to connect a BME280 sensor to an ESP32 to read temperature, h...
Uploading BME280 Sensor Data to ThingSpeak Using ESP32
In this tutorial, we will show you how to connect a BME280 sensor to an ESP32 to read temperature, h...
-
 Water pump control for irrigation via telegram and esp32
Water Pump Control by Telegram and ESP32 is an automated system that allows you to remotely control ...
Water pump control for irrigation via telegram and esp32
Water Pump Control by Telegram and ESP32 is an automated system that allows you to remotely control ...
-
 Air conditioning on/off control via telegram and esp32
In this tutorial we will see how to control an air conditioner, with an esp32 and the telegram appli...
Air conditioning on/off control via telegram and esp32
In this tutorial we will see how to control an air conditioner, with an esp32 and the telegram appli...
-
 35 watt stereo amplifier
In this video we will see how to build an audio amplifier, with the TDA7377 integrated circuit, and ...
35 watt stereo amplifier
In this video we will see how to build an audio amplifier, with the TDA7377 integrated circuit, and ...
-
 Laser alarm with RFID module
More info and updates in https://rogerbit.com/wprb/2024/08/alarma-laser-rfid/In this project, we bui...
Laser alarm with RFID module
More info and updates in https://rogerbit.com/wprb/2024/08/alarma-laser-rfid/In this project, we bui...
-
 Control lights by voice commands and keys
In this tutorial we will see how to create a device to control lights by voice commands, with a modu...
Control lights by voice commands and keys
In this tutorial we will see how to create a device to control lights by voice commands, with a modu...
-
 Stepper motor control x bluetooth and app
In this tutorial we will see a circuit, which controls a stepper motor, with an application made in ...
Stepper motor control x bluetooth and app
In this tutorial we will see a circuit, which controls a stepper motor, with an application made in ...
-
 DFplayermini x bluetooth mp3 player control
More info and updates in https://rogerbit.com/wprb/2022/12/dfplayermini-x-bluetooth/In this tutorial...
DFplayermini x bluetooth mp3 player control
More info and updates in https://rogerbit.com/wprb/2022/12/dfplayermini-x-bluetooth/In this tutorial...
-
 Robot with WiFi control and servos driven by ESP32
More info and updates in https://rogerbit.com/wprb/2023/07/robot-wifi/A robot controlled by Wi-Fi, s...
Robot with WiFi control and servos driven by ESP32
More info and updates in https://rogerbit.com/wprb/2023/07/robot-wifi/A robot controlled by Wi-Fi, s...
-
 How to make a water level meter with uln2803
In this tutorial we will see how to make a water level meter circuit with the built-in uln2803.The p...
How to make a water level meter with uln2803
In this tutorial we will see how to make a water level meter circuit with the built-in uln2803.The p...
-
 Color Detector with Arduino and OLED display
In this tutorial we will show you how to build a color detector using the TCS3200 sensor and an SH11...
Color Detector with Arduino and OLED display
In this tutorial we will show you how to build a color detector using the TCS3200 sensor and an SH11...
-
 DTMF decoder for handy with arduino, control over several kilometers
In this tutorial we will see how to make a circuit to connect to our handy, in this case a Baofeng U...
DTMF decoder for handy with arduino, control over several kilometers
In this tutorial we will see how to make a circuit to connect to our handy, in this case a Baofeng U...
-
 Turn on light from thindspeak with esp32
In this tutorial, we will show you how to control lights over the Internet using an ESP32 and the Th...
Turn on light from thindspeak with esp32
In this tutorial, we will show you how to control lights over the Internet using an ESP32 and the Th...
-
 MP3 player control with webserver using ESP32 WIFI
In this tutorial, you will learn how to build a web server using the ESP32 to control the YX5300 mod...
MP3 player control with webserver using ESP32 WIFI
In this tutorial, you will learn how to build a web server using the ESP32 to control the YX5300 mod...
-
 Time clock with fingerprint IoT module, uploading data to thingspeak
More info in and updates in https://rogerbit.com/wprb/2022/07/reloj-de-control-fingerprint/In this t...
Time clock with fingerprint IoT module, uploading data to thingspeak
More info in and updates in https://rogerbit.com/wprb/2022/07/reloj-de-control-fingerprint/In this t...
-
 Make your own logic tip (includes printed circuit board)
In this video tutorial we will see how to make a logic tip, on a printed circuit, with the integrate...
Make your own logic tip (includes printed circuit board)
In this video tutorial we will see how to make a logic tip, on a printed circuit, with the integrate...
-
 Coil or inductor meter with Arduino and OLED display
More info and updates in https://rogerbit.com/wprb/2022/06/medidor-inductores/In this tutorial we wi...
Coil or inductor meter with Arduino and OLED display
More info and updates in https://rogerbit.com/wprb/2022/06/medidor-inductores/In this tutorial we wi...
-
-
-
-
ARPS-2 – Arduino-Compatible Robot Project Shield for Arduino UNO
2650 0 5 -
A Compact Charging Breakout Board For Waveshare ESP32-C3
3133 3 8 -
AI-driven LoRa & LLM-enabled Kiosk & Food Delivery System
3381 2 1 -
-
-


