


Laser controlled by joystick servos and Arduino
More info and updates in https://rogerbit.com/wprb/2023/06/laser-controlado-x-joystick/
In this tutorial, you will learn how to create a control system for a laser using a joystick, servos, and Arduino.
During this step by step, I will guide you through the entire process, from initial setup to final programming, so you can control a laser using a joystick and servos. We'll explore how to connect the servos in conjunction with the Arduino, so you can move the laser in any direction you want.
This tutorial is designed to be accessible and exciting for everyone. Additionally, you'll discover how to write simple but effective code in Arduino to synchronize the movement of the servos with the joystick inputs, allowing you to aim and control the laser with ease.
You'll be able to use your joystick-controlled laser to create interactive light shows, precision games, or even for educational purposes.
Electronic components
Arduino mini pro

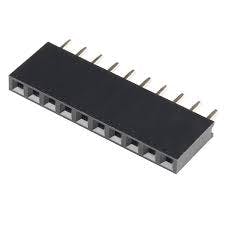
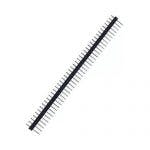
female pins
Socket for arduino nano

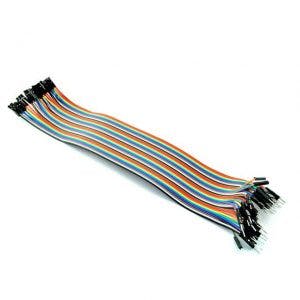
dupont cables
Laser Module ky-008
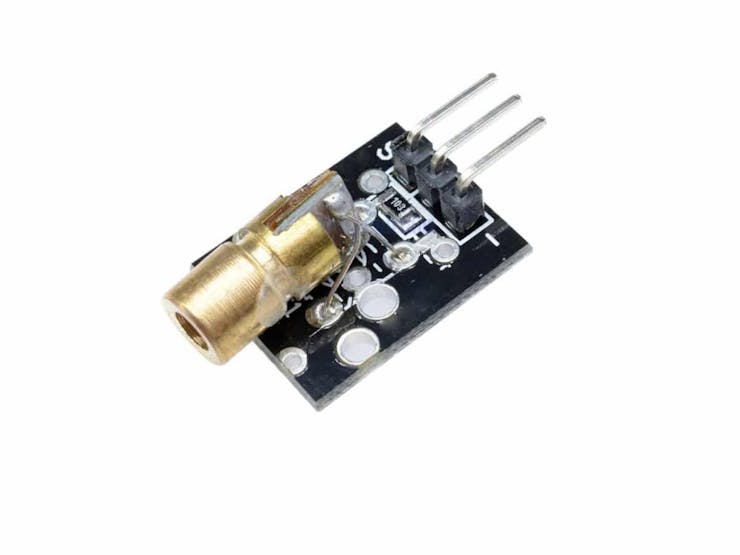
This module specially designed for Arduino easily, quickly and accurately emits a laser beam produced by this component.
It is a Laser Emitting Diode that operates at 5V and emits at a wavelength of 650nm.
Technical characteristics:
Operating voltage: 5V
Wavelength: 650nm
Power 5 mW
Color: Red
Material: PCB
Dimensions: 2.3×1.5×0.9cm
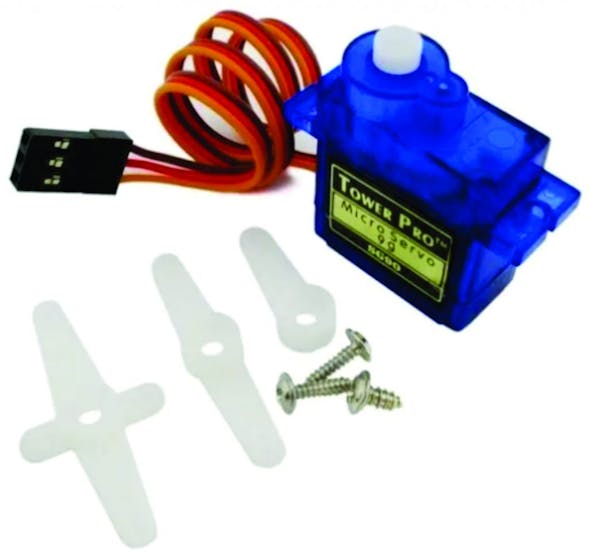
A Servo sg90
Characteristics
Dimensions (L x W xH) = 22.0 x 11.5 x 27 mm (0.86 x 0.45 x 1.0 inches)
Weight: 9 grams
Weight with cable and connector: 10.6 grams
Torque at 4.8 volts: 16.7 oz/in or 1.2 kg/cm
Operating voltage: 4.0 to 7.2 volts
Turning speed at 4.8 volts: 0.12 sec / 60º
Universal connector for most radio control receivers
Compatible with boards such as Arduino and microcontrollers that operate at 5 volts.
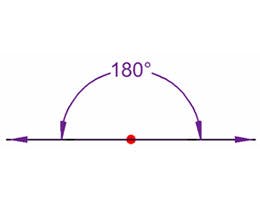
How to control a servomotor?
You can position the servo axis at various angles from 0 to 180º. The servos are controlled using a pulse width modulation (PWM) signal. This means that the PWM signal sent to the motor will determine the position of the shaft.
male pins
A ky-023 Joystick module

The Joystick module allows you to build a manual controller in 2 directions: X and Y. It also has the push-button function that is activated when pressing the Joystick.
It has two potentiometers each with its analog outputs for the direction (VRx-VRy) and a digital output for the button (SW). To read the position it is necessary to convert the analog values using a microcontroller ADC.
Used in robotics, control, automation, video game projects.
Operating Voltage: 3.3 – 5V DC
2 Potentiometers
1 Push Button
Description:
Two-axis joystick sensor module by using PS2 rocker potentiometer, with (X, y) 2-axis analog output, (Z) 1 digital output button. With the Arduino sensor expansion board you can produce remote control and other interactive works. In addition, this product to allow customers to more easily with the arduino expansion board and other standard interfaces, in the design of the X, Y, Z axis of the circuit are separate tracks, the user can use ARDUINO's special line of 3 pins on the expansion board.
Product performance:
Input voltage range: DC 3.3V to 5V
Output signal: the module two-way analog output and a digital output interface, the output value corresponding to the biaxial offset (X, Y), the type of analog; keys that user press Z axis, its type is digital switch.
Arduino controller, sensor expansion board connector can be programmed, complete with creative interactive works.
Cross joystick is a 10K bidirectional resistance, with the rocker in different directions, the resistance tap with changing. This module uses 5V power supply, the original state of Press arrows in the opposite direction, read the voltage decreases, the minimum is 0 V.
PCB

Download gerber file –> ir alarm pcb
3D Parts
Download STL files –> https://rogerbit.com/wprb/wp-content/uploads/2023/04/pcb-alarma-ir.zip
Laser controlled by joystick servos and Arduino
*PCBWay community is a sharing platform. We are not responsible for any design issues and parameter issues (board thickness, surface finish, etc.) you choose.


Raspberry Pi 5 7 Inch Touch Screen IPS 1024x600 HD LCD HDMI-compatible Display for RPI 4B 3B+ OPI 5 AIDA64 PC Secondary Screen(Without Speaker)
BUY NOW


- Comments(1)
- Likes(0)
More by CarlosVolt Tutoriales
-
 Infrared stepper motor control with speed control
More info and updates https://rogerbit.com/wprb/2024/09/motor-paso-a-paso-x-infrarrojo/In this proje...
Infrared stepper motor control with speed control
More info and updates https://rogerbit.com/wprb/2024/09/motor-paso-a-paso-x-infrarrojo/In this proje...
-
 Uploading BME280 Sensor Data to ThingSpeak Using ESP32
In this tutorial, we will show you how to connect a BME280 sensor to an ESP32 to read temperature, h...
Uploading BME280 Sensor Data to ThingSpeak Using ESP32
In this tutorial, we will show you how to connect a BME280 sensor to an ESP32 to read temperature, h...
-
 Water pump control for irrigation via telegram and esp32
Water Pump Control by Telegram and ESP32 is an automated system that allows you to remotely control ...
Water pump control for irrigation via telegram and esp32
Water Pump Control by Telegram and ESP32 is an automated system that allows you to remotely control ...
-
 Air conditioning on/off control via telegram and esp32
In this tutorial we will see how to control an air conditioner, with an esp32 and the telegram appli...
Air conditioning on/off control via telegram and esp32
In this tutorial we will see how to control an air conditioner, with an esp32 and the telegram appli...
-
 35 watt stereo amplifier
In this video we will see how to build an audio amplifier, with the TDA7377 integrated circuit, and ...
35 watt stereo amplifier
In this video we will see how to build an audio amplifier, with the TDA7377 integrated circuit, and ...
-
 Laser alarm with RFID module
More info and updates in https://rogerbit.com/wprb/2024/08/alarma-laser-rfid/In this project, we bui...
Laser alarm with RFID module
More info and updates in https://rogerbit.com/wprb/2024/08/alarma-laser-rfid/In this project, we bui...
-
 Control lights by voice commands and keys
In this tutorial we will see how to create a device to control lights by voice commands, with a modu...
Control lights by voice commands and keys
In this tutorial we will see how to create a device to control lights by voice commands, with a modu...
-
 Stepper motor control x bluetooth and app
In this tutorial we will see a circuit, which controls a stepper motor, with an application made in ...
Stepper motor control x bluetooth and app
In this tutorial we will see a circuit, which controls a stepper motor, with an application made in ...
-
 DFplayermini x bluetooth mp3 player control
More info and updates in https://rogerbit.com/wprb/2022/12/dfplayermini-x-bluetooth/In this tutorial...
DFplayermini x bluetooth mp3 player control
More info and updates in https://rogerbit.com/wprb/2022/12/dfplayermini-x-bluetooth/In this tutorial...
-
 Robot with WiFi control and servos driven by ESP32
More info and updates in https://rogerbit.com/wprb/2023/07/robot-wifi/A robot controlled by Wi-Fi, s...
Robot with WiFi control and servos driven by ESP32
More info and updates in https://rogerbit.com/wprb/2023/07/robot-wifi/A robot controlled by Wi-Fi, s...
-
 How to make a water level meter with uln2803
In this tutorial we will see how to make a water level meter circuit with the built-in uln2803.The p...
How to make a water level meter with uln2803
In this tutorial we will see how to make a water level meter circuit with the built-in uln2803.The p...
-
 Color Detector with Arduino and OLED display
In this tutorial we will show you how to build a color detector using the TCS3200 sensor and an SH11...
Color Detector with Arduino and OLED display
In this tutorial we will show you how to build a color detector using the TCS3200 sensor and an SH11...
-
 DTMF decoder for handy with arduino, control over several kilometers
In this tutorial we will see how to make a circuit to connect to our handy, in this case a Baofeng U...
DTMF decoder for handy with arduino, control over several kilometers
In this tutorial we will see how to make a circuit to connect to our handy, in this case a Baofeng U...
-
 Turn on light from thindspeak with esp32
In this tutorial, we will show you how to control lights over the Internet using an ESP32 and the Th...
Turn on light from thindspeak with esp32
In this tutorial, we will show you how to control lights over the Internet using an ESP32 and the Th...
-
 MP3 player control with webserver using ESP32 WIFI
In this tutorial, you will learn how to build a web server using the ESP32 to control the YX5300 mod...
MP3 player control with webserver using ESP32 WIFI
In this tutorial, you will learn how to build a web server using the ESP32 to control the YX5300 mod...
-
 Time clock with fingerprint IoT module, uploading data to thingspeak
More info in and updates in https://rogerbit.com/wprb/2022/07/reloj-de-control-fingerprint/In this t...
Time clock with fingerprint IoT module, uploading data to thingspeak
More info in and updates in https://rogerbit.com/wprb/2022/07/reloj-de-control-fingerprint/In this t...
-
 Make your own logic tip (includes printed circuit board)
In this video tutorial we will see how to make a logic tip, on a printed circuit, with the integrate...
Make your own logic tip (includes printed circuit board)
In this video tutorial we will see how to make a logic tip, on a printed circuit, with the integrate...
-
 Coil or inductor meter with Arduino and OLED display
More info and updates in https://rogerbit.com/wprb/2022/06/medidor-inductores/In this tutorial we wi...
Coil or inductor meter with Arduino and OLED display
More info and updates in https://rogerbit.com/wprb/2022/06/medidor-inductores/In this tutorial we wi...
-
Programmable Mist Maker - XIAO / QT PY Extension
277 0 0 -
RadioHAT - Raspberry Pi radio development platform
277 0 1 -
-
-
-
-
ARPS-2 – Arduino-Compatible Robot Project Shield for Arduino UNO
2834 0 6 -
A Compact Charging Breakout Board For Waveshare ESP32-C3
3338 3 8 -
AI-driven LoRa & LLM-enabled Kiosk & Food Delivery System
3638 2 2


