


Mini Weather Station Using Arduino Nano
Mini Weather Station Using Arduino Nano
This is a simple and fun project with pocket friendly budget.
Introduction
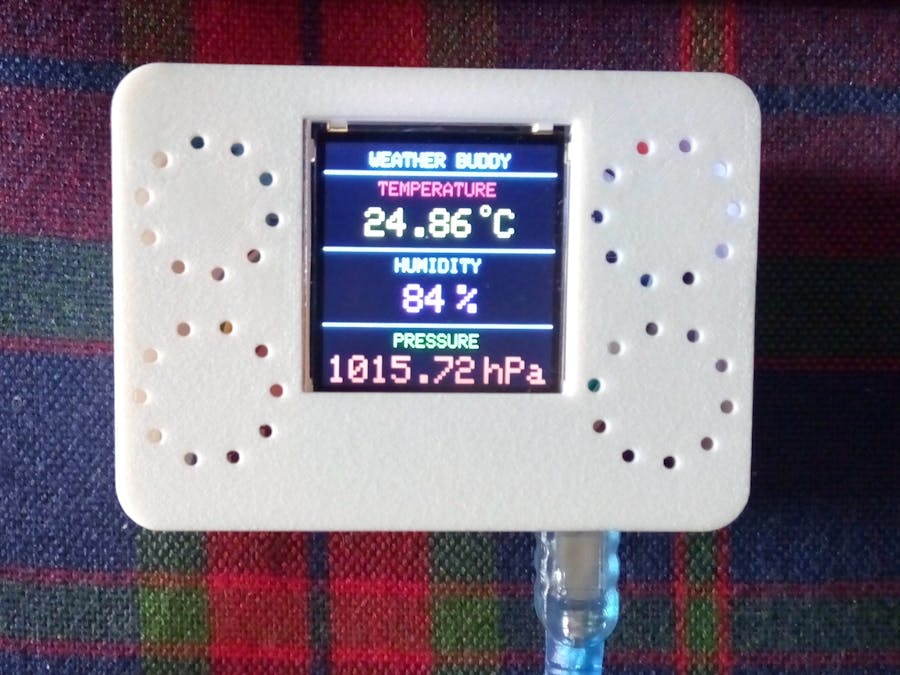
Capturing physical data in real time is always fascinating. In this project you will notonly be able to capture three fundamental physical parameters for weatherpredication viz. temperature, humidity and atmospheric pressure, but also beable to display the real time data on a LCD screen.
Description and Working Principle
The twosensors used in this project are BMP-280 and DHT-11. The former senses thetemperature and atmospheric pressure whereas the later senses the relative humidity.The DHT-11 could have been done with by using BME-280 (it can measure humidityalso) instead of the BMP-280, but if the cost is taken into account then usingthe combination of sensors used here is much more economical for DIY projects.It should also be noticed that although DHT-11 is capable of sensing bothtemperature and humidity, it is used for humidity sensing only because itstemperature sensing resolution is +/-2° compared to +/-.5° for BMP-280. The heart of this project is the Arduino NANOdevelopment board. Here also the NANO board has been chosen over the masspreferred UNO because of its affordable price. A 1.44” ST7735 series TFT LCDscreen is used as the display for our project. A bigger screen has been avoidedhere so that the Arduino NANO is not overloaded.
Circuit and Programming
Acombination of circuit diagram and block diagram has been provided asconveniently as possible to help the makers understand the physicalconfiguration and connection of the components. Tables for pin-out of thecomponents is also provided to make things easier. Going through the diagramand tables one will notice that the 5V and GND pins of the ICSP header onArduino NANO has been utilised for supplying power to the components along withthe on-board power and ground pins. This has been done to do away with anyadditional power source which will make the system bulky.
Coming tothe programming, in the first part an array of libraries have been included tokeep the programming short and simple. Besides the obvious ones, the Wire.h andSPI.h libraries are worth mentioning because Wire.h is the one that allows theArduino to communicate with the I2C/TWI devices such as the BMP-280 and theST7735 LCD and SPI.h provides the serial peripheral interface with the ST7735LCD. In the second part, the sensors are initialized and the layout, fontcolour etc. of the LCD are set up for displaying the data as per ourpreferences. In the final part of our programming, the output from the sensorsare obtained and displayed with a convenient delay between each reading to keepthings stable.
Construction and Testing
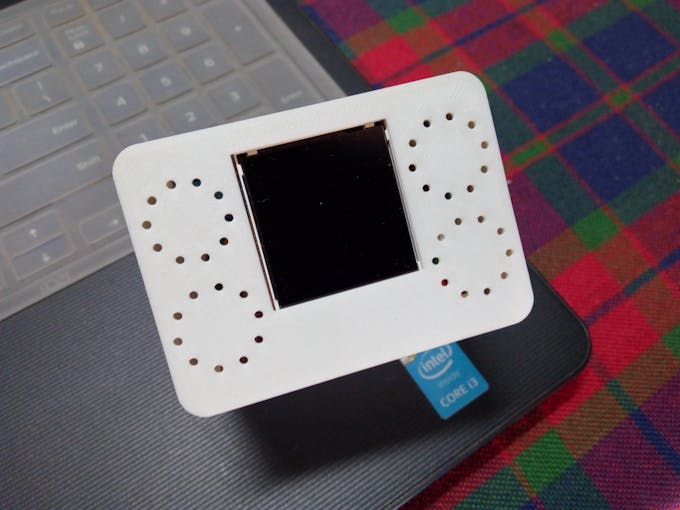
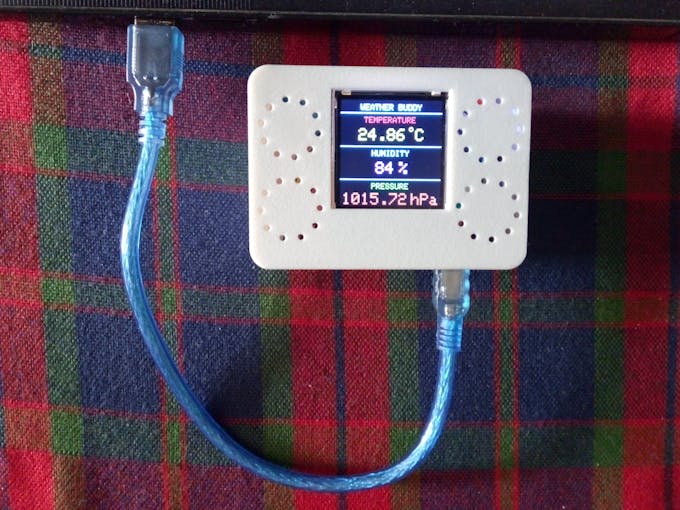
In theprototype, the components have been kept modular and connected using jumperwires instead of soldering. This not only allows easy troubleshooting andrepairing but also makes the assemby process hassle free. The device-case hasbeen custom 3D printed for a perfect fit for the components. The case isprovided with proper ventilation in order to expose the sensors to themeasurands and dissipate the heat generated by the system which will otherwiseinterfere with the sensing elements. The device is powered via the same type AUSB to type B mini USB used to program the Arduino. The prototype has beentested indoors at stretch for a few hours using both PC USB port and 5Vsmartphone charger as supply. The results are quite accurate compared withonline meteorological data, considering the production cost and developmenttime.
In conclusion it can be said that this projectis quite economical, useful to say the least, and most importantly, it is funhaving a small and handy weather station that fits right in your pocket.
Bibliography
· Google.com
· Arduino.cc
· Mytectutor.com
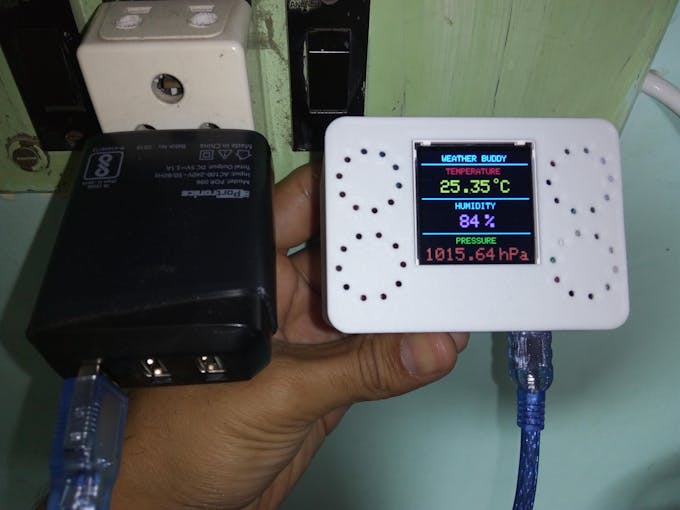
POWERED USING SMARTPHONE WALL ADAPTER
CODE
THE CODEC/C++
#include <SPI.h>               //include Serial Peripheral Interface library
#include <Wire.h>              //include Two Wire Interface library
#include <Adafruit_GFX.h>      // include Adafruit graphics library
#include <Adafruit_ST7735.h>   // include Adafruit ST7735 TFT library
#include <Adafruit_BMP280.h>   // include Adafruit BMP280 sensor library
#include "DHT.h"               //include DHTXX sensor library
#define DHTPIN 2               //DHT11 data pin connected to arduino pin D2
#define DHTTYPE DHT11          //specifying the type of DHT sensor used
#define TFT_RST   8            // TFT RST pin is connected to arduino pin D8
#define TFT_CS    10           // TFT CS  pin is connected to arduino pin D9
#define TFT_DC    9            // TFT DC  pin is connected to arduino pin D10
// initialize ST7735 SERIES TFT library
Adafruit_ST7735 tft = Adafruit_ST7735(TFT_CS, TFT_DC, TFT_RST);

// define device I2C address: 0x76 or 0x77 (0x77 is the library default address)
#define BMP280_I2C_ADDRESS  0x76

Adafruit_BMP280  bmp280;       // initialize Adafruit BMP280 library
DHT dht(DHTPIN, DHTTYPE);      // initialize DHT sensor

void setup(void)
{
  dht.begin();                                         // synchronizing DHT sensor
  tft.initR(INITR_144GREENTAB);                        // initialize a ST7735S chip, black tab
  tft.fillScreen(ST77XX_BLACK);                        // setting black background
  tft.drawFastHLine(0, 15 ,  tft.width(), ST77XX_CYAN);// draw horizontal seperation line at position (0, 15)

  tft.setTextColor(ST77XX_CYAN, ST77XX_BLACK);         // set text color to white and black background
  tft.setTextSize(1);                                  // setting text size to 1
  //tft.setCursor(4, 0);                               // move cursor to position (4, 0) pixel
  //tft.print("ARDUINO + ST7735 TFT");
  tft.setCursor(25, 5);                                // move cursor to position (25, 5) pixel
  tft.print("WEATHER BUDDY");

  // initialize the BMP280 sensor
  if( bmp280.begin(BMP280_I2C_ADDRESS) == 0 )
  {  // connection error or device address wrong!
    tft.setTextColor(ST77XX_RED, ST77XX_CYAN);         // set text color to red and black background
    tft.setTextSize(2);                                // setting text size to 2
    tft.setCursor(5, 76);                              // move cursor to position (5, 76) pixel
    tft.print("Connection");
    tft.setCursor(35, 100);                            // move cursor to position (35, 100) pixel
    tft.print("Error");
    while(1);  // stay here
  }

  tft.drawFastHLine(0, 55,  tft.width(), ST77XX_CYAN);  // draw horizontal seperation line at position (0, 55)pixel
  tft.drawFastHLine(0, 95,  tft.width(), ST77XX_CYAN);  // draw horizontal seperation line at position (0, 195)pixel
  tft.setTextColor(ST77XX_RED, ST77XX_BLACK);           // set text color to red and black background
  tft.setCursor(30, 20);                                // move cursor to position (30, 20) pixel
  tft.print("TEMPERATURE ");                            // setting heading for first section
  tft.setTextColor(ST77XX_CYAN, ST77XX_BLACK);          // set text color to cyan and black background
  tft.setCursor(40, 60);                                // move cursor to position (40, 60) pixel
  tft.print("HUMIDITY ");                               // setting heading for second section
  tft.setTextColor(ST77XX_GREEN, ST7735_BLACK);         // set text color to green and black background
  tft.setCursor(40, 100);                               // move cursor to position (40, 100) pixel
  tft.print("PRESSURE ");                               // setting heading for third section
  tft.setTextSize(2);                                   // setting text size to 2
}

// main loop
void loop()
  {

  char _buffer[8];
  // read temperature, humidity and pressure from the BMP280 sensor
  float temp = bmp280.readTemperature();    // get temperature in °C
  float hum = dht.readHumidity();           // get humidity in rH%
  float pres = bmp280.readPressure();       // get pressure in hPa

  // print temperature (in °C)
  if(temp < 0)                              // if temperature < 0
    sprintf( _buffer, "-%02u.%02u", (int)abs(temp), (int)(abs(temp) * 100) % 100 );
  else                                      // if temperature >= 0
    sprintf( _buffer, " %02u.%02u", (int)temp, (int)(temp * 100) % 100 );// setting the value approximation
  tft.setTextColor(ST77XX_YELLOW, ST77XX_BLACK);  // set text color to yellow and black background
  tft.setCursor(11, 34);                          // move cursor to position (11,34) pixel
  tft.print(_buffer);                             // print temperature from BMP-280 sensor
  tft.drawCircle(89, 34, 2, ST77XX_YELLOW);       // print the degree symbol ( ° )(can be omitted if * is used instead)
  tft.setCursor(95, 34);                          // move cursor to position (95,34) pixel
  tft.print("C");                                 // print the Celcius symbol

  // 2: print humidity (in %)
  sprintf( _buffer, "%02u ", (int)(hum));          // setting the value approximation
  tft.setTextColor(ST77XX_MAGENTA, ST77XX_BLACK);  // set text color to magenta and black background
  tft.setCursor(45, 74);                           // move cursor to position (45,74) pixel
  tft.print(_buffer);                              // print humidity from DHT-11 sensor
  tft.setCursor(75, 74);                           // move cursor to position (75,74) pixel
  tft.print("%");                                  // print the percentage symbol


  // 3: print pressure (in hPa)
  sprintf( _buffer, "%04u.%02u", (int)(pres/100), (int)((uint32_t)pres % 100) ); // setting the value approximation
  tft.setTextColor(ST77XX_ORANGE, ST77XX_BLACK);  // set text color to orange and black background
  tft.setCursor(3, 112);                          // move cursor to position (3,112)pixel
  tft.print(_buffer);                             // print atmospheric pressure from BMP-280
  tft.setCursor(91, 112);                         // move cursor to position (91,112)pixel
  tft.print("hPa");                               // print unit of atmospheric pressure as hecto pascal

  delay(1000);                                    // wait 1 second before taking next sensor reading

}
CUSTOM PARTS AND ENCLOSURES
3D PARTS
THIS IS THE STL FILE FOR THE 3D PRINTED PARTS I USED
SCHEMATICS
CIRCUIT DIAGRAM
YOU JUST NEED TO FOLLOW THE WIRING SHOWN.

Thanks PcbWay For Your Support
- Comments(1)
- Likes(1)
 More by Engineer
-
 Make Your own Smart Watch
This document is also translated in Polish(by Sebastian), Korean language.Various user made their ow...
Make Your own Smart Watch
This document is also translated in Polish(by Sebastian), Korean language.Various user made their ow...
-
 Vintage Flash Clock
Step 1: Parts & ToolsParts:1. Vintage Flash – check junk stores or if you have to, buy one from ...
Vintage Flash Clock
Step 1: Parts & ToolsParts:1. Vintage Flash – check junk stores or if you have to, buy one from ...
-
 Mini Weather Station Using Arduino Nano
This is a simple and fun project with pocket friendly budget....
Mini Weather Station Using Arduino Nano
Mini Weather Station Using Arduino NanoThis is a simple and fun project with pocket friendly budget....
-
 DIY IR Control Otto Bot
Thanks Pcbway For Your SupportCOMPONENTSIR transmitter (generic)×1ABOUT THIS PROJECTIntroductionIn t...
DIY IR Control Otto Bot
Thanks Pcbway For Your SupportCOMPONENTSIR transmitter (generic)×1ABOUT THIS PROJECTIntroductionIn t...
-
 Make Your OWN Solenoid Driver
Learn how to mill a solenoid driver PCB using your Bantam Tools Desktop PCB Milling Machine! This dr...
Make Your OWN Solenoid Driver
Learn how to mill a solenoid driver PCB using your Bantam Tools Desktop PCB Milling Machine! This dr...


