


|
A4988 Stepper Motor Driver Module |
x 6 | |
|
|
NEMA17 stepper motor |
x 6 | |
|
|
1N4148 |
x 1 | |
|
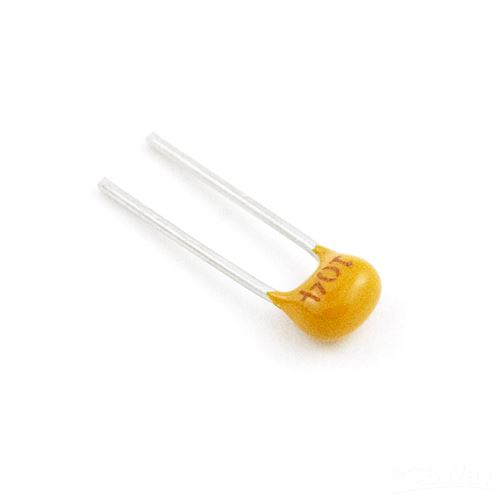
0.1μF Ceramic Capacitor |
x 1 | |
|
|
MF1/4W-1KΩ±1% TCCO
|
x 1 | |
|
|
MF1/4W-220Ω±1% T |
x 1 | |
|
|
MIDI soket |
x 1 | |

|
TLP2662(TP1,F)Toshiba
|
x 1 | |
|
|
LXDC55 |
x 1 | |
|
|
MJ-179PHMulticomp
|
x 1 | |
|
|
12V 3A AC adaptor |
x 1 | |
|
|
ARDUINO_NANO |
x 2 |
Play music with stepper motors.
How to make a stepping motor that makes music
Any 12V NEMA17 standard stepper motor will work.
It will work if you write the parts according to the silk on the board.
Turn on the power to write the program to the arduino.
Please change the channel to receive the program to the channel you want to receive.
^^^^^^^^^^^^^^^^^^^^^^^^^^^^^^^^^^
const int MIDI_CH = 1; // MIDI channel to receive
^^^^^^^^^^^^^^^^^^^^^^^^^^^^^^^^^^
Even if you don't have a DCDC converter, it will work if you supply power to the Arduino via USB.
Supports pitch bend events.
The photocoupler has been confirmed to work with both the TLP2630 and TLP2662
#include <Tone.h>
#include <MIDI.h>

// 音の周波数の配列(Hz単位)
const word noteFreq[] = {
  0,  9,  9, 10,  10, 11,   12,  12, 13, 14, 15, 15,
  16,  17, 18, 19,  21, 22,  23,  25, 26, 28, 29, 31,
  33,  35, 37,  39,  41, 44,  46, 49, 52, 55, 58, 62,
  65, 69, 73, 78,  82, 87,  93, 98, 104,  110,  117,  124,
  131, 139, 147, 156, 165, 175, 185,  196,  208,  220,  233,  247,
  262, 277, 294, 311, 330, 349, 370,  392,  415,  440,  466,  494,
  523, 554, 587, 622, 659, 699, 740,  784,  831,  880,  932,  988,
  1047, 1109, 1175, 1245, 1319, 1397, 1480, 1568, 1661, 1760, 1865, 1976,
  2093, 2218, 2349, 2489, 2637, 2794, 2960, 3136, 3322, 3520, 3729, 3951,
  4186, 4435, 4699, 4978, 5274, 5587, 5920, 6272, 6645, 7040, 7459, 7902,
  8372, 8870, 9397, 9956, 10548,11175,  11840,  12544
};


const int MIDI_CH = 1;  // 受信するMIDIチャンネル

// チャンネル(音声)の数
const int CH_CNT = 3;
int intervals[CH_CNT] = { 0,0,0 }; // 各チャンネルの現在の音の値
int currentPitchBend[CH_CNT] = { 0, 0, 0 }; // 各チャンネルのピッチベンド値
Tone tones[CH_CNT]; // 各チャンネルのToneインスタンス
const byte SND_PINS[CH_CNT] = { 2,3,4 }; // 各チャンネルのPWM出力ピン番号

MIDI_CREATE_DEFAULT_INSTANCE(); // MIDIインスタンスを作成

void setup()
{
  for (int i = 0; i < CH_CNT; i++) {
    pinMode(SND_PINS[i], OUTPUT); // PWM出力ピンを出力モードに設定
    tones[i].begin(SND_PINS[i]); // 各チャンネルのToneを初期化
  }
  MIDI.begin(); // MIDI通信を開始
}

void loop()
{
  uint8_t data1, data2, command;

  if (MIDI.read()) {
    MIDI.setInputChannel(MIDI_CH); // MIDIデータが受信された場合
    command = MIDI.getType(); // 受信するMIDIチャンネルを設定

    if (command == midi::NoteOn) { // ノートオンメッセージの場合
      data1 = MIDI.getData1();    // ノート番号を取得
      data2 = MIDI.getData2();    // ベロシティを取得

      if (data2 > 0) { // ベロシティが0より大きい場合(ノートが再生されている場合)
        for (int i = 0; i < CH_CNT; i++) {
          if (intervals[i] == 0) { // 使用可能なチャンネルを探す
            intervals[i] = data1;  // チャンネルの音の間隔を設定
            tones[i].play(noteFreq[data1] * (1 + (float)currentPitchBend[i] / 8192.0)); // ピッチベンド値に応じて周波数を調整してノートを再生
            break;
          }
        }
      }
    } else if (command == midi::NoteOff) { // ノートオフメッセージの場合
      data1 = MIDI.getData1();  // ノート番号を取得
      for (int i = 0; i < CH_CNT; i++) {
        if (intervals[i] == data1) {// ノート番号が一致するチャンネルを探す
          intervals[i] = 0; // チャンネルの音の間隔をリセット
          tones[i].stop(); // ノートの再生を停止
          break;
        }
      }
    } else if (command == midi::PitchBend) { // ピッチベンドメッセージの場合
      data1 = MIDI.getData1();    // 下位ビットを取得
      data2 = MIDI.getData2();    // 上位ビットを取得
      int pitchBendValue = ((data2 << 7) | data1) - 8192; // 下位ビットと上位ビットを結合
      int channel = MIDI.getChannel() - 1;  // チャンネル番号を取得
    if (intervals[channel] != 0) { // チャンネルが使用中の場合
  currentPitchBend[channel] = pitchBendValue; // ピッチベンド値を設定
  float frequency = noteFreq[intervals[channel]];  // チャンネルの音の周波数を取得
  if (pitchBendValue == -8192) {  // ピッチベンド値が最小値の場合、周波数を半分にする
    frequency /= 2; // 1オクターブ下げる
  } else {
    frequency *= (1 + (float)pitchBendValue / 8192.0); // ピッチベンド値に応じて周波数を調整
  }
  tones[channel].play(frequency); // ピッチベンドを反映した周波数でノートを再生
}
    }
  }
}
Play music with stepper motors.
*PCBWay community is a sharing platform. We are not responsible for any design issues and parameter issues (board thickness, surface finish, etc.) you choose.


Raspberry Pi 5 7 Inch Touch Screen IPS 1024x600 HD LCD HDMI-compatible Display for RPI 4B 3B+ OPI 5 AIDA64 PC Secondary Screen(Without Speaker)
BUY NOW


- Comments(0)
- Likes(2)
 More by Engineer
-
Programmable Mist Maker - XIAO / QT PY Extension
477 1 0 -
RadioHAT - Raspberry Pi radio development platform
380 0 1 -
-
-
-
-
ARPS-2 – Arduino-Compatible Robot Project Shield for Arduino UNO
2914 0 6 -
A Compact Charging Breakout Board For Waveshare ESP32-C3
3418 3 8 -
AI-driven LoRa & LLM-enabled Kiosk & Food Delivery System
3756 2 2


