



|
kicad 7 |
Retro Smart Speaker Controller PCB
Project Overview
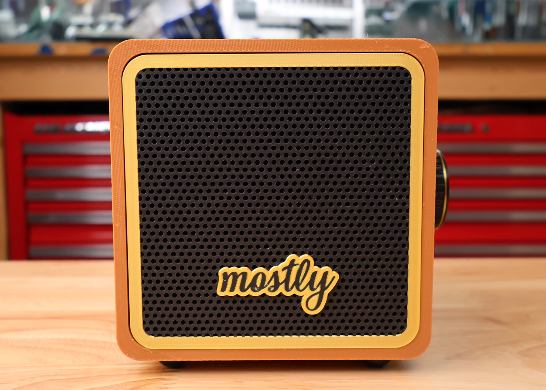
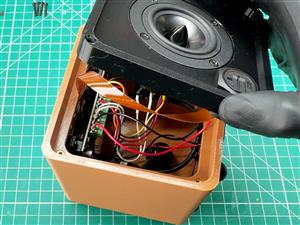
I created this ESP32-based audio controller for a retro smart speaker project that I built and shared on YouTube.
The original goal was to make a simple standalone device that could play a network audio stream, since I could not find a commercial speaker that worked the way I wanted. As the project evolved, I added Bluetooth audio, microSD card playback, a touchscreen interface, and several other features.
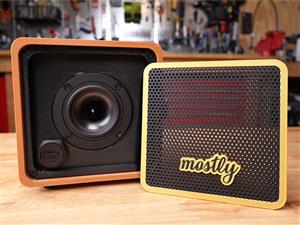
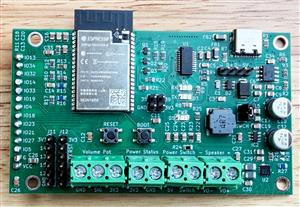
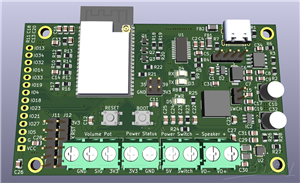
The board is designed to mount directly to a commonly available 2.8-inch capacitive touchscreen and install inside a retro-style 3D-printed speaker enclosure. It runs from a 5V USB supply and handles the speaker’s audio playback, controls, display, and power switching.
It can also be used as a starting point for other projects, including a custom ESP32 speaker, network audio player, Bluetooth speaker, microSD audio player, or touchscreen audio device.
Build Videos and Documentation
The full speaker build is covered across two videos.
The original V1 build covers the complete design and construction of the speaker, including the enclosure, custom controller board, touchscreen interface, light pod, wiring, and final assembly.
The V2 build focuses on the updated enclosure, external microSD card access, improved USB-C connector, new light pod PCB, and the release of the hardware and firmware as open source.
For the best understanding of the complete project, I recommend watching both videos.
V2 Build (current version)
The V2 video covers the latest version of the speaker, including the updated enclosure, external microSD card access, improved USB-C connector, new light pod PCB, and the release of the hardware and firmware as open source.
The V2 blog post includes the complete parts list needed to build the current version of the speaker, along with links to the firmware, PCB files, 3D models, and related project resources.
V2 Blog Post: https://mostlybuilds.com/retro-smart-speaker-v2-now-open-source
V1 Build
The original V1 video provides more detail about the overall design and the initial construction of the speaker, including the enclosure, controller board, touchscreen interface, wiring, light pod, and final assembly.
The V1 blog post includes the parts used for the original V1 version. For the current and complete parts list, use the V2 blog post.
V1 Blog Post: https://mostlybuilds.com/retro-smart-speaker-build
Power Control
Instead of routing the full power path directly through a mechanical switch, the USB input feeds a MIC2549A power switch IC, which switches the downstream 5 V rail.
An AP63301WU-7 buck converter generates the board’s 3.3 V rail from the switched 5 V supply.
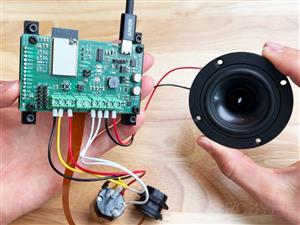
In the final build, I used a 10K combination switch/potentiometer mounted on the side of the enclosure. Turning the knob clicks the device on by enabling the power switch IC, and continuing to turn the knob adjusts the volume through the potentiometer input.
For development and debugging, the board also includes a few extra conveniences. The SWCH header can be used to enable the main power rail without wiring in the external switch, which is helpful when testing the bare board. Alternatively, a jumper can be added at the power switch screw terminal.
Audio Output
For audio output, the ESP32 is connected to a MAX98357A mono I2S Class-D amplifier, which drives a 4 ohm speaker. The board was designed around the Dayton Audio RS75-4 3 inch 4 ohm speaker, but it should work with other suitable 4 ohm speakers as well.
ESP32 Module
The main module is an ESP32-WROVER-E-N16R8. I chose this module because it supports Bluetooth Classic, which is needed for Bluetooth audio playback, and because it includes PSRAM.
The extra memory is useful for a project like this, especially when working with audio, a graphical interface, and multiple playback modes.
Display Interface
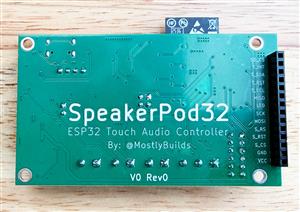
A 14-pin header on the left side of the board is designed for a commonly available 2.8 inch 240x320 IPS capacitive touch screen module with a ILI9341V driver. This display acts as the main user interface for the speaker.
Because the touch screen uses many of the ESP32 GPIO pins, most of the available pins on the module are already assigned. I preserved the JTAG pins as much as possible in case hardware debugging is needed.
Debugging Notes
USB GND, 5V, D+, and D- are broken out for debugging or testing.
The JTAG pins are exposed on header J11. GPIO14 is connected to the display reset signal through 0 ohm resistor R15, and GPIO13 is connected to the SD card chip select line through 0 ohm resistor R16.
If JTAG debugging does not work reliably because those pins are also being used by the screen or SD card, R15 and R16 can be removed to isolate the signals, although this will reduce functionality.
Programming
The USB-C connection includes an onboard FT231XS USB-to-UART interface for programming and serial logging. ESP32 auto-reset circuitry is included, along with dedicated boot and reset buttons for manual control.
Design Notes
This board was designed in KiCad as part of a larger DIY build, so I recommend reviewing the schematic, PCB layout, design rules, and fabrication outputs before manufacturing or modifying it.
The project is provided as-is as a hobbyist design, but I hope it is useful as a starting point for anyone interested in building a custom ESP32 speaker, network audio player, Bluetooth speaker, or retro-style smart speaker project.
Retro Smart Speaker Controller PCB
Project images are for reference only. Actual production is based on the manufacturing files on the project page.
Please review the designer's notes (e.g., PCB thickness) and select the appropriate options.
PCBWay is not responsible
for issues caused by unsuitable parameter selections.
For more important ordering information, please refer to
Read More









Raspberry Pi 5 7 Inch Touch Screen IPS 1024x600 HD LCD HDMI-compatible Display for RPI 4B 3B+ OPI 5 AIDA64 PC Secondary Screen(Without Speaker)
BUY NOW


- Comments(0)
- Likes(2)
More by MostlyBuilds
-
Programmable Mist Maker - XIAO / QT PY Extension
2120 2 2 -
RadioHAT - Raspberry Pi radio development platform
1801 0 4 -
-
-
-
ARPS-2 – Arduino-Compatible Robot Project Shield for Arduino UNO
4013 0 6 -
A Compact Charging Breakout Board For Waveshare ESP32-C3
4750 3 8 -
AI-driven LoRa & LLM-enabled Kiosk & Food Delivery System
5564 2 2 -





















