





|
|
ESP32-C3-MINI-1-N4Espressif
|
x 1 | |
|
|
0402WGF1002TCE |
x 6 | |
|
|
CL05A105KA5NQNC |
x 5 | |
|
|
RT9013-33GB |
x 1 | |
|
|
LMV321IDBVR |
x 1 | |
|
|
0402WGF0000TCE |
x 2 | |
|
|
CL05A475MP5NRNC |
x 3 | |
|
|
CC0402JRNPO9BN150 |
x 1 | |
|
|
CL05B104KO5NNNC |
x 5 | |
|
|
0402WGF1003TCE |
x 2 | |
|
|
0402WGF5602TCE |
x 1 | |
|
|
0402CG220J500NT |
x 1 | |
|
|
0402WGF1001TCE |
x 6 | |
|
|
CL05B472KB5NNNC |
x 1 | |
|
|
NS4150B |
x 1 | |
|
|
CL05B104KB54PNC |
x 1 | |
|
|
0402B102K500NT |
x 2 | |
|
|
0402B222K500NT |
x 2 | |
|
|
0402B102K500NT |
x 2 | |
|
|
WS2812B-4020 |
x 4 | |
|
|
TP5000X-4.2-ESOP8ESOP-8_L4.9-W3.9-P1.27-LS6.0-BL-EP『 』TOPPOWER(南京拓微)
|
x 1 | |
|
|
CL05A106MQ5NUNC |
x 1 | |
|
|
CL05B104KO5NNNC |
x 1 | |
|
|
0402WGF0000TCE |
x 2 | |
|
|
CL05A105KA5NQNC |
x 2 | |
|
|
0402WGF100JTCE |
x 1 | |
|
|
0402WGF3302TCE |
x 2 | |
|
|
FPC 0.5MM 8P 拉抽式 H2.0mm 下接BOOMELE(博穆精密)
|
x 1 | |
|
|
TYPE-C 16PIN 2MD(073) |
x 1 | |
|
|
0402WGF5101TCE |
x 2 | |
|
|
0402WGF1503TCE |
x 1 | |
|
|
GMI4015P-2C-42DB |
x 1 | |
|
|
1.25-6PWB |
x 1 | |
|
|
0402WGF2201TCE |
x 1 | |
|
|
HC-1.25-2PWTHCTL
|
x 1 | |
|
|
CL05A106MQ5NUNC |
x 3 | |
|
|
0402WGF2000TCE |
x 1 |
ESP-HI: Integrating Xiaozhi AI into a Robot Dog
Project Overview
YOU CAN BUY THIS KIT ON ALI EXPRESS
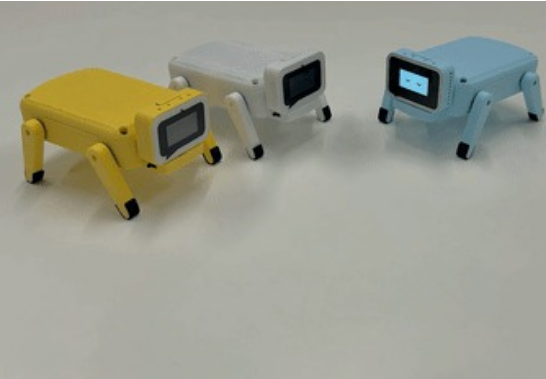
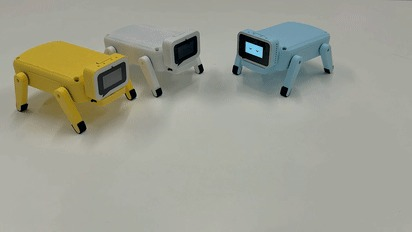
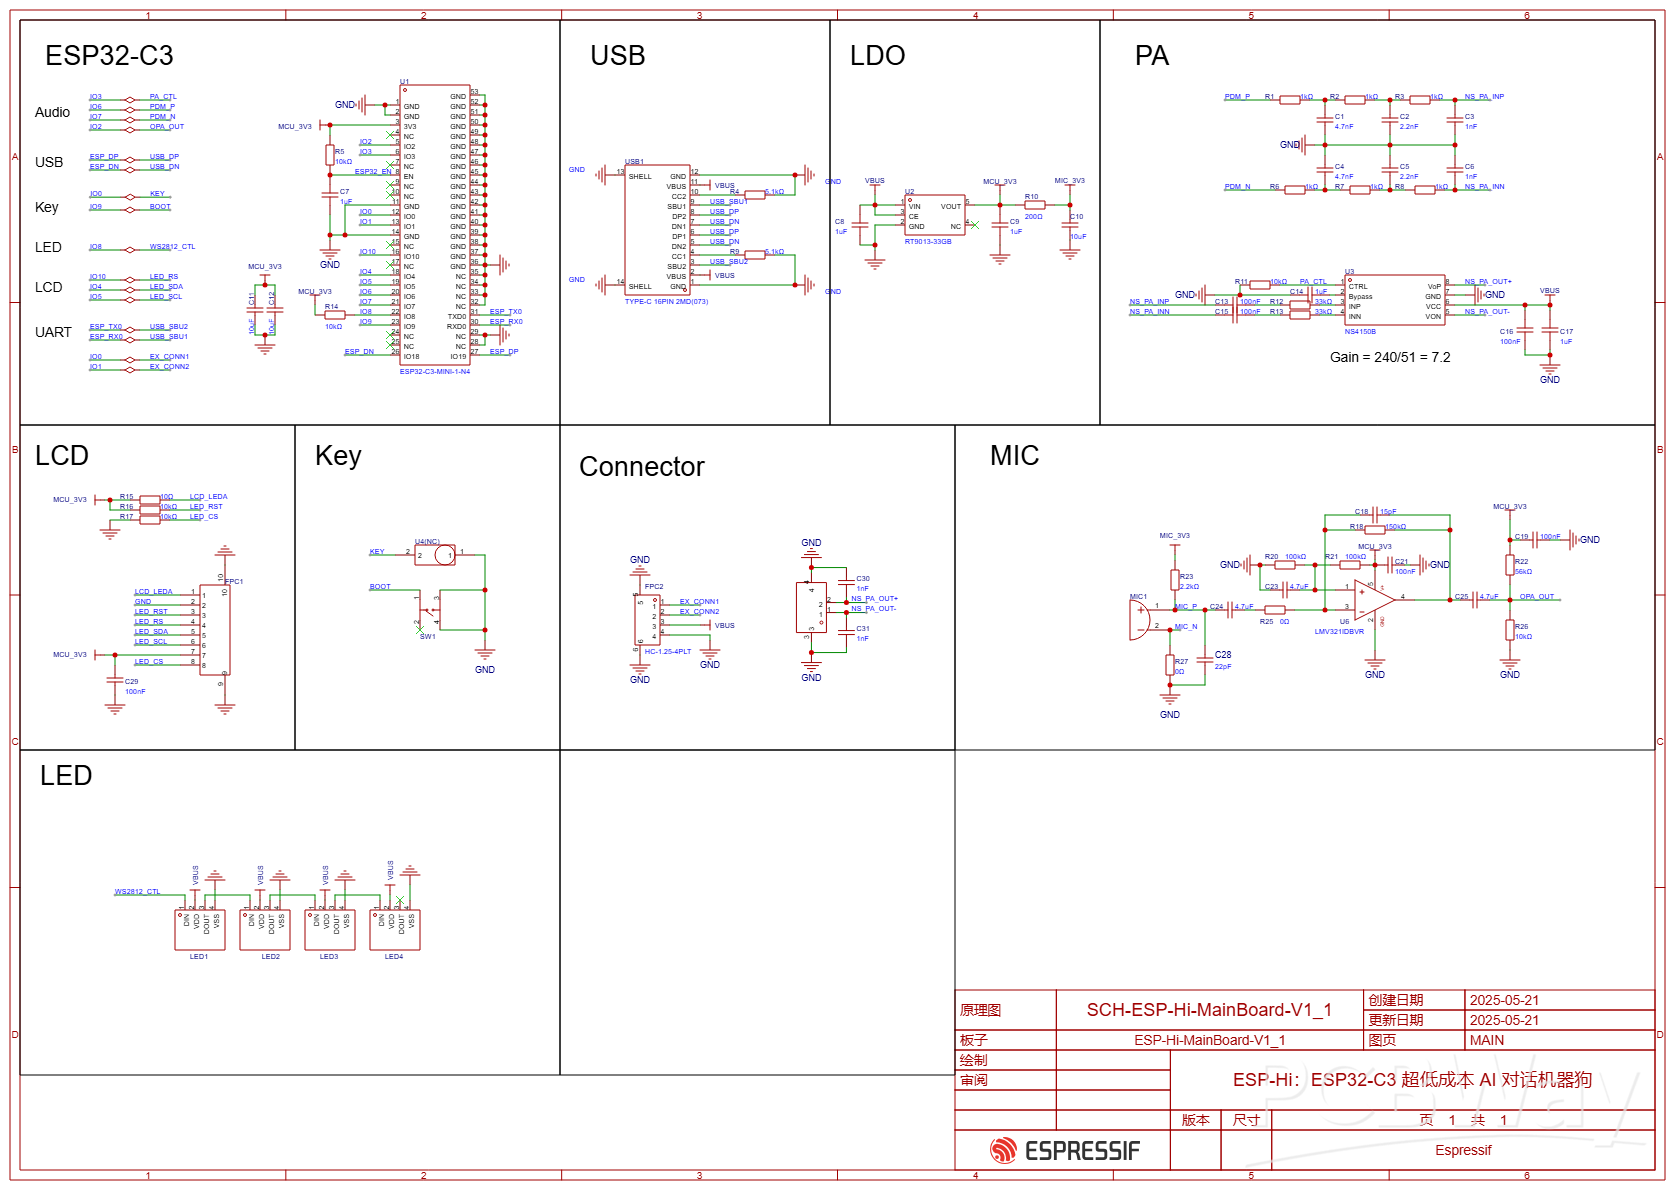
ESP-Hi is an ultra-low-cost AI conversational robot dog based on the ESP32-C3 microcontroller . By integrating with large language models (such as Xiaozhi AI), it can achieve intelligent dialogue functionality; a built-in mercury switch can detect movement for wake-up and motion control; and a 0.96-inch color screen is integrated to display facial expressions. The robot dog has already implemented over ten actions. Through full utilization of the ESP32-C3 peripherals, only minimal board-level hardware is required for sound pickup and output. Simultaneously, the software has been optimized to reduce memory and Flash usage, achieving wake-word detection and multiple peripheral driver support under resource constraints .
The basic firmware is included in the attachment, and the flashing address is 0x00 .
The burning steps are as follows:
Press and hold the Boot button on the top of the device .
Power on the device to put the ESP32-C3 into download mode.
After the program is burned, release the Boot button and power it on again to run the program.
Xiaozhi firmware:
Please download the xiaozhi-esp32 repository and use the following command to compile the ESP-HI Xiaozhi firmware.
python3 scripts/release.py esp-hi
Current firmware supports the following features:
Wake-up words and button wake-up : Wake-up words: Hi, Espressif
Access Platform : Xiaozhi
Supported functions : lighting control, robot dog control, web page control
The project source code is currently being tidied up. Please follow ESP_Friends for updates on when it will be released. Stay tuned!
Function demonstration
Large-scale AI dialogue functionality
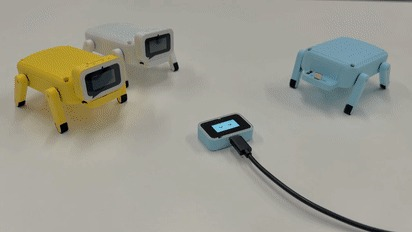
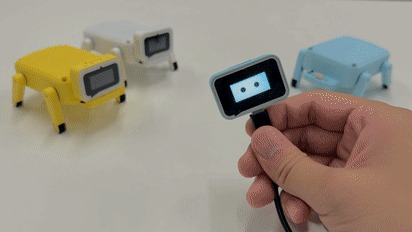
ESP-Hi can achieve conversational chat functionality by connecting to a large language model, supports wake words , and can display emoticons using its onboard 0.96-inch screen. It is currently integrated with Xiaozhi AI .
Adaptation to other platforms is underway...
The specific implementation code is open-source in the ESP-Friends repository .
Motion sensing function
The ESP-Hi AI toy has a built-in mercury switch that can sense the speed of shaking, thereby enabling functions such as waking up/interrupting conversations/performing actions.
Mechanical dog function
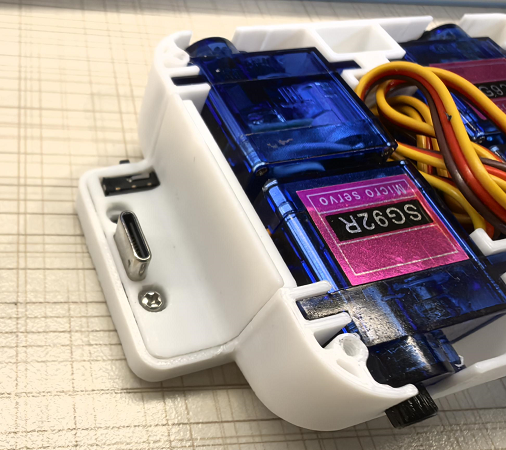
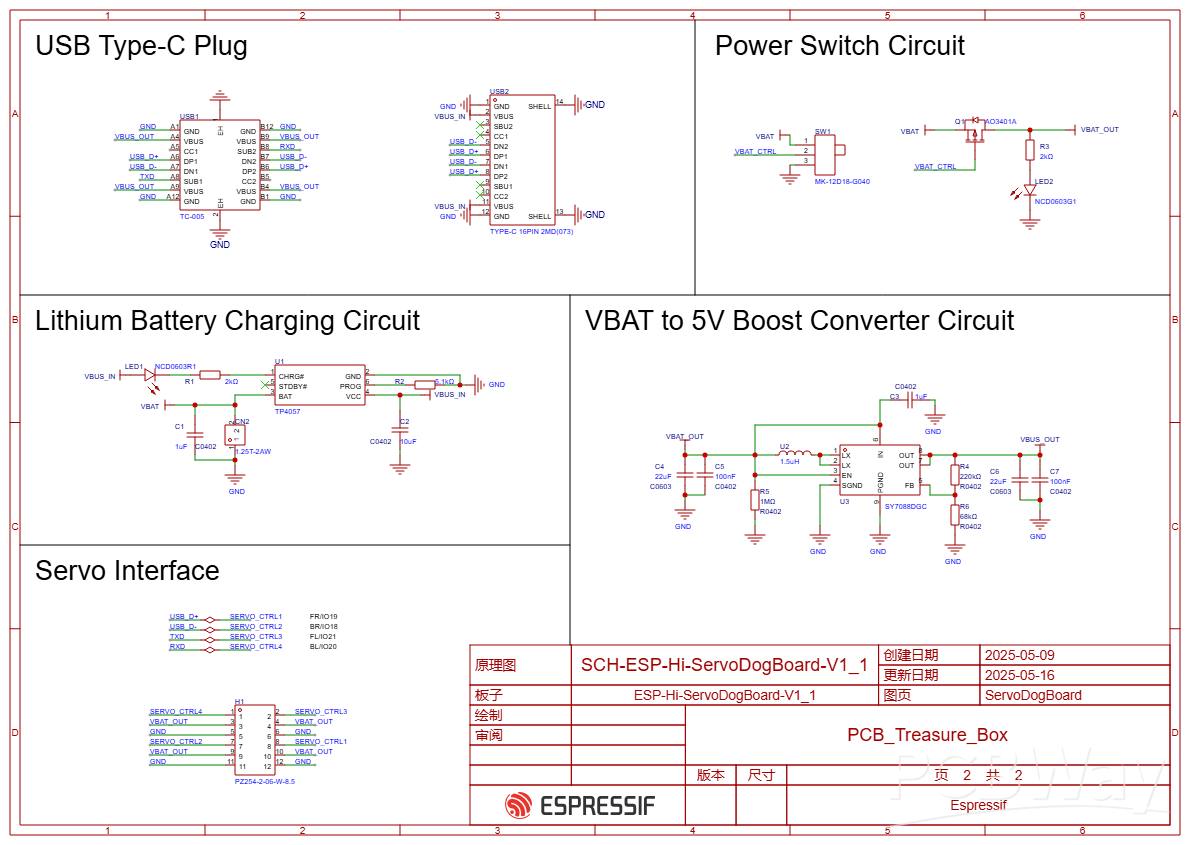
After connecting the servo base via the USB Type-C interface, the ESP-Hi can transform into an AI robotic dog. Dozens of actions have been implemented in the robotic dog control components . In addition, the robotic dog base integrates battery management functions.
Web page control
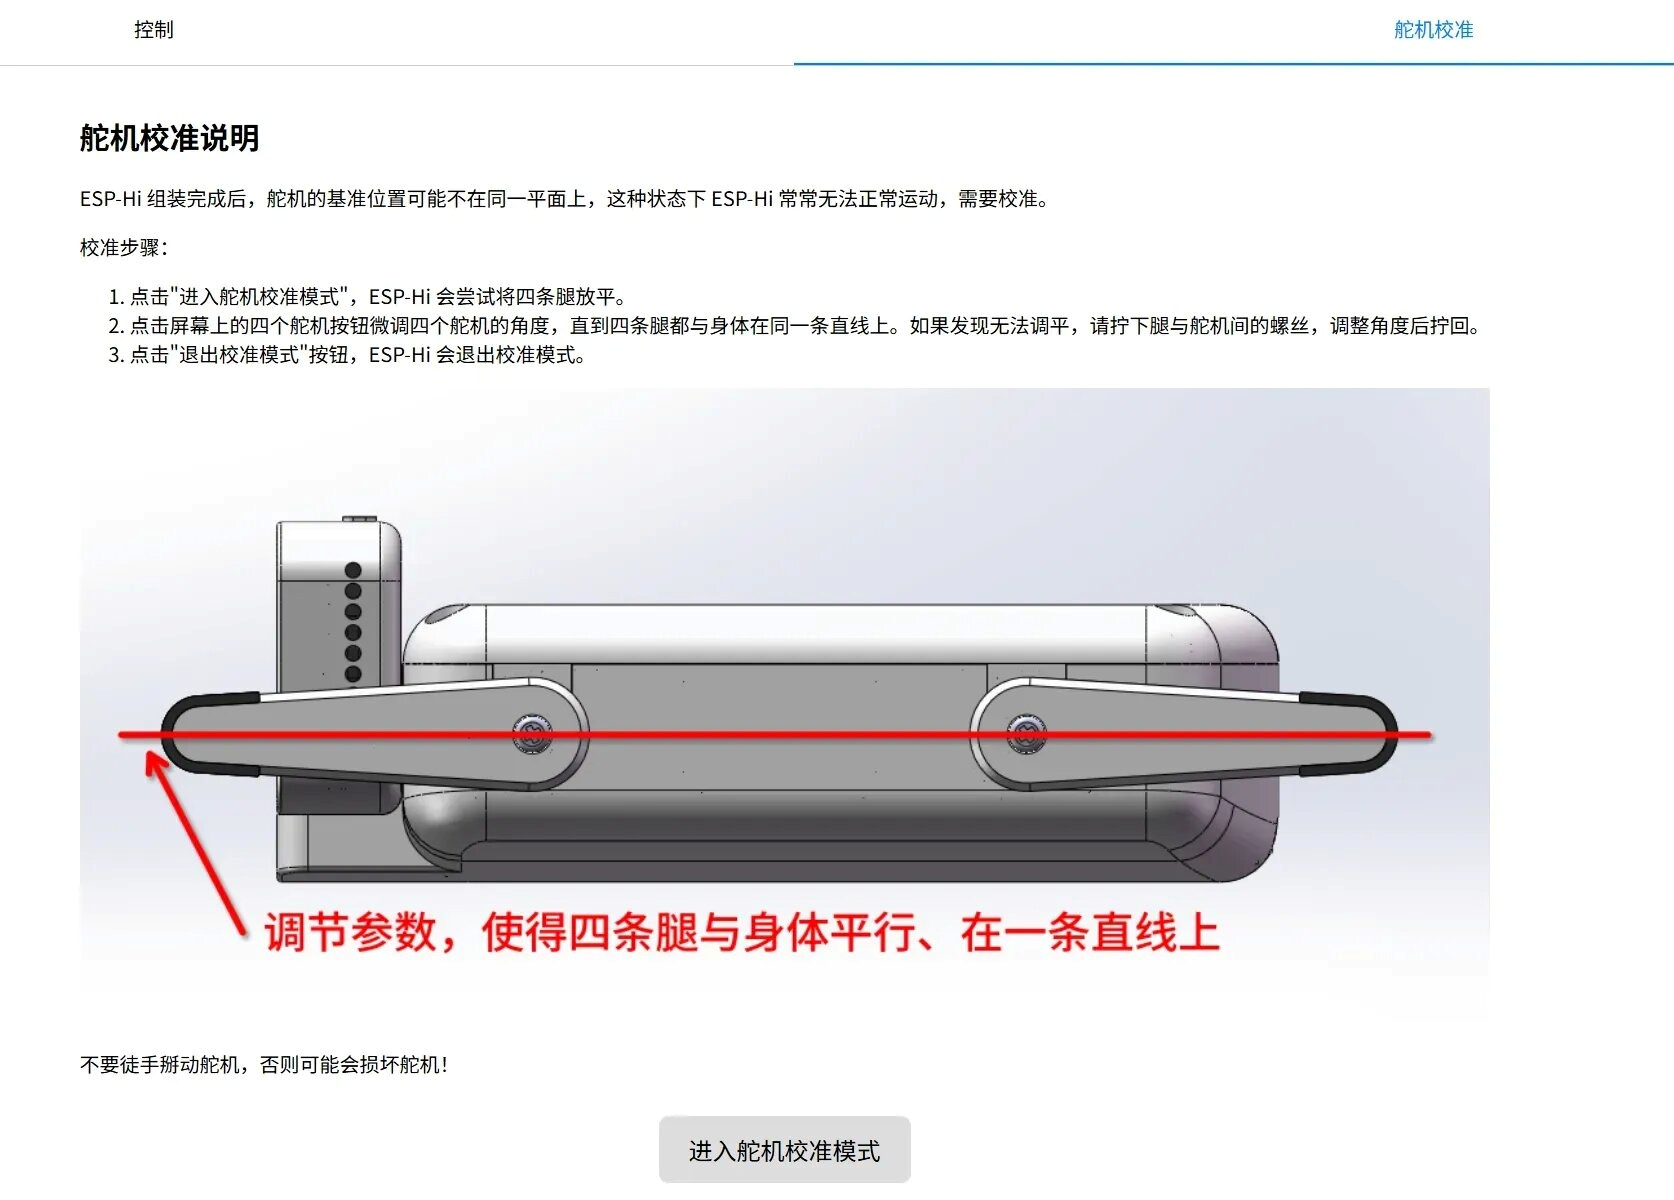
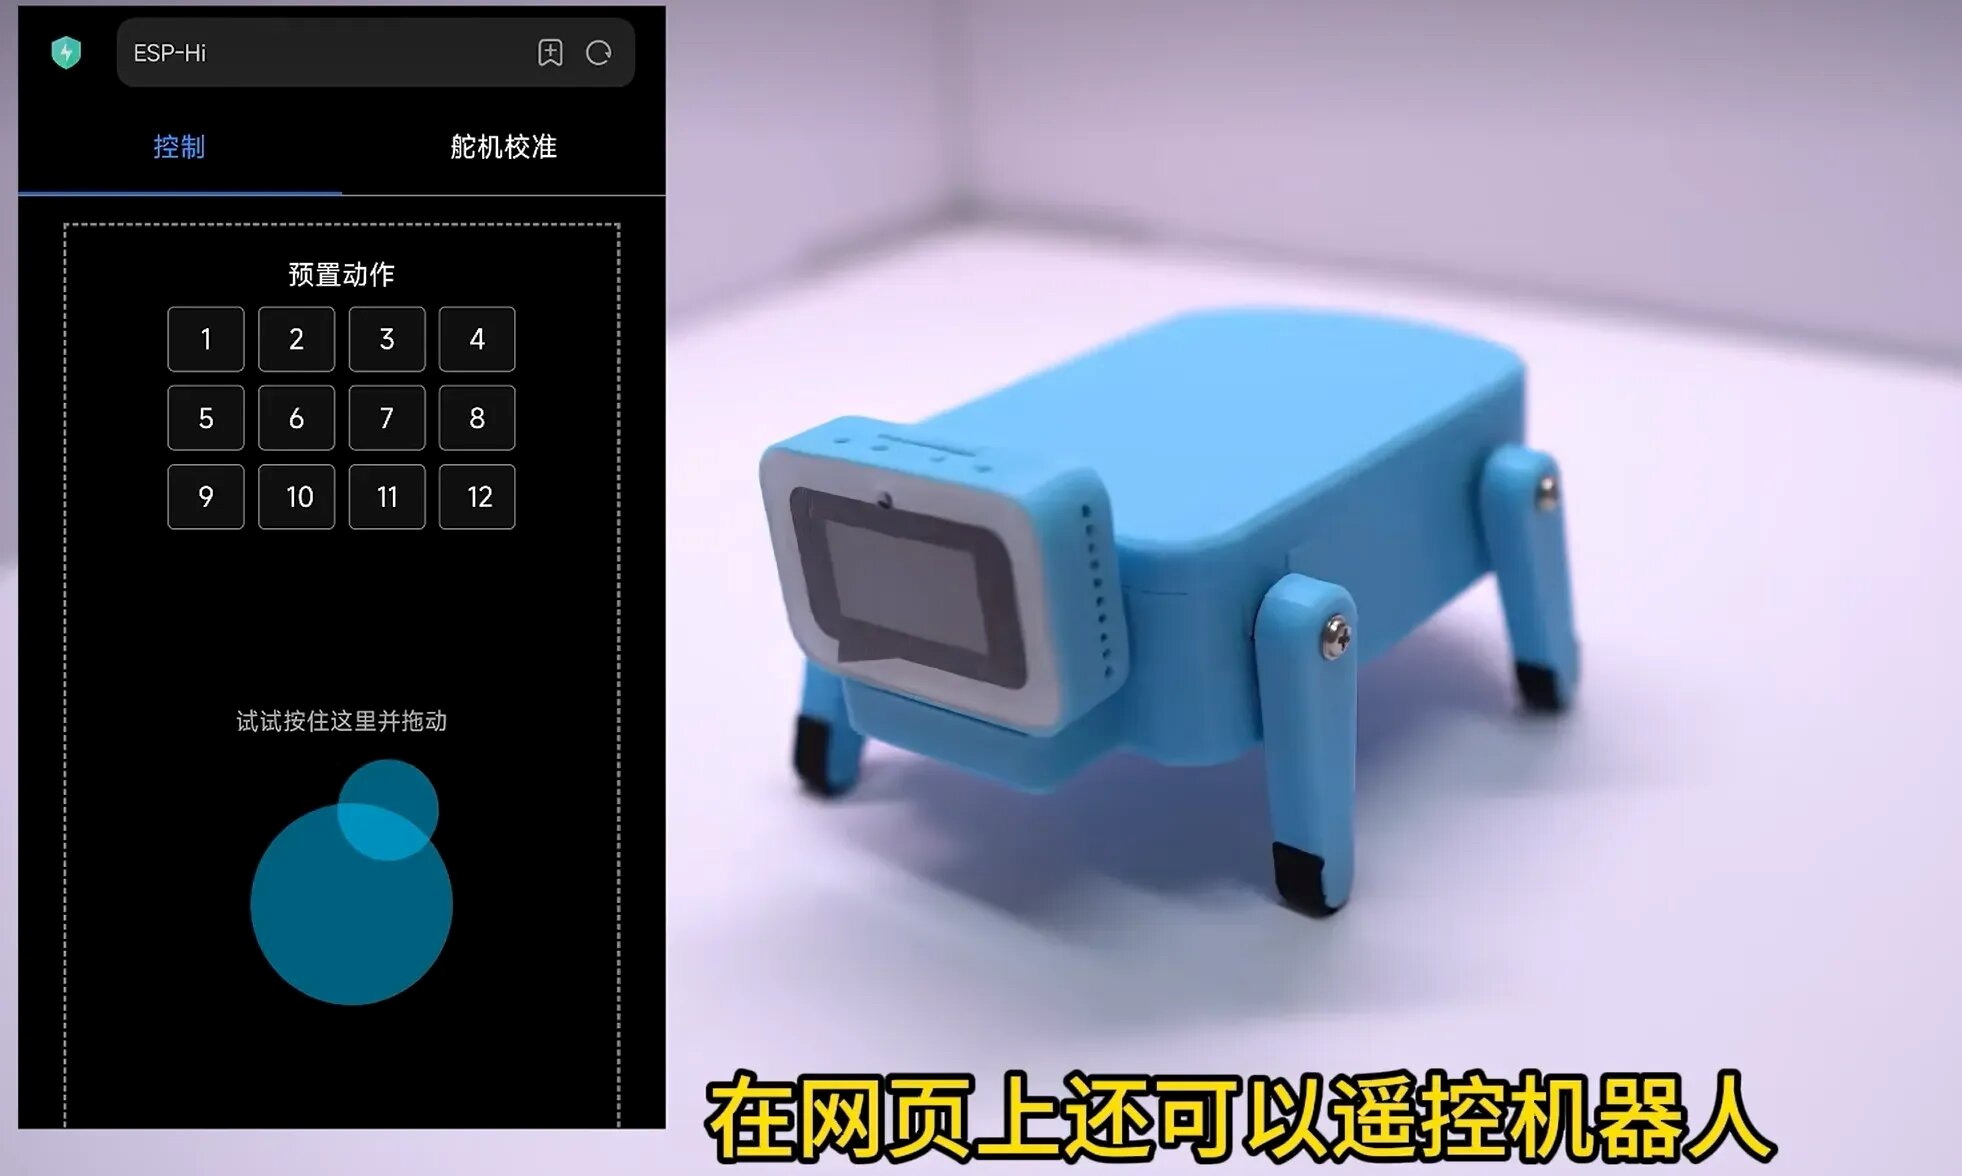
The ESP-Hi also supports web-based control of the Servo Dog, allowing remote control of the robot dog to move forward, backward, turn left, and turn right, as well as 12 preset actions. Servo leveling is also supported via the web interface.
How to access:
First, configure the ESP-HI with the Xiaozhi network.
Mobile phone/PC connected to the same Wi-Fi network
Access the webpage backend by visiting http://esp-hi.local , esp-hi.local , or the IP address of ESP-HI in your browser.
Basic motion control:
Pressing the button allows for basic motion control, which can be interrupted at any time.
Pressing and dragging in the blank area controls the dog's forward, backward, left, and right movements.
Servo calibration:
In servo calibration mode, you can level the robot dog's four legs. Please be sure to read the calibration instructions.
3D structural design
All structural component files are open source and attached; feel free to download and replicate them!
ESP-Hi Body 3D Structure
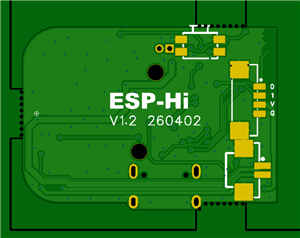
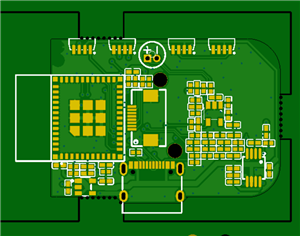
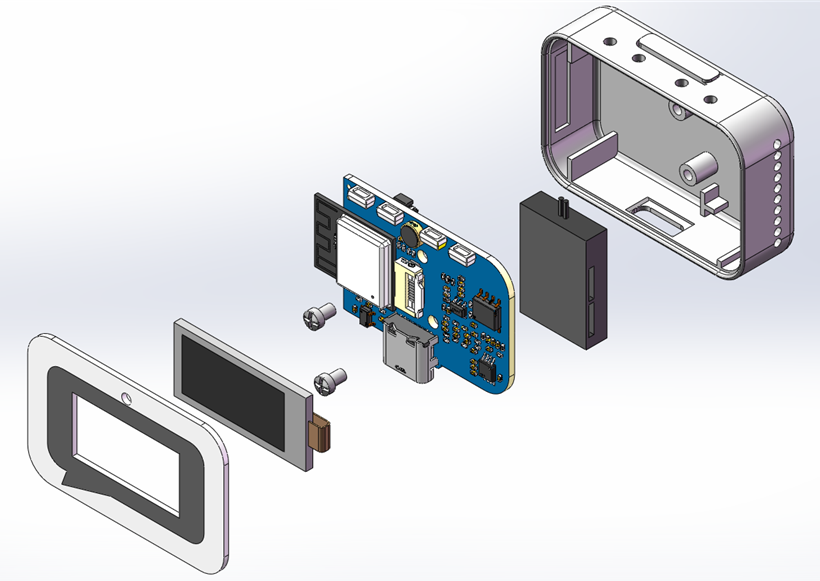
The ESP-Hi main body adopts a stacked design, consisting of an ESP-Hi MainBoard PCB ( 1.2mm thick ), two 3D printed structural parts (a shell and a light-shielding and noise-reducing structural part), and a front acrylic panel ( 1mm thick ).
ESP-Hi Robot Dog Base 3D Structure
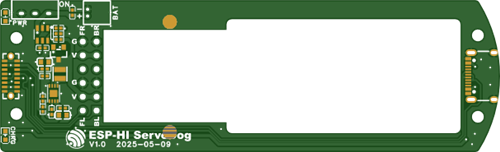
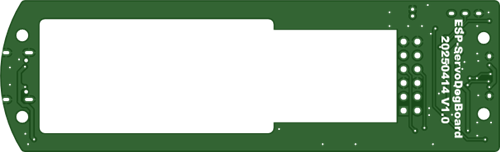
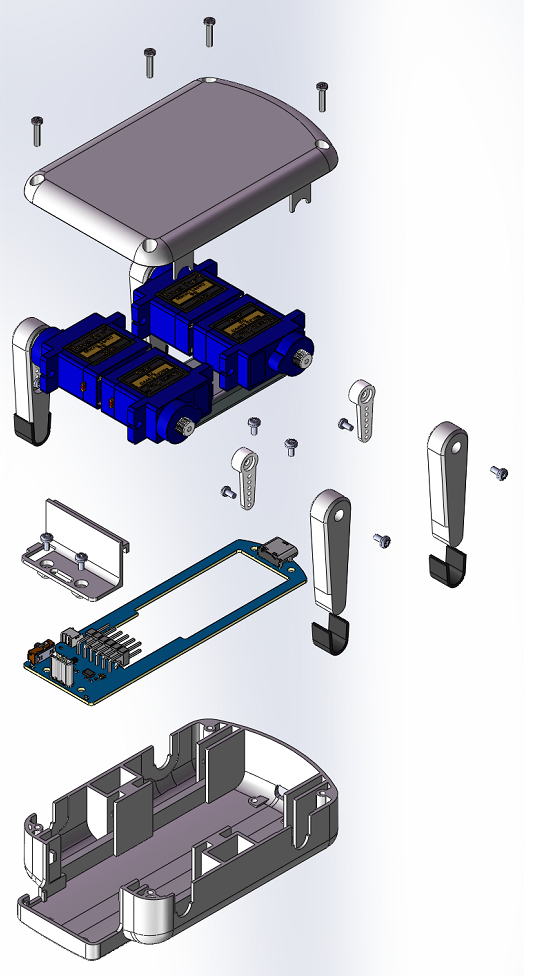
The ESP-Hi robot dog's base consists of a ServoDogBoard PCB board, four 3D-printed parts, a 702040 500mAh lithium-ion battery, and four 180-degree SG92R servos. An exploded view of the 3D structure is shown below:
Replica Tutorial
Please prepare the following materials before assembling the main body:
Serial Number
describe
1
3D printed parts
2
M2*4mm self-tapping screws
4
ESP-Hi MainBoard
5
2014B Speaker
6
Printing panel
Please prepare the following materials before assembling the robot dog base:
Serial Number
describe
1
3D printed parts
2
4 180-degree SG92R servos
4
ServoDogBoard
5
702040 500mAh Lithium-ion Battery
6
Several M2 screws and the servo's included screw pack
Points to note when throwing the board:
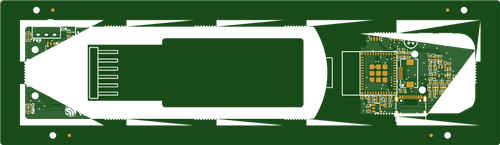
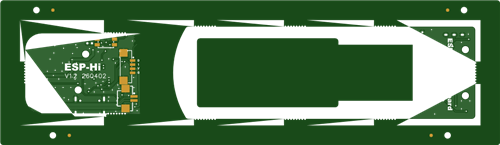
Please select a board thickness of 1.2mm for PCB fabrication.
Hardware assembly
ESP-Hi main unit assembly
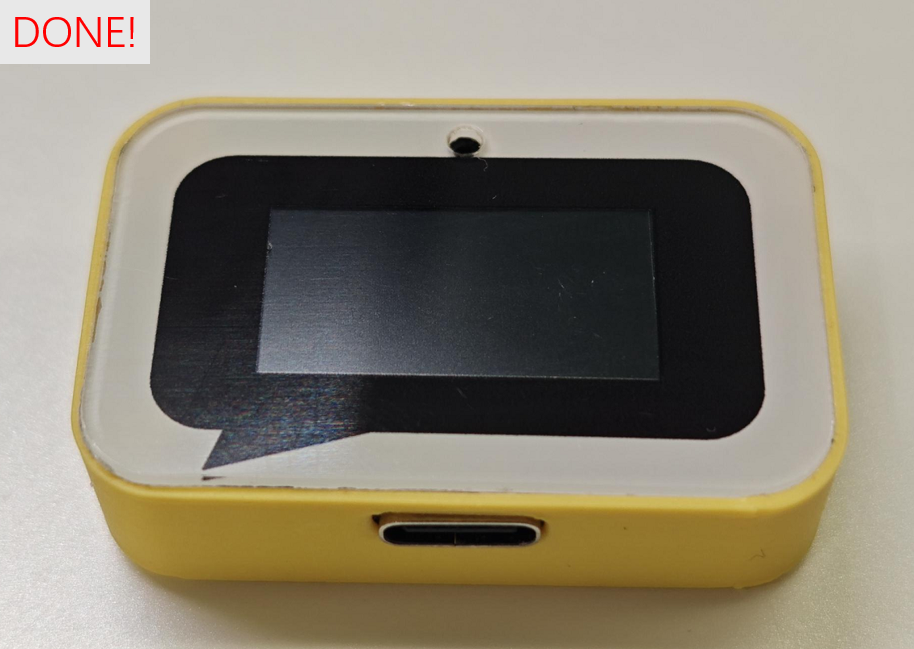
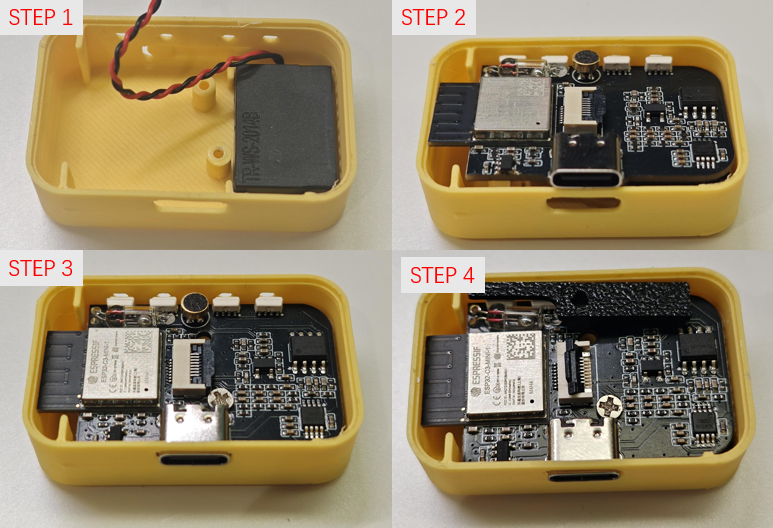
The main body has few structural parts. During assembly, first fix the speaker to the structural parts, and then fix the PCB to the printed shell. Note that the antenna is very close to the shell. During assembly, please first embed the left side and top into the shell, and then use the toughness of the 3D printed shell to put the USB port into the shell.
Assembly completed image:
Because there is a large gap between the PCB and the printed panel, light-shielding and noise-reducing structural components must be used to reduce microphone pickup noise.
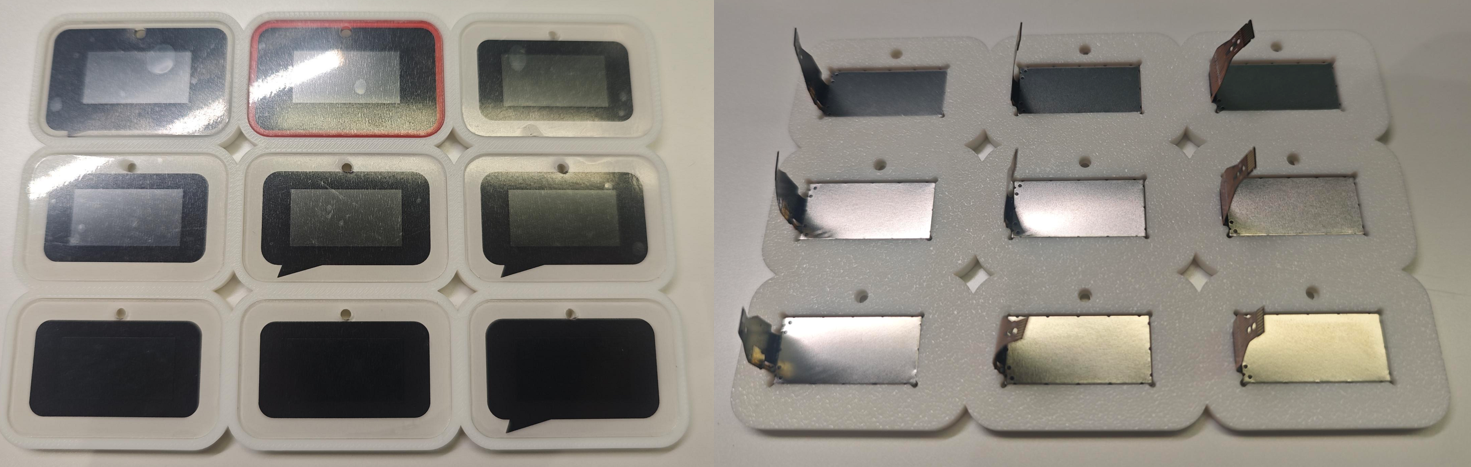
The display screen needs to be pasted onto the acrylic panel. To avoid pasting it crookedly by hand , a screen pasting tool is provided in the accessories . It is recommended to fix the screen onto the tool first, then paste the screen and remove it.
Robot dog base assembly
All 3D printed parts need to be prepared before assembly.
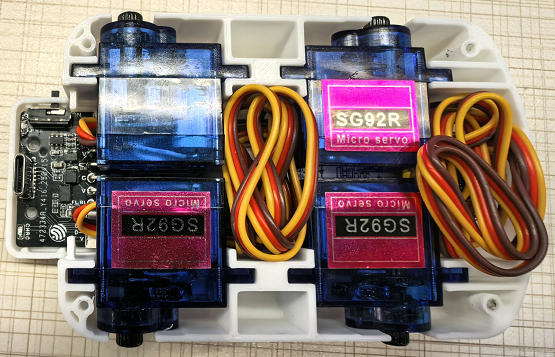
Step 1: Install the PCB board, battery, and four servos into the bottom housing in sequence. The assembled result is shown below:
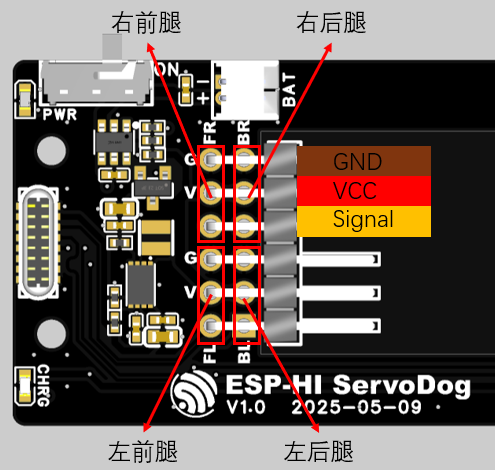
Note: When assembling the servo, ensure the pin order is correct. Please connect the pins according to the silkscreen markings on the PCB board. The assembly diagram is shown below:
Step 2: Install the PCB front cover. The result is as follows:
Step 3: Install the outer casing cover.
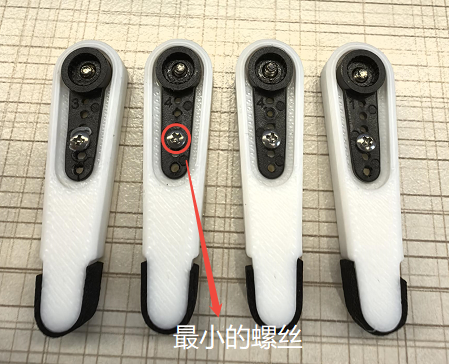
Step 4: Secure the smallest servo arm from the servo accessory kit to the 3D-printed leg using the smallest screws. The result is as follows:
Step 5: The final step is to attach the leg to the servo and secure it with screws.
ESP-HI: Integrating Xiaozhi AI into a Robot Dog
Project images are for reference only. Actual production is based on the manufacturing files on the project page.
Please review the designer's notes (e.g., PCB thickness) and select the appropriate options.
PCBWay is not responsible
for issues caused by unsuitable parameter selections.
For more important ordering information, please refer to
Read More









Raspberry Pi 5 7 Inch Touch Screen IPS 1024x600 HD LCD HDMI-compatible Display for RPI 4B 3B+ OPI 5 AIDA64 PC Secondary Screen(Without Speaker)
BUY NOW


- Comments(0)
- Likes(4)
More by Gugun Gumilar
-
 ESP-HI: Integrating Xiaozhi AI into a Robot Dog
Project OverviewYOU CAN BUY THIS KIT ON ALI EXPRESSESP-Hi is an ultra-low-cost AI conversational rob...
ESP-HI: Integrating Xiaozhi AI into a Robot Dog
Project OverviewYOU CAN BUY THIS KIT ON ALI EXPRESSESP-Hi is an ultra-low-cost AI conversational rob...
-
 Otto Robot ESP32 based Xiaozhi AI Frameworks
YOU CAN BUY THIS KIT ON ALIEXPRESSOtto is an open-source humanoid robot platform with various motion...
Otto Robot ESP32 based Xiaozhi AI Frameworks
YOU CAN BUY THIS KIT ON ALIEXPRESSOtto is an open-source humanoid robot platform with various motion...
-
 Easy Flyback Music
This is my design for easy flyback from franzoli electronics website
Easy Flyback Music
This is my design for easy flyback from franzoli electronics website
-
 Suntik PWM
PWM Module for Modification ATX Power Supply to Variabe power supply
Suntik PWM
PWM Module for Modification ATX Power Supply to Variabe power supply
-
 PCB based Tesla Coil GaN edition
Tesla Coil with pcb as secondary coil, you can read the documentation at https://hackaday.io/project...
PCB based Tesla Coil GaN edition
Tesla Coil with pcb as secondary coil, you can read the documentation at https://hackaday.io/project...
-
 Musical Flyback Driver
https://belajarelektrons.blogspot.com/2015/01/musical-flyback.html
Musical Flyback Driver
https://belajarelektrons.blogspot.com/2015/01/musical-flyback.html
-
 Mini SSTC12V
This time I tried to make a 12 Volt Mini SSTC the reason is simple because it is safer than SSTC whi...
Mini SSTC12V
This time I tried to make a 12 Volt Mini SSTC the reason is simple because it is safer than SSTC whi...
-
SmallOLED - Live PC Stats, Animated Clocks & Audio Visualizer
703 0 3 -
"Talking Multimeter": Arduino-Based Speech Add-on for Multimeters with SCPI Protocol
395 0 1 -
Programmable Mist Maker - XIAO / QT PY Extension
2840 2 3 -
RadioHAT - Raspberry Pi radio development platform
2434 0 4 -
-
-
-
ARPS-2 – Arduino-Compatible Robot Project Shield for Arduino UNO
4519 0 6


















