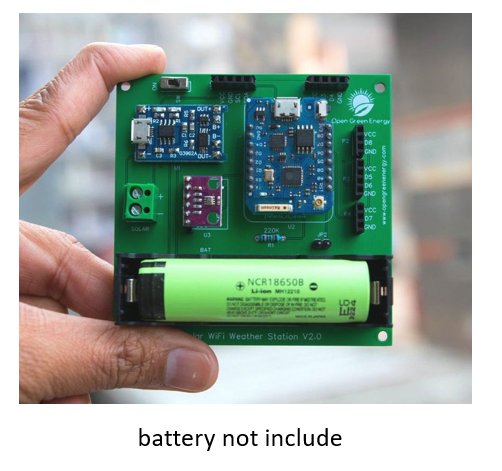
Note:now this is the assembled one and below is the package :
Feature
The salient features of the Solar Powered Wi-Fi Weather Station V2.0 are:
Connect to Wi-Fi, and upload the data to the web (Blynk App and Thingspeak)
Monitoring Weather parameters like Temperature, Pressure, Humidity, Dew Point, altitude and UV level, etc.
Extra ports to add more Weather Sensors
Remote Battery Status Monitoring
By using a Solar Panel (1W) it is Independence from the external power source.
Attention: Battery and 3D printed enclosure are NOT included in the kit package.
Working:
The heart of the project is an ESP8266 based Wemos D1 mini Pro board. It is hooked up to the various Weather Sensors (like BME280, DS18B20, and GY-1145). The sensors sense the current environmental conditions and fed the weather parameters (like: Temperature, Pressure, Humidity, altitude and UV Index, etc.) into the Wemos board. Then these data are processed and uploaded to the web through its inbuilt WiFi chip. The uploaded parameters can be monitored through the Blynk app and Thingspeak.
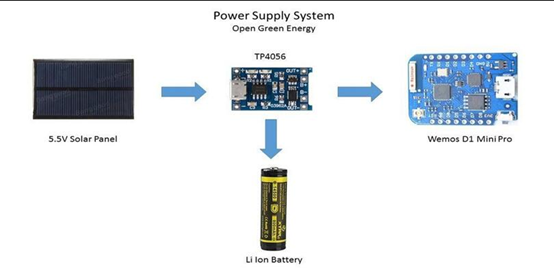
The power supply to the board is provided by a 18650 Li-Ion battery. The battery is charged by using a 1W Solar panel through TP4056 charging board.
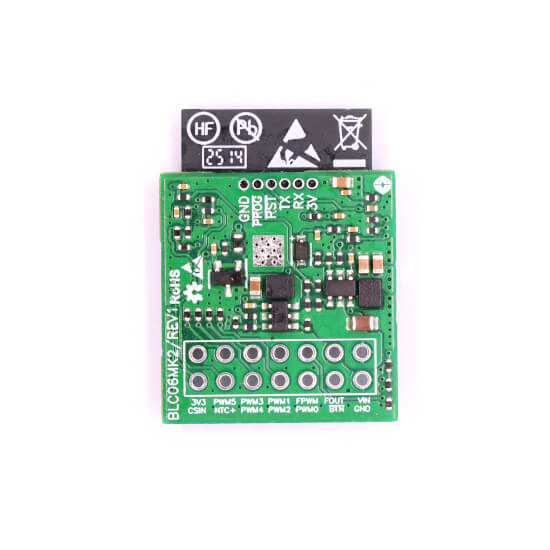
Adding the external antenna
The Wemos D1 mini Pro board have an inbuilt ceramic antenna along with provision for connecting an external antenna to improve the range. Before using the external antenna, you have to reroute the antenna signal from the built-in ceramic antenna, to the external socket. This can be done by rotating the small surface mount (0603) Zero Ohm resistor (sometimes called a link).
Assembling the PCB
It is good practice to solder the components according to their height. Solder the lesser height components first. First solder the resistors, switch and then moved towards the bigger components like headers pin, screw terminal and battery holder.
Adding the modules and battery
Insert the boards into their respective headers. The headers are clearly labelled on the PCB. First place the TP4056 board and solder all the pads. Then add the Wemos Board and BME280 Sensor. At last, insert the 18650 battery into the battery holder.