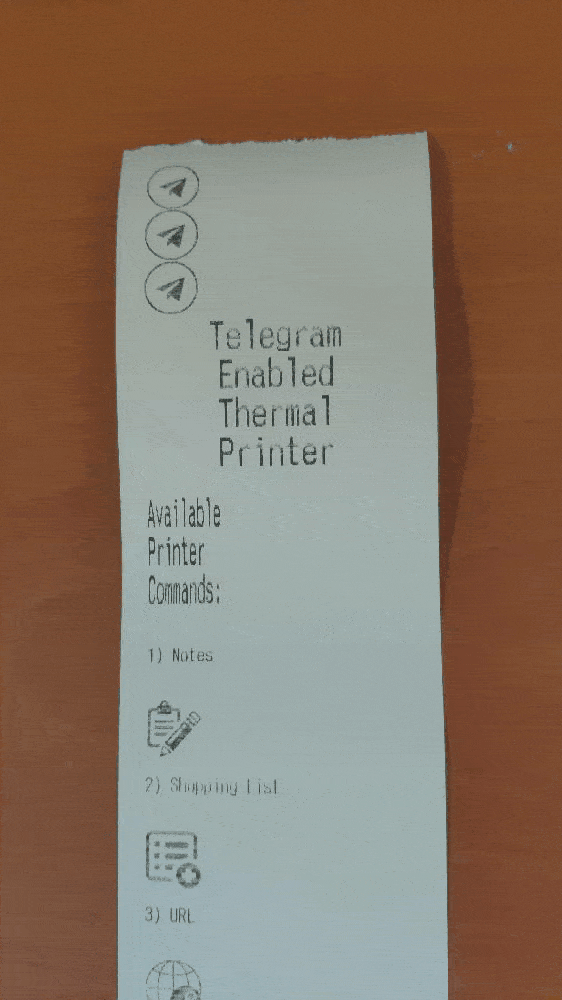
Summary: In this tutorial, I will show you print images and barcodes with a tiny thermal printer via Arduino.
To be able to use a tiny thermal printer with Arduino, download the Adafruit Thermal Printer library.
Built-in functions in the library to print text with different settings:
In Windows, to print bitmaps with the thermal printer:
⭐ Use an image editing program to save your images as 1-bit BMPs - the built-in Paint program will suffice.
You can download the converted images below from here.
⭐ Then, install and run the LCD Assistant.
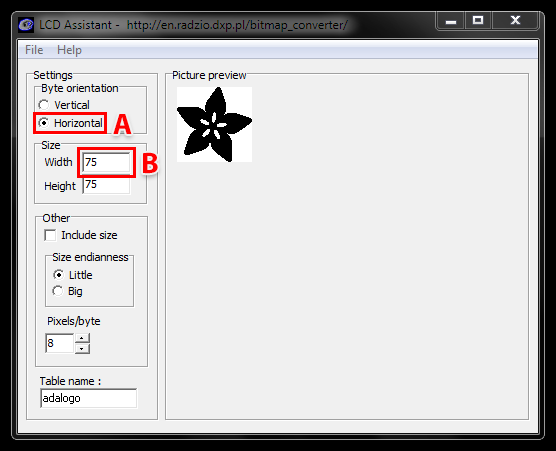
⭐ First, in the “Byte orientation” section of the settings, select “Horizontal” (item A in the image above).
⭐ Second (item B above), you may need to change the Width setting. Because this software (and the thermal printer) handle images in horizontal groups of eight pixels, if the image width is not a multiple of 8, it will be truncated (cropped) to the nearest smaller 8-pixel boundary.
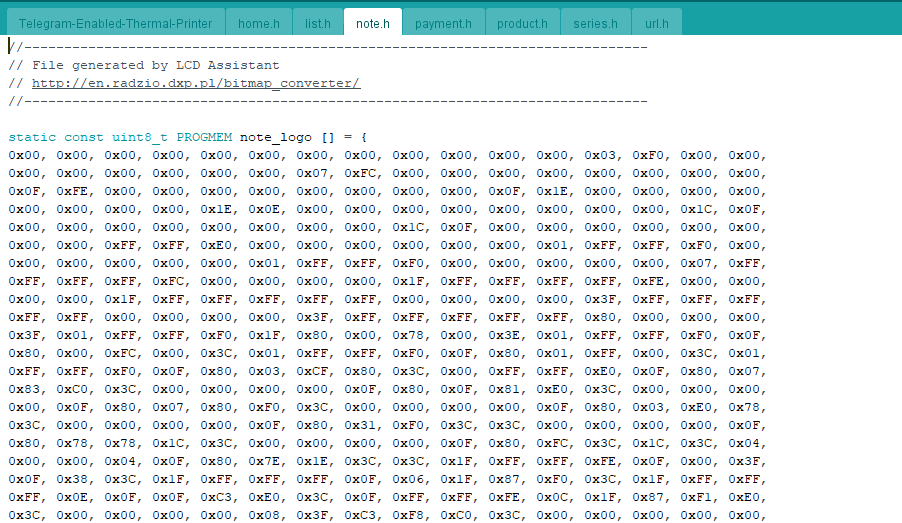
⭐ After converting each image, at the top of the file containing the new table data, change “const unsigned char” to “static const uint8_t PROGMEM” as shown below:
⭐ Then, output the image by calling printBitmap(width, height, tablename), where width and height are the dimensions of the image in pixels.
To inspect the tutorial for Mac and Linux, click here.
Barcode Printing:
⭐ To print barcodes with different codes - UPC A, UPC E, EAN13, EAN8, CODE39, I25, CODEBAR, CODE93, CODE128, CODE11 and MSI - use the printBarcode("barcodedata", BARCODETYPE) function in the library.
In the Arduino IDE, after completing the steps above:
⭐ Define and initiate the thermal printer.
Adafruit_Thermal printer(&Serial1);

...

// NOTE: SOME PRINTERS NEED 19200 BAUD instead of 9600, check test page.
Serial1.begin(9600);  // Initialize hardware serial
printer.begin();
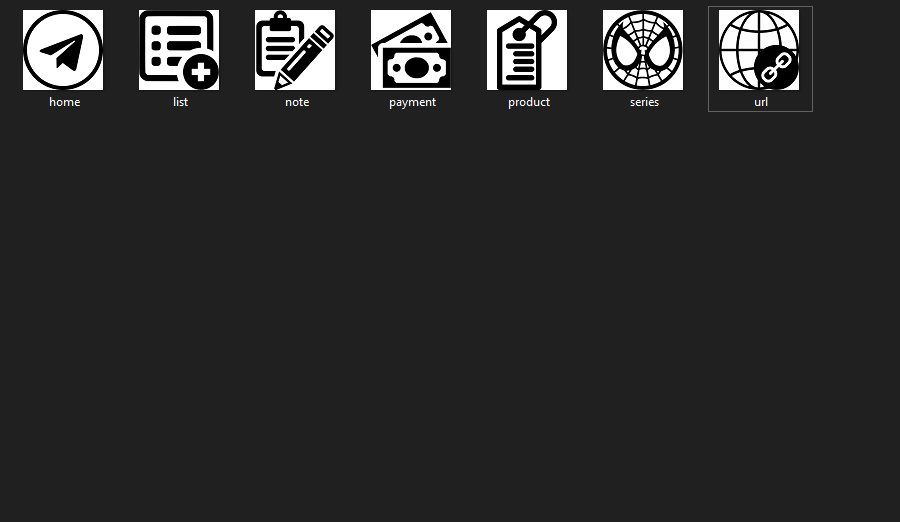
⭐ Include the converted bitmaps.
#include "note.h"
#include "list.h"
#include "url.h"
#include "payment.h"
#include "product.h"
#include "series.h"
#include "home.h"
⭐ Define functions for each command to print the given content.
⭐ For each command, start printing with the given command sign (bitmap).
⭐ The following code is a part of this electronics project.
void print_notes(String text){
  printer.printBitmap(80, 80, note_logo);
  printer.boldOn();
  printer.justify('R');
  printer.setSize('L');
  printer.println(F("Note\n"));
  printer.boldOff();
  printer.justify('L');
  printer.setSize('M');
  printer.println(text);
  printer.feed(5);
  printer.setDefault(); // Restore printer to defaults
}

void print_shopping_list(String text){
  printer.printBitmap(80, 80, list_logo);
  printer.boldOn();
  printer.justify('R');
  printer.setSize('L');
  printer.println(F("Shopping"));
  printer.println(F("List\n"));
  printer.boldOff();
  printer.justify('L');
  printer.setSize('S');
  printer.setLineHeight(50);
  printer.println(text);
  printer.setLineHeight();
  printer.feed(5);
  printer.setDefault(); // Restore printer to defaults
}

void print_URL(String text){
  printer.printBitmap(80, 80, url_logo);
  printer.boldOn();
  printer.justify('R');
  printer.setSize('L');
  printer.println(F("URL\n"));
  printer.boldOff();
  printer.justify('L');
  printer.setSize('S');
  printer.println(text);
  printer.feed(5);
  printer.setDefault(); // Restore printer to defaults
}

void print_payments(String text){
  printer.printBitmap(80, 80, payment_logo);
  printer.boldOn();
  printer.justify('R');
  printer.setSize('L');
  printer.println(F("Payment\n"));
  printer.boldOff();
  printer.justify('L');
  printer.setSize('M');
  printer.println(text);
  printer.feed(5);
  printer.setDefault(); // Restore printer to defaults
}

void print_series(String text){
  printer.printBitmap(80, 80, series_logo);
  printer.boldOn();
  printer.justify('R');
  printer.setSize('L');
  printer.println(F("New"));
  printer.println(F("Episode\n"));
  printer.boldOff();
  printer.justify('L');
  printer.setSize('M');
  printer.println(text);
  printer.feed(5);
  printer.setDefault(); // Restore printer to defaults
}
⭐ In the print_product_barcode function, print out the content as a barcode with the CODE 93 code (compressed version of CODE 39).
void print_product_barcode(const char *text){
  printer.printBitmap(80, 80, product_logo);
  printer.boldOn();
  printer.justify('R');
  printer.setSize('L');
  printer.println(F("Product\n"));
  printer.boldOff();
  printer.justify('L');
  // CODE 93: compressed version of CODE 39:
  printer.setBarcodeHeight(30);
  printer.printBarcode(text, CODE93);
  printer.feed(5);
  printer.setDefault(); // Restore printer to defaults
}
|
|
Arduino |
x 1 | |
|
|
Tiny Thermal Printer |
x 1 |

|
arduino IDEArduino
|


