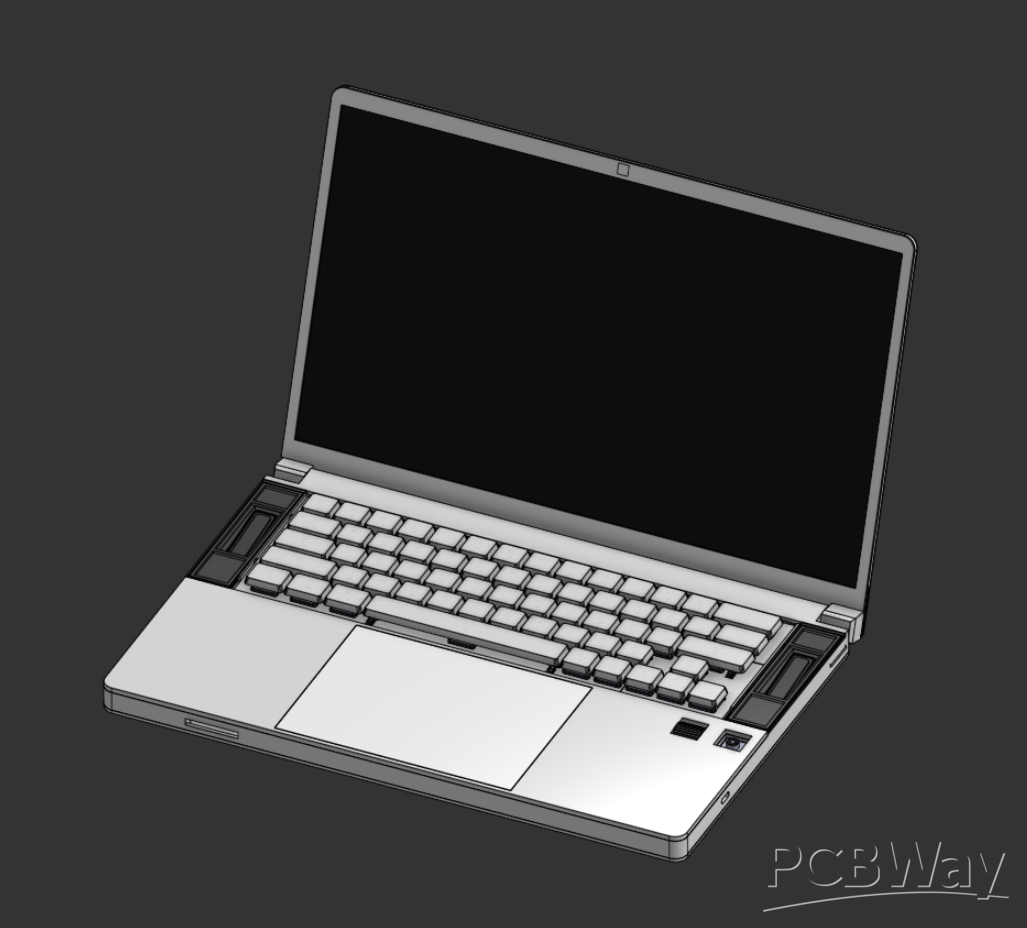

Fully custom laptop
I’m a high school student in Dallas, Texas passionate about electronics engineering and CAD. Through my school’s robotics team, I developed and refined my CAD skills, and by repairing hundreds of laptops at a non-profit, I discovered my passion for electronics. Since then, I have been working extremely hard to complete my personal project, a laptop, which encompasses both these important skills.
After experiencing the design of many different laptop models of all the laptops that I’ve bought and used, I had enough with the mundane designs and decided that I can make my own.
Design requirements:
- Laptop must run windows
- High resolution screen
- Mechanical keyboard with good travel
- Premium audio system
- Reasonable trackpad
- Really good looking art work on the finished product
Compute
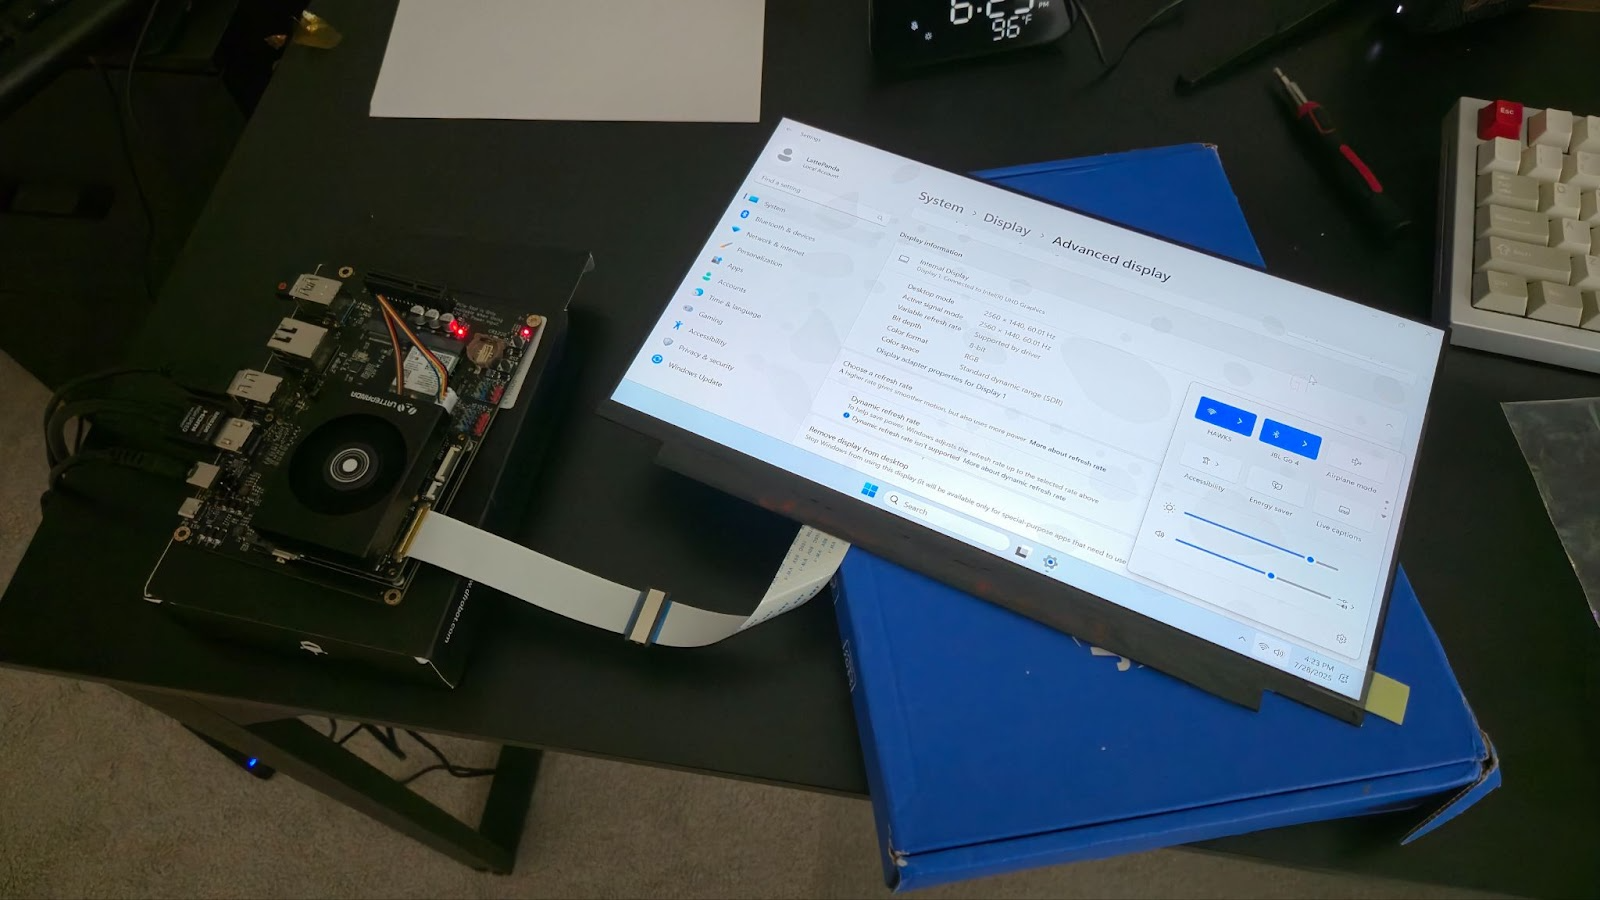
Through researching open source windows compute modules, I found the Lattepanda Mu compute module, which had CPU, RAM, storage, and an eDP connector all soldered with the benefit of being completely open sourced. This compute module plugs into a DDR4 SODIMM slot and has 8 USB 2.0 ports and 8 PCIe gen 3 lanes.
Motherboard and Screen
With this flexibility of the compute module, I was able to create a schematic for the entire board (I still have to design the PCB). To simplify the board design further and lower the risk, I decided to separate all subsystems, so that in case anything failed, I would not have a broken board. These are the different subsystems:
- Keyboard and volume knob module with ATMega32u4 IC
- Webcam and microphone interface with RP2040 IC
- Power distribution with type c PD and battery charger
- Audio system with 2 tweeters and 2 woofers, managed by DSP
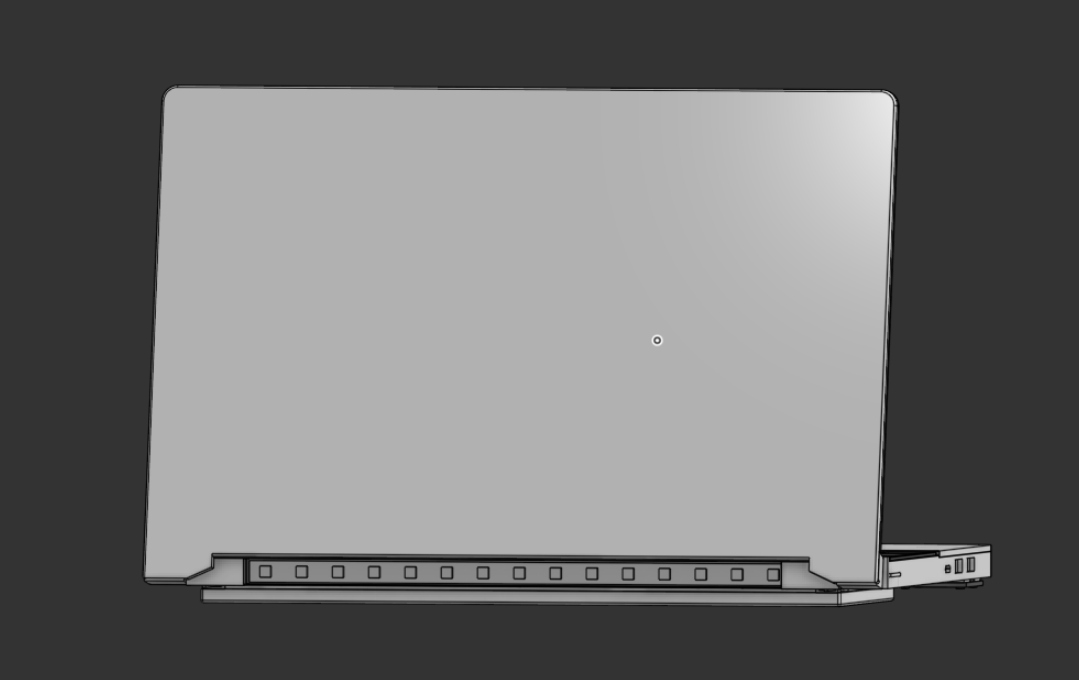
The main motherboard has high speed 2 USB A ports, 1 USB C port, and a SD card reader. It also has 2 m.2 SSD slots, 1 wifi 7 card slot, and the Lattepanda Mu. For the display, I wanted a high resolution panel, so I chose a Lenovo ThinkPad AUO B140QAN02.3 display, with a 14 inch 2560x1440p display 60hz.
Keyboard
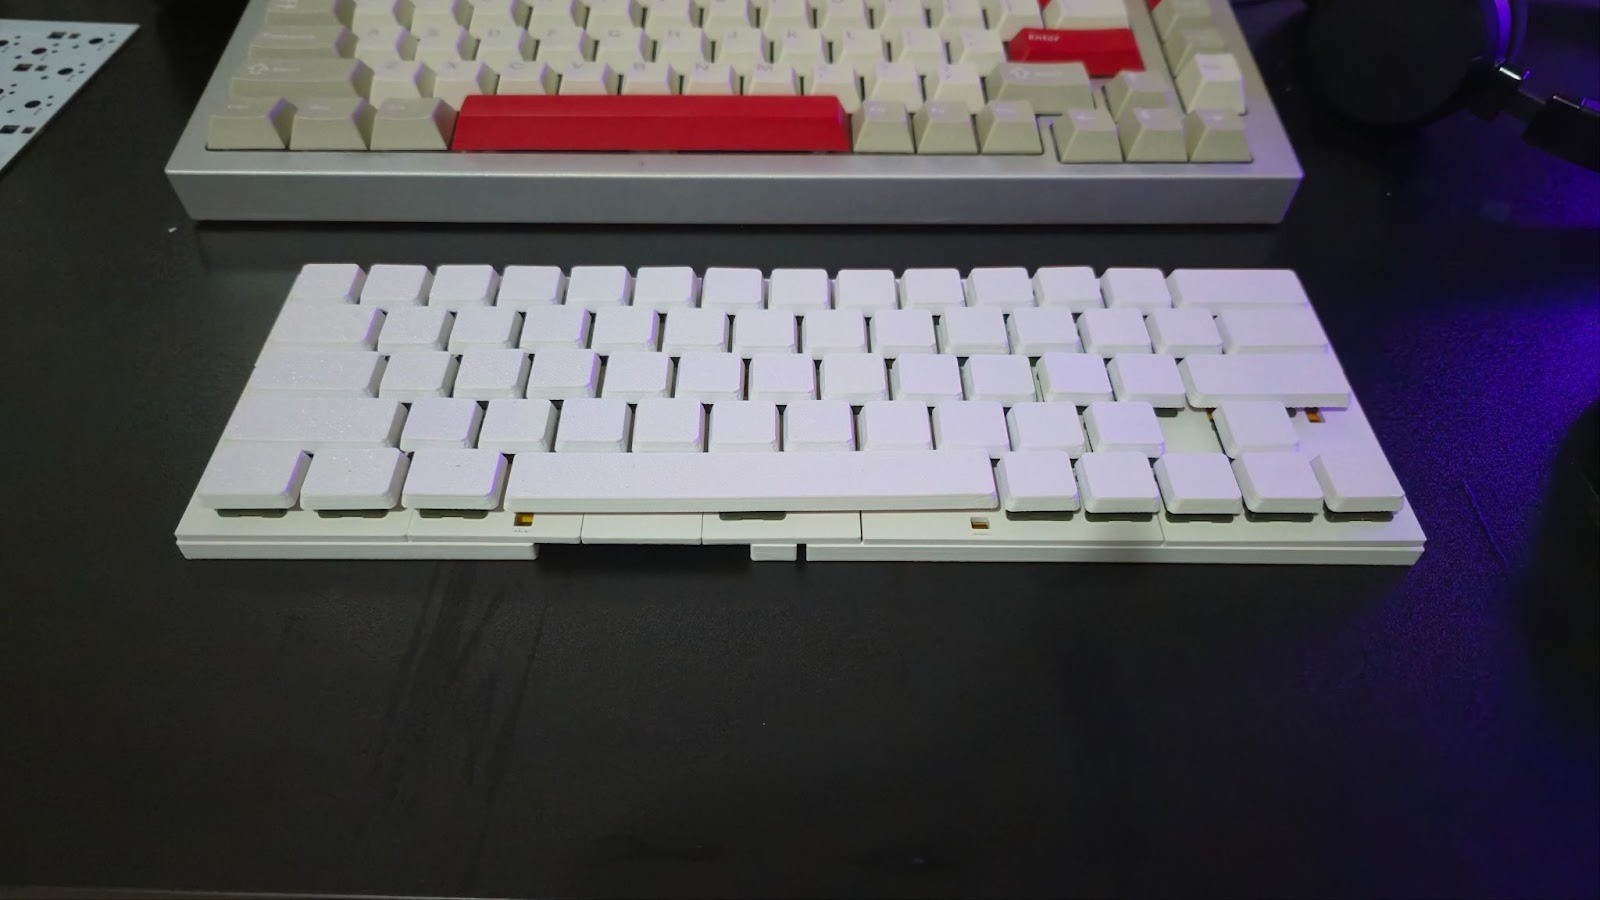
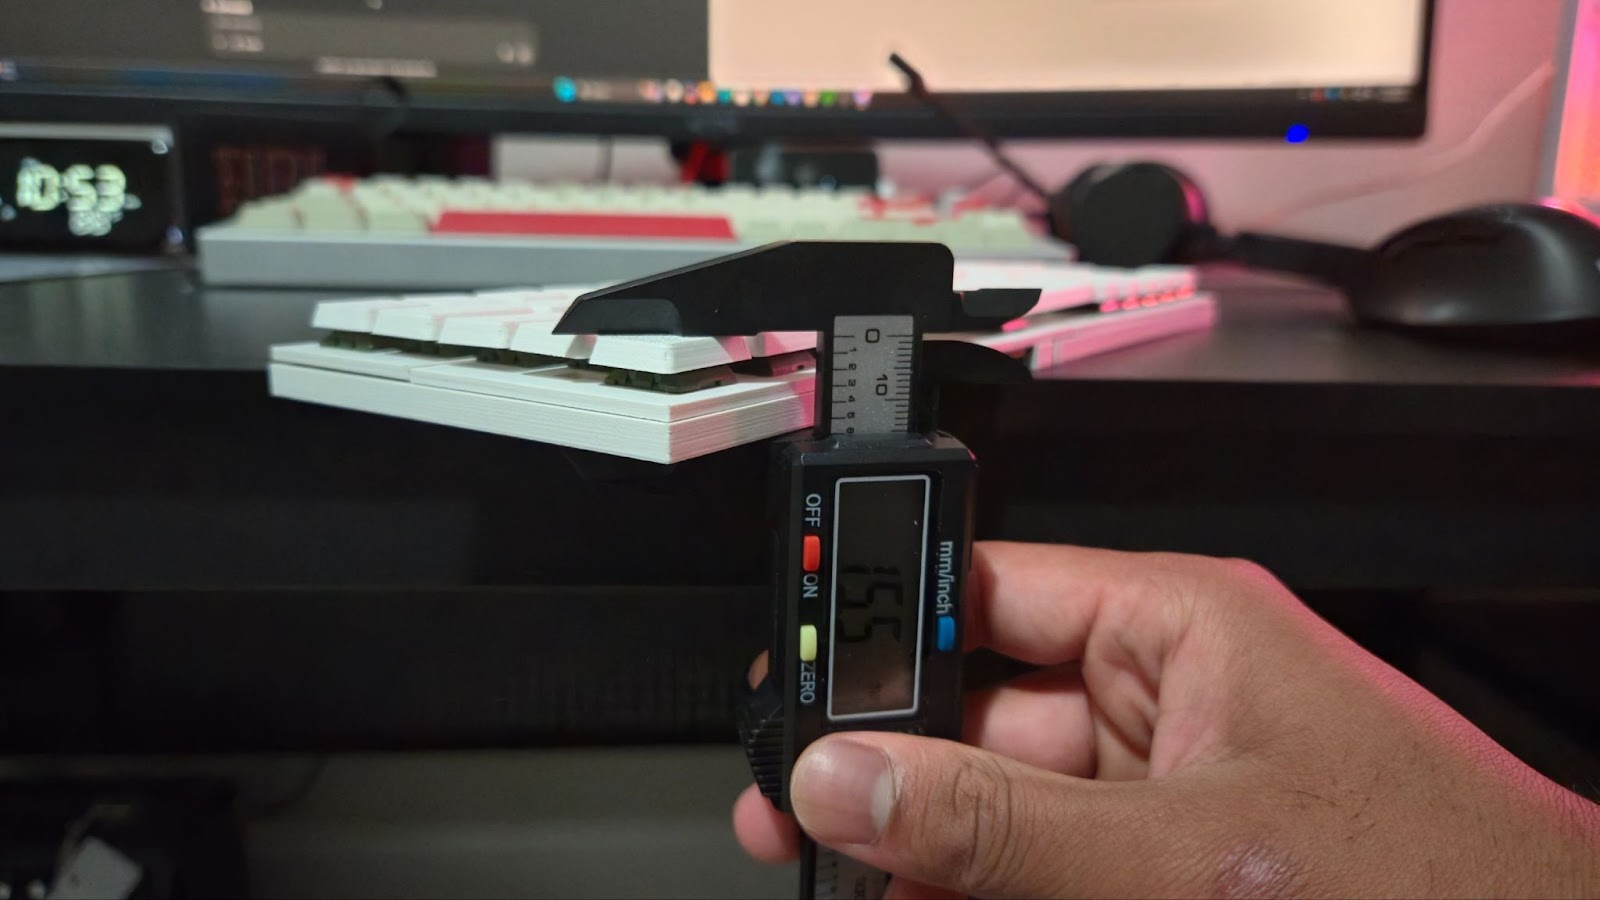
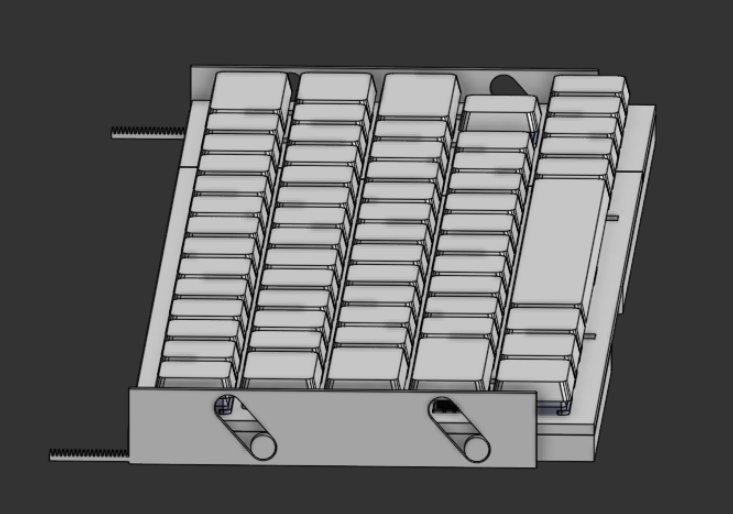
The average switch height of a normal profile mechanical keyboard is greater than 19 mm, however that would be too thick for a laptop. I also didn’t want switches that were too small either. As a result I settled on using the Ghost Low-profile Switches Choc v2. They are 14mm and the end height of the whole keyboard was 15.5mm. This was the perfect size for my laptop. I also used mill maxes to reduce the size of the keyboard and for swapping the switches when needed.
Chassis and Mechanisms
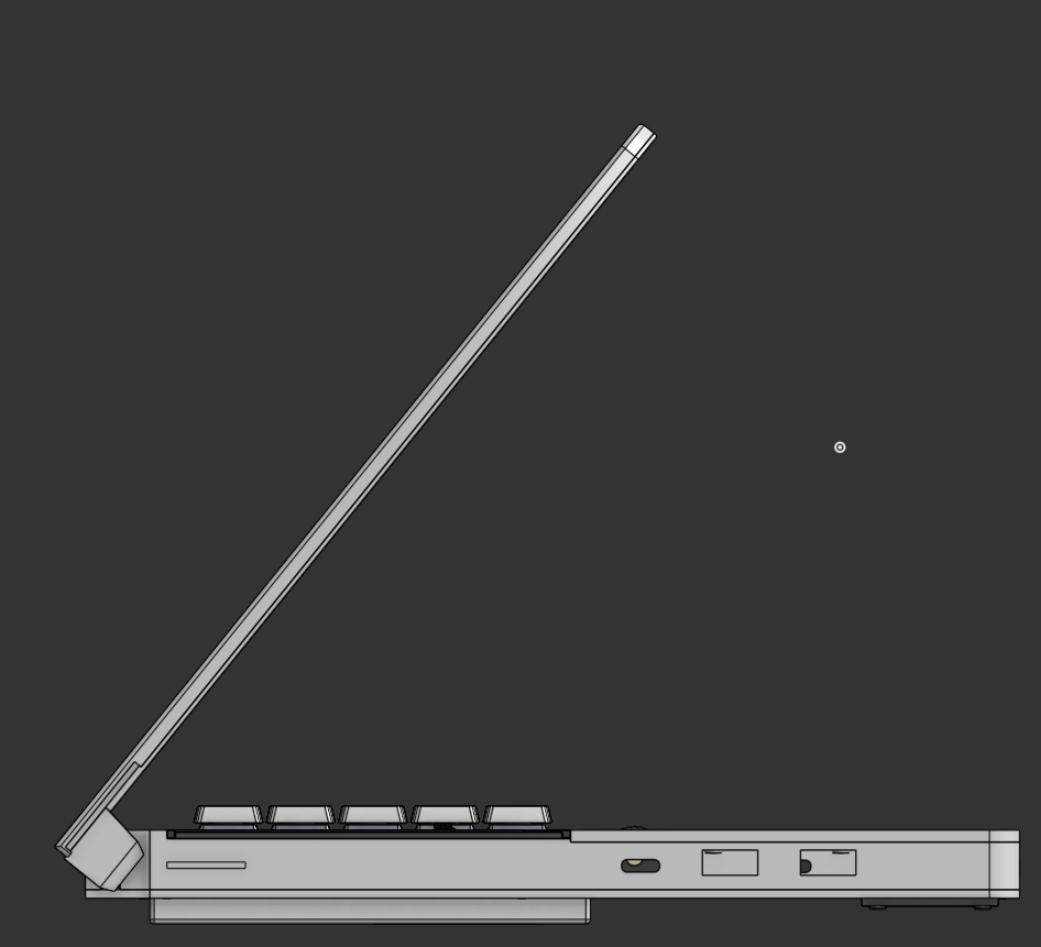
I planned on making the laptop out of aluminum 7075, however it became really expensive and the laptop didn't benefit from it that much. Also to accommodate the weird geometry of the laptop, I had to split everything up into sheet metal and CNC the main body.
The keyboard mechanism allows the mechanical keyboard to rise up 8mm from the chassis, just using the gears from the hinges. The mechanism is similar to how the ROG Duo 16 works, but I am using a cam sliding mechanism instead.
Future Improvements
Originally I planned on using a GPU, however it was causing so many problems like extremely complex power logic, space issues, available power to the laptop when on battery, and being able to source it. I tried designing a laptop board with an ADLink RTX A500 gpu, but I just could not get it to work, but I did learn extremely valuable lessons through the process. Hopefully in the future I can integrate a gpu, possibly an even thinner keyboard, a higher capacity custom shaped battery so I won’t need a whole structure under the keyboard to house it.
Impact
Personally, I have seen a handful of people on YouTube successfully make a fully functioning laptop, and I was heavily inspired by their work. I too hope that I can inspire people around the world to pursue their goals, despite the difficulties that they might face. I have not finished my project yet as I still have to order the parts and finish some software, but I will share my progress of the project on YouTube and other social media platforms.
PCBWay Sponsorship
It's been a dream of mine to build my own laptop and I am extremely happy with the support PCBWay has provided. Through a PCBWay sponsorship, I hope to use PCBWay’s CNC machining and sheet metal services for my custom laptop chassis. Thank you so much to PCBWay and everyone who has supported me through out this process!
Apply for sponsorship >>- Comments(0)
- Likes(2)