


Control your light system with your voice
the project idea was to proof that you can control your home lighting system using only your voice commands , so the 3 LEDs in the project represents different systems in our home as an example .
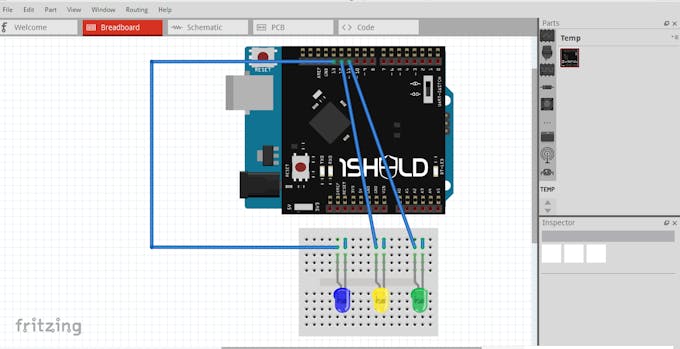
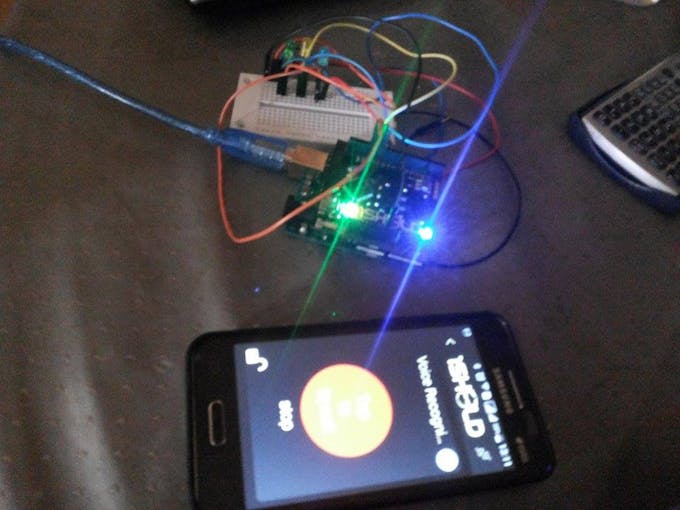
All you need for this project : 1-Arduino uno 2-1sheeld 3-3 LEDs (different colours )then connect the circuit as shown below
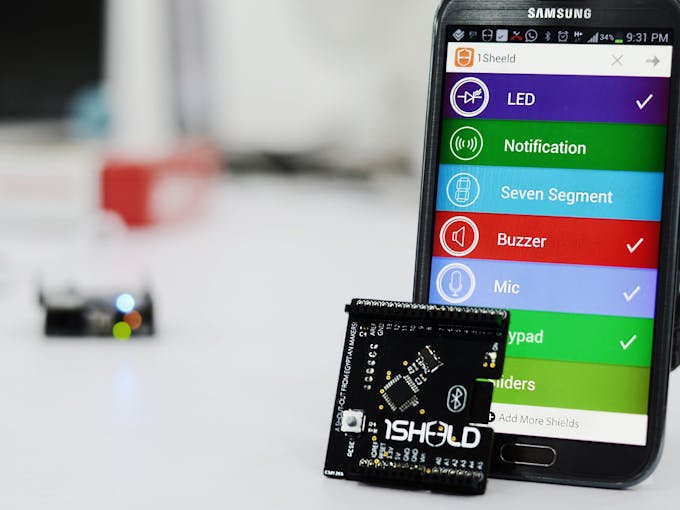
Open 1sheeld app and connect the app with your 1sheeld then open "voice recognition " shield
Press "tap to speak : and then say "playthe 3 leds will turn on
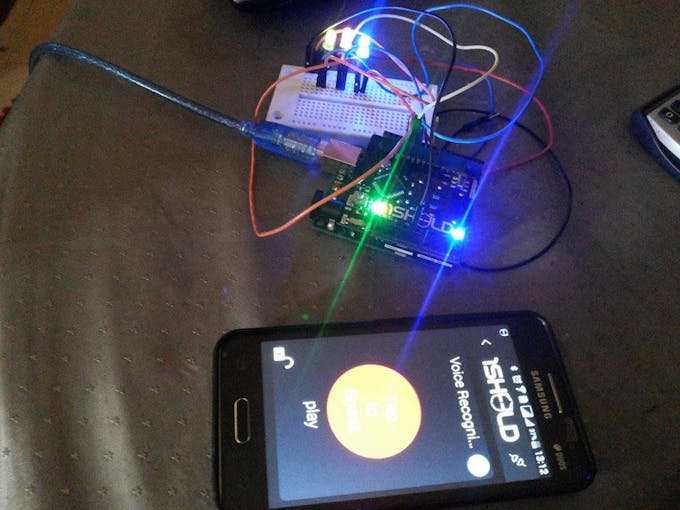
you can turn them off by saying "stop"
Only turn the blue one by saying "blue blue "
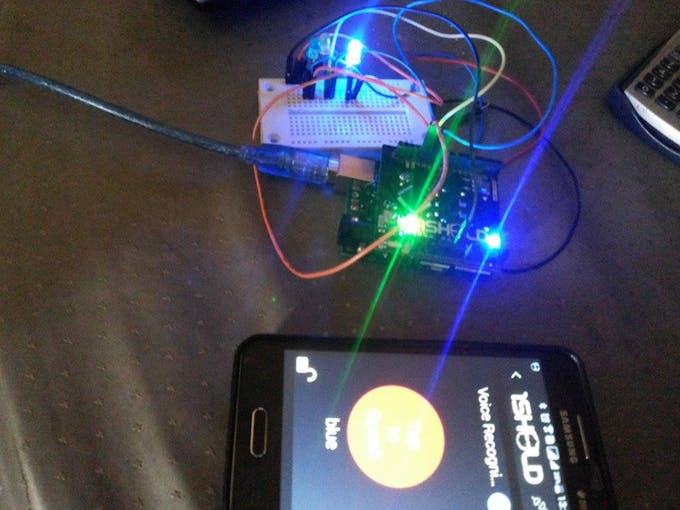
the yellow one by saying "yellow"

and finally the green one by saying "green "
Code #define CUSTOM_SETTINGS
#define INCLUDE_VOICE_RECOGNIZER_SHIELD
#define INCLUDE_MUSIC_PLAYER_SHIELD
#define INCLUDE_TERMINAL_SHIELD
/* Include 1Sheeld library. */
#include <OneSheeld.h>
int Bledpin=13;
int Yledpin=12;
int Gledpin=11;

/* Voice commands set by the user. */
const char playCommand[] = "play";
const char pauseCommand[] = "stop";
const char stopCommand[] = "yellow";
const char nextCommand[] = "green";
const char BlueCommand[] = "blue";

void setup()
{
  pinMode(13,OUTPUT);
  pinMode(12,OUTPUT);
  pinMode(11,OUTPUT);
  /* Start Communication. */
  OneSheeld.begin();
  /* Error Commands handiling. */
  VoiceRecognition.setOnError(error);

  VoiceRecognition.start();
}

void loop ()
{
  /* Check if new command received. */
  if(VoiceRecognition.isNewCommandReceived())
  {
    /* Compare the play command. */
    if(!strcmp(playCommand,VoiceRecognition.getLastCommand()))
    {
      digitalWrite(13,HIGH);
      digitalWrite(12,HIGH);
      digitalWrite(11,HIGH);
    }
    /* Compare the pause command. */
    else if (!strcmp(pauseCommand,VoiceRecognition.getLastCommand()))
    {
       digitalWrite(13,LOW);
      digitalWrite(12,LOW);
      digitalWrite(11,LOW);
    }
    /* Compare the stop command. */
    else if (!strcmp(stopCommand,VoiceRecognition.getLastCommand()))
    {
       digitalWrite(13,LOW);
      digitalWrite(12,HIGH);
       digitalWrite(11,LOW);
    }
    /* Compare the next command. */
    else if (!strcmp(nextCommand,VoiceRecognition.getLastCommand()))
    {
      digitalWrite(13,LOW);
      digitalWrite(11,HIGH);
      digitalWrite(12,LOW);

    }
    else if (!strcmp(BlueCommand,VoiceRecognition.getLastCommand()))
    {

      digitalWrite(12,LOW);
      digitalWrite(13,HIGH);
       digitalWrite(11,LOW);
    }
  }
}

/* Error checking function. */
void error(byte errorData)
{
  /* Switch on error and print it on the terminal. */
  switch(errorData)
  {
    case NETWORK_TIMEOUT_ERROR: Terminal.println("Network timeout");break;
    case NETWORK_ERROR: Terminal.println("Network Error");break;
    case AUDIO_ERROR: Terminal.println("Audio error");break;
    case SERVER_ERROR: Terminal.println("No Server");break;
    case SPEECH_TIMEOUT_ERROR: Terminal.println("Speech timeout");break;
    case NO_MATCH_ERROR: Terminal.println("No match");break;
    case RECOGNIZER_BUSY_ERROR: Terminal.println("Busy");break;
  }
}
Thanks For Watching Pcbwayer
13800+ Projects Sponsored
Posted in
Arduino,
Dec 19,2019
2,651 viewsReport item
- Comments(0)
- Likes(1)
Upload photo
You can only upload 5 files in total. Each file cannot exceed 2MB. Supports JPG, JPEG, GIF, PNG, BMP
0 / 10000


