


Arduino Fingerprint Sensor Tutorial
Step 1: Get All the Parts
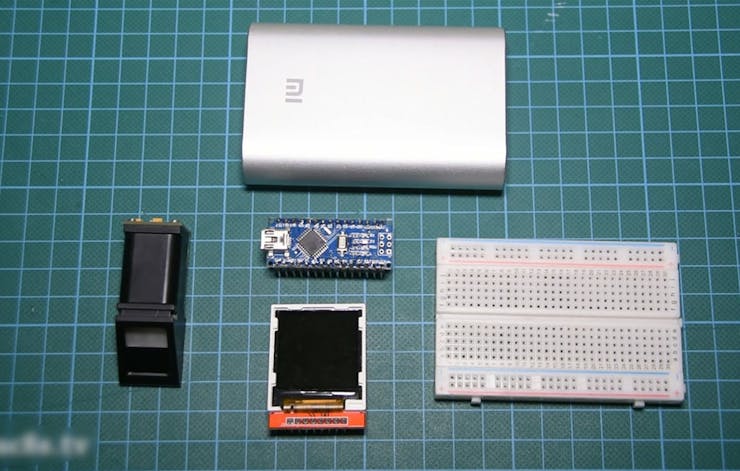
The parts needed in order to build this project are these:
- An Arduino Nano ▶ http://educ8s.tv/part/ArduinoNano
- The fingerprint sensor module ▶ http://educ8s.tv/part/FingerprintSensor
- A 1.44” color TFT display ▶ http://bit.ly/144TFTLCD
- A small breadboard ▶ http://educ8s.tv/part/SmallBreadboard
- Some wires ▶ http://bit.ly/Wires3InOne
- Powerbank ▶ http://educ8s.tv/part/Powerbank
The cost of this project is around $30. If you take in consideration the technology that this project uses, this cost is very low. 10 years ago, projects like this would cost a few hundred dolars!
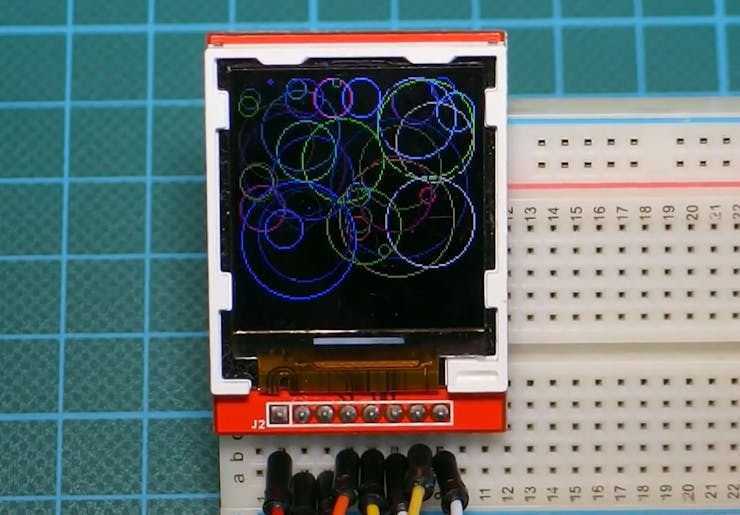
Step 2: The 1.44" LCD Display
1 / 2
This display is very fast. It uses the ILI9163C driver. It has a resolution of 128x128 pixels and it can display up to 260.000 colors. It is very easy to use with Arduino and it costs around 4$.
The display uses the SPI protocol in order to communicate with the Arduino board. We only need to connect 8 wires in order to make it work. Let’s start.
Connection with Arduino
Vcc ▶ 5V pin of the Arduino
GND ▶ Arduino GND pin
CS ▶ Digital Pin 10
RST ▶ DIgital Pin 9
A0 ▶ Digital Pin 8
SDA ▶ Digital Pin 11
SCK ▶ Digital Pin 13
LED ▶ 3.3V pin of the Arduino
As you can see this display is very easy to use with Arduino. It is very cheap, very fast, it is small in size and it only draws around 30mA of current. I think it is a nice display to use in projects that don’t require a big display but color would be nice.
You can get it here ▶ http://bit.ly/144TFTLCD
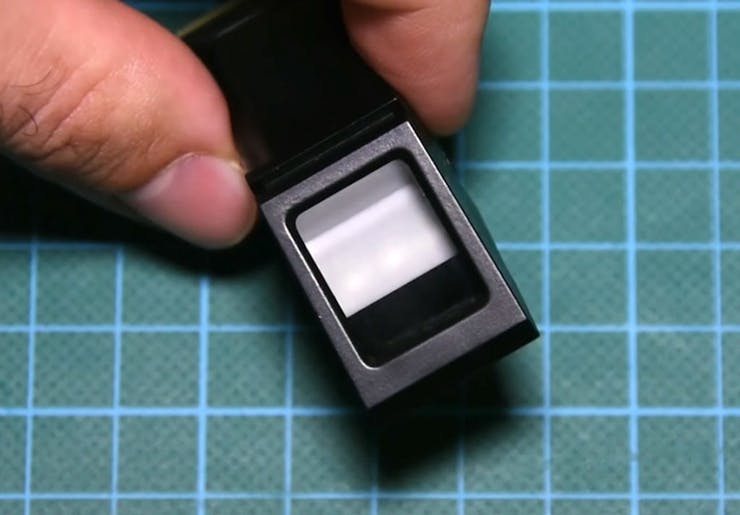
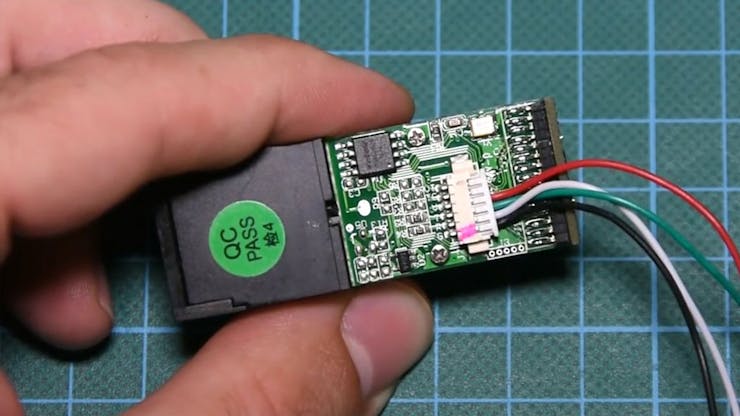
Step 3: The Fingerprint Sensor Module

1 / 3
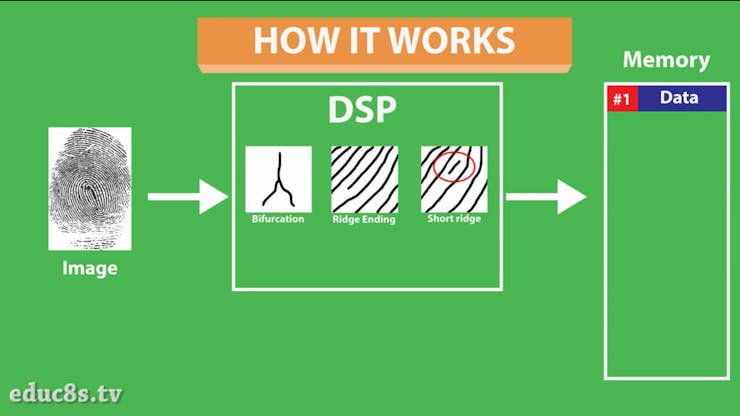
The fingerprint sensor module is small, and nicely built and it uses some advanced DSP (Digital Signal Processing) chips inside.
The sensor works like this. It is an optical sensor, which means it analyzes the photo of a finger. It then renders the image, makes some calculations, finds the features of that finger and then searches in its memory for a fingerprint with the same characteristics. It can achieve all that in less than a second!
This module can store up to 1000 fingerprints in its memory and its false acceptance rate is less than 0.001% which makes it pretty secure! Great! We get all that in a very easy to use module and with very low cost! It is a really impressive technology!
You can get it here ▶ http://educ8s.tv/part/FingerprintSensor
Step 4: Connecting the Parts
1 / 3
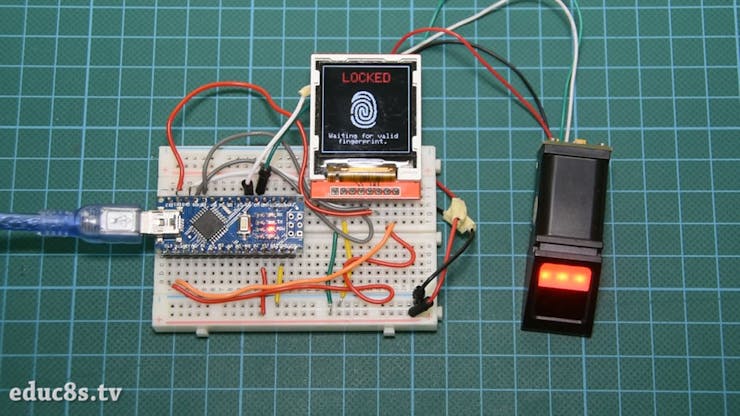
Let’s now put all the parts together.
First we have to connect the fingerprint sensor module. We plug in the cable at the back of the module. Please check the attached photo.
Fingerprint Sensor Connection
Black Wire ▶ Arduino GND
Red Wire ▶ Arduino 5V
Green Wire ▶ Digital Pin 2
White Wire ▶ Digital Pin 3
We are now ready to connect the display to Arduino.
Display Connection
Vcc ▶ 5V pin of the Arduino
GND ▶ Arduino GND pin
CS ▶ Digital Pin 10
RST ▶ DIgital Pin 9
A0 ▶ Digital Pin 8
SDA ▶ Digital Pin 11
SCK ▶ Digital Pin 13
LED ▶ 3.3V pin of the Arduino
That’s it! We are ready to power up the project. As you see it works fine! Easy isn’t it?
Step 5: The Code of the Project
1 / 3
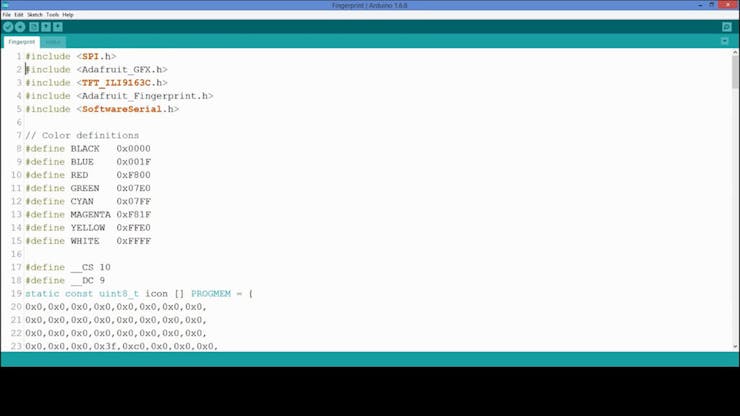
Let’s now see, the software side of the project and how to enroll our fingerprints to the module’s embedded memory in order to recognize them.
We need to download some libraries. First of all we need the Adafruit Fingerprint library, the Adafruit GFX library and the Sumotoy’s library for the display.
https://github.com/adafruit/Adafruit-Fingerprint-Sensor-Library
https://github.com/adafruit/Adafruit-GFX-Library
https://github.com/sumotoy/TFT_ILI9163C
First of all we have to upload the enroll example to our Arduino board. We go to File -> Examples -> Adafruit Fingerprint Sensor Library -> Enroll. With this example program we can store fingerprints in the FLASH memory of the module. We upload the sketch and we open the Serial Monitor. The program ask us to enter the ID to enroll. Then we place the finger on the sensor twice as we are instructed and the fingerprint is stored! You can store as many as 1000 fingerprints this way!
Now, let’s load the code that I have developed. Thanks to Adafruit’s libraries the code of the project is very simple. Let's see a small part of the code.
We start the sensor and the display, and we check for a finger on the sensor every 50ms. If there is a finger on the sensor we request the module to search if that finger is enrolled in it’s memory. If it finds the fingerprint in the memory it returns that fingerprints’ ID. Next it displays a welcome message and locks the screen again after a few seconds.
As always you can find the code of the project attached in this tutorial. Since I update the code from time to time, for the latest version of the code please visit the project's website: http://educ8s.tv/arduino-fingerprint-sensor-module...
Fingerprint.ino
Step 6: Final Thoughts
I am really impressed by the performance and the ease of use of this fingerprint sensor module. With very low cost we can add biometric security features to our projects. That’s amazing. Projects like this would have been impossible for a maker even a few years back. That’s the beauty and power of open source hardware and software. After this first test I am going to use the fingerprint sensor module along with an electric lock in order to see if we can use this sensor in a real life situation, so stay tuned. Please let me know your thoughts about this sensor, in the comments section below. Thanks!
Thanks Pcbway for Sponsorship 😊
- Comments(0)
- Likes(1)


