



|
KiCADKicad
|
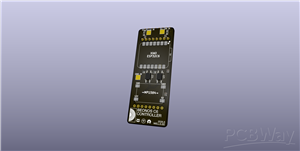
Beonos Controller
Visit the GitHub page to read the full up-to-date README and download the source files.
What is it?
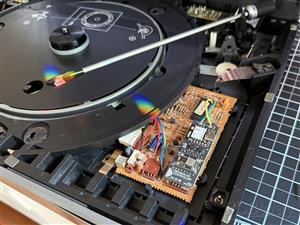
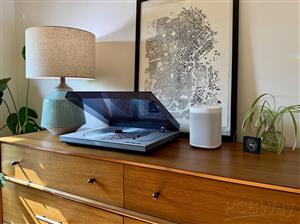
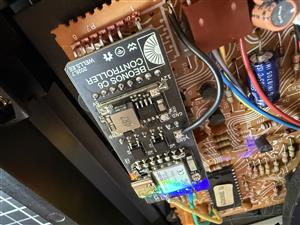
A small ESP32-C6-powered custom PCB that splices into a Beogram's keyboard cable, reads what the turntable is doing, and sends play/pause/stop commands. The result is a 'smart' vintage turntable that behaves like a digital Sonos source.
- Turntable → Sonos: start the turntable and the speaker switches to Line-In and plays. Pause or switch off, and the speaker pauses.
- Sonos → turntable: pick Line-In on the speaker and the turntable starts (it presses Cue). Switch away or pause, and the turntable stops. If there's no record on the platter, the firmware notices and pauses Sonos rather than leaving it playing silence.
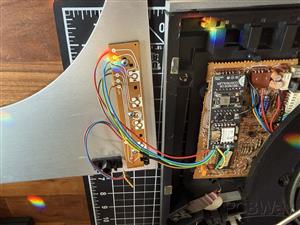
The board splices in-line, so nothing about the turntable is modified permanently — unplug the two headers and it's stock again.
Which turntables
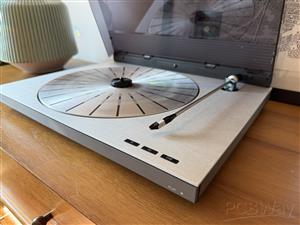
The Beogram 1800 family — the last generation of radial-arm Beograms — all share one control board, so the splice is the same across them:
- Beogram RX 2 1985–90 Built and tested against this
- Beogram 1800 1983–84 Confirmed from service manuals
- Beogram 2000 1983 Confirmed from service manuals
- Beogram 5000 1984 Confirmed from service manuals
- Beogram RX 1984 Very likely, not yet verified
The RX-2 service manual is published as a supplement to the Beogram 1800/2000/5000 manual, and the three share the same power supply (PCB 8005076) and control board (PCB 8005117). Their keyboards are the same two sub-boards — 8005070 for PLAY/STOP and 8005109 for 45/CUE/33 — landing on the same P7 pins, which is what this board splices into. The RX is unverified only because no manual was to hand; it replaced the 1800 and differs from the RX 2 mainly in being supplied with a pickup.
Not compatible. The Beogram 2200 looks close but wires its speed switches straight to the control board alongside indicator lamps and a motor relay, with no separate keyboard board and no CUE or PLAY/STOP lines to intercept. Tangential-arm Beograms (4002, 8000, 6500, 7000, 9000, 5005 and relatives) use a different arm and control system entirely, and pre-1983 radial decks predate this microcomputer control.
To identify an unknown deck, look for a control PCB stamped 8005117, a 24-pin MCU marked B040680 / ETL 5410N, and a keyboard on its own cable whose buttons switch +12V.
Hardware
- MCU: Seeed Studio XIAO ESP32-C6 (castellated edge-mount module)
- Button drivers: 2× LTV-356T optocouplers, switching the turntable's +12V onto the CUE and PLAYPAUSE lines exactly as the real buttons do
- Level shifters: 2× 1M/1.5M dividers dropping the COP410's 5.3V logic to ~3.18V for the ESP's 3.3V inputs. The values are deliberately high so the divider barely loads the COP410's weak CMOS outputs, and any overvoltage is current-limited into the ESP's ESD clamps.
- Power: an off-board MP1584EN buck module (PS1) steps the +12V button rail down to 5V, so the board draws everything from the button cable and never taps the 5.3V supply. The module hangs on flying leads; the board carries four wire pads for it.
- Decoupling: 10µF + 100nF on the buck's 5V output
- Input filtering: 10nF from each divider midpoint to ground, below R6/R8. The dividers present ~600kΩ to the ESP on wires that run past a motor; the caps give a ~6ms time constant, well inside the firmware's 50 ms debounce.
- Connectors: two 1×8 horizontal headers for the in-line splice — J1 (socket, silkscreened TO BOARD) and J2 (header, silkscreened TO KEYBOARD). Pins 1, 2, 4, 6, 7, 8 pass straight through; pins 3 and 5 also land on the optocoupler emitters.
- Flying leads: the two COP410 sense signals and a ground reference arrive on test pads (TP2, TP3, TP5); four more pads go out to the buck module. Everything is silkscreened by function — On-Off IN, PlayPause IN, GND IN, 12V, 5V, GND — so solder by the printed label, not the designator.
Board is 25 × 64 mm, two layers. Sources are beogram-esp32.kicad_pcb / .kicad_sch / .kicad_pro, with the BOM in bom.csv.
Pin map
- XIAO pin Pad GPIO Net Purpose
- D0 1 GPIO0 IN_OnOff_3V3 COP410 pin 11 → ESP. LOW = arm in (turntable on)
- D3 4 GPIO21 IN_PlayPause_3V3 COP410 pin 12 → ESP. HIGH = playing
- D8 9 GPIO19 DRV_PlayPause ESP → U2 opto LED. Pulse 500 ms to "press" PLAYPAUSE
- D10 11 GPIO18 DRV_Cue ESP → U3 opto LED. Pulse 500 ms to "press" CUE
- 5V 14 — VCC 5V in from the MP1584 buck (PS1)
- GND 13 — GND Common ground
D6/D7 (GPIO16/17) are UART0 and are left unconnected on purpose, so the ROM bootloader's serial output can't reach an optocoupler on reset.
Firmware (ESPHome)
Visit the GitHub Repo to find the code.
pip install esphome cp secrets.yaml.example secrets.yaml # fill in WiFi creds in secrets.yaml esphome run beogram-rx2.yaml
First flash needs USB-C; after that, updates go over the air.
Configuring the Sonos speaker
Once it joins WiFi the device shows up in Home Assistant. Set the "Sonos IP" entity to your speaker's address. That's the only setup — the RINCON UUID is discovered from the speaker on boot.
Credits
ESPHome, the Seeed Studio XIAO ESP32-C6, KiCad, and Bang & Olufsen's engineers, who documented the RX2 well enough to reverse a splice point out of it forty years later.
Donate
While beonos is free and open source, donations are deeply appreciated, and make ongoing development and support possible. Donate now
License
CC BY-NC-SA 4.0. © 2026 Wells Riley.
Beonos Controller
Project images are for reference only. Actual production is based on the manufacturing files on the project page.
Please review the designer's notes (e.g., PCB thickness) and select the appropriate options.
PCBWay is not responsible
for issues caused by unsuitable parameter selections.
For more important ordering information, please refer to
Read More









Raspberry Pi 5 7 Inch Touch Screen IPS 1024x600 HD LCD HDMI-compatible Display for RPI 4B 3B+ OPI 5 AIDA64 PC Secondary Screen(Without Speaker)
BUY NOW


- Comments(0)
- Likes(1)
More by Wells Workshop
-
Programmable Mist Maker - XIAO / QT PY Extension
2303 2 2 -
RadioHAT - Raspberry Pi radio development platform
1992 0 4 -
-
-
-
ARPS-2 – Arduino-Compatible Robot Project Shield for Arduino UNO
4152 0 6 -
A Compact Charging Breakout Board For Waveshare ESP32-C3
4913 3 8 -
AI-driven LoRa & LLM-enabled Kiosk & Food Delivery System
5697 2 2 -





















