PCBWay Community
Search title or content
Search
PCBWay
PCB Instant Quote
CNC | 3D Printing
Login
Sign Up
More Notifications
No notifications.
My Profile
My projects
My Likes
My Deals
My Goods for Bazaar
Settings
Sign Out
Projects
Categories
DIY Electronics
Arduino
Hardware
Audio
Computers & USB
Breakout Board Projects
Home Automation
LED Displays & Matrices
IoT
Robotics
View all categories
By Source Files
Onju Voice - AI assistant replacement to Google Nest Mini by @justLV
LogicAnalyzer V6.0
DIY 1kW Open Source MPPT Solar Charge Controller
Tad Boy Color
SummerCart64 - a fully open source N64 flashcart
kv4p HT v1.7b
QuinLED-Dig-Uno
Bike Fingerprint - PCB
Arduino RC engine sound & light controller with inertia simulation for ESP32
Solar Powered WiFi Weather Station V2.0
SIDKick pico 0.2 (SID 6581/8580-replacement for C64/C128)
Frog Boy Color
View all source files projects
Featured Projects
Onju Voice - AI assistant replacement to Google Nest Mini by @justLV
LogicAnalyzer V6.0
DIY 1kW Open Source MPPT Solar Charge Controller
Featured
Source Files
Video
View all projects
Questions
Sponsorships
Feedback
Blog
Store
PCB Design
Contest
- 2026 KiCad PCB Design Contest
- 8th Project Design Contest
- 7th Project Design Contest
- KiCad Design Contest
- 6th Project Design Contest
- 5th PCB Design Contest
- 4th PCB Design Contest
- Raspberry Pi Pico Contest
- PCB Design Tutorial
- 3rd PCB Design Contest
- I CAN SOLDER Kit Contest
- 2nd PCB Design Contest
- 1st PCB Design Contest
Add questions
Create a project
Please verify your email address so that you can enjoy our more comprehensive services.
Wearables
Weather
All categories
DIY Electronics
Arduino
Hardware
Audio
Computers & USB
Breakout Board Projects
Home Automation
LED Displays & Matrices
IoT
Robotics
3D Printing
Blinkenlights
Calculator
Camera
Clocks
CNC
Educational
Automotive
Electronic Games
ESP32
Fabrication Tools
Flight
Guitar
Keyboards
Misc
Music
Nixie Tube
Oscilloscope
Particle
Power Supply
Programmable Logic Projects
Raspberry Pi
Radio
Retro Stuffs
Space & Satellite
Sensors
Software
Synthesizer
Ultrasonic
Virtual Reality
Wearables
Weather
Project by top creative fields
All categories
3D Printing
Arduino
Audio
Automotive
Blinkenlights
Breakout Board Projects
Calculator
Camera
Clocks
CNC
Computers & USB
DIY Electronics
Educational
Electronic Games
ESP32
Fabrication Tools
Flight
Guitar
Hardware
Home Automation
IoT
Keyboards
LED Displays & Matrices
Misc
Music
Nixie Tube
Oscilloscope
Particle
Power Supply
Programmable Logic Projects
Radio
Raspberry Pi
Retro Stuffs
Robotics
Sensors
Software
Space & Satellite
Synthesizer
Ultrasonic
Virtual Reality
Wearables
Weather
View all categories
3D Printing
The content of 3D printing can come from 3D models or other electronic data, and the 3D objects printed by it can have any shape and geometric features.
All tags
3D printing
SLA
DLP
FDM
SLM
SLS
Create a project
Sort by : Trending
Trending
Score
Likes
Views
Discuss
Newest
Featured
Source Files
3D Design
Video
This is a standalone board for the "EnragedRabbitCarrotFeeder" compatible with the firmware Klipper. Instead of routing cables from your main MCU up to your ERCF unit, this extension board can be use ...
ERCF EASY BRD
14605
0
13
Tircown
Tircown
FRANCE
12
0
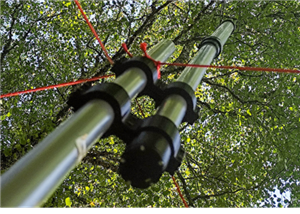
That’s why a repeater is necessary: to fully exploit the available link budget and reach long distances, the transmitter’s location must be carefully chosen. By placing the repeater at a high poi...
LoRaTube: Long-Life LoRa Repeater in a PVC Tube (No Lithium, No Solar)
1453
5
2
Engineer
Engineer
FRANCE
5
3
Joytojoy is an affordable and versatile HID (human interface device) that allows power wheelchairs users to bring new functionalities to their wheelchair's controller :Stick to play on a video game co...
Joytojoy bring game stick and mouse capabilities to your power wheelchair
3052
1
0
Julien OUDIN
Julien OUDIN
FRANCE
1
0
Microcontroller:Design of a custom portable light stick with programmable pattern based on a ATmega328P, programmed by a FTDI chip (You will need to burn the Arduino boot-loader first using the SPI co...
Light Stick v1.2
1412
0
0
Ene Mephir0
Ene Mephir0
FRANCE
0
11
On older Peugeot 206 3-door models, you have to lower the backrest to sit in the rear seats. The seat then moves forward. When the backrest is raised and the seat pulled back, it returns to its initia...
Peugeot 206-seat-slider-t-section
1469
0
0
Philippe Cavenel
Philippe Cavenel
FRANCE
0
0
Designing a 3D printer recycling as many components from e-waste as possible I wasn't able to get my hands on a decent power supply, so instead I decided to use multiple smaller power brick and wall w...
Multi-voltage Ramps shield
1237
2
1
Benjamin W
Benjamin W
FRANCE
0
0
This project is a line follower robot designed for speed and precision in line-tracking competitions. It integrates sensor multiplexing, motor control, and IMU data processing to enable adaptive and r...
line follower robot
821
0
1
Engineer
Engineer
FRANCE
1
0
Frascott : Mascott made in France with those ChienGPT v5 Prompts : 1 - Dans le cadre du "PCBWay Mascot 3D Printing Design Contest" (https://www.pcbway.com/blog/Activities/_02f4938c.html) , je voudrais...
Frascott - French PCBWay Mascott
320
1
8
Alexandre Helicoidee
Alexandre Helicoidee
FRANCE
13
324
Pedro Rev 2 is an open-source robotic board designed for learning and experimentation in electronics, programming, and robotics. It integrates two powerful modules: the NRF24L01 for wireless communica...
Pedro Board Rev 2
1007
0
1
Almtzr Almtzr
Almtzr Almtzr
FRANCE
1
0
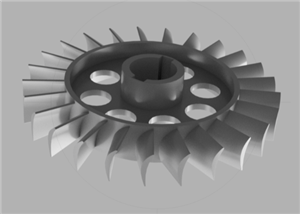
This projet is about building a jet engine. Here is a part of this engine.It is optimizing compression ratio and provides, at maximum speed (30000 rotation/min), almost 1.5 bar of pressure.It must be ...
Turbojet Engine Axial Compressor
427
0
0
MisterBotBreak
MisterBotBreak
FRANCE
0
0
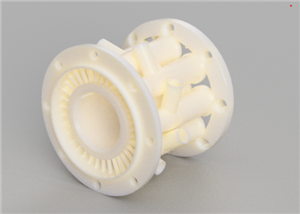
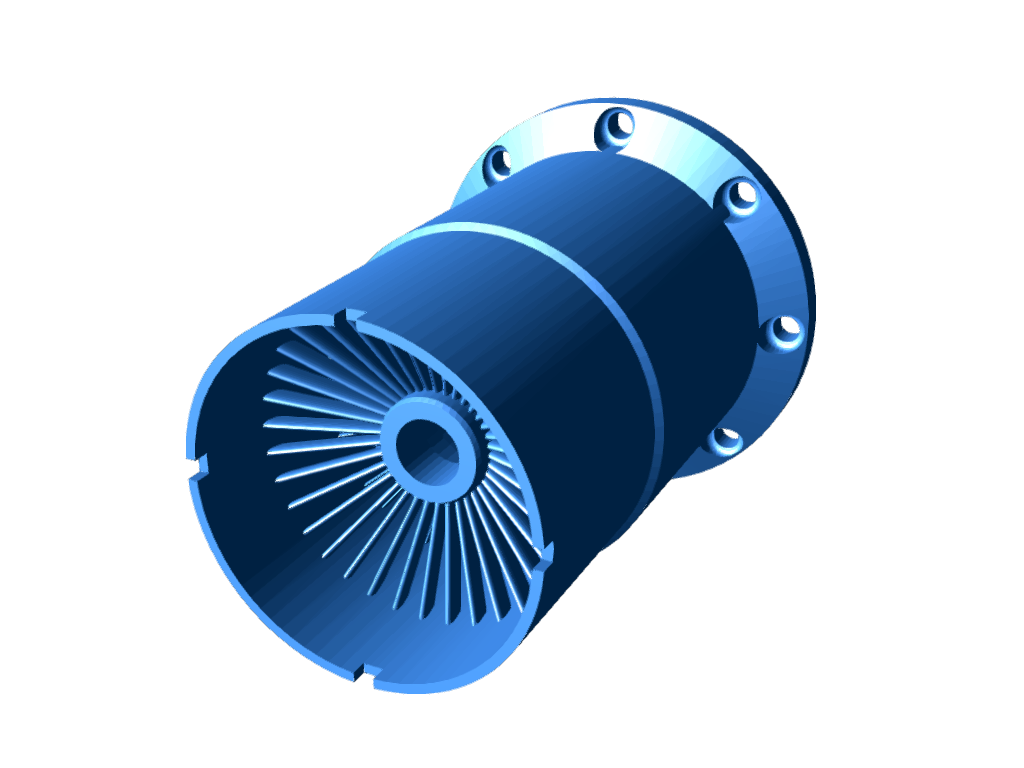
This model is a jet engine combustion chamber module. It is fitted for all the models I've previously added.It contains the combustion chambers.
Turbojet Engine Combustion Chambers Module
325
0
0
MisterBotBreak
MisterBotBreak
FRANCE
0
0
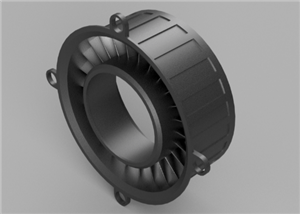
This model is a jet engine back carter. It is fitted for all the models I've previously added.It allows hot air coming from the combustion chamber to be directed to the turbine.
Turbojet Engine Back Carter
293
0
0
MisterBotBreak
MisterBotBreak
FRANCE
0
0
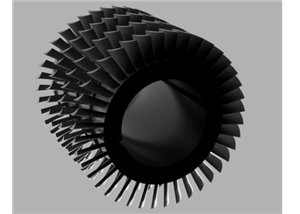
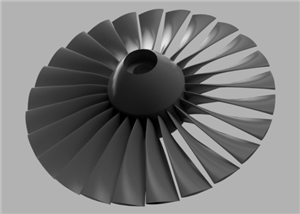
This model is a jet engine turbine. It is fitted for all the models I've previously added. It extracts momentum depending on air speed at entrance.
Turbojet Engine Turbine
404
0
0
MisterBotBreak
MisterBotBreak
FRANCE
0
0
This projet is about building a jet engine. Here is a part of this engine.It is optimizing air speed and thrust for any kind of propulsi
Turbojet Engine Fan
394
0
0
MisterBotBreak
MisterBotBreak
FRANCE
0
0
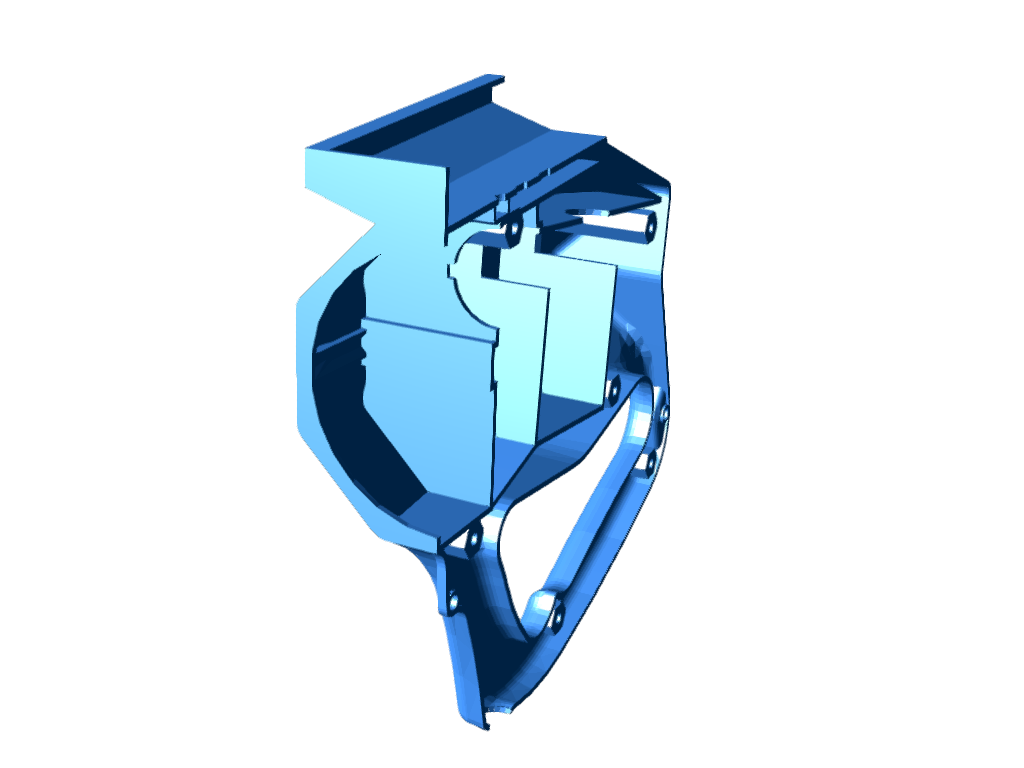
The goal is to build a turbojet engine.
Turbojet engine Front Carter
354
0
1
MisterBotBreak
MisterBotBreak
FRANCE
0
0
nous souhaitons faire imprimer 30 pieces en PLA
coque en pla
132
0
0
Engineer
Engineer
FRANCE
0
0
1
2