Kaax: the future in water cleaning technology
Our Story
I live in Mexico, one day we were asked in our Computer Science subject in school to think of a project that could potentially solve an everyday issue in the country. Just then a very famous news article came out regarding the excessive amount of sargassum in the caribbean coasts of the state of Quintana Roo in March and April of this year. Talking with my friends we came across the idea of building a solution for this problem. We thought there was a lack of both statistics and technology as locals just take their boats and use nets to manually clean the coastline. However, with our idea we could use a series of robots to automate the process, produce reports and much more! We live in the center of the country, thus the beach is kind of far way from us, that's when we got the idea of expanding the technology for cleaning ponds, lakes, rivers and most importantly dams. We found out that only 6% of the countries dams are considered clean under government standards. It truly captures the maker spirit as we began designing and using my A1 Mini to start building a prototype with PLA. Soon out we found out it was a nice starting point but far from a final product. We are decided to keep building, to keep printing, soldering, coding and making until our robots are all over the country making sure the water of Mexicans is clean and safe.
The project
"Primer l'amor, després la tècnica." Antoni Gaudí.
(First love, then technique)
CAD

BETA - We used onshape to build our "beta" version of the robot. This included a bulldozer style front arm as the intake which soon proved to be inefficient. We worked on it and desided to remove this first idea. No camera, we didn't even model the container with the electronics (we used a very simple tupper and stuffed everything inside).
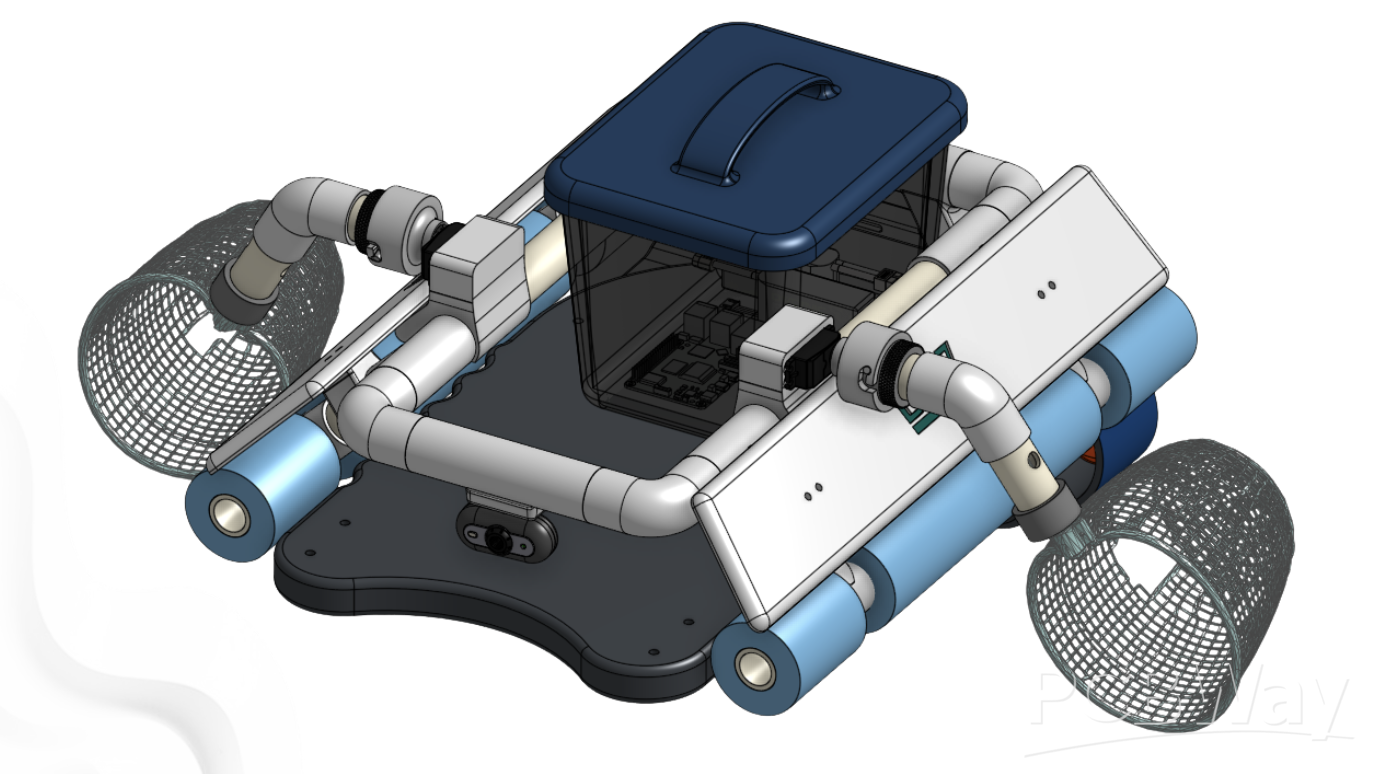
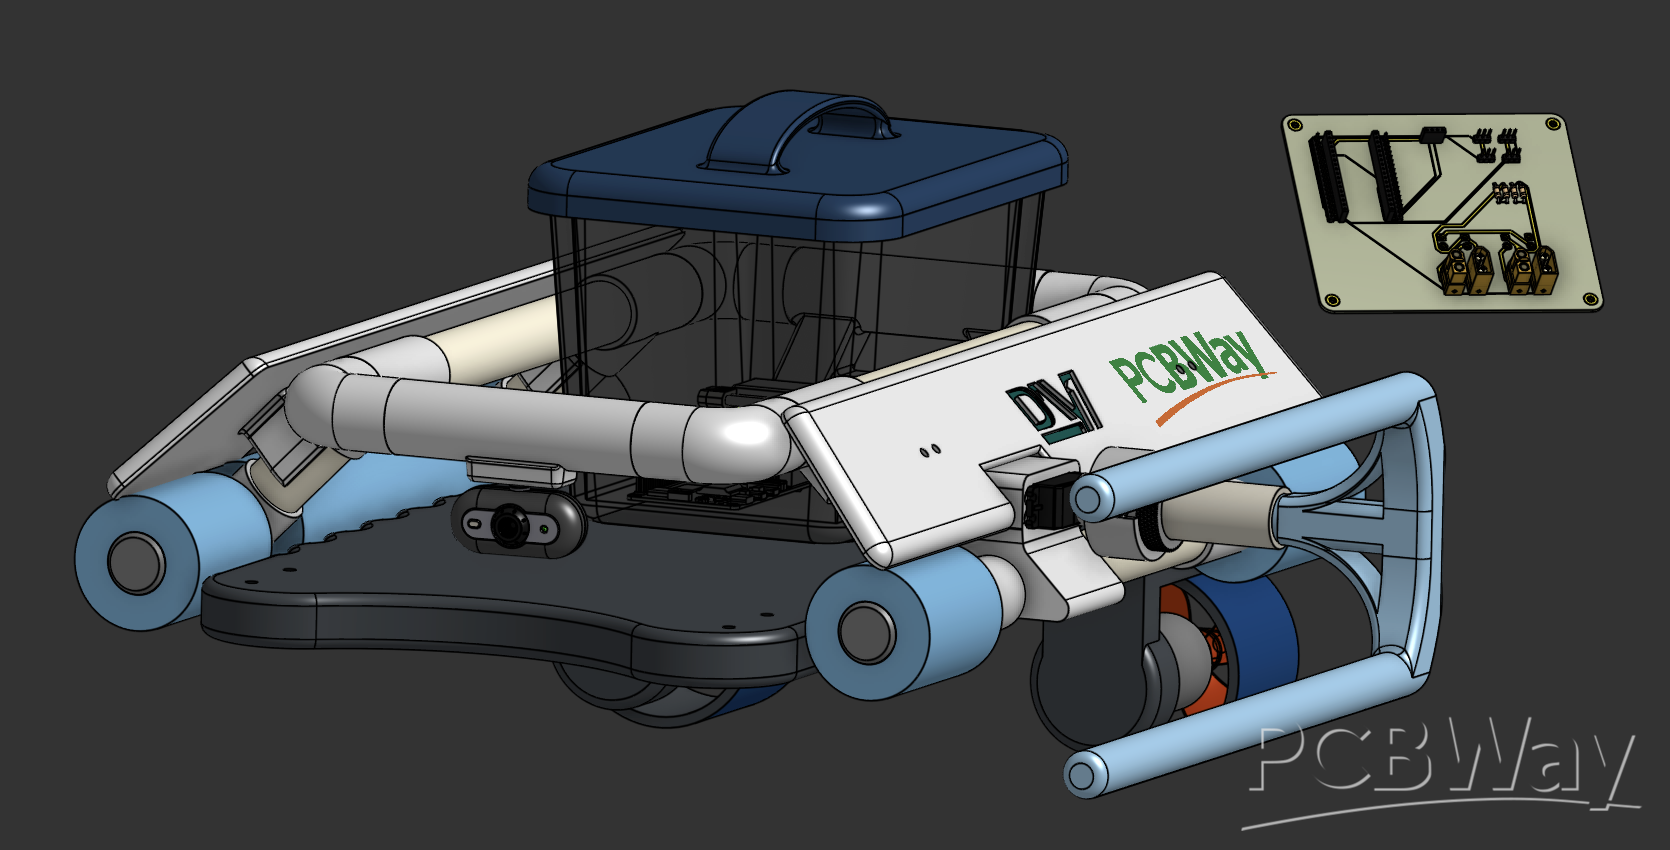
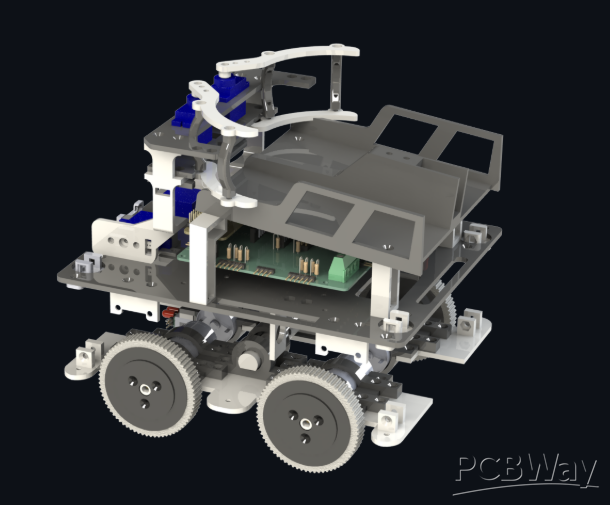
Version 1 - This is the current state of our robot including a dual system of nets controlled by two servos which allowed us to pick up contaminants. We now modeled the electronics inside our enclosure and the camera up at the front of the robot.
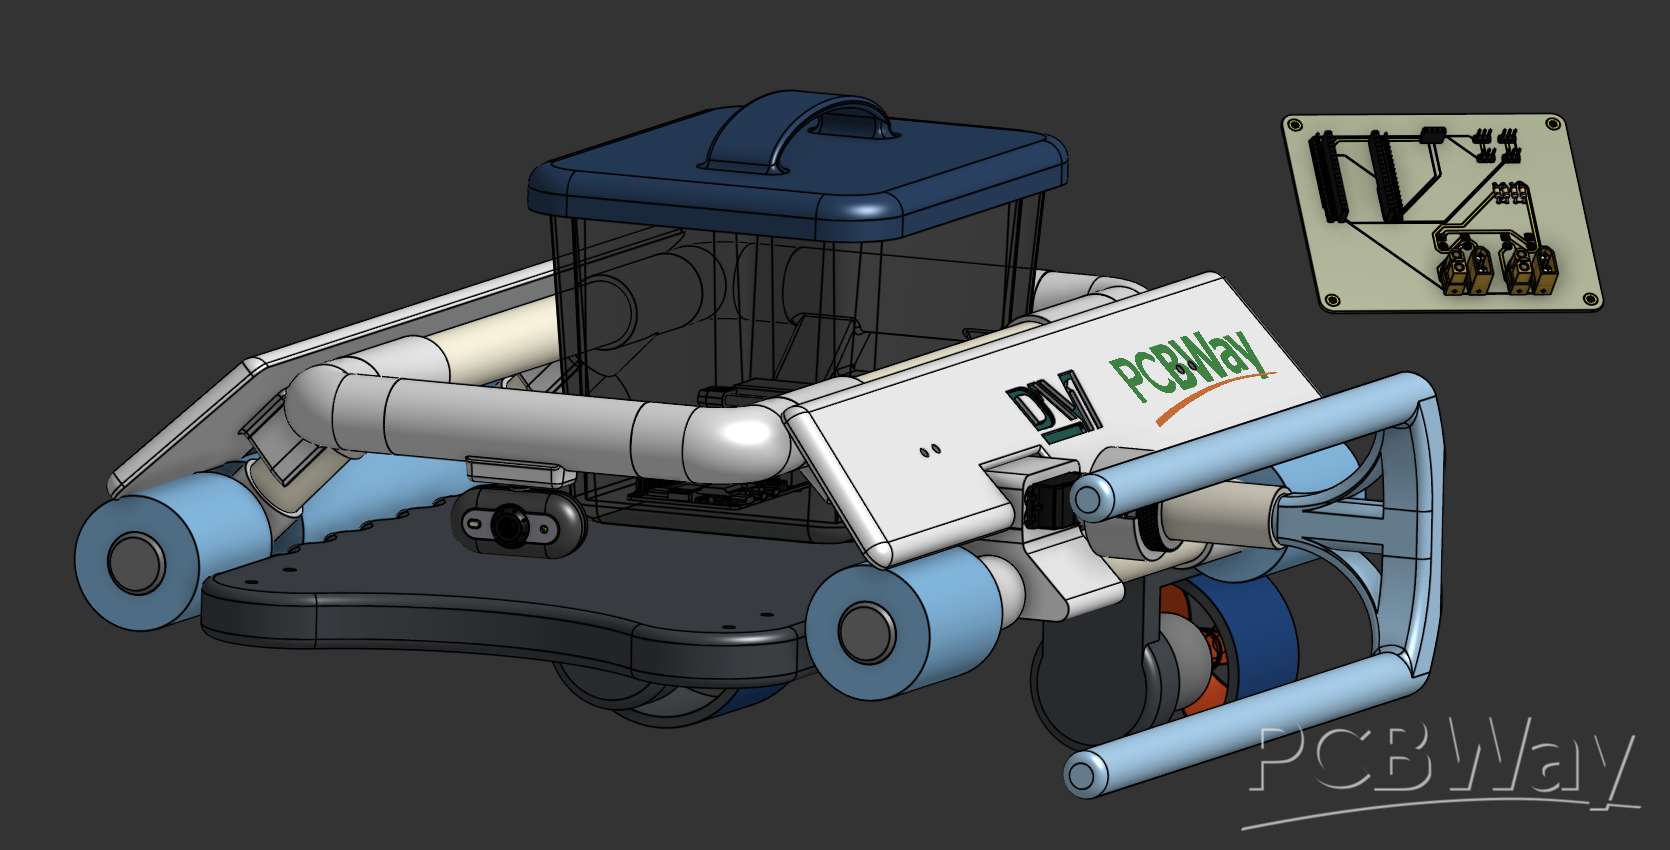
Version 2 - For this second version we are going to change the net system using a new adapter which is the big blue piece you are seeing. We plan to change our current enclosure for a tactical box style and as you may have noticed we are introducing our first PCB.
PCB
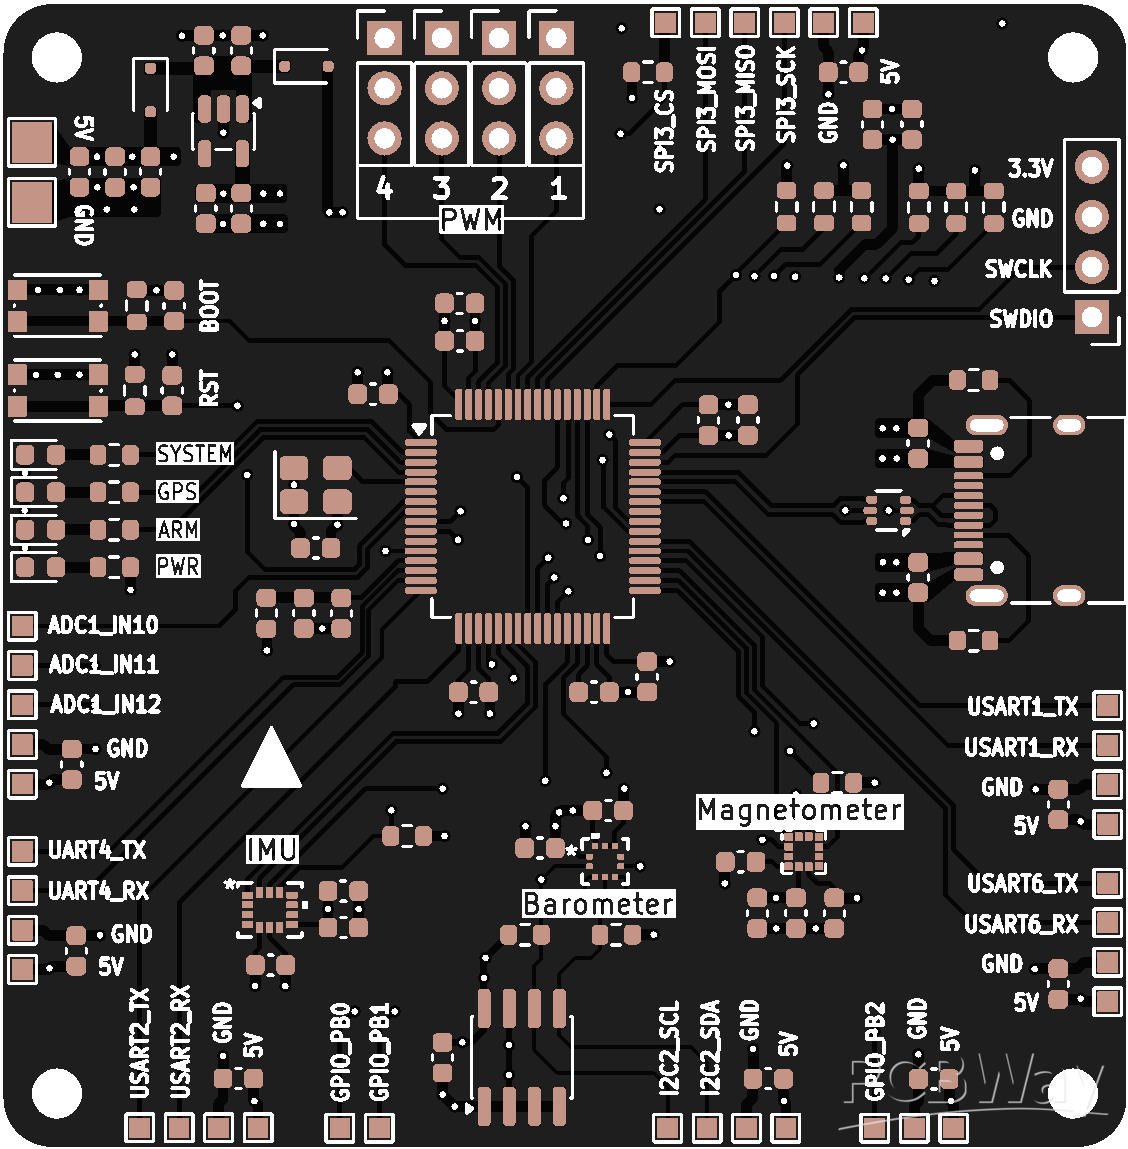
Our PCB is simple two layer one in which the former Raspberry Pi gets replaced by an ESP32 with Lora included. This ESP32 mounts unto the sockets of the PCB.
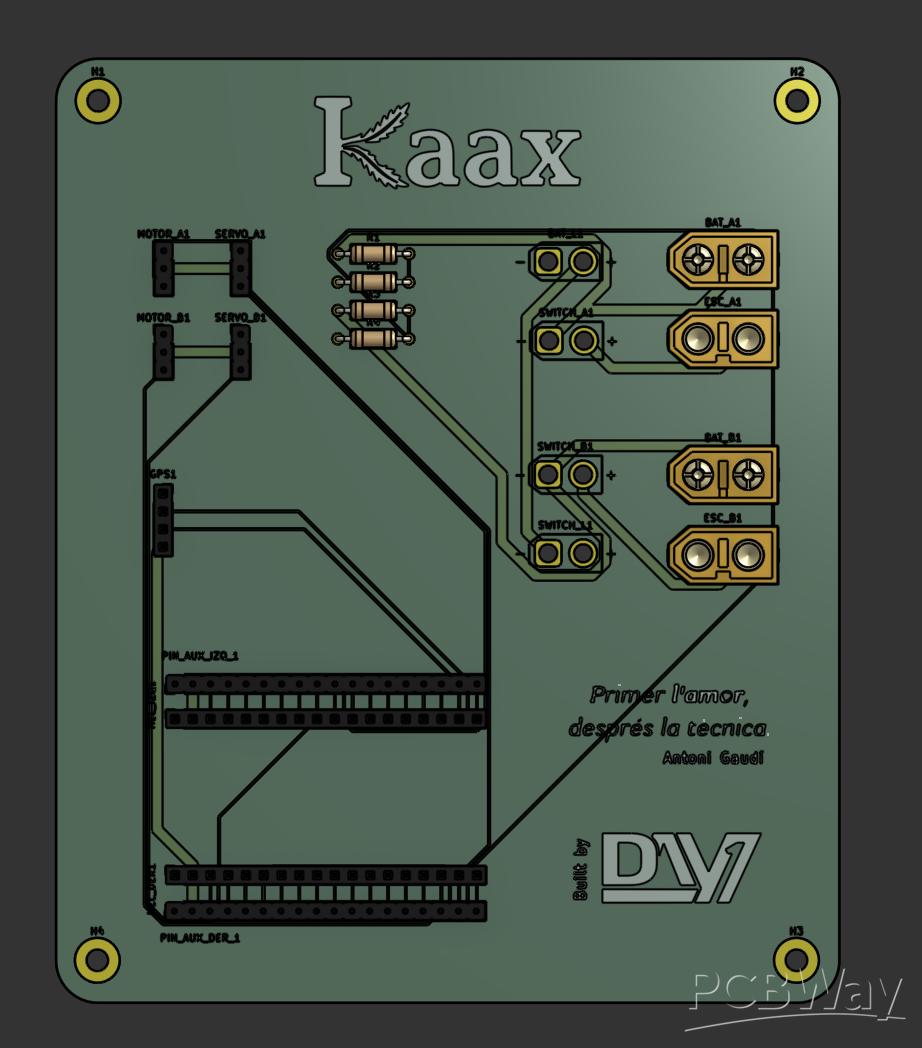
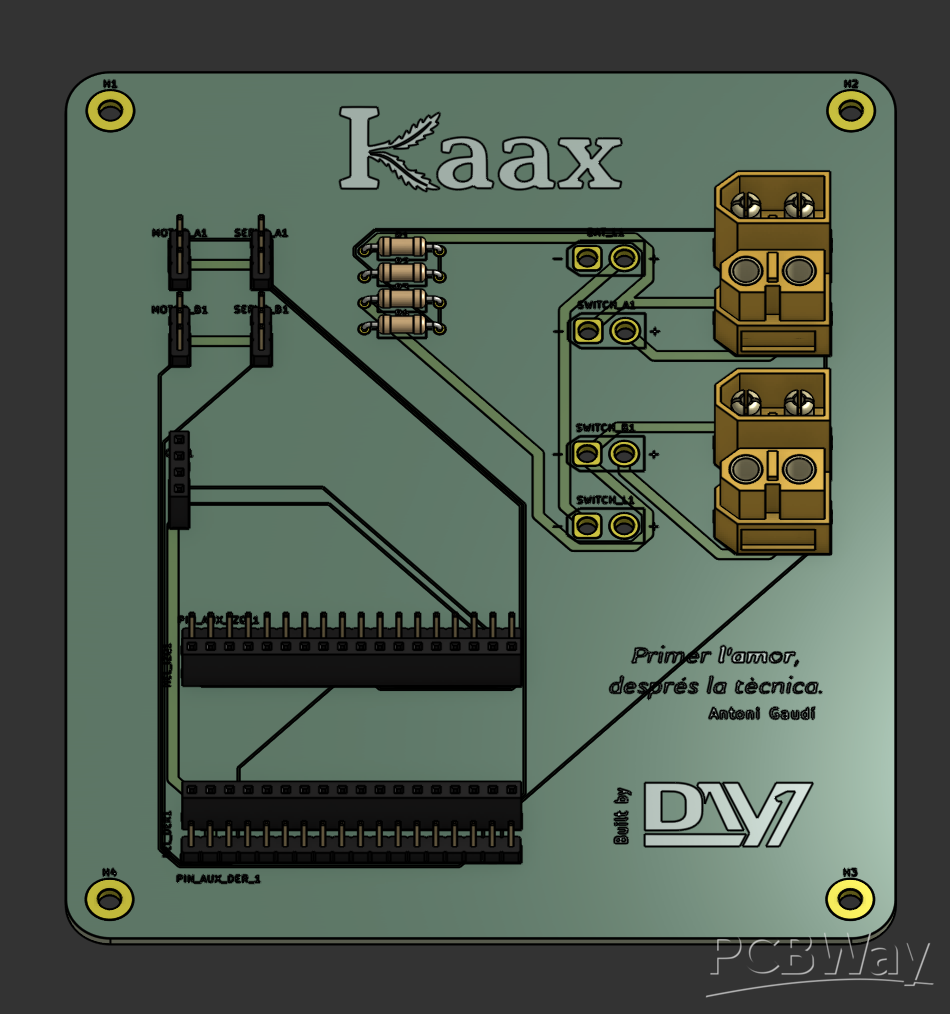
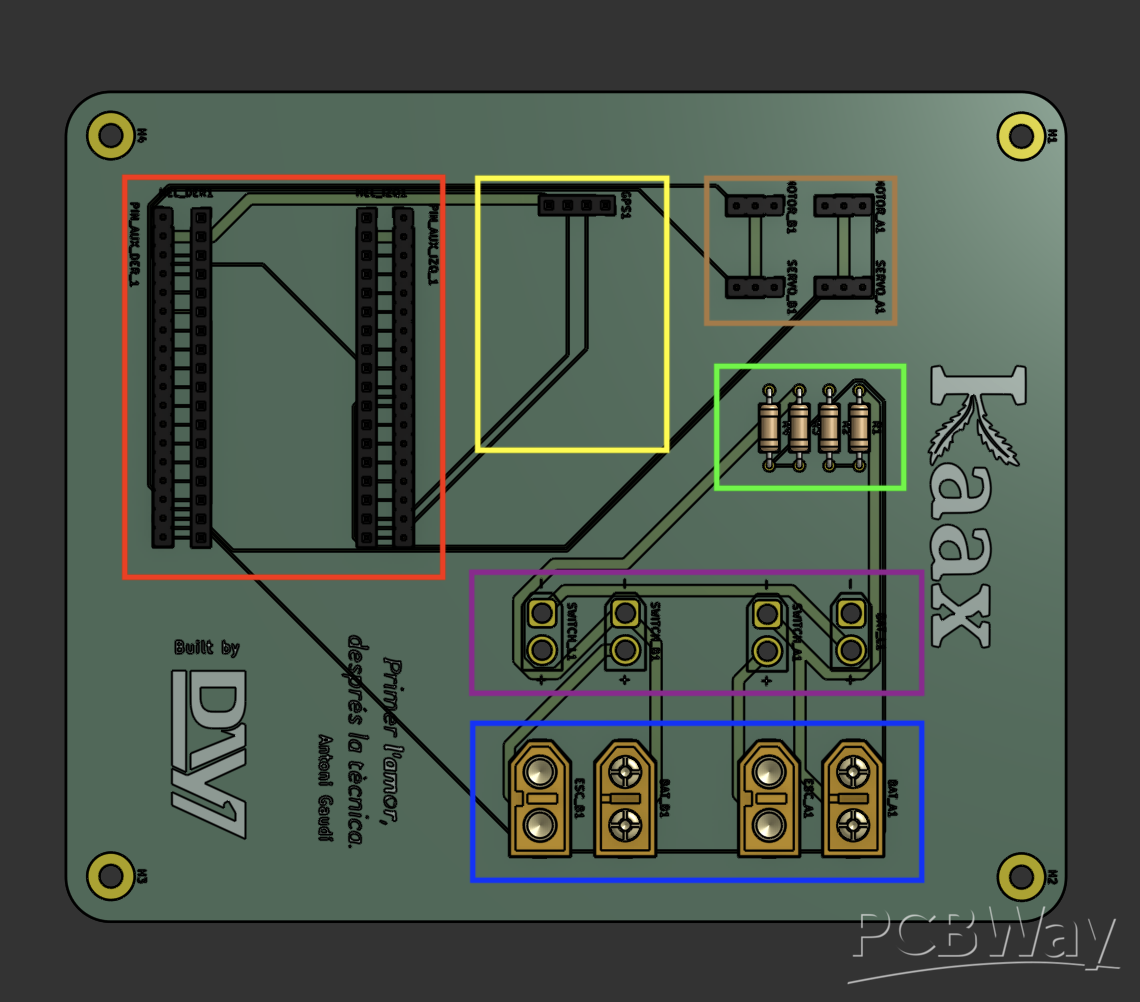
- The blue area represents the connections for our two batteries and the ESC (Electronic Speed Controllers) for each motor.
- The current flows from the battery to the purple section where the connections for switches lay. This switches are meant to allow our robot to be turned on and off mantaining an individual switch for each battery including the special one used soley for the ESP32.
- The green area is a series of Resistors that are used to allow the ESP32 to monitor the charge of each battery.
- On the brown part you can see the pins for connecting 2 Servos and the "servo-like" connection of the ESCs.
- The yellow box encloses the sockets for our GPS module.
- Lastly, the red box has inside sockets for the ESP32 to be put on and a series of pins for debugging directly.
CODE
It was coded using a variety of HTML, Python and Java. For more information visit our github page.
https://github.com/Dquezada2108/Yum-Kaaxa/tree/main
A bit about myself
My name's Diego Quezada, ever since I was a kid I liked technology and robotics. In middle school I took robotics as a subject and fell in love with making builds which began with cardboard, later wood and a little over a year ago when I got my first 3D printer with PLA. I won several robotics competitions in middle school, took part in FTC (First Tech Challenge) of the organisation FIRST (an international robotics competition) in team 22413 and would later join team 3472 in FRC (First Robotics Competition) in High School. In High School I learned how to 3D model in Onshape and Solid Works, then I learned CAM (Computer Aided Manufacture), laser cutting, CNC, etc. I embody the spirit of a maker, I have been a Maker since the moment I was able to make my first LED turn on, all the way to the complex robots I am building with my teams. The most recent being DAY1 Robotics, a team of 3 students including me focused around the idea of creating robots to solve social issues. Being selected for Let's Make It Fund would be an exceptional opportunity to impulse a life long dream of building tomorrow's future one print at a time. And just like my team and I like to say... Remember: One day... or DAY1
Follow us on Instagram: @day1robotics
- Comments(0)
- Likes(1)